[PaintCode] Progress bar tutorial
Bài đăng này đã không được cập nhật trong 4 năm
Mở đầu
Như bài viết trước, mình có giới thiệu về Paintcode. Hôm nay chúng ta cùng bắt đầu với tutorial về tạo một progress bar đơn giản. Để chúng ta có những thao tác ban đầu với Paintcode.
Mục tiêu
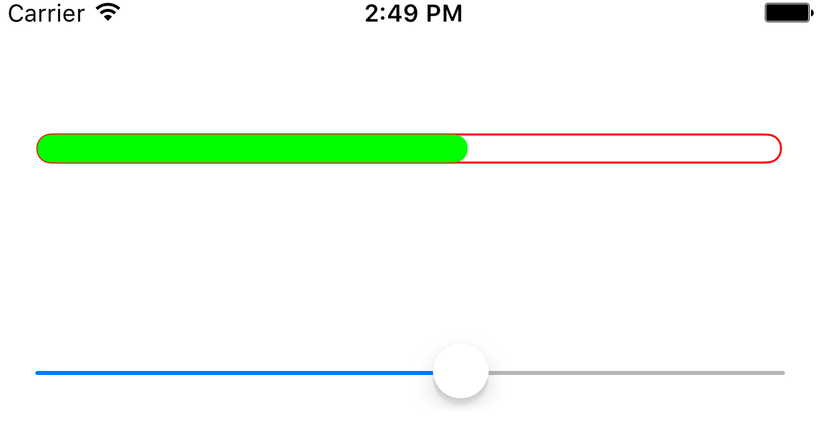
Custom progress bar như sau:
Các bước thực hiện
1. Bước 1:
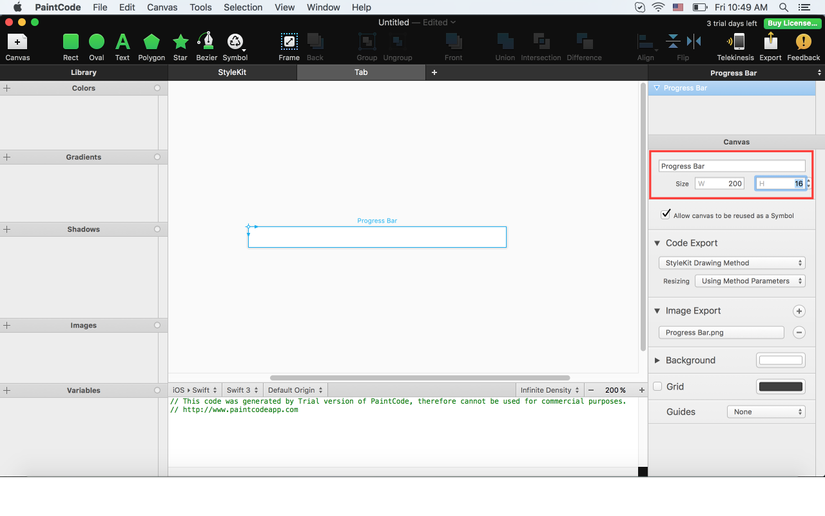
- Tạo tab làm việc mới, và đặt tên cho canvas là Progress Bar
- Set size: Width = 200, Height = 16
2. Bước 2:
- Click button Rect
- Kéo vào trong canvas progress bar để tạo 1 rectangle.
- Đặt tên cho rectangle là progress border
- Set frame: X = 1, Y = 1, Width = 198, Height = 14
- Set stroke color is red
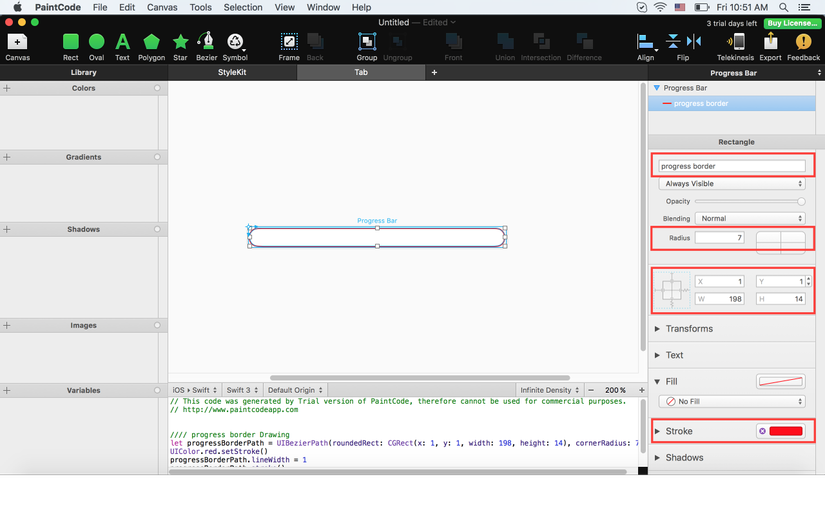
3. Bước 3:
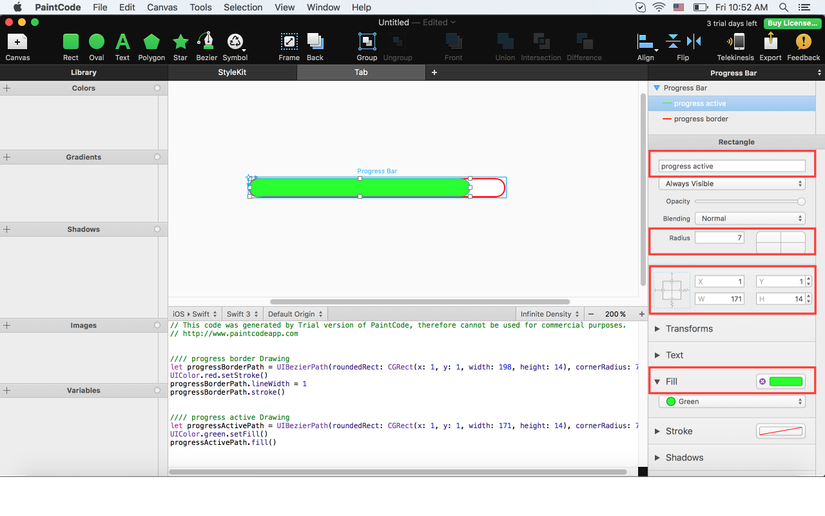
- Click button Rect
- Kéo vào trong canvas progress bar để tạo thêm 1 rectangle.
- Đặt tên cho rectangle này là progress active
- Set frame: X = 1, Y = 1, Width = 171, Height = 14
- Set fill color is green
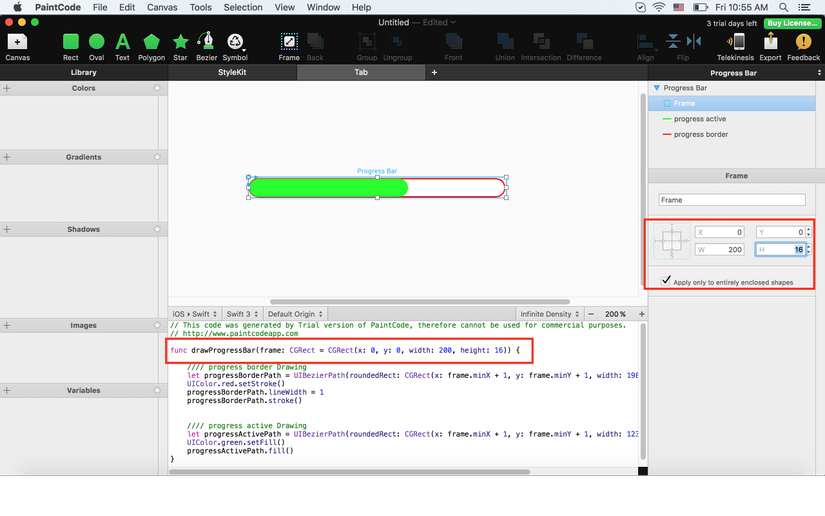
4. Bước 4:
- Click button Frame và click bất kỳ đâu trong progress bar để tạo 1 Frame. Lúc này paint code sẽ tự động tạo ra một function cho bạn.
func drawProgressBar(frame: CGRect = CGRect(x: 0, y: 0, width: 200, height: 16))
- Set frame: X = 0, Y = 0, Width = 200, Height = 16
- Tích chọn check box: Apply only entirely enclosed shapes
5. Bước 5:
- Ở tab Variables, click + -> Number
- Tạo 1 variable là progress
- Connect variable progress với Width của progress active
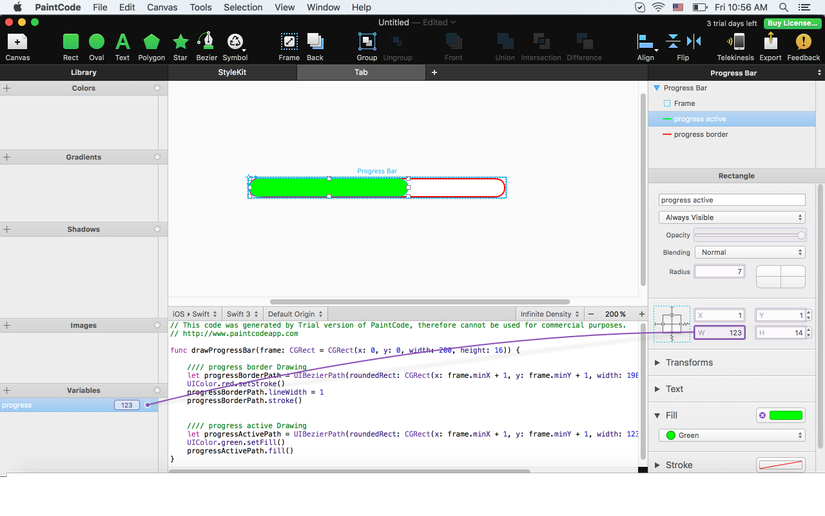
Function lúc này sẽ thay đổi thành:
func drawProgressBar(frame: CGRect = CGRect(x: 0, y: 0, width: 200, height: 16), progress: CGFloat = 123)
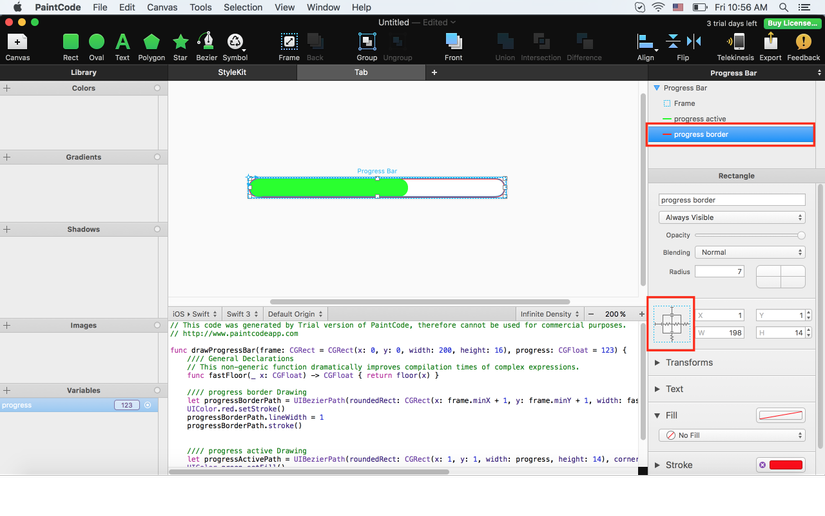
6. Bước 6: Tạo relationship giữa width progress border với width frame.
- Select progress border
- Click Width constraint để thay đổi thành wavy line. Lúc này progress border sẽ resize khi frame resize. Paintcode sẽ tự động gen ra đoạn code:
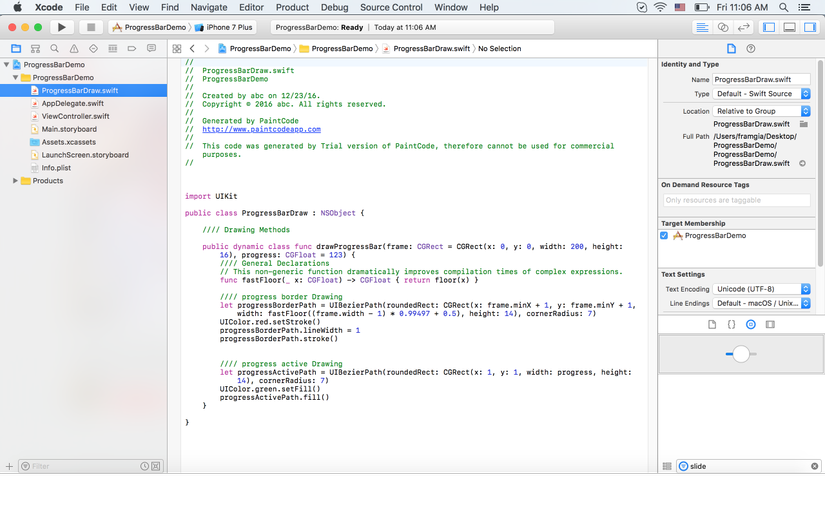
let progressBorderPath = UIBezierPath(roundedRect: CGRect(x: frame.minX + 1, y: frame.minY + 1, width: fastFloor((frame.width - 1) * 0.99497 + 0.5), height: 14), cornerRadius: 7)
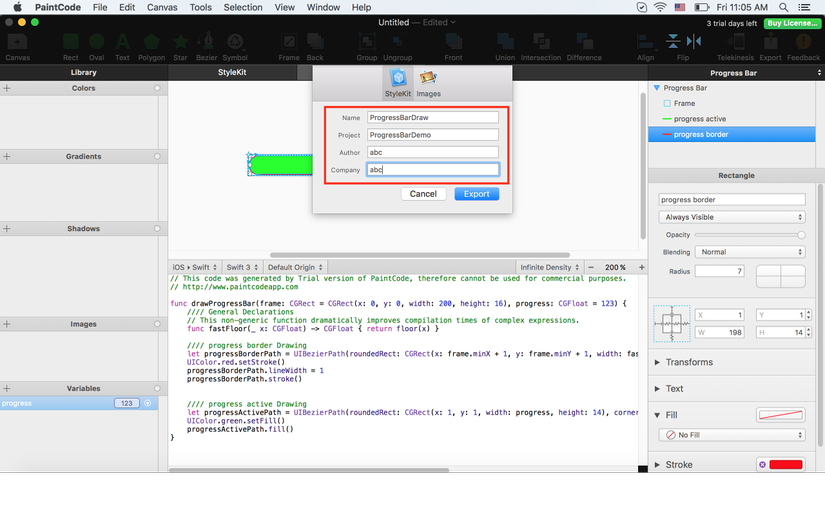
7. Bước 7: Export ra file.
8. Bước 8: Add vào project xcode:
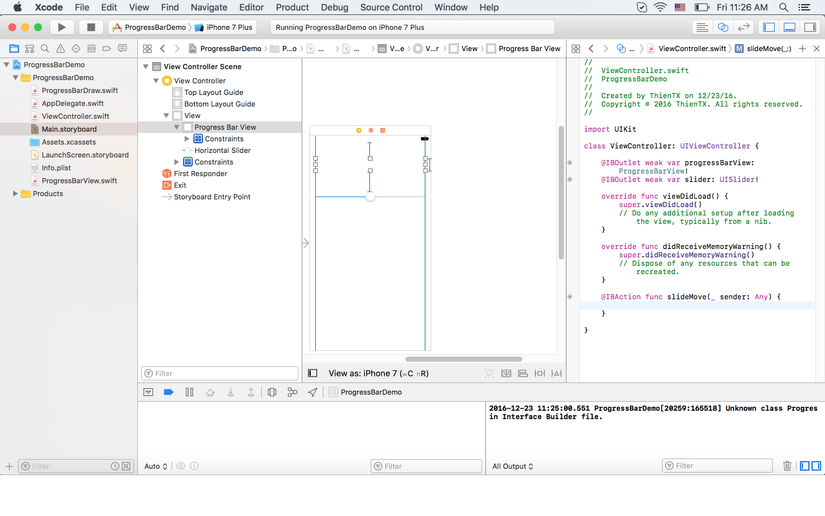
9. Bước 9:
- Tạo 1 class ProgressBarView.
- Add ProgressBarView, Slider in storyboard
- Connect IBOutlet và IBAction cho các items.
10. Bước 10: Coding
- Class ProgressBarView:
class ProgressBarView: UIView {

    private var innerProgress:CGFloat = 0.0

    var progress: CGFloat {
        set(newProgress) {
            if newProgress > 1.0 {
                innerProgress = 1.0
            } else if innerProgress < 0 {
                innerProgress = 0.0
            } else {
                innerProgress = newProgress
            }
            setNeedsDisplay()
        }
        get {
            return innerProgress * bounds.width
        }
    }

    override func draw(_ rect: CGRect) {
        ProgressBarDraw.drawProgressBar(frame: bounds, progress: progress)
        }
}
- Class ViewController
class ViewController: UIViewController {

    @IBOutlet weak var progressBarView: ProgressBarView!
    @IBOutlet weak var slider: UISlider!

    override func viewDidLoad() {
        super.viewDidLoad()
        // Do any additional setup after loading the view, typically from a nib.
    }

    override func didReceiveMemoryWarning() {
        super.didReceiveMemoryWarning()
        // Dispose of any resources that can be recreated.
    }

    @IBAction func slideMove(_ sender: Any) {
        print("\(slider.value)")
        progressBarView.progress = CGFloat(slider.value)
    }
}
**11. Bước 11: **
Run và nhìn ngắm sản phẩm nào. 
Kết luận:
Trên đây là tutorial đơn giản đề chúng ta có thể làm quen với Paintcode và thấy được sự thuận lợi của nó. Hy vọng sẽ có ích với các bạn. Thanks.
All rights reserved
