Observer Design Pattern Trong Javascript: Hiểu Một Cách Dễ Dàng Cùng Functional Programming Và Các Ví Dụ Thực Tế
Bài đăng này đã không được cập nhật trong 2 năm
1. Giới thiệu
1.1. Nhắc lại về Design Pattern
Trong thế giới lập trình, Design Pattern hay mẫu thiết kế là một giải pháp tổng quát để giải quyết những vấn đề thường gặp trong thiết kế phần mềm. Nó không phải là một đoạn mã có thể chuyển đổi trực tiếp thành mã nguồn, nhưng là một mô tả hay mẫu mà bạn có thể tuân theo để giải quyết một vấn đề cụ thể trong ngữ cảnh của bạn.
1.2. Giới thiệu Observer Design Pattern
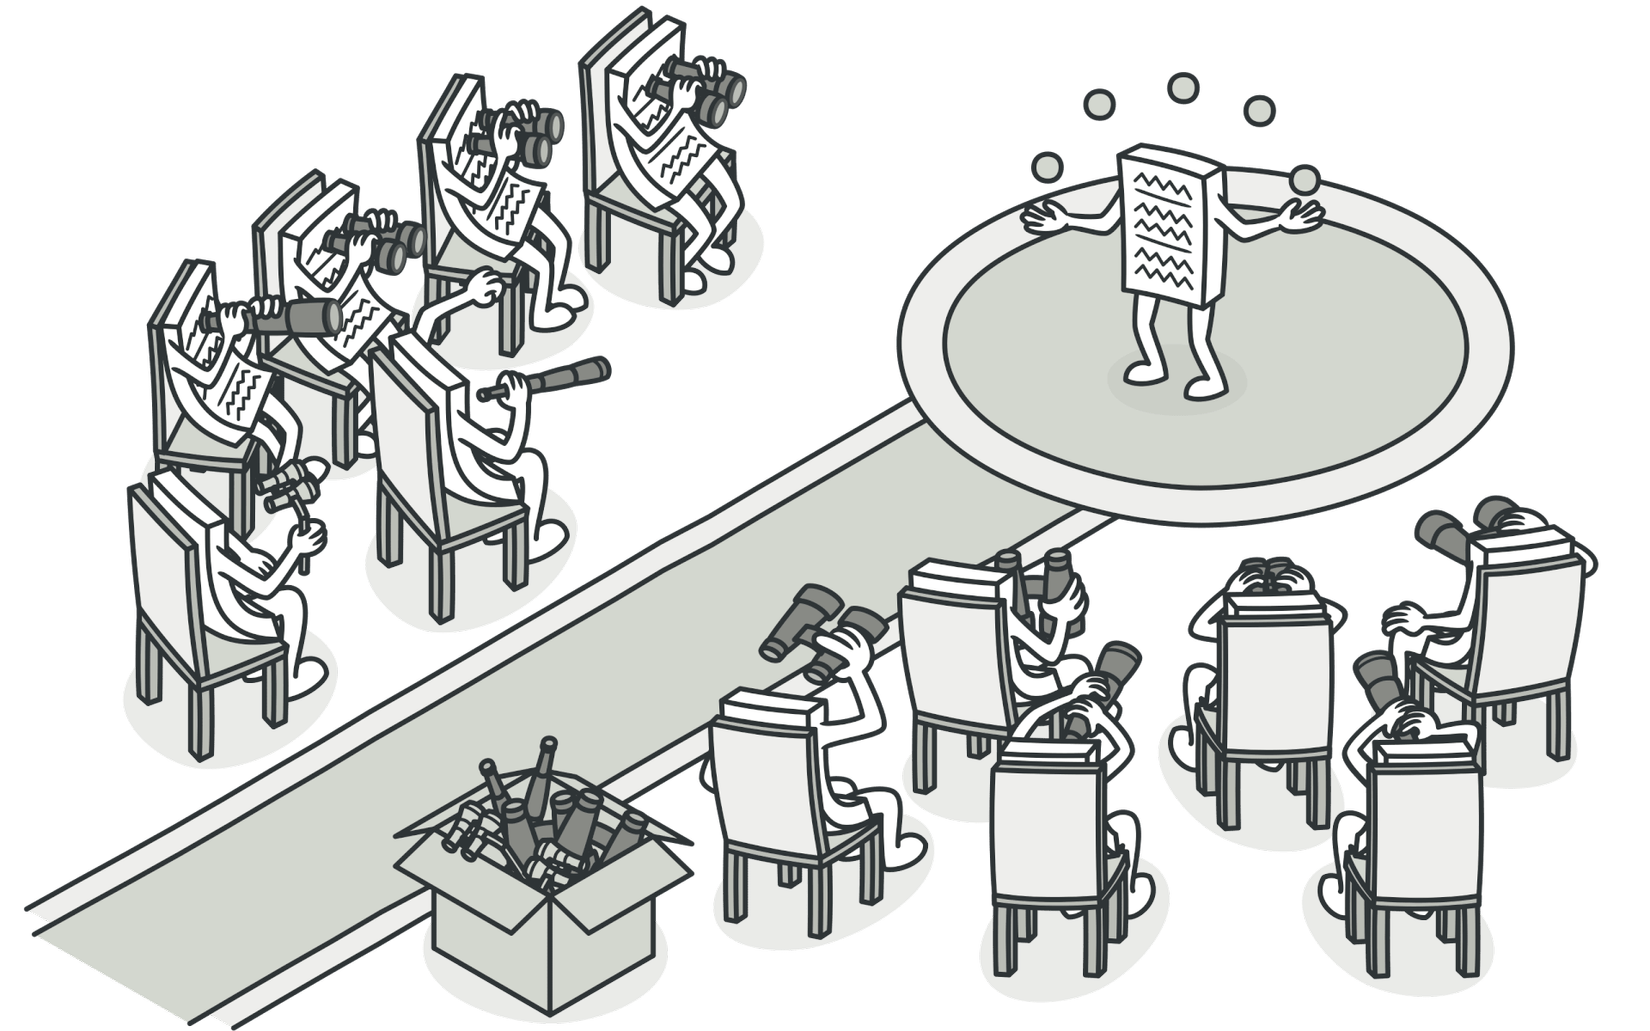
Trong số các mẫu thiết kế phổ biến, Observer Design Pattern đứng ra như một công cụ mạnh mẽ để tạo ra các ứng dụng linh hoạt và dễ bảo dưỡng. Observer Design Pattern thuộc loại mẫu thiết kế hành vi (behavioral pattern) và đặc biệt hữu ích trong các tình huống khi một đối tượng cần thông báo cho các đối tượng khác về sự thay đổi trạng thái của nó.
1.3. Mục tiêu của bài viết
Bài viết này nhằm giúp bạn hiểu rõ hơn về Observer Design Pattern trong lập trình Javascript, cùng với sự kết hợp của Functional Programming, thông qua lý thuyết và các ví dụ thực tế.
2. Tìm hiểu về Observer Design Pattern
2.1. Định nghĩa Observer Design Pattern
Observer Design Pattern định nghĩa mối quan hệ một-nhiều giữa các đối tượng sao cho khi một đối tượng thay đổi trạng thái, tất cả các đối tượng phụ thuộc vào nó đều được thông báo và cập nhật tự động.
2.2. Cơ chế hoạt động của Observer Design Pattern
Cơ chế hoạt động của Observer Design Pattern gồm hai khía cạnh chính: "Subject" và "Observers". "Subject" là đối tượng mà trạng thái của nó sẽ được theo dõi, và "Observers" là những đối tượng muốn được thông báo khi có sự thay đổi trạng thái từ "Subject".
2.3. Ứng dụng của Observer Design Pattern trong thực tế
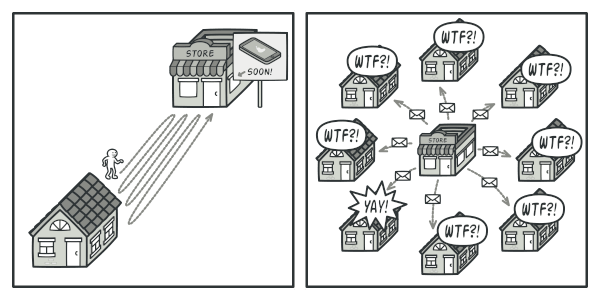
Observer Design Pattern thường được sử dụng trong các ứng dụng thời gian thực như Live Auction Systems, Stock Market, và các trò chơi trực tuyến. Nó cũng rất hữu ích trong việc xây dựng các ứng dụng có tính năng "Push Notification", là nơi một số sự kiện nhất định sẽ thông báo tới người dùng.
2.4. Ví dụ trực quan tự tạo một thư viên Observer đơn giản bằng Javascript theo style Functional Programming
2.4.1 Tạo thư viên Observer
Dưới đây là đoạn mã Javascript đơn giản tạo ra một thư viện Observer theo phong cách Functional Programming:
/**
 * Tạo một thư viện Observer đơn giản.
 */
const createObserver = () => {
    // Danh sách các observers sẽ được lưu trữ ở đây
    let observers = [];

    // Hàm đăng ký observer mới
    const subscribe = (fn) => {
        observers.push(fn);
    };

    // Hàm loại bỏ observer
    const unsubscribe = (fn) => {
        observers = observers.filter(observer => observer !== fn);
    };

    // Hàm thông báo tới tất cả observers
    const notify = (data) => {
        observers.forEach(observer => observer(data));
    };

    return {
        subscribe,
        unsubscribe,
        notify
    };
};
2.4.2 Sử dụng thư viên Observer vừa tạo
Sau khi tạo xong thư viện Observer, bạn có thể sử dụng nó như sau:
// Tạo một Observer mới
const observer = createObserver();

// Tạo và đăng ký một observer mới
observer.subscribe(data => console.log(`Observer 1: ${data}`));

// Tạo và đăng ký một observer mới
observer.subscribe(data => console.log(`Observer 2: ${data}`));

// Thông báo tới tất cả observers
observer.notify('Hello, Observer!');
Khi chạy đoạn mã trên, bạn sẽ thấy dòng chữ "Hello, Observer!" được in ra hai lần, mỗi lần tương ứng với một observer.
3. Observer Design Pattern trong Javascript
3.1. Sự kết hợp giữa Observer Design Pattern và Javascript
Javascript là ngôn ngữ lập trình đa mô hình, bao gồm mô hình hướng đối tượng và mô hình hàm. Điều này làm cho Javascript trở thành lựa chọn lý tưởng để triển khai Observer Design Pattern. Sự linh hoạt của Javascript trong việc xử lý hàm và đối tượng cho phép chúng ta tạo ra các Observer và Subject một cách dễ dàng.
3.2. Các bước để triển khai Observer Design Pattern trong Javascript
Bước 1: Tạo ra một lớp Observer. Một Observer cần phải có phương thức update() để nhận thông báo từ Subject.
Bước 2: Tạo ra một lớp Subject. Lớp Subject cần có các phương thức để thêm (addObserver), xoá (removeObserver) và thông báo (notify) tới tất cả các Observers.
Bước 3: Tạo ra các thực thể (instances) của Observer và đăng ký chúng tới một Subject.
Bước 4: Khi có sự thay đổi nào đó, Subject sẽ gọi phương thức notify để thông báo tới tất cả các Observers đã đăng ký.
4. Ví dụ về việc sử dụng Observer Design Pattern trong Javascript
4.1. Ví dụ 1: Tạo ra một ứng dụng chat đơn giản
4.1.1. Mô tả ứng dụng
Ứng dụng chat đơn giản này sẽ có nhiều người dùng (Observers) đăng ký tới một kênh chat (Subject). Khi có một tin nhắn mới trên kênh chat, tất cả người dùng đều sẽ nhận được tin nhắn đó.
4.1.2. Cách triển khai Observer Design Pattern
Trong ví dụ này, mỗi người dùng (User) sẽ là một Observer, và kênh chat (ChatRoom) sẽ là Subject. Các User có thể đăng ký tới ChatRoom, và khi có một tin nhắn mới, ChatRoom sẽ thông báo tới tất cả các User.
4.1.3. Phân tích code ví dụ
class User {
    constructor(name) {
        this.name = name;
    }

    update(message) {
        console.log(`${this.name} received: ${message}`);
    }
}

class ChatRoom {
    constructor() {
        this.users = [];
    }

    addUser(user) {
        this.users.push(user);
    }

    removeUser(user) {
        this.users = this.users.filter(u => u !== user);
    }

    sendMessage(message) {
        this.users.forEach(user => user.update(message));
    }
}

// Tạo ra một ChatRoom
let chatRoom = new ChatRoom();

// Tạo ra hai User
let user1 = new User('Alice');
let user2 = new User('Bob');

// Thêm hai User vào ChatRoom
chatRoom.addUser(user1);
chatRoom.addUser(user2);

// Gửi tin nhắn tới tất cả User trong ChatRoom
chatRoom.sendMessage('Hello, everyone!');
Khi chạy đoạn mã trên, bạn sẽ thấy hai dòng chữ "Alice received: Hello, everyone!" và "Bob received: Hello, everyone!" được in ra, mỗi dòng tương ứng với một User.
4.2. Ví dụ 2: Quản lý trạng thái nhiệt độ trong một hệ thống điều hòa thông minh
4.2.1. Mô tả hệ thống
Hệ thống điều hòa thông minh này gồm nhiều thiết bị nhiệt độ (Observers) đăng ký tới một cảm biến nhiệt độ trung tâm (Subject). Khi cảm biến nhiệt độ cập nhật nhiệt độ mới, tất cả các thiết bị nhiệt độ đều sẽ cập nhật trạng thái của mình.
4.2.2. Cách triển khai Observer Design Pattern
Trong ví dụ này, mỗi thiết bị nhiệt độ (TemperatureDevice) sẽ là một Observer, và cảm biến nhiệt độ (TemperatureSensor) sẽ là Subject. Các TemperatureDevice có thể đăng ký tới TemperatureSensor, và khi có một nhiệt độ mới, TemperatureSensor sẽ thông báo tới tất cả các TemperatureDevice.
4.2.3. Phân tích code ví dụ
class TemperatureDevice {
    constructor(name) {
        this.name = name;
    }

    update(temperature) {
        console.log(`${this.name} updated: Current temperature is ${temperature} degrees.`);
    }
}

class TemperatureSensor {
    constructor() {
        this.devices = [];
        this.temperature = 0;
    }

    addDevice(device) {
        this.devices.push(device);
    }

    removeDevice(device) {
        this.devices = this.devices.filter(d => d !== device);
    }

    setTemperature(temperature) {
        this.temperature = temperature;
        this.notifyAllDevices();
    }

    notifyAllDevices() {
        this.devices.forEach(device => device.update(this.temperature));
    }
}

// Tạo ra một TemperatureSensor
let sensor = new TemperatureSensor();

// Tạo ra hai TemperatureDevice
let device1 = new TemperatureDevice('Device 1');
let device2 = new TemperatureDevice('Device 2');

// Thêm hai TemperatureDevice vào TemperatureSensor
sensor.addDevice(device1);
sensor.addDevice(device2);

// Cập nhật nhiệt độ mới
sensor.setTemperature(25);
Khi chạy đoạn mã trên, bạn sẽ thấy hai dòng chữ "Device 1 updated: Current temperature is 25 degrees." và "Device 2 updated: Current temperature is 25 degrees." được in ra, mỗi dòng tương ứng với một TemperatureDevice.
5. Ví dụ thực tế về Observer Design Pattern trong JavaScript dựa trên Functional Programming
5.1. Mô tả vấn đề cần giải quyết
Giả sử chúng ta đang xây dựng một ứng dụng bán hàng online. Trong quá trình mua hàng, người dùng cần cập nhật thông tin cá nhân như tên, địa chỉ, số điện thoại,... và chúng ta cần cập nhật thông tin này đồng thời trên nhiều component khác nhau. Observer Design Pattern giúp chúng ta giải quyết vấn đề này một cách hiệu quả.
5.2. Giới thiệu về Functional Programming
Functional Programming là một phong cách lập trình nhấn mạnh vào việc sử dụng hàm một cách thuần túy (pure functions) và tránh tình trạng thay đổi trạng thái (state mutation). Functional Programming giúp chúng ta viết code dễ hiểu, dễ test và dễ bảo dưỡng.
5.3. Giải pháp thông qua Observer Design Pattern
Chúng ta sẽ sử dụng Observer Design Pattern để xây dựng một hệ thống thông báo, sao cho khi thông tin người dùng được cập nhật, tất cả các component liên quan sẽ nhận được thông báo và cập nhật lại trạng thái của mình.
5.4. Bước 1: Xây dựng Observer
Đầu tiên, chúng ta cần xây dựng Observer. Mỗi Observer sẽ có một hàm update để cập nhật trạng thái khi có thông báo từ Subject.
// Observer
const Observer = (function() {
    function Observer(name) {
        this.name = name;
    }

    Observer.prototype.update = function(message) {
        console.log(`Observer ${this.name} received message: ${message}`);
    };

    return Observer;
})();
Trong đoạn code trên, Observer là một hàm khởi tạo với tham số name. Hàm update sẽ được gọi khi có thông báo từ Subject.
5.5. Bước 2: Xây dựng Subject
Tiếp theo, chúng ta cần xây dựng Subject. Subject chính là nơi quản lý danh sách các Observer và thông báo cho chúng khi có sự kiện xảy ra.
// Subject
const Subject = (function() {
    function Subject() {
        this.observers = [];
    }

    Subject.prototype.subscribe = function(observer) {
        this.observers.push(observer);
    };

    Subject.prototype.unsubscribe = function(observer) {
        const index = this.observers.indexOf(observer);
        if(index > -1) {
            this.observers.splice(index, 1);
        }
    };

    Subject.prototype.notify = function(message) {
        this.observers.forEach(observer => observer.update(message));
    };

    return Subject;
})();
Trong đoạn code trên, Subject quản lý một mảng observers. Mỗi khi có thông báo mới, Subject sẽ duyệt qua mảng observers và gọi hàm update của từng Observer.
5.6. Bước 3: Xây dựng Client
Cuối cùng, chúng ta cần xây dựng Client để điều khiển quá trình này.
// Client
const observer1 = new Observer("Observer 1");
const observer2 = new Observer("Observer 2");

const subject = new Subject();
subject.subscribe(observer1);
subject.subscribe(observer2);

subject.notify("Update information");
Trong đoạn code trên, Client tạo ra hai Observer và một Subject. Client sau đó đăng ký hai Observer này với Subject và cuối cùng gửi một thông báo thông qua Subject.
5.7. Kết quả và phân tích
Kết quả là một hệ thống linh hoạt, cho phép cập nhật thông tin đồng thời trên nhiều component khác nhau mà không cần phải trực tiếp liên lạc giữa chúng. Điều này giúp giảm bớt sự phụ thuộc giữa các component, tăng khả năng tái sử dụng code và giúp hệ thống dễ dàng mở rộng hơn.
6. Kết luận
6.1. Tóm tắt nội dung chính
Trong bài viết này, chúng ta đã tìm hiểu về Observer Design Pattern - một mẫu thiết kế phổ biến trong lập trình hướng đối tượng. Chúng ta đã khám phá cơ chế hoạt động của Observer Design Pattern, cùng với việc áp dụng nó trong Javascript và Functional Programming.
6.2. Đánh giá về việc sử dụng Observer Design Pattern trong Javascript cùng Functional Programming
Sử dụng Observer Design Pattern cung cấp cho chúng ta một hệ thống linh hoạt, độc lập và dễ mở rộng. Điều này giúp giảm bớt sự phụ thuộc giữa các component, tăng khả năng tái sử dụng code và giúp hệ thống dễ dàng mở rộng hơn.
6.3. Khuyến nghị cho người đọc
Đối với những người mới học về Design Pattern, Observer có thể hơi phức tạp. Tuy nhiên, nếu bạn tiếp tục thực hành và nắm vững nó, bạn sẽ thấy nó rất hữu ích trong việc xây dựng các ứng dụng phức tạp.
7. 5 câu hỏi thường gặp và câu trả lời (FAQs)
7.1. Q&A1: Tại sao nên sử dụng Observer Design Pattern?
Trả lời: Observer Design Pattern giúp chúng ta tạo ra một hệ thống mà các thành phần có thể tương tác với nhau mà không cần biết rõ về nhau. Điều này giúp giảm sự phụ thuộc giữa các component, tăng khả năng tái sử dụng code và giúp hệ thống dễ dàng mở rộng hơn.
7.2. Q&A2: Observer Design Pattern có nhược điểm gì không?
Trả lời: Một nhược điểm của Observer Design Pattern là nó có thể tạo ra sự phức tạp không cần thiết nếu có quá nhiều Observers và/hoặc Subject.
7.3. Q&A3: Observer Design Pattern có thể sử dụng trong ngôn ngữ lập trình nào?
Trả lời: Observer Design Pattern có thể được sử dụng trong hầu hết các ngôn ngữ lập trình hướng đối tượng, bao gồm Java, C++, Python và JavaScript.
7.4. Q&A4: Observer Design Pattern có phải là một mẫu thiết kế hành vi (Behavioral Pattern) không?
Trả lời: Đúng, Observer Design Pattern là một trong những mmẫu thiết kế hành vi (Behavioral Pattern). Nó tập trung vào cách thức các đối tượng tương tác và phân phối trách nhiệm.
7.5. Q&A5: Có những mẫu thiết kế nào tương tự Observer Design Pattern?
Trả lời: Có một số mẫu thiết kế khác tương tự như Observer như Mediator, Event Aggregator hay Publisher/Subscriber. Mỗi mẫu thiết kế có ưu và nhược điểm riêng, và chúng nên được sử dụng phù hợp với từng trường hợp cụ thể.
Kết thúc bài viết tại đây, hy vọng bạn đã hiểu rõ hơn về Observer Design Pattern và cách áp dụng nó trong Javascript và Functional Programming. Hãy tiếp tục thực hành và khám phá thêm để trở thành lập trình viên chuyên nghiệp hơn. Chúc bạn thành công!
English Version
1. Introduction
1.1. Recap on Design Patterns
In the programming world, Design Patterns are general solutions to common problems in software design. They are not code snippets that can be directly converted into source code, but rather descriptions or templates that you can follow to solve a specific problem in your context.
1.2. Introduction to Observer Design Pattern
Among the popular design patterns, the Observer Design Pattern stands out as a powerful tool for creating flexible and maintainable applications. The Observer Design Pattern belongs to the behavioral pattern category and is particularly useful in situations where an object needs to notify other objects about its state changes.
1.3. Objectives of the Article
This article aims to help you understand the Observer Design Pattern in JavaScript programming, along with the combination of Functional Programming, through theory and practical examples.
2. Understanding the Observer Design Pattern
2.1. Definition of Observer Design Pattern
The Observer Design Pattern defines a one-to-many relationship between objects, so that when one object changes its state, all the objects dependent on it are notified and updated automatically.
2.2. How Observer Design Pattern Works
The Observer Design Pattern operates with two main aspects: the "Subject" and the "Observers". The "Subject" is the object whose state will be tracked, and the "Observers" are the objects that want to be notified when there is a change in the state of the "Subject".
2.3. Applications of Observer Design Pattern in Real Life
The Observer Design Pattern is often used in real-time applications such as Live Auction Systems, Stock Market, and online games. It is also very useful in building applications with "Push Notification" features, where certain events will be notified to the users.
2.4. Visual Example: Creating a Simple Observer Library in JavaScript using Functional Programming Style
2.4.1 Creating the Observer Library
Here is a simple JavaScript code snippet that creates an Observer library in the Functional Programming style:
/**
 * Create a simple Observer library.
 */
const createObserver = () => {
    // Store the list of observers here
    let observers = [];

    // Function to subscribe a new observer
    const subscribe = (fn) => {
        observers.push(fn);
    };

    // Function to unsubscribe an observer
    const unsubscribe = (fn) => {
        observers = observers.filter(observer => observer !== fn);
    };

    // Function to notify all observers
    const notify = (data) => {
        observers.forEach(observer => observer(data));
    };

    return {
        subscribe,
        unsubscribe,
        notify
    };
};
2.4.2 Using the Created Observer Library
After creating the Observer library, you can use it as follows:
// Create a new Observer
const observer = createObserver();

// Create and subscribe a new observer
observer.subscribe(data => console.log(`Observer 1: ${data}`));

// Create and subscribe another observer
observer.subscribe(data => console.log(`Observer 2: ${data}`));

// Notify all observers
observer.notify('Hello, Observer!');
When running the above code snippet, you will see the message "Hello, Observer!" printed twice, each time corresponding to an observer.
3. Observer Design Pattern in JavaScript
3.1. Combining Observer Design Pattern and JavaScript
JavaScript is a multi-paradigm programming language, including object-oriented and functional programming models. This makes JavaScript an ideal choice for implementing the Observer Design Pattern. The flexibility of JavaScript in handling functions and objects allows us to easily create Observers and Subjects.
3.2. Steps to Implement Observer Design Pattern in JavaScript
Step 1: Create an Observer class. An Observer needs to have an update() method to receive notifications from the Subject.
Step 2: Create a Subject class. The Subject class needs to have methods to add (addObserver), remove (removeObserver), and notify all Observers.
Step 3: Create instances of Observers and register them with a Subject.
Step 4: When there is a change, the Subject will call the notify method to notify all registered Observers.
4. Example of Using Observer Design Pattern in JavaScript
4.1. Example 1: Creating a Simple Chat Application
4.1.1. Application Description
This simple chat application will have multiple users (Observers) subscribing to a chat channel (Subject). When a new message is posted on the chat channel, all users will receive that message.
4.1.2. Implementation of Observer Design Pattern
In this example, each user (User) will be an Observer, and the chat channel (ChatRoom) will be the Subject. Users can subscribe to the ChatRoom, and when there is a new message, the ChatRoom will notify all Users.
4.1.3. Code Analysis of the Example
class User {
    constructor(name) {
        this.name = name;
    }

    update(message) {
        console.log(`${this.name} received: ${message}`);
    }
}

class ChatRoom {
    constructor() {
        this.users = [];
    }

    addUser(user) {
        this.users.push(user);
    }

    removeUser(user) {
        this.users = this.users.filter(u => u !== user);
    }

    sendMessage(message) {
        this.users.forEach(user => user.update(message));
    }
}

// Create a ChatRoom
let chatRoom = new ChatRoom();

// Create two Users
let user1 = new User('Alice');
let user2 = new User('Bob');

// Add the two Users to the ChatRoom
chatRoom.addUser(user1);
chatRoom.addUser(user2);

// Send a message to all Users in the ChatRoom
chatRoom.sendMessage('Hello, everyone!');
When running the above code, you will see the messages "Alice received: Hello, everyone!" and "Bob received: Hello, everyone!" printed, each corresponding to a User.
4.2. Example 2: Managing Temperature Status in a Smart Thermostat System
4.2.1. System Description
This smart thermostat system consists of multiple temperature devices (Observers) subscribing to a central temperature sensor (Subject). When the temperature sensor updates the temperature, all the temperature devices will update their status.
4.2.2. Implementation of Observer Design Pattern
In this example, each temperature device (TemperatureDevice) will be an Observer, and the temperature sensor (TemperatureSensor) will be the Subject. The TemperatureDevices can subscribe to the TemperatureSensor, and when there is a new temperature, the TemperatureSensor will notify all the TemperatureDevices.
4.2.3. Code Analysis of the Example
class TemperatureDevice {
    constructor(name) {
        this.name = name;
    }

    update(temperature) {
        console.log(`${this.name} updated: Current temperature is ${temperature} degrees.`);
    }
}

class TemperatureSensor {
    constructor() {
        this.devices = [];
        this.temperature = 0;
    }

    addDevice(device) {
        this.devices.push(device);
    }

    removeDevice(device) {
        this.devices = this.devices.filter(d => d !== device);
    }

    setTemperature(temperature) {
        this.temperature = temperature;
        this.notifyAllDevices();
    }

    notifyAllDevices() {
        this.devices.forEach(device => device.update(this.temperature));
    }
}

// Create a TemperatureSensor
let sensor = new TemperatureSensor();

// Create two TemperatureDevices
let device1 = new TemperatureDevice('Device 1');
let device2 = new TemperatureDevice('Device 2');

// Add the two Temperature

Devices to the TemperatureSensor
sensor.addDevice(device1);
sensor.addDevice(device2);

// Update the temperature
sensor.setTemperature(25);
When running the above code, you will see the messages "Device 1 updated: Current temperature is 25 degrees." and "Device 2 updated: Current temperature is 25 degrees." printed, each corresponding to a TemperatureDevice.
5. Real-Life Example of Observer Design Pattern in JavaScript based on Functional Programming
5.1. Problem Description
Let's say we are building an online shopping application. During the purchase process, users need to update their personal information such as name, address, phone number, etc., and we need to update this information simultaneously across multiple components. The Observer Design Pattern helps us solve this problem efficiently.
5.2. Introduction to Functional Programming
Functional Programming is a programming paradigm that emphasizes the use of pure functions and avoids state mutation. Functional Programming helps us write code that is easy to understand, test, and maintain.
5.3. Solution using Observer Design Pattern
We will use the Observer Design Pattern to build a notification system, so that when user information is updated, all related components will be notified and update their own states.
5.4. Step 1: Building the Observer
First, we need to build the Observer. Each Observer will have an update function to update its state when notified by the Subject.
// Observer
const Observer = (function() {
    function Observer(name) {
        this.name = name;
    }

    Observer.prototype.update = function(message) {
        console.log(`Observer ${this.name} received message: ${message}`);
    };

    return Observer;
})();
In the above code, Observer is a constructor function with the name parameter. The update function will be called when there is a notification from the Subject.
5.5. Step 2: Building the Subject
Next, we need to build the Subject. The Subject will manage a list of Observers and notify them when events occur.
// Subject
const Subject = (function() {
    function Subject() {
        this.observers = [];
    }

    Subject.prototype.subscribe = function(observer) {
        this.observers.push(observer);
    };

    Subject.prototype.unsubscribe = function(observer) {
        const index = this.observers.indexOf(observer);
        if(index > -1) {
            this.observers.splice(index, 1);
        }
    };

    Subject.prototype.notify = function(message) {
        this.observers.forEach(observer => observer.update(message));
    };

    return Subject;
})();
In the above code, Subject manages an array of observers. Whenever there is a new notification, Subject iterates over the observers array and calls the update function of each Observer.
5.6. Step 3: Building the Client
Finally, we need to build the Client to control this process.
// Client
const observer1 = new Observer("Observer 1");
const observer2 = new Observer("Observer 2");

const subject = new Subject();
subject.subscribe(observer1);
subject.subscribe(observer2);

subject.notify("Update information");
In the above code, the Client creates two Observers and a Subject. The Client then subscribes these two Observers to the Subject and finally sends a notification through the Subject.
5.7. Result and Analysis
The result is a flexible system that allows updating information simultaneously across multiple components without direct communication between them. This reduces the dependency between components, increases code reusability, and makes the system easily scalable.
6. Conclusion
6.1. Summary of the Main Content
In this article, we have learned about the Observer Design Pattern, a popular design pattern in object-oriented programming. We explored the mechanism of the Observer Design Pattern, along with its application in JavaScript and Functional Programming.
6.2. Evaluation of Using Observer Design Pattern in JavaScript with Functional Programming
Using the Observer Design Pattern provides us with a flexible, decoupled, and easily extensible system. This reduces the dependency between components, increases code reusability, and makes the system easily scalable.
6.3. Recommendations for Readers
For those new to Design Patterns, the Observer pattern may seem complex. However, with continued practice and understanding, you will find it very useful in building complex applications.
7. Frequently Asked Questions (FAQs)
7.1. Q&A1: Why should I use the Observer Design Pattern?
Answer: The Observer Design Pattern helps us create a system where components can interact with each other without having a clear knowledge of each other. This reduces the dependency between components, increases code reusability, and makes the system easily scalable.
7.2. Q&A2: Does the Observer Design Pattern have any drawbacks?
Answer: One drawback of the Observer Design Pattern is that it can introduce unnecessary complexity if there are too many Observers and/or Subjects.
7.3. Q&A3: Can the Observer Design Pattern be used in any programming language?
Answer: The Observer Design Pattern can be used in most object-oriented programming languages, including Java, C++, Python, and JavaScript.
7.4. Q&A4: Is the Observer Design Pattern a behavioral pattern?
Answer: Yes, the Observer Design Pattern is one of the behavioral patterns. It focuses on the way objects interact and distribute responsibilities.
7.5. Q&A5: What other design patterns are similar to the Observer Design Pattern?
Answer: There are other similar patterns to Observer, such as Mediator, Event Aggregator, or Publisher/Subscriber. Each design pattern has its own advantages and disadvantages and should be used appropriately in specific cases.
This concludes the article. I hope you now have a better understanding of the Observer Design Pattern and how to apply it in JavaScript and Functional Programming. Keep practicing and exploring to become a more proficient developer. Good luck!
日本語版
1. はじめに
1.1. デザインパターンの概要
プログラミングの世界では、デザインパターン はソフトウェア設計における一般的な問題の解決策です。それらはソースコードに直接変換できるコードの断片ではありません。代わりに、特定の問題を解決するために使用できる記述やテンプレートです。
1.2. Observerデザインパターンの概要
人気のあるデザインパターンの中でも、Observerデザインパターン は柔軟でメンテナンスしやすいアプリケーションを作成するための強力なツールとして特筆されます。Observerデザインパターンは、行動パターンのカテゴリに属し、オブジェクトがその状態の変化を他のオブジェクトに通知する必要がある状況で特に有用です。
1.3. この記事の目的
この記事の目的は、JavaScriptプログラミングにおけるObserverデザインパターンと関数型プログラミングの組み合わせを、理論と実例を通じて理解するのを助けることです。
2. Observerデザインパターンの理解
2.1. Observerデザインパターンの定義
Observerデザインパターンは、オブジェクト間の一対多の関係を定義し、あるオブジェクトが状態を変更すると、それに依存するすべてのオブジェクトが通知を受け、自動的に更新されるようにします。
2.2. Observerデザインパターンの動作方法
Observerデザインパターンは、「Subject(主体)」と「Observers(観察者)」の2つの主要な要素で機能します。 「Subject」は状態を追跡するオブジェクトであり、「Observers」は「Subject」の状態の変化を通知を受けたいオブジェクトです。
2.3. Observerデザインパターンの実生活への応用例
Observerデザインパターンは、リアルタイムのアプリケーション(ライブオークションシステム、株式市場、オンラインゲームなど)や、「プッシュ通知」機能を持つアプリケーションの構築によく使用されます。特定のイベントがユーザーに通知される機能があります。
2.4. 視覚的な例: JavaScriptで関数型プログラミングスタイルを使用してシンプルなObserverライブラリを作成する
2.4.1. Observerライブラリの作成
次のシンプルなJavaScriptのコードスニペットは、関数型プログラミングスタイルでObserverライブラリを作成します。
/**
 * シンプルなObserverライブラリを作成します。
 */
const createObserver = () => {
    // Observerのリストをここに格納します
    let observers = [];

    // 新しいObserverを登録するための関数
    const subscribe = (fn) => {
        observers.push(fn);
    };

    // Observerを解除するための関数
    const unsubscribe = (fn) => {
        observers = observers.filter(observer => observer !== fn);
    };

    // すべてのObserverに通知するための関数
    const notify = (data) => {
        observers.forEach(observer => observer(data));
    };

    return {
        subscribe,
        unsubscribe,
        notify
    };
};
2.4.2. 作成したObserverライブラリの使用方法
Observerライブラリを作成した後は、以下のように使用できます。
// 新しいObserverを作成します
const observer = createObserver();

// 新しいObserverを作成して登録します
observer.subscribe(data => console.log(`Observer 1: ${data}`));

// 別のObserverを作成して登録します
observer.subscribe(data => console.log(`Observer 2: ${data}`));

// すべてのObserverに通知します
observer.notify('こんにちは、Observer!');
上記のコードスニペットを実行すると、「こんにちは、Observer!」というメッセージが2回表示されます。それぞれが1つのObserverに対応しています。
3. JavaScriptにおけるObserverデザインパターン
3.1. ObserverデザインパターンとJavaScriptの組み合わせ
JavaScriptはオブジェクト指向と関数型プログラミングモデルを含む多パラダイムのプログラミング言語です。これにより、JavaScriptはObserverデザインパターンの実装に理想的な選択肢となります。JavaScriptの関数とオブジェクトの扱いの柔軟性により、簡単にObserverとSubjectを作成することができます。
3.2. JavaScriptでObserverデザインパターンを実装する手順
Step 1: Observerクラスを作成します。Observerには、Subjectからの通知を
受け取るためのupdate()メソッドが必要です。
Step 2: Subjectクラスを作成します。Subjectクラスには、Observerを追加するためのメソッド(addObserver)、Observerを削除するためのメソッド(removeObserver)、およびすべてのObserverに通知するためのメソッドが必要です。
Step 3: Observerのインスタンスを作成し、Subjectに登録します。
Step 4: 変更がある場合、Subjectはnotifyメソッドを呼び出して登録されたObserver全体に通知します。
4. JavaScriptでObserverデザインパターンを使用した例
4.1. 例1: シンプルなチャットアプリケーションの作成
4.1.1. アプリケーションの説明
このシンプルなチャットアプリケーションでは、複数のユーザー(Observers)がチャットチャンネル(Subject)に購読し、チャットチャンネルに新しいメッセージが投稿されると、すべてのユーザーがそのメッセージを受け取ります。
4.1.2. Observerデザインパターンの実装
この例では、各ユーザー(User)がObserverであり、チャットチャンネル(ChatRoom)がSubjectです。ユーザーはChatRoomに購読し、新しいメッセージがあるとChatRoomはすべてのユーザーに通知します。
4.1.3. 例のコード解析
class User {
    constructor(name) {
        this.name = name;
    }

    update(message) {
        console.log(`${this.name}さんが受信しました: ${message}`);
    }
}

class ChatRoom {
    constructor() {
        this.users = [];
    }

    addUser(user) {
        this.users.push(user);
    }

    removeUser(user) {
        this.users = this.users.filter(u => u !== user);
    }

    sendMessage(message) {
        this.users.forEach(user => user.update(message));
    }
}

// ChatRoomを作成します
let chatRoom = new ChatRoom();

// Userを2つ作成します
let user1 = new User('Alice');
let user2 = new User('Bob');

// 2つのUserをChatRoomに追加します
chatRoom.addUser(user1);
chatRoom.addUser(user2);

// ChatRoomのすべてのUserにメッセージを送信します
chatRoom.sendMessage('こんにちは、みなさん!');
上記のコードを実行すると、「Aliceさんが受信しました: こんにちは、みなさん!」と「Bobさんが受信しました: こんにちは、みなさん!」というメッセージが表示されます。それぞれのメッセージは1人のUserに対応しています。
4.2. 例2: スマートサーモスタットシステムでの温度状態の管理
4.2.1. システムの説明
このスマートサーモスタットシステムは、複数の温度デバイス(Observers)が中央の温度センサー(Subject)に購読し、温度センサーが温度を更新すると、すべての温度デバイスが状態を更新します。
4.2.2. Observerデザインパターンの実装
この例では、各温度デバイス(TemperatureDevice)がObserverであり、温度センサー(TemperatureSensor)がSubjectです。TemperatureDeviceはTemperatureSensorに購読し、新しい温度があるとTemperatureSensorはすべてのTemperatureDeviceに通知します。
4.2.3. 例のコード解析
class TemperatureDevice {
    constructor(name) {
        this.name = name;
    }

    update(temperature) {
        console.log(`${this.name}が更新されました: 現在の温度は${temperature}度です。`);
    }
}

class TemperatureSensor {
    constructor() {
        this.devices = [];
        this.temperature = 0;
    }

    addDevice(device) {
        this.devices.push(device);
    }

    removeDevice(device) {
        this.devices = this.devices.filter(d => d !== device);
    }

    setTemperature(temperature) {
        this.temperature = temperature;
        this.notifyAllDevices();
    }

    notifyAllDevices() {
        this.devices.forEach(device => device.update(this.temperature));
    }
}

// TemperatureSensorを作成します
let sensor = new TemperatureSensor();

// TemperatureDeviceを2つ作成します
let device1 = new TemperatureDevice('デバイス1');
let device2 = new TemperatureDevice('デバイス2');

// 2つのTemperatureDeviceをTemperatureSensorに追加します
sensor.addDevice(device1);
sensor.addDevice(device2);

// 温度を更新します
sensor.setTemperature(25);
上記のコードを実行すると、「デバイス1が更新されました: 現在の温度は25度です。」と「デバイス2が更新されました: 現在の温度は25度です。」というメッセージが表示されます。それぞれのメッセージはTemperatureDeviceに対応しています。
5. JavaScriptにおける関数型プログラミングを活用したObserverデザインパターンの実生活の例
5.1. 問題の説明
オンラインショッピングアプリケーションを作成しているとします。購入プロセス中に、ユーザーは名前、住所、電話番号などの個人情報を更新する必要があり、この情報を複数のコンポーネントに同時に更新する必要があります。Observerデザインパターンは、効率的にこの問題を解決するのに役立ちます。
5.2. 関数型プログラミングの紹介
関数型プログラミングは、純粋な関数の使用を重視し、状態の変更を避けるプログラミングパラダイムです。関数型プログラミングを使うことで、理解しやすいコードを書き、テストしやすく、メンテナンスしやすいコードを作成することができます。
5.3. Observerデザインパターンを使用した解決策
Observerデザインパターンを使用して、通知システムを構築します。ユーザー情報が更新されると、関連するすべてのコンポーネントに通知され、それぞれが状態を更新します。
5.4. ステップ1: Observerの構築
まず、Observerを構築する必要があります。各Observerには、Subjectからの通知を受けて状態を更新するupdate関数があります。
// Observer
const Observer = (function() {
    function Observer(name) {
        this.name = name;
    }

    Observer.prototype.update = function(message) {
        console.log(`Observer ${this.name}がメッセージを受け取りました: ${message}`);
    };

    return Observer;
})();
上記のコードでは、Observerはnameパラメータを持つコンストラクタ関数です。update関数は、Subjectからの通知があったときに呼び出されます。
5.5. ステップ2: Subjectの構築
次に、Subjectを構築する必要があります。SubjectはObserverのリストを管理し、イベントが発生したときにObserverに通知します。
// Subject
const Subject = (function() {
    function Subject() {
        this.observers = [];
    }

    Subject.prototype.subscribe = function(observer) {
        this.observers.push(observer);
    };

    Subject.prototype.unsubscribe = function(observer) {
        const index = this.observers.indexOf(observer);
        if(index > -1) {
            this.observers.splice(index, 1);
        }
    };

 Subject.prototype.notify = function(message) {
        this.observers.forEach(observer => observer.update(message));
    };

    return Subject;
})();
上記のコードでは、Subjectはobserversの配列を管理します。新しい通知があるたびに、Subjectはobserversの配列を繰り返し、各Observerのupdate関数を呼び出します。
5.6. ステップ3: クライアントの構築
最後に、このプロセスを制御するクライアントを構築する必要があります。
// Client
const observer1 = new Observer("Observer 1");
const observer2 = new Observer("Observer 2");

const subject = new Subject();
subject.subscribe(observer1);
subject.subscribe(observer2);

subject.notify("情報を更新しました");
上記のコードでは、Clientは2つのObserverと1つのSubjectを作成します。Clientはこれらの2つのObserverをSubjectに購読し、最後にSubjectを通じて通知を送信します。
5.7. 結果と解析
結果は、複数のコンポーネント間で情報を同時に更新し、それらの間で直接的な通信を行わずに柔軟なシステムを作成することができます。これにより、コンポーネント間の依存関係が減少し、コードの再利用性が向上し、システムのスケーラビリティが向上します。
6. 結論
6.1. メインコンテンツの要約
この記事では、オブジェクト指向プログラミングにおける人気のあるデザインパターンであるObserverデザインパターンについて学びました。Observerデザインパターンの仕組みと、JavaScriptと関数型プログラミングでの応用について探求しました。
6.2. JavaScriptと関数型プログラミングでのObserverデザインパターンの利用評価
Observerデザインパターンの利用は、柔軟性があり、疎結合で拡張性のあるシステムを提供します。コンポーネント間の依存関係が減少し、コードの再利用性が向上し、システムのスケーラビリティが向上します。
6.3. 読者へのおすすめ
デザインパターンに初めて触れる人にとっては、Observerパターンは複雑に感じるかもしれません。しかし、継続的な練習と理解を深めることで、複雑なアプリケーションの構築に非常に役立つことがわかるでしょう。
7. よくある質問(FAQ)
7.1. Q&A1: なぜObserverデザインパターンを使用する必要があるのですか?
Answer: Observerデザインパターンは、コンポーネント同士が互いに明確な知識を持たずに相互作用できるシステムを作成するのに役立ちます。これにより、コンポーネント間の依存関係が減少し、コードの再利用性が向上し、システムのスケーラビリティが向上します。
7.2. Q&A2: Observerデザインパターンには欠点はありますか?
Answer: Observerデザインパターンの欠点の1つは、ObserverやSubjectが多すぎる場合に不必要な複雑さを導入することがあります。
7.3. Q&A3: Observerデザインパターンはどのプログラミング言語でも使用できますか?
Answer: Observerデザインパターンは、Java、C++、Python、JavaScriptなどのほとんどのオブジェクト指向プログラミング言語で使用することができます。
7.4. Q&A4: Observerデザインパターンは行動パターンの一つですか?
Answer: はい、Observerデザインパターンは行動パターンの一つです。オブジェクト間の相互作用と責任の分散に焦点を当てています。
7.5. Q&A5: Observerデザインパターンと類似の他のデザインパターンはありますか?
Answer: Observerに類似した他のパターンには、Mediator、Event Aggregator、Publisher/Subscriberなどがあります。各デザインパターンにはそれぞれ利点と欠点があり、特定のケースに適切に使用する必要があります。
これで記事は終了です。Observerデザインパターンの理解とJavaScriptおよび関数型プログラミングへの適用方法がより深まったことを願っています。継続的な練習と探求を通じて、より優れた開発者になることをお祈りします。頑張ってください!
Mình hy vọng bạn thích bài viết này và học thêm được điều gì đó mới.
Donate mình một ly cafe hoặc 1 cây bút bi để mình có thêm động lực cho ra nhiều bài viết hay và chất lượng hơn trong tương lai nhé. À mà nếu bạn có bất kỳ câu hỏi nào thì đừng ngại comment hoặc liên hệ mình qua: Zalo - 0374226770 hoặc Facebook. Mình xin cảm ơn.
Momo: NGUYỄN ANH TUẤN - 0374226770
TPBank: NGUYỄN ANH TUẤN - 0374226770 (hoặc 01681423001)
All rights reserved
