Node Express Image Upload And Resize
Bài đăng này đã không được cập nhật trong 7 năm
Step 1: Create Node Express Project
mkdir nodejs
cd nodejs
Khởi tạo
npm init -y
Tiếp theo cần cài đặt 1 số package sau
npm install express body-parser ejs uuid multer sharp --save
Giải thích:
express: Express là một web application framework for nodejsejs: template enginebody-parser: để xử lí JSON, dự liệu thô, text và mã hóa URL..multer: để xử lí phần multipart/form-data.uuid: UUID là viết tắt của Universally Unique IDentifier, hiểu nôm na là nó sẽ random ra một định danh duy nhất:sharp: đây là thư viện image resize libraries.
Tiếp theo cần cài đặt nodemon, khi save code tự động Restart Server NodeJS
npm install nodemon --save-dev
Để sử dụng nodemon, ta cần Thêm vào file package.json code như sau:
"scripts": {
    "start": "nodemon server.js"
},
Step 2: Create a server.js file.
Tạo file server.js trong folder root, và thêm đoạn code như dưới:
const express = require('express');
const app = express();
const port = process.env.PORT || 3000;

app.listen(port, function () {
    console.log('Server is running on PORT',port);
});
Tại terminal, run npm start.
npm start
nó output như dưới, là chúng ta đã tạo server nodejs ok rồi.
FRAMGIA\vu.huy.tuan@framgia0394-pc:~/www/nodejs$ npm start

> nodejs@1.0.0 start /home/vu.huy.tuan/www/nodejs
> nodemon server.js

[nodemon] 1.18.10
[nodemon] to restart at any time, enter `rs`
[nodemon] watching: *.*
[nodemon] starting `node server.js`
Server is running on PORT 3000
Step 3: Configure the EJS templating engine.
để sử dụng EJS teamplate, thêm code sau vào file server.js
app.use(express.static('public'));
app.set('view engine', 'ejs');
create folder public/index.html
<!-- index.html -->

<!DOCTYPE html>
<html lang="en">
<head>
    <meta charset="UTF-8">
    <meta name="viewport" content="width=He, initial-scale=1.0">
    <meta http-equiv="X-UA-Compatible" content="ie=edge">
    <title> Upload Example</title>
</head>
<body>
<p>
    <a href="/upload">Demo Upload</a>
</p>
</body>
</html>
Step 4: Configure Express Router.
Tạo file router.js
const express = require('express');
const app = express();
const router = express.Router();

router.get('/', async function (req, res) {
   await res.render('index');
});

module.exports = router;
require file route trong file server.js
const express = require('express');
const bodyParser = require('body-parser');

const app = express();
const port = process.env.PORT || 3000;
const router = require('./router');

app.use(bodyParser.json());
app.use(bodyParser.urlencoded({extended: true}));

app.use(express.static('public'));
app.set('view engine', 'ejs');

app.use('/upload', router);

app.listen(port, function () {
    console.log('Server is running on PORT',port);
});
Step 5: Create a form.
Tạo form upload, create file index.ejs trong folder views với nội dung như sau:
<!DOCTYPE html>
<html lang="en">
<head>
  <title>Bootstrap Example</title>
  <meta charset="utf-8">
  <meta name="viewport" content="width=device-width, initial-scale=1">
  <link rel="stylesheet" href="https://maxcdn.bootstrapcdn.com/bootstrap/3.4.0/css/bootstrap.min.css">
  <script src="https://ajax.googleapis.com/ajax/libs/jquery/3.3.1/jquery.min.js"></script>
  <script src="https://maxcdn.bootstrapcdn.com/bootstrap/3.4.0/js/bootstrap.min.js"></script>
</head>
<body>

<div class="container-fluid">
  <div class="row content">
    <div class="col-sm-12">
      <h4><small>Demo</small></h4>
      <hr>
        <div class="container">
        <div class="col-md-8 col-md-offset-2">
            <h3>File Input Example</h3>
            <form method="post" action="upload/post" enctype="multipart/form-data">
            <div class="form-group">
                <input type="file" name="image" class="input-group input-file"/>
                <button type="submit" name="upload" class="btn btn-primary pull-right">Upload</button>
            </form>
        </div>
        </div>
    </div>
  </div>
</div>
</body>
</html>
view form: http://localhost:3000/upload
Step 6: Create file upload middleware
để xử lý multipart/form-data trong Node.js, chúng ta đã cài đặt multer, để xử dụng nó chúng ta cần tạo file uploadMiddleware.js với nội dung như sau
// uploadMiddleware.js

const multer = require('multer');

const upload = multer({
  limits: {
    fileSize: 4 * 1024 * 1024,
  }
});

module.exports = upload
Step 7: Resize the image
như đã đề cập ở trên để thay đổi kích thước hình ảnh JPEG, PNG, WebP và TIFF chúng ta sẽ sử dụng Sharp vs nodejs, chúng ta sẽ resize lại kích thước của ảnh nhưng vẫn giữ đc chất của nó. Để sử dụng Sharp, ta tạo file Resize.js trong folder root và thêm đoạn mã sau.
// Resize.js

const sharp = require('sharp');
const uuidv4 = require('uuid/v4');
const path = require('path');

class Resize {
  constructor(folder) {
    this.folder = folder;
  }
  async save(buffer) {
    const filename = Resize.filename();
    const filepath = this.filepath(filename);

    await sharp(buffer)
      .resize(300, 300, { // size image 300x300
        fit: sharp.fit.inside,
        withoutEnlargement: true
      })
      .toFile(filepath);

    return filename;
  }
  static filename() {
     // random file name
    return `${uuidv4()}.png`;
  }
  filepath(filename) {
    return path.resolve(`${this.folder}/${filename}`)
  }
}
module.exports = Resize;
Trong file trên, mình đã tạo class là Resize, và config đường dẫn đến thư mục upload trong folder public.
Step 8: Save the image in the file system
//router.js
const express = require('express');
const app = express();
const path = require('path');

const router = express.Router();
const upload = require('./uploadMiddleware');
const Resize = require('./Resize');

router.get('/', async function (req, res) {
    await res.render('index');
});

router.post('/post', upload.single('image'), async function (req, res) {
    // folder upload
    const imagePath = path.join(__dirname, '/public/images');
    // call class Resize
    const fileUpload = new Resize(imagePath);
    if (!req.file) {
        res.status(401).json({error: 'Please provide an image'});
    }
    const filename = await fileUpload.save(req.file.buffer);

    return res.status(200).json({ name: filename });
});

module.exports = router;
Step 9: Demo upload
Màn hình upload
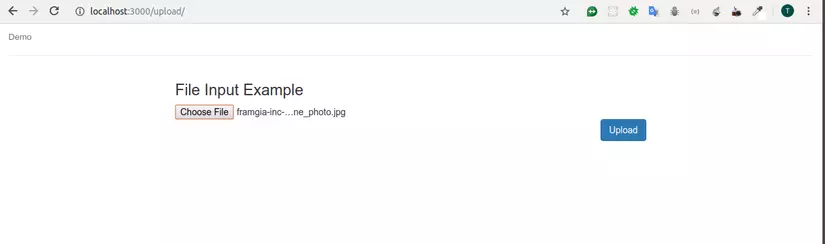
Click upload

File uploaded

Step 10: Summary
Như vậy mình đã hướng dẫn sử dụng lib sharp, để upload vs resize ảnh trong nodejs, hy vọng bài viết sẽ giúp ích cho bạn, Thank you so much !
- Tham khảo: https://appdividend.com
- Link Source Code
All rights reserved
