Nghiên cứu về GraphQL và ứng dụng trên Magento, NestJS (Phần 2)
Bài đăng này đã không được cập nhật trong 2 năm
Tiếp nối với nội dung của bài viết trước thì ở bài viết này chúng ta sẽ đi sâu vào phần ứng dụng GraphQL vào dự án. Ở phần này chúng ta sẽ tìm hiểu và ứng dụng GraphQL vào Magento kèm với các đoạn code ví dụ.
GraphQL trong Magento 2
- Kể từ phiên bản 2.3 thì Magento bắt đầu hỗ trợ GraphQL cho hệ thống
- Magento xây dựng sẵn một số API hỗ trợ GraphQL có sẵn trong phần core của mình, các API này thường được đặt ở trong module có chứa từ graphql trong thư mục
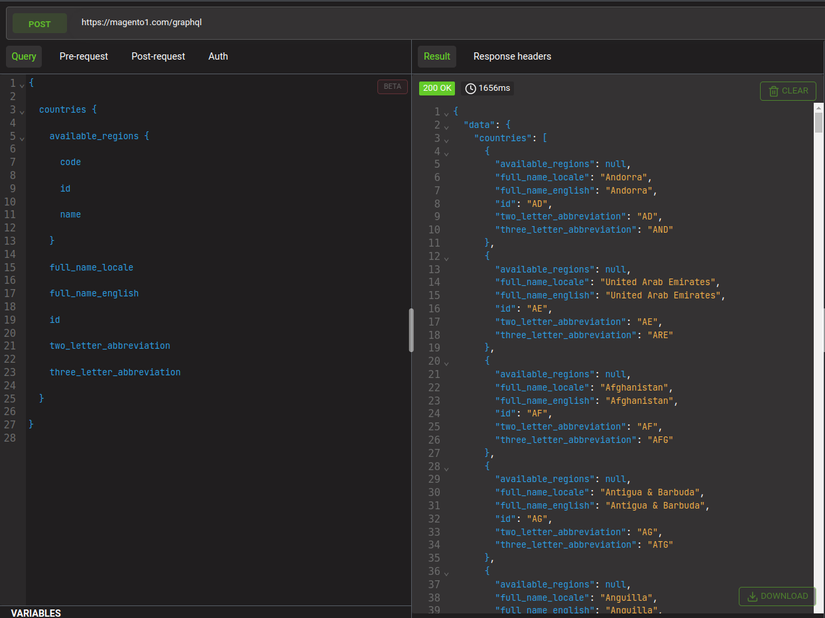
vendor\magento - Để truy cập vào GraphQL trên magento thì truy cập ở url
/graphql
VD: Lấy danh sách của cáccountriestrong hệ thống
{
  countries {
    available_regions {
      code
      id
      name
    }
    full_name_locale
    full_name_english
    id
    two_letter_abbreviation
    three_letter_abbreviation
  }
}
Các bước để tạo một module có sử dụng GraphQL Magento
Bước 1: Chuẩn bị môi trường và công cụ
- Cài đặt môi trường phát triển magento 2. Mình sẽ không đi vào chi tiết bước này mọi người có thể tham khảo ở link Installation Guide
- Cài đặt công cụ hỗ trợ GraphQL: có thể sử dụng extension của Chrome như Altair GraphQL Client hoặc ChromeiQL
Bước 2: Khởi tạo module
- Tạo folder
TestModule/GraphQLở trong thử mụcapp/code - Tạo file
registration.phptại đường dẫnapp/code/TestModule/GraphQL/registration.php
<?php

use Magento\Framework\Component\ComponentRegistrar;

ComponentRegistrar::register(ComponentRegistrar::MODULE, 'TestModule_GraphQL', __DIR__);
- Tạo file
module.xmltại đường dẫnapp/code/TestModule/GraphQL/etc/module.xml
<?xml version="1.0"?>
<config xmlns:xsi="http://www.w3.org/2001/XMLSchema-instance"
    xsi:noNamespaceSchemaLocation="urn:magento:framework:Module/etc/module.xsd">
    <module name="TestModule_GraphQL" setup_version="1.0.0">
        <sequence>
            <module name="Magento_Backend" />
            <module name="Magento_GraphQl" />
            <module name="Magento_Review" />
        </sequence>
    </module>
</config>
Bước 3: Định nghĩa GraphQL Schema
- File schema cho GraphQL của magento sẽ được đặt ở trong thư mục
etc - Tạo một file
schema.graphqlstại đường dẫnapp/code/TestModule/GraphQL/etc/schema.graphqls - Trong GraphQL theo như ta đã nghiên cứu ở bài viết trước thì sẽ có 2 type là type Query để truy vấn dữ liệu và type Mutation để gửi các yêu cầu tác động đễ dữ liệu (thêm, sửa, xóa). Vì vậy ở file
schema.graphqlschúng ta sẽ định nghĩa 2 type này - Query:
# GraphQl Schema for Query
type Query {
    allReviews(
        pageSize: Int = 20
            @doc(
                description: "The maximum number of results to return at once. The default value is 20."
            )
        currentPage: Int = 1
            @doc(
                description: "The page of results to return. The default value is 1."
            )
    ): ListReviews
        @doc(description: "Return all reviews")
        @resolver(class: "TestModule\\GraphQL\\Model\\Resolver\\AllReviews")

    listReviewOfProduct(
        productId: Int
        pageSize: Int = 20
            @doc(
                description: "The maximum number of results to return at once. The default value is 20."
            )
        currentPage: Int = 1
            @doc(
                description: "The page of results to return. The default value is 1."
            )
    ): ListReviews
        @doc(description: "Return list review of product")
        @resolver(
            class: "TestModule\\GraphQL\\Model\\Resolver\\ListReviewOfProduct"
        )
}

type ListReviews @doc(description: "Contain a list of reviews") {
    items: [Review]! @doc(description: "List of reviews")
    page_info: SearchResultPageInfo!
        @doc(description: "Metadata for pagination rendering.")
}

type Review @doc(description: "Review info type") {
    entity_id: Int! @doc(description: "Review ID")
    title: String! @doc(description: "Title of review")
    detail: String @doc(description: "Detail of review")
    nickname: String! @doc(description: "Nickname of reviewer")
    customer_id: Int @doc(description: "Customer ID")
    email: String! @doc(description: "Email of reviewer")
    created_at: String! @doc(description: "Created at")
}
- Ở đây schema định nghĩa 2 object types là Review bao gồm các trường thông tin của 1 review và ListReviews bao gồm một danh sách các reviews và các thông tin về trang được truy vấn
- Type Query định nghĩa 2 trường là allReviews để lấy thông tin của tất cả các reviews trong hệ thống và listReviewOfProduct để lấy danh sách review của một product thông qua product id.
- Mutation:
# GraphQl Schema for Mutation
type Mutation {
    createReview(
        input: CreateReviewInput! @doc(description: "An input object to create a review")
    ) : CreateReviewOutput! @doc(description: "An output after created a review")
    @resolver(class: "TestModule\\GraphQL\\Model\\Resolver\\CreateReview")
}

input CreateReviewInput
    @doc(
        description: "CreateReviewInput"
    ) {
    sku: String! @doc(description: "Product Sku")
    nickname: String! @doc(description: "Nickname of reviewer")
    email: String @doc(description: "Email of reviewer")
    title: String! @doc(description: "Title of review")
    details: String @doc(description: "Details of review")
    ratings: [ReviewRatingInput!]! @doc(description: "Rating of review")
}

input ReviewRatingInput @doc(description: "Reviewer's rating for a single aspect of a review.") {
    id: String! @doc(description: "An encoded rating ID.")
    value_id: String! @doc(description: "An encoded rating value ID.")
}

type CreateReviewOutput
    @doc(
        description: "CreateReviewOutput"
    ) {
    success: Boolean! @doc(description: "True if the review was successfully created")
    item: Review @doc(description: "Review created")
}
- Ở đây Schema định nghĩa 2 input ReviewRatingInput và CreateReviewInput đễ xác định các trường sẽ truyền vào để tạo review
- Object type CreateReviewOutput được định nghĩa để xác định các dữ liệu sẽ trả về của Mutation
- Type Mutation định nghĩa trường createReview để cung cấp khả năng tạo review cho user
B4: Tạo Schema Resolver
- Schema Resolver chính là nơi sẽ trực tiếp xử lý các truy vấn ở GraphQL
- Schema Resolver thường được đặt ở thư mục
Model/Resolver - Tạo một file
AllReviews.phpở đường dẫnapp/code/TestModule/GraphQL/Model/Resolver/AllReviews.php
<?php

declare(strict_types=1);

namespace TestModule\GraphQL\Model\Resolver;

use Magento\Framework\GraphQl\Query\ResolverInterface;
use Magento\Framework\GraphQl\Config\Element\Field;
use Magento\Framework\GraphQl\Schema\Type\ResolveInfo;
use Magento\Framework\GraphQl\Exception\GraphQlInputException;
use Magento\Review\Model\ResourceModel\Review\Collection as ReviewCollection;
use Magento\Review\Model\ResourceModel\Review\CollectionFactory as ReviewCollectionFactory;

class AllReviews implements ResolverInterface
{
    /**
     * @var ReviewCollectionFactory
     */
    private $reviewCollectionFactory;

    /**
     * @param ReviewCollectionFactory $reviewCollectionFactory
     */
    public function __construct(ReviewCollectionFactory $reviewCollectionFactory)
    {
        $this->reviewCollectionFactory = $reviewCollectionFactory;
    }

    /**
     * @inheritdoc
     */
    public function resolve(
        Field $field,
        $context,
        ResolveInfo $info,
        array $value = null,
        array $args = null
    ) {
        $this->validateInput($args);

        /** @var ReviewCollection */
        $reviewCollection = $this->reviewCollectionFactory->create();
        $reviewCollection->setPageSize($args['pageSize'])
            ->setCurPage($args['currentPage']);
        $reviewCollection->getSelect()->joinLeft(
            ['rating' => $reviewCollection->getTable('rating_option_vote')],
            'main_table.review_id = rating.review_id',
            ['rating' => 'value']
        );

        $data = [
            'items' => $reviewCollection->getData(),
            'page_info' => [
                'page_size' => $reviewCollection->getPageSize(),
                'current_page' => $reviewCollection->getCurPage(),
                'total_pages' => $reviewCollection->getLastPageNumber()
            ]
        ];

        return $data;
    }

    /**
     * @throws GraphQlInputException
     */
    private function validateInput(array $input)
    {
        if ($input['currentPage'] < 1) {
            throw new GraphQlInputException(__('currentPage value must be greater than 1'));
        }

        if ($input['pageSize'] < 1) {
            throw new GraphQlInputException(__('pageSize value must be greater than 1'));
        }
    }
}
- Ở file này, method
resolvesẽ phụ trách xử lý các yêu cầu từ GraphQL do client gửi lên và trả về thông tin tương ứng - Lưu ý: Các class resolver xử lý GraphQL đều phải implement interface
ResolverInterface - Tương tự với file
ListReviewOfProduct.phpvàCreateReview.php. Vì các đoạn code khá dài nên mình sẽ không ghi chi tiết code của 2 file đó ở bài viết này, để đọc code của 2 file này mọi người có thể vào link repo mình để bên dưới.
B5: Chạy và kiểm tra query GraphQL
- Chạy các command sau để đảm bảo module được bật
bin/magento module:enable TestModule_GraphQL
bin/magento setup:upgrade
bin/magento setup:di:compile
bin/magento cache:clean
- Kiểm tra query
Query:
{
  allReviews(pageSize: 20, currentPage: 1) {
    items {
      created_at
      customer_id
      detail
      email
      entity_id
      nickname
      title
    }
    page_info {
      current_page
      page_size
      total_pages
    }
  }
}
Response:
{
  "data": {
    "allReviews": {
      "items": [
        {
          "created_at": "2024-01-10 04:52:58",
          "customer_id": 1,
          "detail": "Lorem ipsum dolor sit amet, consectetur adipiscing elit. Morbi in purus ullamcorper, sagittis turpis tristique, ullamcorper lectus. Nullam interdum aliquam porttitor.",
          "email": "",
          "entity_id": 1,
          "nickname": "Customer",
          "title": "Lorem ipsum dolor"
        },
        {
          "created_at": "2024-01-12 04:52:58",
          "customer_id": 2,
          "detail": "Nulla libero leo, sagittis placerat dapibus id, auctor congue mi. Praesent sit amet est sapien. Sed ultricies consequat libero, id porttitor lectus accumsan ut.",
          "email": "",
          "entity_id": 2,
          "nickname": "Steve",
          "title": "Praesent sit amet"
        },
        ...
    ],
    "page_info": {
        "current_page": 1,
        "page_size": 20,
        "total_pages": 10
    }
Tổng kết
- Ở bài viết này chúng ta đã tìm hiểu cách để sử dụng và phát triển API GraphQL với Magento 2. Magento 2 cung cấp khá nhiều các API với GraphQL mọi người có thể đọc và tìm hiểu kĩ hơn các API được cung cấp ở Link hoặc ở code của magento trong thử mục
vendor/magentovới các module có tên chứa từgraphql. Đây là link repo code của bài viết này: Link Repo - Ở bài viết tiếp theo của series chúng ta sẽ tiếp tục tìm hiểu cách ứng dụng GraphQL vào NestJS
Tài liệu tham khảo
All rights reserved
