Mail trong Laravel
Bài đăng này đã không được cập nhật trong 3 năm
Giới thiệu
Trong Laravel có thể gửi mail theo nhiều cách (driver) khác nhau như SMTP, Mailgun, Postmark, Amazon SES …Bạn có thể gửi các transaction mail (mail giao dịch) như Postmark hoặc các mail với số lượng lớn (mattketing, thông báo khách hàng) như Amazon SES…
1. Cấu hình
- Config email service trong file
config/mail.php, những mailer được config trong đây sẽ có config riêng và cách gửi riêng
API dựa trên các driver như Mailgun và Postmark thường đơn giản và nhanh hơn các máy chủ SMTP. Nếu có thể, bạn nên sử dụng một trong các driver đó.
-
Mailgun driver
- Truớc tiên cần cài đặt Symfony Mailgun Mailer để sử dụng được mailgun driver:
composer require symfony/postmark-mailer symfony/http-client- Sau đó bạn cần config domain và secret trong
config/services.phpvà set nó làm default trongconfig/mail.php:
'mailgun' => [ 'domain' => env('MAILGUN_DOMAIN'), 'secret' => env('MAILGUN_SECRET'), 'endpoint' => env('MAILGUN_ENDPOINT', 'api.mailgun.net'), 'scheme' => 'https', ],- Bạn cũng có thể thay đổi region endpoit ở trên
-
Postmark Driver
- Truớc tiên cần cài đặt Symfony Mailgun Mailer để sử dụng được Postmark driver:
composer require symfony/mailgun-mailer symfony/http-client- Sau đó bạn cần config token của Postmark trong
config/services.phpvà set nó làm default trongconfig/mail.php:
'postmark' => [ 'token' => env('POSTMARK_TOKEN'), ],- Bạn cũng có thể chỉ định 1 message stream nào đó được gửi đi. Message stream là 1 luồng tin nhắn phân chia theo cách gửi mà nó sẽ có 2 loại là : transactional và broadcast
'postmark' => [ 'transport' => 'postmark', 'message_stream_id' => env('POSTMARK_MESSAGE_STREAM_ID'), ], -
SES Driver
- Truớc tiên cần cài đặt Amazon AWS SDK for PHP để sử dụng được Postmark driver:
composer require aws/aws-sdk-php- Sau đó bạn cần config key, secret và region của SES trong
config/services.phpvà set nó làm default trongconfig/mail.php:
'ses' => [ 'key' => env('AWS_ACCESS_KEY_ID'), 'secret' => env('AWS_SECRET_ACCESS_KEY'), 'region' => env('AWS_DEFAULT_REGION', 'us-east-1'), ],- Sử dụng AWS temporary credentials làm session token bằng cách thêm token vào config array
'ses' => [ 'key' => env('AWS_ACCESS_KEY_ID'), 'secret' => env('AWS_SECRET_ACCESS_KEY'), 'region' => env('AWS_DEFAULT_REGION', 'us-east-1'), 'token' => env('AWS_SESSION_TOKEN'), ],- Để thêm những điều kiện bổ sung vào SWS SDK's SendEmail method khi gửi mail, ta thêm option array vào configuration ví dụ như:
'ses' => [ 'key' => env('AWS_ACCESS_KEY_ID'), 'secret' => env('AWS_SECRET_ACCESS_KEY'), 'region' => env('AWS_DEFAULT_REGION', 'us-east-1'), 'options' => [ 'ConfigurationSetName' => 'MyConfigurationSet', 'EmailTags' => [ ['Name' => 'foo', 'Value' => 'bar'], ], ], ], -
Trong trường hợp mail service của bạn bị lỗi thì bạn cần phải tạo 1 backup khác. Để giải quyết vấn đề đó ta xử dụng đến Failover . Bạn có thể khai báo 1 mảng mailers đã được định nghĩa.
'mailers' => [
    'failover' => [
        'transport' => 'failover',
        'mailers' => [
            'postmark',
            'mailgun',
            'sendmail',
        ],
    ],

    // ...
],
Bạn cần set mailer đó làm mặc định trong config/mail.php
2. Tạo mailable
-
Để tạo mới 1 mailable thì bạn có thể sử dụng command sau:
php artisan make:mail OrderShipped -
Sau khi tạo class Mailable đó sẽ nằm trong thư mục app/Mail và sẽ có những method mặc định : envelope, content và attachments
2.1 Config the sender
Config thông tin người gửi trong method envelope :
use Illuminate\Mail\Mailables\Address;
use Illuminate\Mail\Mailables\Envelope;

/**
 * Get the message envelope.
 */
public function envelope(): Envelope
{
    return new Envelope(
        from: new Address('jeffrey@example.com', 'Jeffrey Way'),
        subject: 'Order Shipped',
    );
}
Nếu bạn sử dụng chung 1 địa chỉ mail cho tất cả các email của bạn thì khi đó bạn nên sử dụng đến global from. Bạn có thể config nó trong config/mail.php
    'from' => [
        'address' => env('MAIL_FROM_ADDRESS', 'hello@example.com'),
        'name' => env('MAIL_FROM_NAME', 'Example'),
    ],
2.2 Config the view
Trong class Mailable bạn tạo ở trên, method content sẽ chỉ định bạn dùng view nào hay template nào để làm nội dung mail:
/**
 * Get the message content definition.
 *
 * @return \Illuminate\Mail\Mailables\Content
 */
public function content()
{
    return new Content(
        view: 'emails.orders.shipped',
    );
}
2.3 View data
- Sử dụng Public Properties : Khi bạn khai báo và định nghĩa trong constructor của mailable và bên view sẽ có thể nhận được biến này
<?php namespace App\Mail; use App\Models\Order; use Illuminate\Bus\Queueable; use Illuminate\Mail\Mailable; use Illuminate\Mail\Mailables\Content; use Illuminate\Queue\SerializesModels; class OrderShipped extends Mailable { use Queueable, SerializesModels; /** * The order instance. * * @var \App\Models\Order */ public $order; /** * Create a new message instance. * * @param \App\Models\Order $order * @return void */ public function __construct(Order $order) { $this->order = $order; } /** * Get the message content definition. * * @return \Illuminate\Mail\Mailables\Content */ public function content() { return new Content( view: 'emails.orders.shipped', ); } }- Sử dụng with để truyền : cũng giống như ở Controller bạn cũng có thể sử dụng with để truyền data:
/**
 * Get the message content definition.
 *
 * @return \Illuminate\Mail\Mailables\Content
 */
public function content()
{
    return new Content(
        view: 'emails.orders.shipped',
        with: [
            'orderName' => $this->order->name,
            'orderPrice' => $this->order->price,
        ],
    );
}
2.3 Attachment
Để đính kèm theo email bạn gửi đi bạn cần truyền vào đường dẫn của file muốn đính kèm trong method attachments trong Mailable. Đường dẫn mặc định từ folder public
Bạn cũng có thể tự chỉnh được tên file và MineType mong muốn bằng cách sử dụng as và withMine/** * Get the attachments for the message. * * @return \Illuminate\Mail\Mailables\Attachment[] */ public function attachments() { return [ Attachment::fromPath('/path/to/file') ->as('name.pdf') ->withMime('application/pdf'), ]; }- Attaching Files From Disk Nếu bạn lưu file ở 1 ổ đĩa nào đó thì cần phải thay fromPath bên trên bằng fromStorage :
/**
* Get the attachments for the message.
*
* @return \Illuminate\Mail\Mailables\Attachment[]
*/
public function attachments()
{
   return [
       Attachment::fromStorage('/path/to/file')
               ->as('name.pdf')
               ->withMime('application/pdf'),
   ];
}
Sử dụng fromStorageDisk nếu bạn sử dụng 1 dịch vụ lưu trữ khác với default:
/** * Get the attachments for the message. * * @return \Illuminate\Mail\Mailables\Attachment[] */ public function attachments() { return [ Attachment::fromStorageDisk('s3', '/path/to/file') ->as('name.pdf') ->withMime('application/pdf'), ]; }- Raw Data Attachments Bạn cũng có thể định kèm raw data, đặt tên và MineType cho data đó bằng cách sử dụng fromData
/**
   * Get the attachments for the message.
   *
   * @return \Illuminate\Mail\Mailables\Attachment[]
   */
  public function attachments()
  {
      return [
          Attachment::fromData(fn () => $this->pdf, 'Report.pdf')
                  ->withMime('application/pdf'),
      ];
  }
2.4 Inline Attachments
Ngoài cách đính kèm trên bạn cũng có thể đính kèm trực tiếp trong view của mail. Sử dụng method embed trên biến $message. Biến $message này Laravel sẽ tự gen cho bạn
<body>
     Here is an image:

     <img src="{{ $message->embed($pathToImage) }}">
</body>
=> Biến $message này sẽ không sử dụng được trong plain-text message
2.5 Attachable Objects
Bạn cũng có thể đính kèm Object hay data của 1 Object vào Mail. Để sử dụng chúng ta cần implement
Illuminate\Contracts\Mail\Attachabletrong Object đó và định nghĩa 1 method là toMailAttachment, trong method này bạn sẽ tuỳ chọn cái gì sẽ được đính kèm vào mail<?php namespace App\Models; use Illuminate\Contracts\Mail\Attachable; use Illuminate\Database\Eloquent\Model; use Illuminate\Mail\Attachment; class Photo extends Model implements Attachable { /** * Get the attachable representation of the model. */ public function toMailAttachment(): Attachment { return Attachment::fromPath('/path/to/file'); } }Sau khi đã định nghĩa object đính kèm, bạn ruturn object đó trong method attachments của Mailable, cần inject trong constructor:
/**
* Get the attachments for the message.
*
* @return array<int, \Illuminate\Mail\Mailables\Attachment>
*/
public function attachments(): array
{
   return [$this->photo];
}
2.6 Customizing The Symfony Message
Bạn có thể custom 1 callback funtion tuỳ chỉnh lại message trước khi gửi đi. Để sử dụng bạn cần thêm param using vào method envelope:
use Illuminate\Mail\Mailables\Envelope;
use Symfony\Component\Mime\Email;

/**
 * Get the message envelope.
 *
 * @return \Illuminate\Mail\Mailables\Envelope
 */
public function envelope()
{
    return new Envelope(
        subject: 'Order Shipped',
        using: [
            function ($message) {
                $message->from('longnv12@gmail.com')->html('Lorem ipsum...');
            },
        ]
    );
}
Ở trong đây thay vì bạn phải tuỳ chỉnh bằng những method bên ngoài ví dụ như method content thì bạn có thể sử dụng trực tiếp với $message với html(). Tham khảo thêm tại đây
3. Markdown mailable
Markdown là 1 loại ngôn ngữ dánh dấu văn bản dễ viết và dễ đọc. Bài viết các bạn đang đọc này cũng sử dụng cú pháp markdown. Vậy Markdown mail cũng vậy nó sẽ giúp chúng ta xây dựng template mail nhanh hơn đẹp mắt hơn
3.1 Generating Markdown Mailables
Để tạo mailable sử dụng markdown template b sử dụng câu lệnh sau:
php artisan make:mail OrderShipped --markdown=emails.orders.shippedVà khi config content của mail bạn sử dụng markdown thay cho view parameter:
use Illuminate\Mail\Mailables\Content;

 /**
  * Get the message content definition.
  *
  * @return \Illuminate\Mail\Mailables\Content
  */
 public function content()
 {
     return new Content(
         markdown: 'emails.orders.shipped',
         with: [
             'url' => $this->orderUrl,
         ],
     );
 }
3.2 Writing Markdown Messages
Markdown mailable sử dụng kết hợp giữa Blade và cú pháp Markdown để dễ dàng xây dựng 1 email và tận dụng các UI components có sẵn của Laravel
<x-mail::message> # Order Shipped Your order has been shipped! <x-mail::button :url="$url"> View Order </x-mail::button> Thanks,<br> {{ config('app.name') }} </x-mail::message>-
Button Component : sẽ tạo ra 1 button link nằm ở chính giữa. Nó chấp nhận 2 argruments là url và color hỗ trợ các loại như primary, success, error:
<x-mail::button :url="$url" color="success"> View Order </x-mail::button> -
Panel Component : sẽ tạo ra 1 khối văn bản có màu nền khác với màu nên của emai giúp tăng sự chú ý:
<x-mail::panel> This is the panel content. </x-mail::panel> -
Table Component : component này cho phép bạn chuyển từ table dạng Markdown sáng html
<x-mail::table>
| Laravel       | Table         | Example  |
| ------------- |:-------------:| --------:|
| Col 2 is      | Centered      | $10      |
| Col 3 is      | Right-Aligned | $20      |
</x-mail::table>
3.3 Customizing The Components
Để tuỳ chỉnh sâu hơn Markdown mail bạn có thể xuất các component ra để tuỳ chỉnh từng phần. để thực hiện bạn sử dụng câu lệnh sau:
php artisan vendor:publish --tag=laravel-mailCâu lệnh trên sẽ publish các component ra
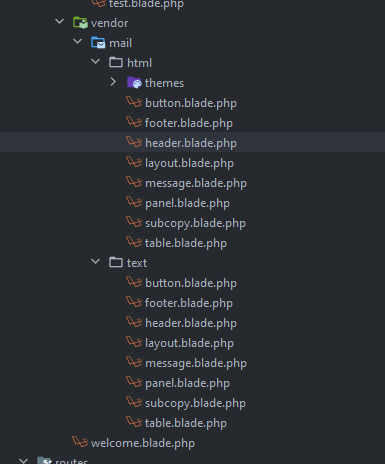
resources/views/vendor/mail. Trong thư mục này sẽ chứa 2 thư mục con làhtmlvàtextbạn có thể tuỳ chỉnh từng phần theo ý muốn
3. Gửi mail
Để gửi mail bạn sử dụng method to để xác định người nhận. Bạn có thể truyền vào email address, user instance hoặc 1 collection users. Nếu bạn truyền vào object hoặc collection nó sẽ tự động nhận email và name làm thông tin người nhận nên hãy đảm bảo 2 trường đó tồn tại. Sau đó sử dụng method send để gửi đi.
<?php

namespace App\Http\Controllers;

use App\Http\Controllers\Controller;
use App\Mail\OrderShipped;
use App\Models\Order;
use Illuminate\Http\Request;
use Illuminate\Support\Facades\Mail;

class OrderShipmentController extends Controller
{
    /**
     * Ship the given order.
     *
     * @param  \Illuminate\Http\Request  $request
     * @return \Illuminate\Http\Response
     */
    public function store(Request $request)
    {
        $order = Order::findOrFail($request->order_id);

        // Ship the order...

        Mail::to($request->user())->send(new OrderShipped($order));
    }
}
Bạn cũng có thể sử dụng các method khác như cc, bcc,..:
Mail::to($request->user())
    ->cc($moreUsers)
    ->bcc($evenMoreUsers)
    ->send(new OrderShipped($order));
Bạn cũng có thể chỉ định 1 Mailer khác default để thực hiện gửi email:
Mail::mailer('postmark')
        ->to($request->user())
        ->send(new OrderShipped($order));
3.1 Queueing Mail
- Queue a mail Việc gửi mail đôi khi có thể làm ảnh hưởng đến thời gian trả về của hệ thống. Và để cải thiện điều đó ta sử dụng đến hàng đợi queue. Để sử dụng bạn thêm method queue thay cho method send:
Mail::to($request->user())
    ->cc($moreUsers)
    ->bcc($evenMoreUsers)
    ->queue(new OrderShipped($order));
Method này sẽ tự động đẩy job vào queue để thực hiện việc gửi mail. Chú ý bạn cần config queue thì mới sử dụng được tính năng này
- Delayed message queueing Để delay mail trong queue bạn sử dụng method later:
Mail::to($request->user())
    ->cc($moreUsers)
    ->bcc($evenMoreUsers)
    ->later(now()->addMinutes(10), new OrderShipped($order));
- Delayed message queueing Để delay mail trong queue bạn sử dụng method later:
Mail::to($request->user())
    ->cc($moreUsers)
    ->bcc($evenMoreUsers)
    ->later(now()->addMinutes(10), new OrderShipped($order));
- Set queue mặc định khi gửi mail Nếu bạn việc gửi mail luôn được xếp vào hàng đợi queue thì bạn cần implement ShouldQueue trong class Maillable của bạn. Khi đó mỗi khi gọi đến method send việc gửi mail sẽ được xếp vào queue:
use Illuminate\Contracts\Queue\ShouldQueue;

class OrderShipped extends Mailable implements ShouldQueue
{
    //
}
- Queue mail và transaction Khi bạn sử dụng mail trong transaction, trong 1 số trường hợp mail sẽ được queue xử lý gửi đi trước. Và mail đó liên quan đến một Model hay bản ghi nào đó chưa được update do transaction chưa được commit sẽ dẫn đến việc kết quả sẽ không như mong muốn. Để xử lí điều đó bạn có thể sử dụng đến method afterCommit :
Mail::to($request->user())->send(
   (new OrderShipped($order))->afterCommit()
);
Hoặc bạn có thể gọi đến trong constructor của Mailable để mặc định sử dụng aftercommit cho mail đó:
<?php

namespace App\Mail;

use Illuminate\Bus\Queueable;
use Illuminate\Contracts\Queue\ShouldQueue;
use Illuminate\Mail\Mailable;
use Illuminate\Queue\SerializesModels;

class OrderShipped extends Mailable implements ShouldQueue
{
   use Queueable, SerializesModels;

   /**
    * Create a new message instance.
    *
    * @return void
    */
   public function __construct()
   {
       $this->afterCommit();
   }
}
4. Local Development
Khi phát triển 1 tính năng gửi mail ở local đôi khi bạn không muốn phải gửi đến 1 địa chỉ mail thật sự nào đó thì có thể sử dụng những cách sau:
- Log Driver Sử dụng log mail driver khi đó mail của bạn sẽ được viết vào trong log thay vì gửi đến 1 địa chỉ mail khai báo. Bạn cũng cần config trong .env với key là MAIL_LOG_CHANNEL và value là driver log bạn muốn lưu:
    Mail::mailer('log')
        ->to('example@gmail.com')
        ->send( new MailTest($user));
- Sử dụng các mail service khác
- Bạn có thể sử dụng HELO, Mailtrap, smtp để gửi đến 1 địa chỉ mail giả để phục vụ quá trình test
- Nếu bạn sử dụng Laravel Sail thì có thể sử dụng đến Mailpit interface thông qua
localhost:8025
- Preview in browser Bạn có thể trả về trực tiếp Mailable class trong Controller và mail của bạn sẽ được hiện thị dưới dạng view:
Route::get('/mailable', function () {
   $invoice = App\Models\Invoice::find(1);

   return new App\Mail\InvoicePaid($invoice);
});
- Sử dụng global to address Bạn có thể chỉ định 1 địa chỉ to global bằng method alwaysTo với method này bạn có thể setup gửi đến 1 địa chỉ nhất định để test dựa vào môi trường. Thông thường nó sẽ được viết trong boot của Service Provider:
use Illuminate\Support\Facades\Mail;

/**
* Bootstrap any application services.
*
* @return void
*/
public function boot()
{
   if ($this->app->environment('local')) {
       Mail::alwaysTo('taylor@example.com');
   }
}
All rights reserved
