Load More Records khi scroll với laravel và vuejs
Bài đăng này đã không được cập nhật trong 6 năm
Như chúng ta biết, trên một trang web khi hiển thị nhiều dữ liệu chúng ta luôn có một thanh phân trang và khi nhấp vào một liên kết để phân trang thì sẽ chuyển nội dung đến trang tiếp theo, sau đó sẽ mất thời gian và tải trang mỗi lần.
Chúng ta có một cách phân trang nữa đó là load more, kiểu phân trang này rất tiện lợi, khi bạn cuộn (scroll) thì nó sẽ tải thêm dữ liệu và đẩy xuống phía dưới. Vì vậy, trong hướng dẫn này, mình sẽ thực hiện load more bằng cách sử dụng Laravel và Vue.
1. Cài đặt laravel
Vẫn là câu lệnh quen thuộc với ai dùng laravel:
composer create-project --prefer-dist laravel/laravel blog
2. Cài đặt vuejs
Sau khi xong laravel chúng ta tiếp tục chạy command:
php artisan preset vue

npm install

npm install vue-resource

npm install vue-infinite-loading
Chúng ta cài đặt các gói của vuejs.
3. Tạo bảng Post và Model
Chúng ta tạo một migration post bằng command sau:
php artisan make:migration create_posts_table
Trong database/migrations chúng ta sẽ thấy một file chúng ta mới tạo ra cho bảng post. Chúng ta sửa file đó như sau:
<?php


use Illuminate\Support\Facades\Schema;
use Illuminate\Database\Schema\Blueprint;
use Illuminate\Database\Migrations\Migration;


class CreatePostsTable extends Migration
{
    /**
     * Run the migrations.
     *
     * @return void
     */
    public function up()
    {
        Schema::create('posts', function (Blueprint $table) {
            $table->increments('id');
            $table->string('title');
            $table->string('description');
            $table->timestamps();
        });
    }


    /**
     * Reverse the migrations.
     *
     * @return void
     */
    public function down()
    {
        Schema::dropIfExists('posts');
    }
}
Sau khi có migration chúng ta sẽ chạy command để tạo ra bảng:
php artisan migrate
Tiếp tục tạo model cho bảng Post:
php artisan make:model Post
trong file app/Post.php chúng ta thay đổi một chút như sau:
<?php


namespace App;


use Illuminate\Database\Eloquent\Model;


class Post extends Model
{
    /**
     * The attributes that are mass assignable.
     *
     * @var array
     */
    protected $fillable = [
        'title',
        'description'
    ];
}
4. Tạo route
Chúng ta sẽ tạo một route như sau:
routes/web.php
Route::get('posts', 'PostController@index');
5. Tạo Controller
Chúng ta chạy command tạo controller như sau php artisan make:controller
Trong file app/Http/Controllers/PostController.php chúng ta sửa như sau:
<?php

namespace App\Http\Controllers;

use Illuminate\Http\Request;
use App\Post;

class PostController extends Controller
{
    /**
     * success response method.
     *
     * @return \Illuminate\Http\Response
     */
    public function index()
    {
        $data = Post::orderBy('id')->paginate(10);
        return response()->json($data);
    }
}
Ở đây trong action index chúng ta sẽ lấy tất cả các bản ghi sắp xếp theo id và sử dụng paginate của laravel lấy 10 bản ghi.
Sau đó trả ra dạng Json.
6. Tạo component trong vue
Ở đây chúng ta sẽ viết lại file resources/assets/js/app.js và các component.
Trong file resources/assets/js/app.js sửa lại như sau:
require('./bootstrap');

window.Vue = require('vue');
Vue.use(require('vue-resource'));

Vue.component('example-component', require('./components/ExampleComponent.vue'));
Vue.component('InfiniteLoading', require('vue-infinite-loading'));

const app = new Vue({
    el: '#app'
});
Chúng ta sẽ thấy có một component là ExampleComponent Chúng ta sẽ sửa lại file này như sau:
<template>
    <div class="container" style="margin-top:50px;">
        <div class="row justify-content-center">
            <div class="col-md-8">
                <div class="card">
                    <div class="card-header"><strong>Load more khi scroll với laravel và vuejs</strong></div>

                    <div class="card-body">
                        <div>
                          <p v-for="item in items">
                            <a v-bind:href="'http://localhost/post/'+item.slug" target="_blank">{{item.title}}</a>
                          </p>
                          <infinite-loading @distance="1" @infinite="infiniteHandler"></infinite-loading>

                        </div>
                    </div>
                </div>
            </div>
        </div>
    </div>
</template>

<script>
    export default {
        mounted() {
            console.log('Laravel and Vuejs.')
        },
        data() {
            return {
              items: [],
              page: 1,
            };
          },
          methods: {
            infiniteHandler($state) {
                let that = this;

                this.$http.get('/posts?page='+this.page)
                    .then(response => {
                        return response.json();
                    }).then(data => {
                        $.each(data.data, function(key, value) {
                                that.items.push(value);
                        });
                        $state.loaded();
                    });

                this.page = this.page + 1;
            },
          },
    }
</script>
Tiêps theo chúng ta sẽ sử dụng lại file blade:
resources/views/welcome.blade.php
<!DOCTYPE html>
<html>
    <head>
        <meta charset="utf-8">
        <meta name="csrf-token" content="{{ csrf_token() }}">
        <meta http-equiv="X-UA-Compatible" content="IE=edge">
        <meta name="viewport" content="width=device-width, initial-scale=1">
        <title>Load more khi scroll với laravel và vuejs </title>
        <link href="{{asset('css/app.css')}}" rel="stylesheet" type="text/css">
    </head>
    <body>
        <div id="app">
            <example-component></example-component>
        </div>
        <script src="{{asset('js/app.js')}}" ></script>
    </body>
</html>
chúng ta phải thêm script 'js/app.js' vào nhé.
Thành quả của chúng ta đây:
 Nhưng nó trống trơn =)). Vì chúng ta chưa có dữ liệu nào
7. Seed data cho bảng post
Chúng ta sẽ tạo một file factiories như sau:
php artisan make:factory PostFactory
Sau đó sửa file database/factories
<?php

use Faker\Generator as Faker;

$factory->define(\App\Post::class, function (Faker $faker) {
    return [
        'title' => $faker->name,
        'description' => $faker->text,
    ];
});
chúng ta chạy command php artisan make:seed PostsTableSeeder sau đó sửa file
database/seeds/PostsTableSeeder.php
<?php

use Illuminate\Database\Seeder;

class PostsTableSeeder extends Seeder
{
    /**
     * Run the database seeds.
     *
     * @return void
     */
    public function run()
    {
        factory(\App\Post::class, 1000)->create();
    }
}
Trong function run() chúng ta sẽ sử dụng hàm của helper trong Laravel là hàm factory(). Đối số thứ nhất truyền vào class Model , đối số thứ hai truyền vào số lượng bản ghi muốn sính ra.
Giờ chúng ta vào file DatableSeeder.php trong hàm run() :
<?php

use Illuminate\Database\Seeder;

class DatabaseSeeder extends Seeder
{
    /**
     * Run the database seeds.
     *
     * @return void
     */
    public function run()
    {
        // $this->call(UsersTableSeeder::class);
        $this->call(PostsTableSeeder::class);
    }
}
Xong chúng ta sẽ chạy lệnh php artisan db:seed. để tạo ra các bảng ghi cho bảng Post.
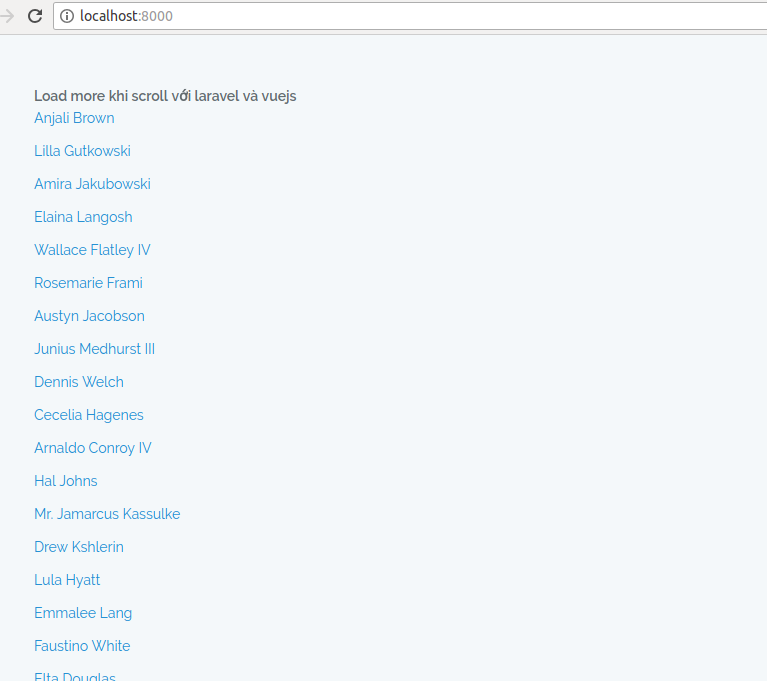
Và kết quả của chúng ta. Các bạn lăn chuột xuống và xem nhé =)).
Chúc các bạn thành công!
Tài liệu tham khảo
All rights reserved
