Laravel Livewire - SPA say no Javascript (Phần 2)
Bài đăng này đã không được cập nhật trong 6 năm
Giới thiệu
Ở phần 1, chúng ta đã setup package Livewire và chạy thử thành công. Hôm nay, chúng ta sẽ quay lại bài toán CRUD cho Contact sử dụng Livewire để xây dựng SPA 1 cách đơn giản mà không cần viết 1 dòng code javascript nào cả. Let's go!!!
1. Khai báo route và viết Controller
Ở phần trước chúng ta đã chuẩn bị những thứ cần thiết để 1 component Livewire có thể hoạt động.
Route khai báo trong routes/web.php:
Route::view('contacts', 'contacts);
Mọi controller của livewire được lưu trữ trong thư mục app/Http/Livewire:
<?php

namespace App\Http\Livewire;

use Livewire\Component;

class ContactComponent extends Component
{
    public $data, $name, $phone, $address, $selected_id;
    public $updateMode = false;

    public function render()
    {
        $this->data = Contact::all();

        return view('livewire.contacts.component');
    }
}
2. Read data
Để tiện quản lý chúng ta sẽ khai báo cấu trúc file views cho component Contact trong thư mục livewire/contacts:
views
  livewire
    contacts
      component.blade.php
      create.blade.php
      update.blade.php
Với SPA, các chức năng CRUD sẽ thao tác trên 1 màn hình duy nhất. File component.blade.php:
<div>
<div class="row">Laravel - Livewire CRUD</div>
<div class="row">
<div class="col-md-6">
@if (count($errors) > 0)
<div class="alert alert-danger">
<a href="#" class="close" data-dismiss="alert">×</a>
<strong>Sorry!</strong> invalid input.<br><br>
<ul style="list-style-type:none;">
@foreach ($errors->all() as $error)
<li>{{ $error }}</li>
@endforeach
</ul>
</div>
@endif
@if($updateMode)
@include('livewire.contacts.update')
@else
@include('livewire.contacts.create')
@endif
</div>
</div>
<div class="row" style="margin-top: 20px">
<table class="table table-bordered table-condensed">
<tr>
<td>ID</td>
<td>NAME</td>
<td>PHONE</td>
<td>ACTION</td>
</tr>
@foreach($data as $row)
<tr>
<td>{{$row->id}}</td>
<td>{{$row->name}}</td>
<td>{{$row->phone_number}}</td>
<td width="150">
<button wire:click="edit({{ $row->id }})" class="btn btn-xs btn-primary">Edit</button>
<button wire:click="destroy({{ $row->id }})" class="btn btn-xs btn-danger">Delete</button>
</td>
</tr>
@endforeach
</table>
</div>
</div>
Chúng ta sẽ đi từng chức năng nên chưa cần quan tâm 2 file view create.blade.php và update.blade.php, tạm thời các bạn cứ comment lại phần include 2 file view này.
Xem chút thành quả trước nhé:
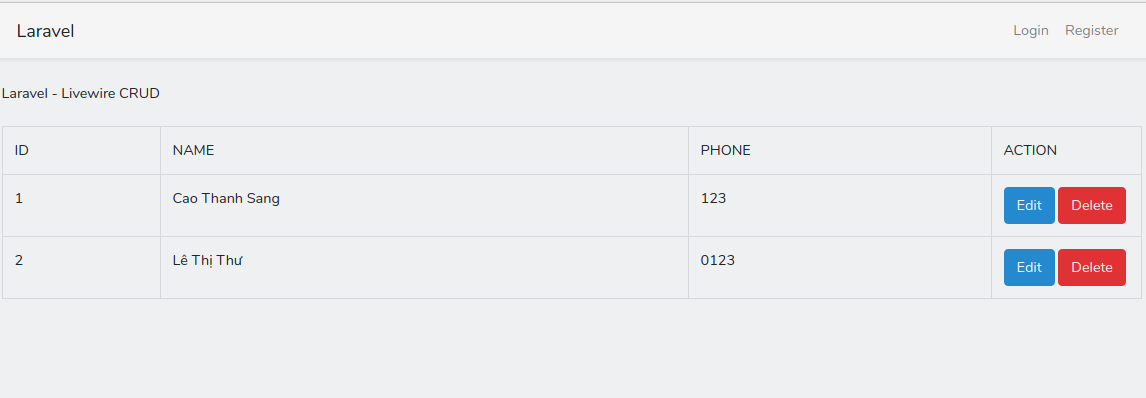
Ở đây mình đã chuẩn bị sẵn data để show ra. Phân tích code trong controller một chút, Livewire components sẽ lưu trữ và tracking data dưới dạng thuộc tính công khai và tự động truyền vào view mà không cần truyền vào như 1 params trong method view().
Lưu ý:
- Dữ liệu được lưu trữ trong các thuộc tính public được hiển thị cho phía front-end. Do đó, bạn KHÔNG NÊN lưu trữ dữ liệu nhạy cảm trong đó.
- Thuộc tính CHỈ có thể là một trong các kiểu dữ liệu cơ bản của js (string, int, array, boolean), HOẶC là eloquent model (hay collections).
- Đối với PHP> = 7.4: thuộc tính công khai trong các component của Livewire hiện KHÔNG hỗ trợ typed properties.
3. Create data
File view create.blade.php
<div>
    <h2>New Contact</h2>
    <div class="form-group">
        <label for="email">Name:</label>
        <input wire:model="name" type="text" class="form-control">
    </div>
    <div class="form-group">
        <label for="pwd">Phone:</label>
        <input wire:model="phone" type="text" class="form-control">
    </div>
    <div class="form-group">
        <label for="pwd">Address:</label>
        <input wire:model="address" type="text" class="form-control">
    </div>
    <button wire:click="store()" class="btn btn-primary">Save</button>
</div>
Chúng ta thấy ở view đang gọi 1 sự kiện click đến function store() trong controller:
class ContactComponent extends Component
{
    ...

    private function resetInput()
    {
        $this->reset([
            'name',
            'phone',
            'address'
        ]);
    }

    public function store()
    {
        $this->validate([
            'name' => 'required|min:5',
            'phone' => 'required',
            'address' => 'required',
        ]);

        Contact::create([
            'name' => $this->name,
            'phone_number' => $this->phone,
            'address' => $this->address,
        ]);

        $this->resetInput();
    }
}
Việc store data với Livewire không khác gì lúc viết code Laravel thông thường bao gồm Validate data, gọi method create() của Eloquent. Ngoài ra, Livewire cung cấp $this->reset() để lập trình lại các giá trị thuộc tính public về trạng thái ban đầu.
Ở file view chúng ta thấy ở input có sử dụng cú pháp wire:model="property-name" - đây chính là cơ chế data binding của Livewire, một khái niệm quen thuộc với các bạn đã sử dụng Vue, React hay Angular. Livewire có thể "bind" (hoặc "synchronize") giá trị hiện tại của một số thành phần HTML với một thuộc tính cụ thể trong component. Khi có event xảy ra trên input, property sẽ được tự động update và livewire lắng nghe sự kiện đó tiếp theo sẽ gửi 1 AJAX request để re-render component với data mới.
Với cơ chế data binding của Livewire ta có thể tùy chỉnh với 1 số options sau:
- Debouncing input:
- Mặc định khi nhập vào input thì cứ 150ms thì property lại được update. Điều này có nghĩa là ngay lập tức property được update để tránh việc gửi quá nhiều request ta có thể sử dụng debounce để điều chỉnh time.
<input type="text" wire:model.debounce.500ms="name">
- Binding với loại data lồng nhau
<input type="text" wire:model="parent.message">
- Lazy updating
- Việc lập tức update property là cần thiết với dạng
<select>tuy nhiên với kiểu nhập văn bản thì không nên. Ta có thể sử dụng lazy để lắng nghe sự kiện change của input.
<input type="text" wire:model.lazy="name">
4. Update data
Chúng ta đã tạo data mới thành công còn bây giờ hãy thêm chức năng edit để chỉnh sửa chúng. File view update.blade.php sẽ như sau
<div>
    <h2>Edit Contact</h2>
    <input type="hidden" wire:model="selected_id">
    <div class="form-group">
        <label for="email">Name:</label>
        <input wire:model="name" type="text" class="form-control">
    </div>
    <div class="form-group">
        <label for="pwd">Phone:</label>
        <input wire:model="phone" type="text" class="form-control">
    </div>
    <div class="form-group">
        <label for="pwd">Address:</label>
        <input wire:model="address" type="text" class="form-control">
    </div>
    <button wire:click="update()" class="btn btn-primary">Update</button>
    <button wire:click="cancel()" class="btn btn-default">Cancel</button>
</div>
Update code cho file ContactComponent.php
class ContactComponent extends Component
{
    ...

    public function edit($id)
    {
        $record = Contact::findOrFail($id);

        $this->selected_id = $id;
        $this->name = $record->name;
        $this->phone = $record->phone_number;
        $this->address = $record->address;

        $this->updateMode = true;
    }

    public function update()
    {
        $this->validate([
            'selected_id' => 'required|numeric',
            'name' => 'required|min:5',
            'phone' => 'required',
            'address' => 'required',

        ]);

        if ($this->selected_id) {
            $record = Contact::find($this->selected_id);
            $record->update([
                'name' => $this->name,
                'phone_number' => $this->phone,
                'address' => $this->address,
            ]);

            $this->resetInput();
            $this->updateMode = false;
        }
    }
}
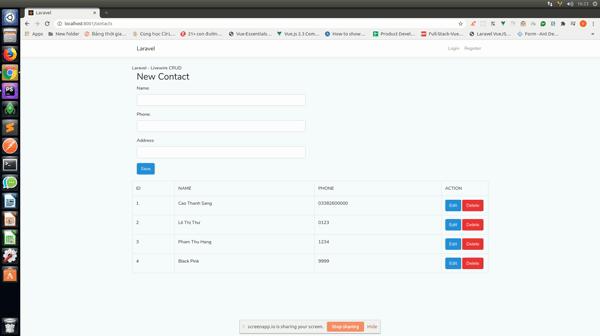
Chúng ta xem thành quả nào
5. Delete data
Cuối cùng là chức năng delete, chúng ta lại update code trong ContactComponent
class ContactComponent extends Component
{
    ...

    public function destroy($id)
    {
        if ($id) {
            $record = Contact::where('id', $id);
            $record->delete();
        }
    }
}
Ở file view chúng ta đã chuẩn bị sẵn cho việc này rồi. Ta có thể truyền tham số trực tiếp vào action
<button wire:click="destroy({{ $row->id }})" class="btn btn-xs btn-danger">Delete</button>
Để lắng nghe các tương tác trên trang và gọi method trong component, Livewire cung cấp một số directives để việc xử lý việc này một cách dễ dàng
| Event | Directive |
|---|---|
| click | wire:click |
| keydown | wire:keydown |
| submit | wire:submit |
Đặc biệt, Livewire còn cung cấp một số magic actions, chúng luôn bắt đầu với ký tự '$':
| Function | Description |
|---|---|
| $refresh | Component sẽ được re-render mà không cần bất kỳ action nào xảy ra |
| $set('property', value) | Shortcut để update giá trị của property |
| $toggle('property') | Shortcut để update giá trị boolean của property |
| $emit('event', ...params) | Livewire sẽ phát ra một sự kiện global với tham số truyền vào |
| $event | Một biến đặc biệt chứa giá trị của sự kiện đã được kích hoạt hành động. Ví dụ: wire:change="setSomeProperty($event.target.value)" |
Tổng kết
Vậy là chúng ta đã hoàn thành chức năng CRUD model như một trang Single Page Application mà không cần bất kỳ một dòng code Js nào hay sử dụng framework Vue, React,... Thật đơn giản phải không nào? Livewire quả thật là 1 package mạnh mẽ và hấp dẫn, nó còn rất nhiều thứ để chúng ta khám phá.
Mình xin chân thành cảm ơn các bạn đã đọc bài viết. Hy vọng rằng chúng ta sẽ gặp nhau ở những phần tiếp theo 
Nguồn:
All rights reserved
