Laravel-admin: Xây dựng trang quản trị trong 1 nốt nhạc - Phần 2 Model Grid
Bài đăng này đã không được cập nhật trong 4 năm
Giới thiệu
Ở phần 1, chúng ta đã cài đặt package và chạy thử demo CRUD đơn giản. Ở phần 2, chúng ta sẽ đi tìm hiểu cách custom trang Index - hiển thị bảng dữ liệu trở nên sinh động và mạnh mẽ hơn.
Để custom trang Index thì chúng ta chỉ cần chỉnh sửa trong function grid() trong Controller:
<?php

namespace App\Admin\Controllers;

use App\Models\User;
use Encore\Admin\Controllers\AdminController;
use Encore\Admin\Form;

class UserController extends AdminController
{
    ...
    protected function grid()
    {
        $grid = new Grid(new User());

        $grid->column('id', __('Id'));
        $grid->column('name', __('Name'));
        $grid->column('email', __('Email'));
        $grid->column('password', __('Password'));
        $grid->column('created_at', __('Created at'));
        $grid->column('updated_at', __('Updated at'));

        return $grid;
    }
}
1.Cách sử dụng cơ bản
Thêm cột để hiển thị dữ liệu:
// Thêm trực tiếp 1 cột thông qua tên trường
$grid->username('Username');

// Hiệu ứng tương tự như trên
$grid->column('username', 'Username');

// Hiển thị dữ liệu dạng Json
$grid->column('profile->mobile', '手机号');

// Hiển thị nhiều cột
$grid->columns('email', 'username' ...);
Chúng ta có thể lấy dữ liệu theo điều kiện bằng cách sử dụng query:
$grid->model()->where('id', '>', 100)
    ->whereIn('id', [1, 2, 3])
    ->whereBetween('votes', [1, 100])
    ->whereColumn('updated_at', '>', 'created_at')
    ->orderBy('id', 'desc')
    ->take(100)
Tùy chỉnh kết quả hiển thị của cột
$grid->text()->display(function($text) {
    return str_limit($text, 30, '...');
});

$grid->name()->display(function ($name) {
    return "<span class='label'>$name</span>";
});

$grid->email()->display(function ($email) {
    return "mailto:$email";
});

// Hiển thị một cột không được định nghĩa trong bảng dữ liệu
// Có thể sử dụng dữ liệu của cột khác để hiển thị
$grid->column('full_name')->display(function () {
    return $this->first_name . ' ' . $this->last_name;
});
Ta có thể tắt một số tính năng mặc định
$grid->disableCreateButton();

$grid->disablePagination();

$grid->disableFilter();

$grid->disableExport();

$grid->disableRowSelector();

$grid->disableActions();

$grid->disableColumnSelector();
2. Hiển thị dữ liệu có quan hệ - Relation
Để có thể hiển thị dữ liệu có quan hệ thì chúng ta phải định nghĩa các mối quan hệ trong Model sau đó mới sử dụng được ở grid()
1. One to One - Quan hệ 1-1
Ví dụ model User và Profile có quan hệ 1-1
$grid = new Grid(new User);

$grid->column('id', 'ID')->sortable();
$grid->column('name', 'Name');

$grid->column('profile.age');
$grid->column('profile.gender');

//or
$grid->profile()->age();
$grid->profile()->gender();

return $grid;
2. One to Many - Quan hệ 1-n
Ví dụ một Post có nhiều Comment. Hiển thị bảng dữ liệu Post như sau
$grid = new Grid(new Post);

$grid->column('id', 'id')->sortable();
$grid->column('title');
$grid->column('content');

$grid->column('comments', 'Comments count')->display(function ($comments) {
    $count = count($comments);
    return "<span class='label label-warning'>{$count}</span>";
});

return $grid;
Còn nếu chúng ta muốn hiển thị bảng dữ liệu của Comment:
$grid = new Grid(new Comment);

$grid->column('id');
$grid->column('post.title');
$grid->column('content');

return $grid;
3. Many to Many - Quan hệ n-n
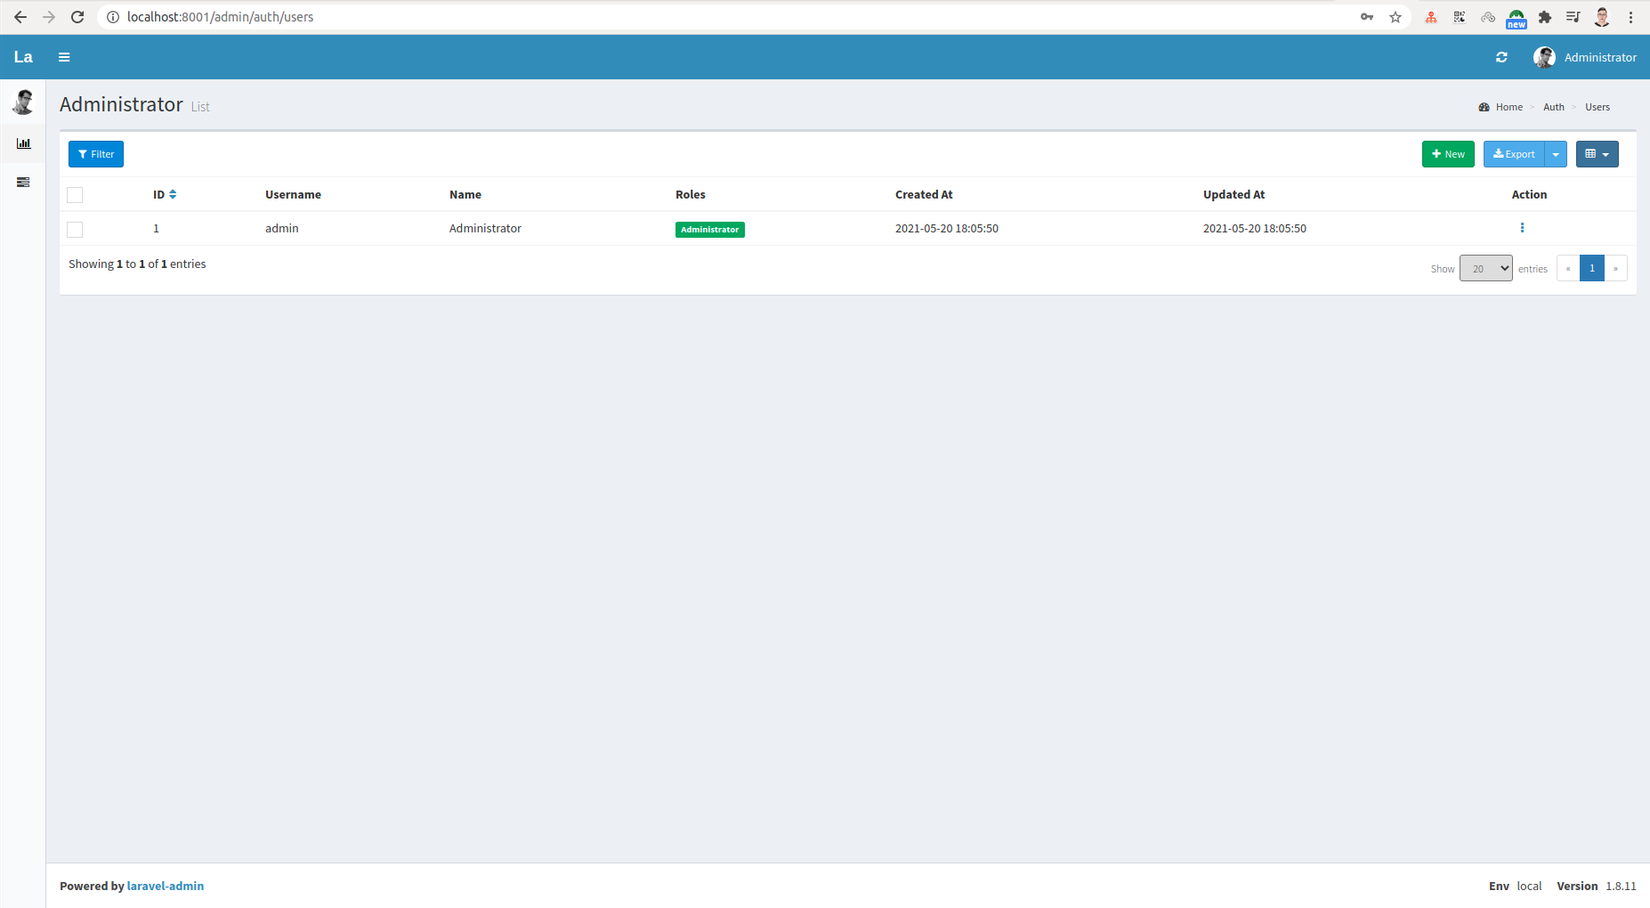
Ví dụ model User và Role có quan hệ nhiều - nhiều.
$grid = new Grid(new User);
// Sử dụng sortable() để dữ liệu có thể sắp xếp theo cột.
$grid->id('ID')->sortable();
$grid->username();
$grid->name();
$grid->roles()->display(function ($roles) {
$roles = array_map(function ($role) {
return "<span class='label label-success'>{$role['name']}</span>";
}, $roles);
return join(' ', $roles);
});
return $grid;
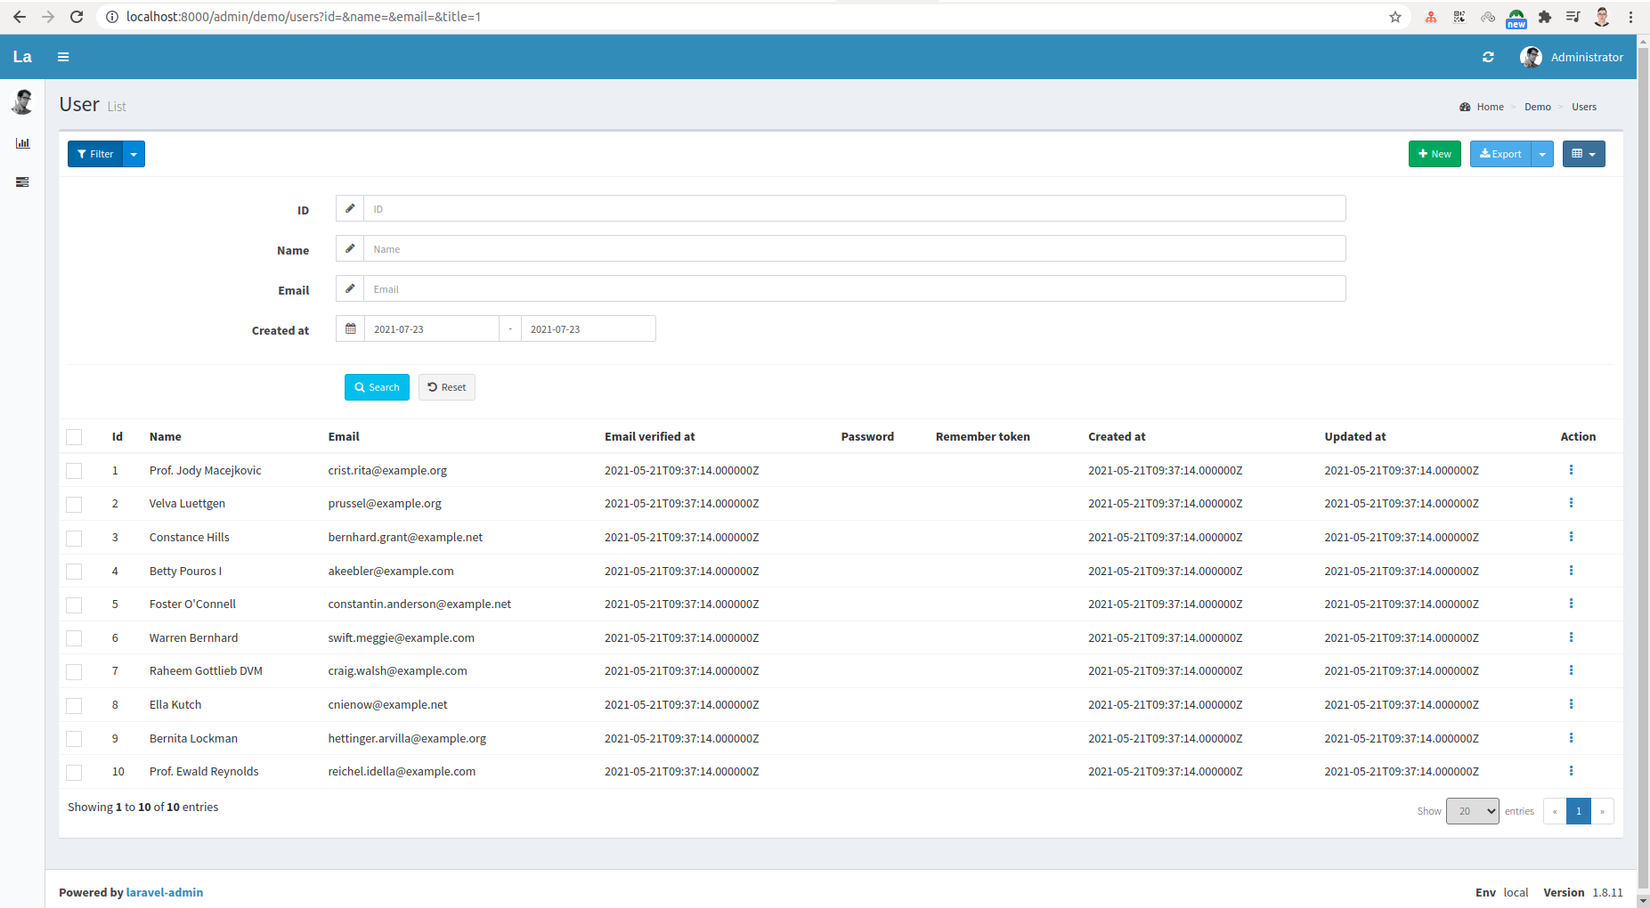
3. Filters
Laravel-admin cung cấp bộ lọc filter tiện dụng và dễ dàng tùy chỉnh theo nhu cầu.
$grid->filter(function ($filter) {
    // Xóa ID filter mặc định
    $filter->disableIdFilter();

    // Thêm 1 filter theo cột dữ liệu
    $filter->like('name', 'Name');
    $filter->like('email', 'Email');
});
1. Filter type
Laravel-admin xây dựng các loại filter tương tự như Query Builder:
// WHERE 'column' = $input
$filter->equal('column', $label);
$filter->notEqual('column', $label);
// WHERE 'column' LIKE "%"$input"%"
$filter->like('column', $label);
$filter->contains('title');
// WHERE 'column' ILIKE "%"$input"%"
$filter->ilike('column', $label);
// WHERE 'column' LIKE $input"%"
$filter->startsWith('title');
// WHERE 'column' LIKE "%"$input
$filter->endsWith('title');
// WHERE 'column' > $input
$filter->gt('column', $label);
// WHERE 'column' < $input
$filter->lt('column', $label);
// WHERE 'column' BETWEEN "$start" AND "$end":
$filter->between('column', $label);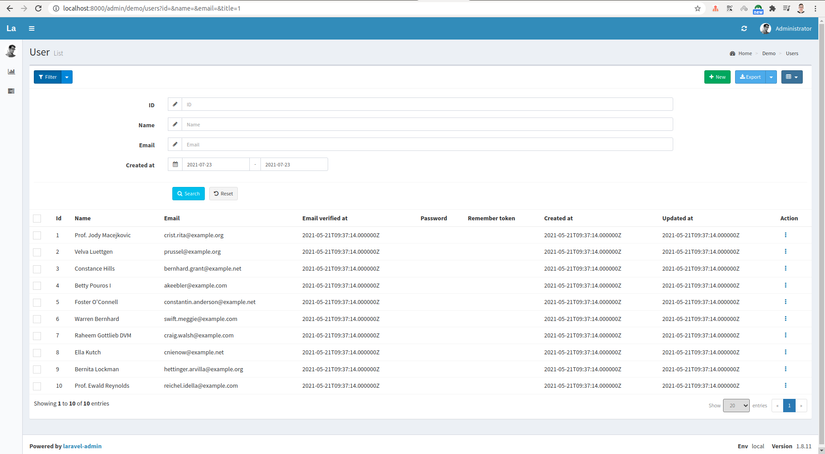
// set datetime field type
$filter->between('column', $label)->datetime();
// set time field type
$filter->between('column', $label)->time();
// WHERE 'column' IN (...$inputs)
$filter->in('column', $label)->multipleSelect(['key' => 'value']);
// WHERE 'column' NOT IN (...$inputs)
$filter->notIn('column', $label)->multipleSelect(['key' => 'value']);
// WHERE DATE(column) = $input
$filter->date('column', $label);
$filter->day('column', $label);
$filter->month('column', $label);
$filter->year('column', $label);
// Tạo truy vấn phức tạp
// WHERE title LIKE "%$input%" OR content LIKE "%$input%"
$filter->where(function ($query) {
$query->where('title', 'like', "%{$this->input}%")
->orWhere('content', 'like', "%{$this->input}%");
}, 'Text');
// Truy vấn với relationship
$filter->where(function ($query) {
$query->whereHas('profile', function ($query) {
$query->where('address', 'like', "%{$this->input}%")->orWhere('email', 'like', "%{$this->input}%");
});
}, 'Address or mobile');
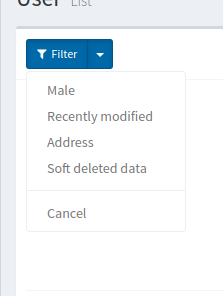
2. Truy vấn xác định (Define the scope of the query)
Chúng ta có thể nhóm các câu truy vấn dữ liệu thường xuyên sử dụng dưới dạng query scope và nó sẽ được hiển thị dưới dạng drop-down menu ở filter
$filter->scope('male', 'Male')->where('gender', 'm');

$filter->scope('new', 'Recently modified')
    ->whereDate('created_at', date('Y-m-d'))
    ->orWhere('updated_at', date('Y-m-d'));

// Relationship query
$filter->scope('address')->whereHas('profile', function ($query) {
    $query->whereNotNull('address');
});

$filter->scope('trashed', 'Soft deleted data')->onlyTrashed();
Param đầu tiên của scope là khóa của truy vấn. Nó sẽ xuất hiện trong param url. Param thứ hai là label của item drop-down menu. Nếu không được điền, param sẽ được hiển thị dưới dạng nhãn.
3. Field type
Loại input mặc định là text và chúng ta có thể thay đổi type của input:
$filter->equal('column')->url();

$filter->equal('column')->email();

$filter->equal('column')->integer();

$filter->equal('column')->ip();

$filter->equal('column')->mac();

$filter->equal('column')->mobile();

// $options refer to https://github.com/RobinHerbots/Inputmask/blob/4.x/README_numeric.md
$filter->equal('column')->decimal($options = []);

// $options refer to https://github.com/RobinHerbots/Inputmask/blob/4.x/README_numeric.md
$filter->equal('column')->currency($options = []);

// $options refer to https://github.com/RobinHerbots/Inputmask/blob/4.x/README_numeric.md
$filter->equal('column')->percentage($options = []);

// $options refer to https://github.com/RobinHerbots/Inputmask
$filter->equal('column')->inputmask($options = [], $icon = 'pencil');

// Select
$filter->equal('column')->select(['key' => 'value'...]);

// Hoặc select dữ liệu từ API
$filter->equal('column')->select('api/users');

// MultipleSelect - Tương đương với truy vấn IN, NOT IN
$filter->in('column')->multipleSelect(['key' => 'value'...]);
$filter->in('column')->multipleSelect('api/users');

// Radio
$filter->equal('released')->radio([
    ''   => 'All',
    0    => 'Unreleased',
    1    => 'Released',
]);

// Checkbox
$filter->in('gender')->checkbox([
    'm'    => 'Male',
    'f'    => 'Female',
]);

// Input kết hợp bootstrap-datetimepicker
$filter->equal('column')->datetime($options);

// `date()` equals to `datetime(['format' => 'YYYY-MM-DD'])`
$filter->equal('column')->date();

// `time()` equals to `datetime(['format' => 'HH:mm:ss'])`
$filter->equal('column')->time();

// `day()` equals to `datetime(['format' => 'DD'])`
$filter->equal('column')->day();

// `month()` equals to `datetime(['format' => 'MM'])`
$filter->equal('column')->month();

// `year()` equals to `datetime(['format' => 'YYYY'])`
$filter->equal('column')->year();

4. Inline Editing
Chúng ta có thể sửa dữ liệu trực tiếp trong bằng bằng cách click vào dữ liệu, một pop-up dialog box sẽ hiện ra và chỉ việc save thôi.
Lưu ý: Đối với cột có thể sửa trực tiếp thì nó phải là cột tương ứng tồn tại trong model form.
// Text input
$grid->column('title')->editable();

// Textarea input
$grid->column('title')->editable('textarea');

// Select
$grid->column('title')->editable('select', [1 => 'option1', 2 => 'option2', 3 => 'option3']);

// Date selection
$grid->column('birth')->editable('date');
$grid->column('published_at')->editable('datetime');
$grid->column('year')->editable('year');
$grid->column('month')->editable('month');
$grid->column('day')->editable('day');

// Switch
// set text, color, and stored values
$states = [
    'on' => ['value' => 1, 'text' => 'open', 'color' => 'primary'],
    'off' => ['value' => 2, 'text' => 'close', 'color' => 'default'],
];
$grid->column('status')->switch($states);

//Switch group
$states = [
    'on' => ['text' => 'YES'],
    'off' => ['text' => 'NO'],
];

$grid->column('switch_group')->switchGroup([
    'hot' => 'hot',
    'new' => 'latest'
    'recommend' => 'recommended',
], $states);

// Radio
$grid->column('options')->radio([
    1 => 'Sed ut perspiciatis unde omni',
    2 => 'voluptatem accusantium doloremque',
    3 => 'dicta sunt explicabo',
    4 => 'laudantium, totam rem aperiam',
]);

//Checkbox
$grid->column('options')->checkbox([
    1 => 'Sed ut perspiciatis unde omni',
    2 => 'voluptatem accusantium doloremque',
    3 => 'dicta sunt explicabo',
    4 => 'laudantium, totam rem aperiam',
]);
Tạm kết
Ở phần 2 này, chúng ta đã cùng nhau tìm hiểu cách tùy chỉnh trang Index để sinh động hơn, phục vụ nhiều mục đích hơn khi sử dụng package Laravel-admin. Ngoài ra chúng ta có thể thêm các actions, data export, quick create,... mình sẽ trình bày ở các phần tiếp theo.
Hy vọng bài viết sẽ giúp ích cho các bạn trong quá trình học tập và làm việc. Cảm ơn bạn đã đọc bài 
Nguồn:
All rights reserved
