Laravel 5.7: Approve New Registered Users from Administrator
Bài đăng này đã không được cập nhật trong 7 năm
-
Laravel framework đi kèm với hệ thống Auth tích hợp, khá tốt. Nhưng nó không bao gồm tất cả các trường hợp, và phổ biến nhất là sự chấp thuận của quản trị viên của mỗi người dùng đăng ký mới. Trong bài viết này, tôi sẽ hướng dẫn bạn cách thực hiện nó trong project Laravel 5.7 mới nhất.
-
Các bước chúng ta cần làm sẽ bao gồm:
- Chuẩn bị cấu trúc DB: migrations, models and seeders
- Hạn chế người dùng mới truy cập trang dashboard
- Thông báo cho administrator về người dùng mới
- Administrator phê duyệt người dùng mới
1. Chuẩn bị
-
Trước tiên, hãy tạo một dự án Laravel mới:
laravel new laravel -
Sau đó, bạn cần định cấu hình tệp .env của chúng tôi với thông tin đăng nhập cơ sở dữ liệu.
-
Tiếp theo, hãy tạo các liên kết Login/Register sử dụng auth mặc định của laravel:
php artisan make:auth -
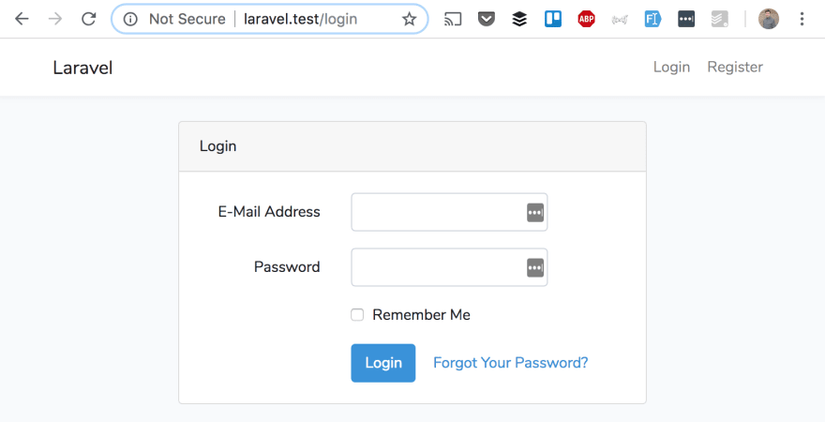
Vì vậy, chúng ta có thể đăng nhập bằng biểu mẫu này:
 https://images.viblo.asia/b6c80b6d-8d99-4ea5-845e-83e13192dcf4.png
 -
Xác thực đăng nhập Laravel
-
Từ bảng users trong DB, chúng ta cần thêm hai trường:
-
admin(boolean, 0/1) - để xác định user có roles/permissions là admin hay không -
approved_at(timestamp, nullable) - sẽ được đặt thành current timestamp khi user mới được phê duyệt -
Tạo file migrate:
php artisan make:migration add_admin_to_users_table -
Với nội dung:
Schema::table('users', function (Blueprint $table) { $table->boolean('admin')->default(false); $table->timestamp('approved_at')->nullable(); }); -
Ngoài ra, chúng ta cần thêm các trường đó vào mảng
$fillabletrong model app/User.php:protected $fillable = [ 'name', 'email', 'password', 'admin', 'approved_at' ];
Seeding admin user
-
Tạo file seeder với lệnh sau:
php artisan make:seeder AdminSeeder -
Nó sẽ tạo một tập tin mới trong thư mục database/seeds và chúng ta điền vào như sau:
class AdminSeeder extends Seeder { /** * Run the database seeds. * * @return void */ public function run() { \App\User::create([ 'name' => 'Admin', 'email' => 'admin@admin.com', 'email_verified_at' => now(), 'password' => bcrypt('verysafepassword'), 'admin' => 1, 'approved_at' => now(), ]); } } -
Cuối cùng, chúng ta cần thêm lớp này vào file database/seeds/DatabaseSeeder.php
public function run() { $this->call(AdminSeeder::class); } -
Bây giờ, chúng ta đã sẵn sàng với cấu trúc DB của mình và có thể chạy điều này:
php artisan migrate --seed -
Tại thời điểm này, nếu chúng ta đăng nhập bằng thông tin đăng nhập
admin@admin.com- verysafepassword, chúng ta sẽ thấy Home Dashboard trống của chúng ta, được tạo ra từ Laravel mặc định.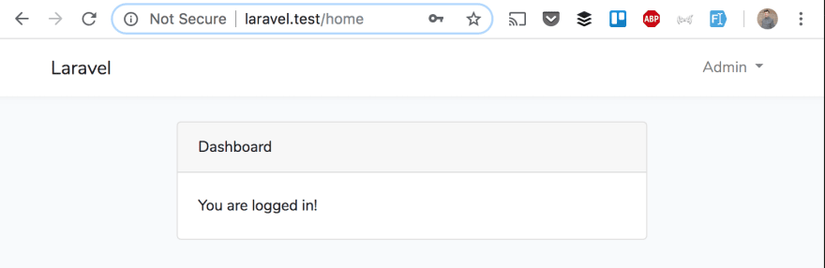
2. Hạn chế người dùng mới
-
Ok, bây giờ chúng ta có thể đăng ký với người dùng mới nhưng sẽ không được chấp thuận. Hãy hạn chế họ truy cập vào dashboard.
-
Đầu tiên, chúng ta tạo một tệp Blade riêng biệt sẽ có văn bản như "Waiting for approval". Đây sẽ là một trang chúng ta sẽ chuyển hướng đến, cho mọi yêu cầu của người dùng không được chấp thuận.
-
Cụ thể là
resources/views/approval.blade.php:@extends('layouts.app') @section('content') <div class="container"> <div class="row justify-content-center"> <div class="col-md-8"> <div class="card"> <div class="card-header">Waiting for Approval</div> <div class="card-body"> Your account is waiting for our administrator approval. <br /> Please check back later. </div> </div> </div> </div> </div> @endsection -
Tiếp theo, chúng ta tạo một Controller để trỏ đến nó. Hoặc, trên thực tế, chúng ta tạo một phương thức giống như HomeController:
public function approval() { return view('approval'); } -
Và nó trông như thế này:
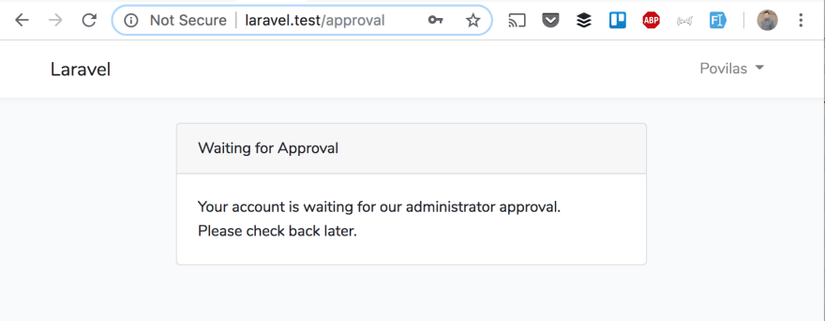
-
Cuối cùng, chúng ta cần route nó. Hãy đặt nó dưới auth middleware, và
routes/web.phpsẽ như sau:Route::middleware(['auth'])->group(function () { Route::get('/approval', 'HomeController@approval')->name('approval'); Route::get('/home', 'HomeController@index')->name('home'); }); -
Bây giờ, chúng ta cần hạn chế quyền truy cập đối với người dùng không được chấp thuận vào
/homeURLđó . Chúng ta tạo một Middleware mới :php artisan make:middleware CheckApproved -
Nó tạo ra một tập tin
app/Http/Middleware/CheckApproved.phpmà chúng ta điền vào như thế này:namespace App\Http\Middleware; use Closure; class CheckApproved { /** * Handle an incoming request. * * @param \Illuminate\Http\Request $request * @param \Closure $next * @return mixed */ public function handle($request, Closure $next) { if (!auth()->user()->approved_at) { return redirect()->route('approval'); } return $next($request); } } -
Chúng ta cần đăng ký Middleware đó
app/Http/Kernel.phptrong mảng$routeMiddleware:protected $routeMiddleware = [ 'auth' => \App\Http\Middleware\Authenticate::class, // ... 'verified' => \Illuminate\Auth\Middleware\EnsureEmailIsVerified::class, 'approved' => \App\Http\Middleware\CheckApproved::class, ]; -
Cuối cùng, chúng ta thêm home route vào khối dưới Middleware đó, vì vậy bây giờ
routes/web.phpcủa chúng ta sẽ trông như sau:Route::middleware(['auth'])->group(function () { Route::get('/approval', 'HomeController@approval')->name('approval'); Route::middleware(['approved'])->group(function () { Route::get('/home', 'HomeController@index')->name('home'); }); }); -
Vì vậy, bây giờ, mọi người dùng mới, sau khi đăng nhập hoặc trên bất kỳ hành động nào, sẽ được chuyển hướng đến approval page.
3. Thông báo cho quản trị viên về người dùng mới
-
Chúng ta sẽ sử dụng chức năng Laravel Notifications mặc định của Laravel.
-
Hãy tạo một lớp Notification mới:
php artisan make:notification NewUser -
Sau đó, chúng ta điền vào file mới được tạo ra
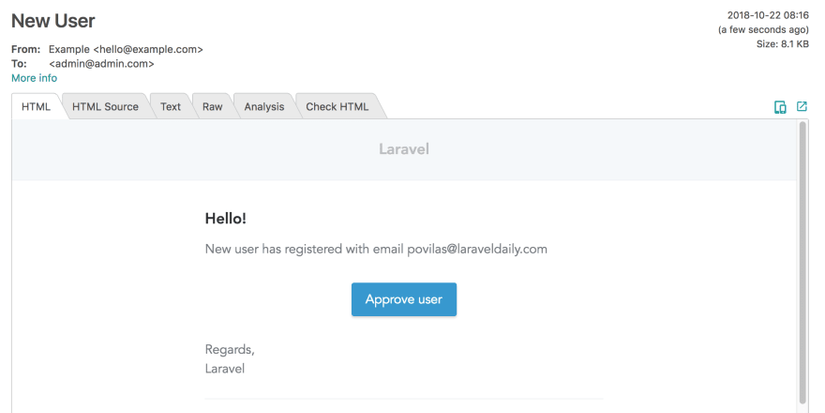
app/Notifications/NewUser.php:namespace App\Notifications; use App\User; use Illuminate\Bus\Queueable; use Illuminate\Notifications\Notification; use Illuminate\Contracts\Queue\ShouldQueue; use Illuminate\Notifications\Messages\MailMessage; class NewUser extends Notification { use Queueable; private $new_user; /** * Create a new notification instance. * * @return void */ public function __construct(User $new_user) { $this->new_user = $new_user; } /** * Get the mail representation of the notification. * * @param mixed $notifiable * @return \Illuminate\Notifications\Messages\MailMessage */ public function toMail($notifiable) { return (new MailMessage) ->line('New user has registered with email ' . $this->new_user->email) ->action('Approve user', route('admin.users.approve', $this->new_user->id)); } } -
Một vài điều cần lưu ý ở đây:
- Chúng ta sẽ chuyển người dùng đã đăng ký mới như một đối tượng thông qua phương thức
__construct(), sau đó nó biến thành một biến private, mà chúng ta sẽ sử dụng trong phương thứctoMail()như$this->new_user; - Chúng ta chỉ định route để phê duyệt người dùng ở bên dưới.
- Chúng ta sẽ chuyển người dùng đã đăng ký mới như một đối tượng thông qua phương thức
-
Bây giờ, để sử dụng thông báo này, chúng ta sẽ extends controller
app/Http/Controllers/Auth/RegisterController.php, cụ thể là phương thứccreate():// Don't forget to add this use App\Notifications\NewUser; // ... /** * Create a new user instance after a valid registration. * * @param array $data * @return \App\User */ protected function create(array $data) { $user = User::create([ 'name' => $data['name'], 'email' => $data['email'], 'password' => Hash::make($data['password']), ]); $admin = User::where('admin', 1)->first(); if ($admin) { $admin->notify(new NewUser($user)); } return $user; } -
Để kiểm tra việc gửi một email, tôi khuyên bạn nên sử dụng MailTrap và đặt thông tin đăng nhập của nó vào file
.env:MAIL_DRIVER=smtp MAIL_HOST=smtp.mailtrap.io MAIL_PORT=2525 MAIL_USERNAME=54043xxxxxxxxxx MAIL_PASSWORD=a7d17xxxxxxxxx MAIL_ENCRYPTION=null -
Vì vậy, trên mỗi người dùng mới, quản trị viên sẽ nhận được một cái gì đó như thế này:
4. Phê duyệt Người dùng Mới bởi Quản trị viên
-
Trong bước trước, chúng ta đã sử dụng một route:
route('admin.users.approve', $this->new_user->id)bây giờ chúng ta hãy thực sự triển khai nó. -
Chúng ta thực sự cần hai route: để liệt kê người dùng và phê duyệt một trong số họ. Ngoài ra, chúng tôi cần hạn chế nó cho người dùng quản trị, vì vậy hãy tạo một middleware khác:
php artisan make:middleware CheckAdmin -
Ta điền vào tập tin mới
app/Http/Middleware/CheckAdmin.php:namespace App\Http\Middleware; use Closure; class CheckAdmin { /** * Handle an incoming request. * * @param \Illuminate\Http\Request $request * @param \Closure $next * @return mixed */ public function handle($request, Closure $next) { if (!auth()->user()->admin) { return redirect()->route('home'); } return $next($request); } } -
Chúng ta cũng cần thêm nó vào mảng app/Http/Kernel.php, như sau:
protected $routeMiddleware = [ 'auth' => \App\Http\Middleware\Authenticate::class, // ... 'approved' => \App\Http\Middleware\CheckApproved::class, 'admin' => \App\Http\Middleware\CheckAdmin::class, ]; -
Cuối cùng, đây là phiên bản
routes/web.phpcuối cùng của chúng ta:Route::middleware(['auth'])->group(function () { Route::get('/approval', 'HomeController@approval')->name('approval'); Route::middleware(['approved'])->group(function () { Route::get('/home', 'HomeController@index')->name('home'); }); Route::middleware(['admin'])->group(function () { Route::get('/users', 'UserController@index')->name('admin.users.index'); Route::get('/users/{user_id}/approve', 'UserController@approve')->name('admin.users.approve'); }); }); -
Điều cuối cùng chúng ta cần là thực hiện phê duyệt thực tế.
php artisan make:controller UserController -
Đây là mã cho
app/Http/Controllers/UserController.php:namespace App\Http\Controllers; use App\User; class UserController extends Controller { public function index() { $users = User::whereNull('approved_at')->get(); return view('users', compact('users')); } public function approve($user_id) { $user = User::findOrFail($user_id); $user->update(['approved_at' => now()]); return redirect()->route('admin.users.index')->withMessage('User approved successfully'); } } -
Vì vậy, phương thức
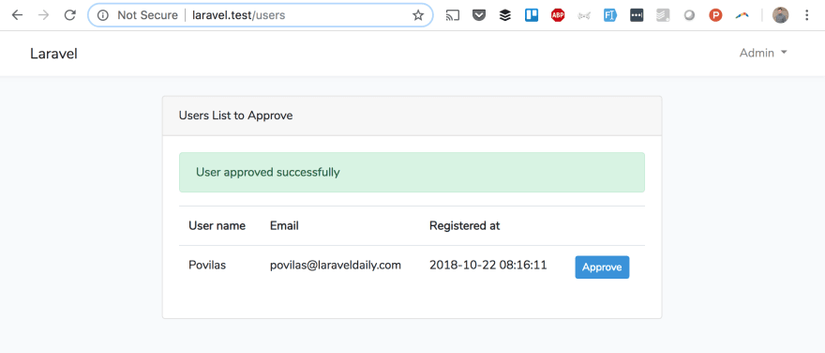
approve()sẽ phê duyệt người dùng và chuyển hướng trở lại danh sách. Được triển khai trongresources/views/users.blade.php:@extends('layouts.app') @section('content') <div class="container"> <div class="row justify-content-center"> <div class="col-md-8"> <div class="card"> <div class="card-header">Users List to Approve</div> <div class="card-body"> @if (session('message')) <div class="alert alert-success" role="alert"> {{ session('message') }} </div> @endif <table class="table"> <tr> <th>User name</th> <th>Email</th> <th>Registered at</th> <th></th> </tr> @forelse ($users as $user) <tr> <td>{{ $user->name }}</td> <td>{{ $user->email }}</td> <td>{{ $user->created_at }}</td> <td><a href="{{ route('admin.users.approve', $user->id) }}" class="btn btn-primary btn-sm">Approve</a></td> </tr> @empty <tr> <td colspan="4">No users found.</td> </tr> @endforelse </table> </div> </div> </div> </div> </div> @endsection -
Kết quả hình ảnh cuối cùng:
-
Quản trị viên phê duyệt người dùng
Tài liệu tham khảo
All rights reserved
