Laravel 5.5 + Vue.js: Simple CRUD Project
Bài đăng này đã không được cập nhật trong 4 năm
- Tháng rồi dự án của mình dần đi vào giai đoạn cuối, cũng không có gì hay ho để khoe khoang với mọi người. Nên kỳ này mình lại quyết định quay trở lại loạt bài tutorial quen thuộc.
- Chẳng là trong lúc rảnh rỗi ngồi xem lại dự án cũ (Laravel 5.4 + Angular 2) cũng thấy có nhiều cái hay, mình tranh thủ ngó qua mấy thằng framework JS tương tự Angular, thì thấy thằng
Vue.jscó vẻ mới, đang rất phổ biến hiện nay mà lại dễ học. Nay mình sẽ làm bài đầu tiên về Vue.js kết hợp với Laravel 5.5 để làm 1 project đơn giản.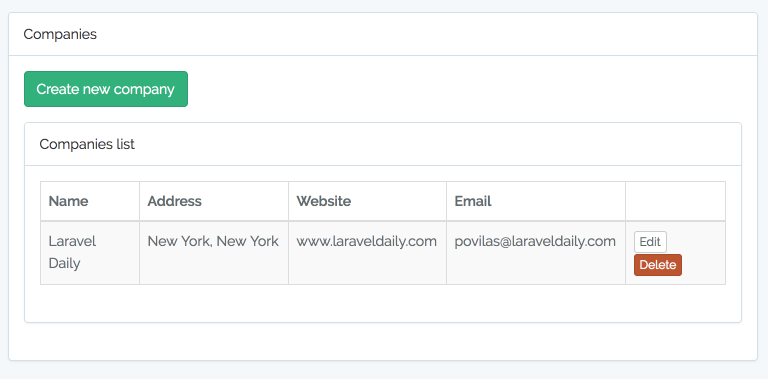
- Trên đây là kết quả chúng ta hướng đến, một project CRUD (Create/Read/Update/Delete) quản lý compananies.
- Tất nhiên cần build một project laravel sau đó thêm Vue.js vào để xử lý phía client.
I. Tạo project Laravel
- Ta sử dụng phiên bản laravel 5.5 mới nhất tại thời điểm viết bài.
- Bước 1: Tạo project laravel bằng 1 trong 2 lệnh sau:
laravel newhoặccomposer create-project - Bước 2: Chạy lệnh
php artisan make:authđể tạo mẫu signup, login, logout. - Bước 3: Copy nội dung file resources/views/auth/login.blade để tạo ra file resources/views/admin/companies/index.blade.php với nội dung như sau:
@extends('layouts.app')

@section('content')
    <div class="container">
        <div class="row">
            <div class="col-md-8 col-md-offset-2">
                <div class="panel panel-default">
                    <div class="panel-heading">Companies</div>

                    <div class="panel-body">
                        Coming soon...
                    </div>
                </div>
            </div>
        </div>
    </div>
@endsection
II. Tạo database và API
-
Đây là phần sử lý CRUD chính bên phía server laravel
-
Bước 1: Tạo Model và database. Chạy lệnh
php artisan make:model Company -m -
Lệnh này sẽ tạo ra file app/Company.php và ta sẽ sửa như sau:
class Company extends Model { protected $fillable = ['name', 'address', 'website', 'email']; } -
Tạo file migrate tương ứng với các trường trên:
public function up() { Schema::create('companies', function (Blueprint $table) { $table->increments('id'); $table->string('name')->nullable(); $table->string('address')->nullable(); $table->string('website')->nullable(); $table->string('email')->nullable(); $table->timestamps(); }); } -
Tiếp theo ta sẽ tạo CompaniesController với lệnh
make:controllervới chút tùy biết đường dẫn:php artisan make:controller Api/V1/CompaniesController --resource -
Kết quả thu được như sau:
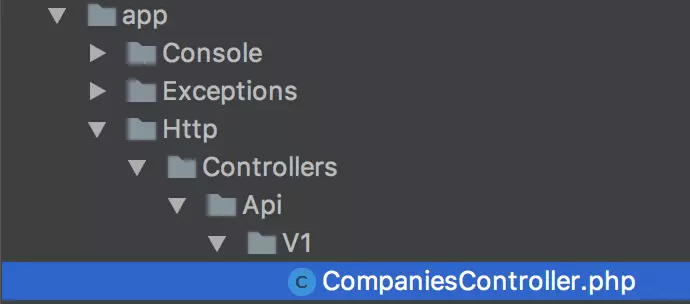
-
Ta cần update CompaniesController lại như sau:
namespace App\Http\Controllers\Api\V1; use App\Company; use Illuminate\Http\Request; use App\Http\Controllers\Controller; class CompaniesController extends Controller { public function index() { return Company::all(); } public function show($id) { return Company::findOrFail($id); } public function update(Request $request, $id) { $company = Company::findOrFail($id); $company->update($request->all()); return $company; } public function store(Request $request) { $company = Company::create($request->all()); return $company; } public function destroy($id) { $company = Company::findOrFail($id); $company->delete(); return ''; } } -
Cuối cùng ta cần thêm vào file routes/api.php để chỉ định url dẫn đến CompaniesController
Route::group(['prefix' => '/v1', 'namespace' => 'Api\V1', 'as' => 'api.'], function () { Route::resource('companies', 'CompaniesController', ['except' => ['create', 'edit']]); }); -
Như các bạn thấy, ở đây ta thêm tiền tố api vào url và bỏ đi các phương thức get create, get edit không cần thiết, 2 phương thức này sẽ được xử lý phía client bằng Vue.js
- Lưu ý: đây là project demo đơn giản để ta hiểu sự kết hợp giữa laravel và Vue.js nên tạm thời ta không để authenticate cho phần API này
- Nhớ chạy lệnh
php artisan migrateđể tạo database
- OK, phần API đến đây là ngon lành, ta có thể test luôn với Postman. Tiếp theo ta sẽ đến phần Vue.js
III. Bắt đầu với Vue.js
- Để bắt đầu viết code Vue.js, ta thậm chí không cần cài đặt nó bởi vì nó đã được laravel tích hợp sẵn rồi, xem file resources/assets/js/app.js:
/** * First we will load all of this project's JavaScript dependencies which * includes Vue and other libraries. It is a great starting point when * building robust, powerful web applications using Vue and Laravel. */ require('./bootstrap'); window.Vue = require('vue'); /** * Next, we will create a fresh Vue application instance and attach it to * the page. Then, you may begin adding components to this application * or customize the JavaScript scaffolding to fit your unique needs. */ Vue.component('example', require('./components/Example.vue')); const app = new Vue({ el: '#app' }); - Theo mặc định tất cả các view do Vue.js tạo ra sẽ được tải vào thẻ có id="app", thẻ này đã được tạo ra bởi lệnh
make:authở trên trong file resources/views/layouts/app.blade.php:<body> <div id="app"> <nav class="navbar navbar-default navbar-static-top"> <div class="container"> ... - Để Vue.js gọi được đến API thì ta cần Vue-router, cài đặt bằng lệnh:
npm install && npm install vue-router - Tiếp theo ta cần chạy lệnh để biên dịch file Vue.js
npm run watch - Nó sẽ biên dịch file resources/assets/js/app.js thành file public/js/app.js, nó được tạo bời lệnh
make:auth– Ta có thể nhìn tháy app.js được thêm vào ở cuối file layouts/app.blade.php:<!-- Scripts --> <script src="{{ asset('js/app.js') }}"></script> </body> </html>
IV. Vue-router và Index/List Component
- Bước này ta sẽ dùng Vue-route để định nghĩa các views khác nhau cho CRUD.
- Đầu tiên ta mở file resources/views/admin/companies/index.blade.php và update như sau:
... <div class="panel-heading">Companies</div> <div class="panel-body table-responsive"> <router-view name="companiesIndex"></router-view> <router-view></router-view> </div> ... - Để ý dòng route-view, chính xác là companiesIndex sẽ được tải vào đây. Bây giờ ta sẽ đi tạo nó.
- Mở file resources/assets/js/app.js và thêm nội dung bên dưới:
/** * First we will load all of this project's JavaScript dependencies which * includes Vue and other libraries. It is a great starting point when * building robust, powerful web applications using Vue and Laravel. */ require('./bootstrap'); window.Vue = require('vue'); import VueRouter from 'vue-router'; window.Vue.use(VueRouter); import CompaniesIndex from './components/companies/CompaniesIndex.vue'; import CompaniesCreate from './components/companies/CompaniesCreate.vue'; import CompaniesEdit from './components/companies/CompaniesEdit.vue'; const routes = [ { path: '/', components: { companiesIndex: CompaniesIndex } }, {path: '/admin/companies/create', component: CompaniesCreate, name: 'createCompany'}, {path: '/admin/companies/edit/:id', component: CompaniesEdit, name: 'editCompany'}, ] const router = new VueRouter({ routes }) const app = new Vue({ router }).$mount('#app') - Nếu bạn đã đừng làm việc qua với Angular thì cách viết của Vue cũng không khác là mấy. Nhưng nếu bạn chưa từng đụng đến Angular cũng đừng lo lắng, bạn có thể xem qua tài liệu về Vue.js. Về cơ bản thì với mỗi route cần tương ứng với một Vue component giống như CompaniesIndex, CompaniesCreate, CompaniesEdit.
- Tạo file resources/assets/js/components/companies/CompaniesIndex.vue:
<template> <div> <div class="form-group"> <router-link :to="{name: 'createCompany'}" class="btn btn-success">Create new company</router-link> </div> <div class="panel panel-default"> <div class="panel-heading">Companies list</div> <div class="panel-body"> <table class="table table-bordered table-striped"> <thead> <tr> <th>Name</th> <th>Address</th> <th>Website</th> <th>Email</th> <th width="100"> </th> </tr> </thead> <tbody> <tr v-for="company, index in companies"> <td>{{ company.name }}</td> <td>{{ company.address }}</td> <td>{{ company.website }}</td> <td>{{ company.email }}</td> <td> <router-link :to="{name: 'editCompany', params: {id: company.id}}" class="btn btn-xs btn-default"> Edit </router-link> <a href="#" class="btn btn-xs btn-danger" v-on:click="deleteEntry(company.id, index)"> Delete </a> </td> </tr> </tbody> </table> </div> </div> </div> </template> <script> export default { data: function () { return { companies: [] } }, mounted() { var app = this; axios.get('/api/v1/companies') .then(function (resp) { app.companies = resp.data; }) .catch(function (resp) { console.log(resp); alert("Could not load companies"); }); }, methods: { deleteEntry(id, index) { if (confirm("Do you really want to delete it?")) { var app = this; axios.delete('/api/v1/companies/' + id) .then(function (resp) { app.companies.splice(index, 1); }) .catch(function (resp) { alert("Could not delete company"); }); } } } } </script> - Dòng chưa thẻ <router-link :to=”{name: ‘createCompany’}”> sẽ link tới component CompaniesCreate tải ra view mà không cần tải lại cả trang.
- Các data sẽ được tải ra bởi <tr v-for=”company, index in companies”> với các trường tương ứng.
- Data trong bảng được get từ API bởi JS axios.get(‘/api/v1/companies’) -> app.companies = resp.data;
- Tương tự với sự kiện xóa, API xóa sẽ được gọi thông qua axios.delete(‘/api/v1/companies/’ + id) và chỉ tải lại bảng chứ không tải lại cả trang
- Ban đầu do chưa có companies nào nên, bảng sẽ là trống.
V. Create/Edit Vue components
-
Ở phần API trên ta đã bỏ 2 phương thức get create, get edit để phần này ta dùng Vue.js tạo form create/edit
-
Tạo file resources/assets/js/components/companies/CompaniesCreate.vue
<template> <div> <div class="form-group"> <router-link to="/" class="btn btn-default">Back</router-link> </div> <div class="panel panel-default"> <div class="panel-heading">Create new company</div> <div class="panel-body"> <form v-on:submit="saveForm()"> <div class="row"> <div class="col-xs-12 form-group"> <label class="control-label">Company name</label> <input type="text" v-model="company.name" class="form-control"> </div> </div> <div class="row"> <div class="col-xs-12 form-group"> <label class="control-label">Company address</label> <input type="text" v-model="company.address" class="form-control"> </div> </div> <div class="row"> <div class="col-xs-12 form-group"> <label class="control-label">Company website</label> <input type="text" v-model="company.website" class="form-control"> </div> </div> <div class="row"> <div class="col-xs-12 form-group"> <label class="control-label">Company email</label> <input type="text" v-model="company.email" class="form-control"> </div> </div> <div class="row"> <div class="col-xs-12 form-group"> <button class="btn btn-success">Create</button> </div> </div> </form> </div> </div> </div> </template> <script> export default { data: function () { return { company: { name: '', address: '', website: '', email: '', } } }, methods: { saveForm() { event.preventDefault(); var app = this; var newCompany = app.company; axios.post('/api/v1/companies', newCompany) .then(function (resp) { app.$router.push({path: '/'}); }) .catch(function (resp) { console.log(resp); alert("Could not create your company"); }); } } } </script> -
Thẻ <template> chứa nội dung chính và <script> chứa JS xử lý data truyền lên API
-
Giá trị các trường dược gán bởi: input type=”text” v-model=”company.name”
-
Event được chạy khi form submit: v-on:submit=”saveForm()” và phương thức gọi đến API: axios.post(‘/api/v1/companies’, newCompany)
-
Sau khi Vue.js gửi form thì chỉ nội dung bảng được tải lại chứ không tải lại cả trang.
-
Tương tự như CompaniesCreate thì resources/assets/js/components/companies/CompaniesEdit.vue chỉ cần sửa lại JS mà giữ nguyên phần <template>:
<script> export default { mounted() { let app = this; let id = app.$route.params.id; app.companyId = id; axios.get('/api/v1/companies/' + id) .then(function (resp) { app.company = resp.data; }) .catch(function () { alert("Could not load your company") }); }, data: function () { return { companyId: null, company: { name: '', address: '', website: '', email: '', } } }, methods: { saveForm() { event.preventDefault(); var app = this; var newCompany = app.company; axios.patch('/api/v1/companies/' + app.companyId, newCompany) .then(function (resp) { app.$router.replace('/'); }) .catch(function (resp) { console.log(resp); alert("Could not create your company"); }); } } } </script> -
Như vậy là ta đã hoàn thành project Laravel + Vue.js, để test thử kết quả ta cần thêm controller app/Http/Controllers/CompaniesController.php với nội dung như sau:
<?php namespace App\Http\Controllers; class CompaniesController extends Controller { /** * Display a listing of the resource. * * @return \Illuminate\Http\Response */ public function index() { return view('admin.companies.index'); } -
Và thêm vào route routes/web.php
Route::group(['middleware' => ['auth'], 'prefix' => 'admin', 'as' => 'admin.'], function () { Route::get('companies', 'CompaniesController@index')->name('companies.index'); }); -
Cuối cùng chạy lệnh
php artisan servevà truy cập vào đường link tương ứng:Laravel development server started: <http://127.0.0.1:8000> -
Trong project này thì đường link cụ thể là: http://127.0.0.1:8000/admin/companies/
-
Mình cũng đã thực hiện thành công và đẩy source code lên github, các bạn có thể tham khảo tại đây: Laravel 5.5 + Vue.js: Simple CRUD Project
Tài liệu tham khảo
10 simple Vue.js CRUD example and tutorials Quick Start with Laravel 5.5 + Vue.js: Simple CRUD Project Vue.js document
All rights reserved
