Làm việc với video sử dụng AVFoundation và CoreMedia
Bài đăng này đã không được cập nhật trong 7 năm

Bài viết này sẽ đề cập đến một số khái niệm quan trọng để làm việc với video trong iOS. Nó được chia thành hai phần. Trong phần 1, chúng ta sẽ tạo một VideoService để thiết lập và chạy UIImagePickerController phụ trách tác vụ ghi và lưu video vào Photos application. Sau đó ở phần 2, chúng ta sẽ tạo một custom VideoPlayerView để play lại video của chúng ta. Ngoài ra, VideoPlayerView sẽ cung cấp một vài chức năng như pause, lọc video bằng thanh slider, hiển thị thời gian, và chọn thời điểm để phát lại. Trong quá trình triển khai, bài viết sẽ giải thích về các frameworks được sử dụng. Nào bắt đầu thôi.
Ghi và lưu video với VideoService
Bước 1: Tạo Singleton
Chúng ta chỉ có thể ghi và lưu một video duy nhất tại một thời điểm, và cần có một tham chiếu đến video đã lưu. Với ý nghĩa này, VideoService của chúng ta rất thích hợp với Singleton pattern. Chúng ta có thể cài đặt như dưới:
class VideoService {

    static let instance = VideoService()
    private init() {}

}
Bước 2: Xin Permission, kiểm tra thiết bị và chạy Video Recorder
Trước khi nói về chạy chương trình Video Recorder, chúng ta cần sự cho phép của người dùng để truy cập vào phần cứng thiết bị của họ, cụ thể là microphone và camera. Trong iOS, chúng ta yêu cầu cấp phép thông qua info.plist. Mở file và thêm vào 2 từ khoá là Microphone Usage Description, và Camera Usage Description. Một từ khoá sẽ cần một chuỗi đính kèm nhằm giải thích ngắn gọn cho người dùng rằng tại sao cần truy cập vào phần cứng thiết bị.
Bây giờ, hãy thực hiện một số kiểm tra và ghi video:
import MobileCoreServices

extension VideoService {

    private func isVideoRecordingAvailable() -> Bool {
        let front = UIImagePickerController.isCameraDeviceAvailable(.front)
        let rear = UIImagePickerController.isCameraDeviceAvailable(.rear)
        if !front || !rear {
            return false
        }
        guard let media = UIImagePickerController.availableMediaTypes(for: .camera) else {
            return false
        }
        return media.contains(kUTTypeMovie as String)
    }

    private func setupVideoRecordingPicker() -> UIImagePickerController {
        let picker = UIImagePickerController()
        picker.sourceType = .camera
        picker.videoQuality = .typeMedium
        picker.mediaTypes = [kUTTypeMovie as String]
        return picker
    }

    func launchVideoRecorder(in vc: UIViewController, completion: (() -> ())?) {
        guard isVideoRecordingAvailable() else {
            return }

        let picker = setupVideoRecordingPicker()

        if UIDevice.current.userInterfaceIdiom == UIUserInterfaceIdiom.phone {
            vc.present(picker, animated: true) {
                completion?()
            }
        }
    }
}
Bây giờ, bạn có thể chạy chương trình ghi video từ view controller chỉ với một lệnh đơn giản:
VideoService.instance.launchVideoRecorder(in: self, completion: nil)
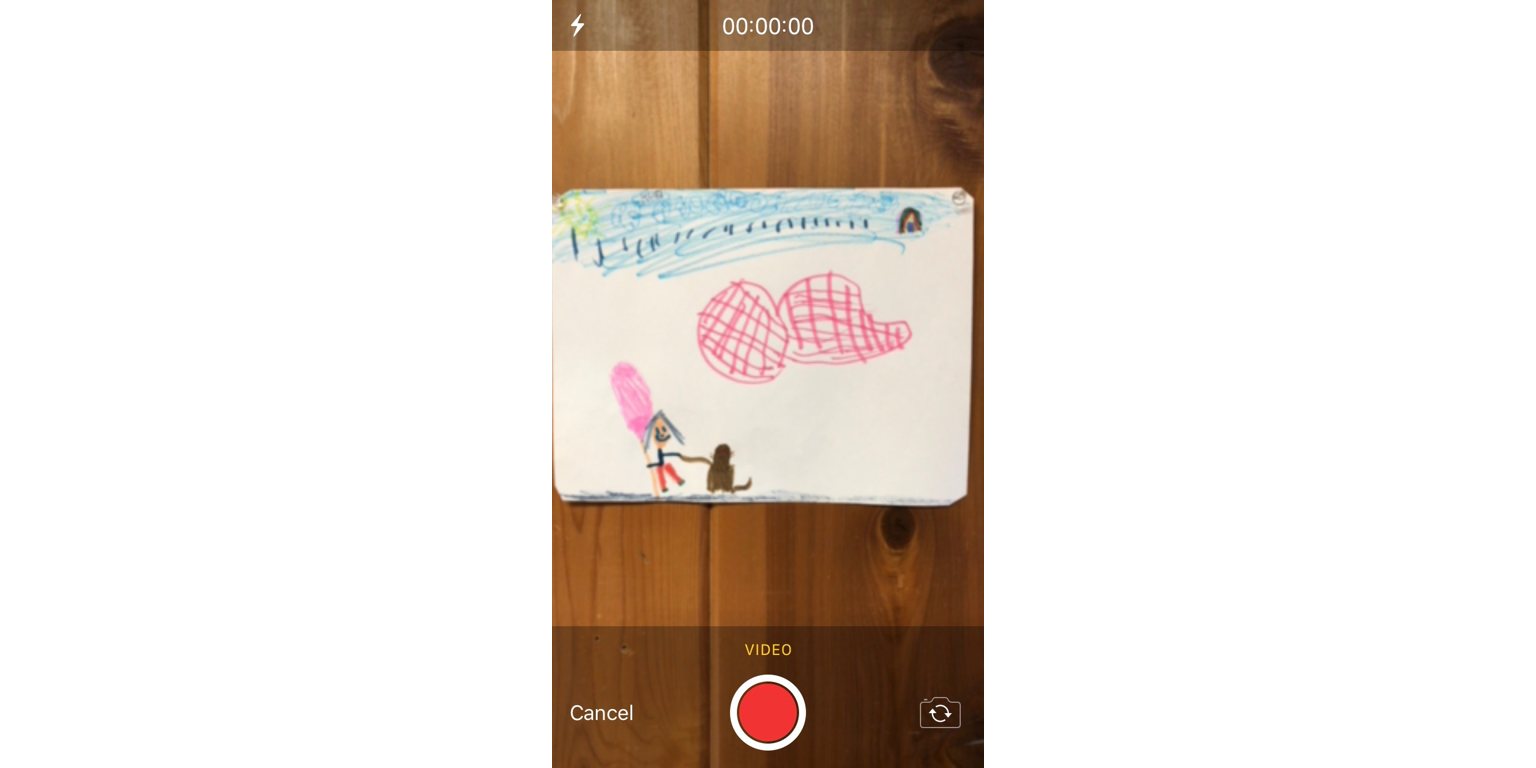
Để kiểm tra đoạn code trên, bạn cần sử dụng một thiệt bị thật. Build và run chương trình, bạn có thể thực hiện quay video giống như bên dưới:

Bước 3: Tuân thủ UIImagePickerControllerDelegate
Nếu bạn nhấn vào record button, Recorder sẽ sử dụng thiết lập mặc định và bạn không thể xác lập được việc lưu video như bạn muốn. Để thực hiện được việc đó, bạn cần cài đặt UIImagePickerControllerDelegate.
class VideoService: NSObject {

    static let instance = VideoService()
    private override init() {}

}

extension VideoService: UIImagePickerControllerDelegate, UINavigationControllerDelegate {

    func imagePickerController(_ picker: UIImagePickerController, didFinishPickingMediaWithInfo info: [UIImagePickerController.InfoKey : Any]) {
        print("VideoService: entered didFinishPickingMediaWithInfo")
    }
}
Bước 4: Lưu video vào Photos Album
Khi bạn xác nhận được rằng delegate method được gọi thành công, bạn có thể tiến hành lưu video vào photo album:
extension VideoService {

    private func saveVideo(at mediaUrl: URL) {
        let compatible = UIVideoAtPathIsCompatibleWithSavedPhotosAlbum(mediaUrl.path)
        if compatible {
            UISaveVideoAtPathToSavedPhotosAlbum(mediaUrl.path, self, #selector(video(videoPath:didFinishSavingWithError:contextInfo:)), nil)

        }
    }

    @objc func video(videoPath: NSString, didFinishSavingWithError error: NSError?, contextInfo info: AnyObject) {
        //we will use this soon.
    }
}

extension VideoService: UIImagePickerControllerDelegate, UINavigationControllerDelegate {

    func imagePickerController(_ picker: UIImagePickerController, didFinishPickingMediaWithInfo info: [UIImagePickerController.InfoKey : Any]) {
            guard let mediaURL = info[UIImagePickerController.InfoKey.mediaURL] as? URL else { return }
            self.saveVideo(at: mediaURL)
    }
}
Bước 5: Truyền Video Url với Delegate pattern
Sau khi đã lưu thành công video, chúng ta có thể trả lại giá trị url của nó bằng sử dụng delegate:
protocol VideoServiceDelegate {
    func videoDidFinishSaving(error: Error?, url: URL?)
}

class VideoService: NSObject {

    var delegate: VideoServiceDelegate?

    static let instance = VideoService()
    private override init() {}

}

extension VideoService {

    @objc func video(videoPath: NSString, didFinishSavingWithError error: NSError?, contextInfo info: AnyObject) {
        let videoURL = URL(fileURLWithPath: videoPath as String)
        self.delegate?.videoDidFinishSaving(error: error, url: videoURL)
    }
}
Bây giờ trong view controller, bạn có thể áp dụng VideoServiceDelegate, cài đặt giao thức và đặt VideoService’s delegate property bằng cách dùng VideoService.instance.delegate = self . Trong đoạn trích bên dưới, chúng ta xác nhận việc lưu thành công và thông báo cho người dùng. Bây giờ, bạn có thể mở Photo application và xem lại đoạn film của mình.
extension ViewController : VideoServiceDelegate {

    func videoDidFinishSaving(error: Error?, url: URL?) {
        let success: Bool = error == nil && url != nil

        let title = success ? "Success" : "Error"
        let message = success ? "Video was saved" : "Could not save video"
        let alert = UIAlertController(title: title, message: message, preferredStyle: .alert)
        alert.addAction(UIAlertAction(title: "OK", style: .cancel, handler: nil))
        self.present(alert, animated: true, completion: nil)
    }

}
Playing Back Video với VideoPlayerView
Trước đây playback video sử dụng MPMoviePlayerControll cung cấp một số chức năng mặc định tiên dụng chỉ với vài bước cài đặt đơn giản. Tuy nhiên nó không còn được sử dụng từ iOS9 và được thay thế bằng AVFoundation, AVPlayer, đòi hỏi nhiều hơn về mặt thiết lập, nhưng cho phép tùy biến cao hơn.
Trong phần tiếp theo, chúng ta sẽ tạo một class custom VideoPlayerView, là subclass của UI và chưa toàn bộ các thành phần UI để tương tác video.
Bước 1: Tạo AVPlayer và AVPlayerLayer
Để hiển thị video, trước tiên chúng tôi cần import AVFoundation và sau đó thiết lập hai thuộc tính AVPlayer và AVPlayerLayer.
class VideoPlayerView: UIView {

    private var player: AVPlayer?
    private var playerLayer: AVPlayerLayer?

    init(withFrame frame: CGRect, videoURLString: String) {
        super.init(frame: frame)

        setupVideoPlayer(with: videoURLString)
    }

    private func setupVideoPlayer(with path: String) {
        addPlayer(with: path)
        player?.play()
    }

    private func addPlayer(with urlPath: String) {
        let videoURL = URL(fileURLWithPath: urlPath)
        player = AVPlayer(url: videoURL)
        playerLayer = AVPlayerLayer(player: player)

        self.layer.addSublayer(playerLayer!)
        playerLayer?.frame = self.bounds
    }
}
extension ViewController : VideoServiceDelegate {

    func videoDidFinishSaving(error: Error?, url: URL?) {
        let success: Bool = error == nil && url != nil

        if success {
            playMovie(with: url!)
        }
    }
}


extension ViewController {

    private func playMovie(with url: URL) {
        let playerRect = CGRect(x: 0, y: 0, width: view.bounds.width, height: view.bounds.width / 2)
        videoPlayerView = VideoPlayerView(withFrame: playerRect, videoURLString: url.path)
        view.addSubview(videoPlayerView!)
    }

}
Bước 2: Chạm để điều khiển Play and Pause
Bây giờ, hãy điều khiển Play và Pause bằng cách thêm Tap gesture vào VideoPlayerView
class VideoPlayerView: UIView {

    private var isSettingPlay = true

    init(withFrame frame: CGRect, videoURLString: String) {
        super.init(frame: frame)

        setupVideoPlayer(with: videoURLString)
        addGestureRecognizer(UITapGestureRecognizer(target: self, action: #selector(handleTapGesture)))
    }

    @objc private func handleTapGesture(sender: UITapGestureRecognizer) {
        if isSettingPlay {
            player?.pause()
        } else {
            player?.play()
        }
        isSettingPlay = !isSettingPlay
    }

}
Bước 3: Theo dõi việc Play video bằng Label và Slider
extension String {

    static func duration(from time: CMTime) -> String {
        let totalSeconds = CMTimeGetSeconds(time)
        let secondsText = String(format: "%02d", Int(totalSeconds) % 60)
        let minutesText = String(format: "%02d", Int(totalSeconds) / 60)
        return  "\(minutesText):\(secondsText)"
    }

}

extension UISlider {

    func setSliderValue(for player: AVPlayer, progress: CMTime) {
        guard let duration = player.currentItem?.duration else { return }
        let totalSeconds = CMTimeGetSeconds(duration)
        let progressSeconds = CMTimeGetSeconds(progress)
        self.value = Float(progressSeconds / totalSeconds)
    }

}

extension VideoPlayerView {

  private func trackVideoProgress() {
        let interval = CMTime(value: 1, timescale: 2)
        player?.addPeriodicTimeObserver(forInterval: interval, queue: DispatchQueue.main, using: { (progressTime) in
            self.currentTimeLabel.text = String.duration(from: progressTime)
            if let player = self.player {
                self.slider.setSliderValue(for: player, progress: progressTime)
            }
        })
    }

    override func observeValue(forKeyPath keyPath: String?, of object: Any?, change: [NSKeyValueChangeKey : Any]?, context: UnsafeMutableRawPointer?) {

        guard keyPath == AVPlayer.observableKey.loadedTimeRanges.rawValue else { return }

        guard let duration = player?.currentItem?.duration else { return }
        videoLengthLabel.text = String.duration(from: duration)
    }
}
Bước 4: Nhảy đến các điểm khác nhau của video bằng Slider
extension VideoPlayerView {

      @objc private func handleSliderChangedValue(sender: UISlider) {
        if let duration = player?.currentItem?.duration {
            let totalSeconds = CMTimeGetSeconds(duration)

            let value = Float64(slider.value) * totalSeconds
            let seekTime = CMTime(value: Int64(value), timescale: 1)

            player?.seek(to: seekTime, completionHandler: { (_) in })
        }
    }

}
Tổng kết
Chúng ta vừa hoàn thành một bài nhỏ về cách làm viêc với video và coreMedia thông qua UIImagePickerController và AVFoudation. Đây đều là các công cụ mạnh mẽ được Apple cung cấp và mang lại một trải nghiệm tuyệt vời người dùng.
Thanks for reading! Refer
All rights reserved