Làm quen với Node.js: Xây dựng web server đơn giản
Bài đăng này đã không được cập nhật trong 6 năm
Chào các bạn! Mình lại tiếp tục với loạt bài viết làm quen với Node.js. Hôm nay, mình sẽ giới thiệu đến các bạn cách xây dựng một webserver đơn giản với Node.js. Và cũng sẽ kết thúc loạt bài làm quen với Node.js ở đây. Mình sẽ tiếp tục với loạt bài mới về sử dụng web framework Express.
1. Xây dựng web server đơn giản:
Mình tạo module app.js. Mình sử dụng module HTTP để tạo một server đơn giản.
app.js

var http = require("http");

http.createServer(function(req, res) {
  res.writeHead(200, {'Content-Type': 'text/plain-text'});
  res.end("Hello, I'm a Node js Server")
}).listen(3000);

console.log("Listening on port 3000... ");
Chạy module app.js trên terminal và mở browser nhập địa chỉ localhost:3000, chúng ta sẽ thấy xuất hiện dòng chữ Hello, I'm a Node js Server. Như vậy, mình đã thành công trong việc tạo một web server đơn giản rồi. :>
Giờ, mình sẽ tạo một file html để trả về cho client thay vì một plain-text như trên. Tạo file index.html, ở cùng cấp với app.js, đồng thời chỉnh sửa lại nội dung trong response như sau:
index.html

<!DOCTYPE html>
<head>
  <meta charset="utf-8">
  <meta name="viewport" content="width=device-width">
  <title>Creating a server with Node.js</title>
</head>
<body>
  <h1>Creating a server with Node.js</h1>
  <div>
    <p>Hello, I'm a Node.js server!</p>
  </div>
</body>
</html>
---------
app.js

var http = require("http");
var fs = require("fs");

http.createServer(function(req, res) {
  res.writeHead(200, {'Content-Type': 'text/html'});
  var html = fs.readFileSync(__dirname + "/index.html", 'utf8');

  res.end(html);
}).listen(3000);

console.log("Listening on port 3000... ");
Về cơ bản, cách xử lý cũng không khác gì mấy. Tuy nhiên, ở đây thay vì content-type: text/plain-text sẽ là text/html. Đồng thời, mình đọc nội dung file html và trả về kết quả trong response.
Tắt và chạy lại app.js, reload lại trang localhost:3000 trên browser, lúc này, chúng ta có một giao diện với nội dung trả về từ file html trên.
Tiếp theo, mình sẽ nâng cấp lên mức độ đơn giản lên phức tạp một chút và làm ứng dụng web tra cứu biến số xe Việt Nam nhé.
2. Xây dựng web app đơn giản "Tra cứu biển số xe Việt Nam":
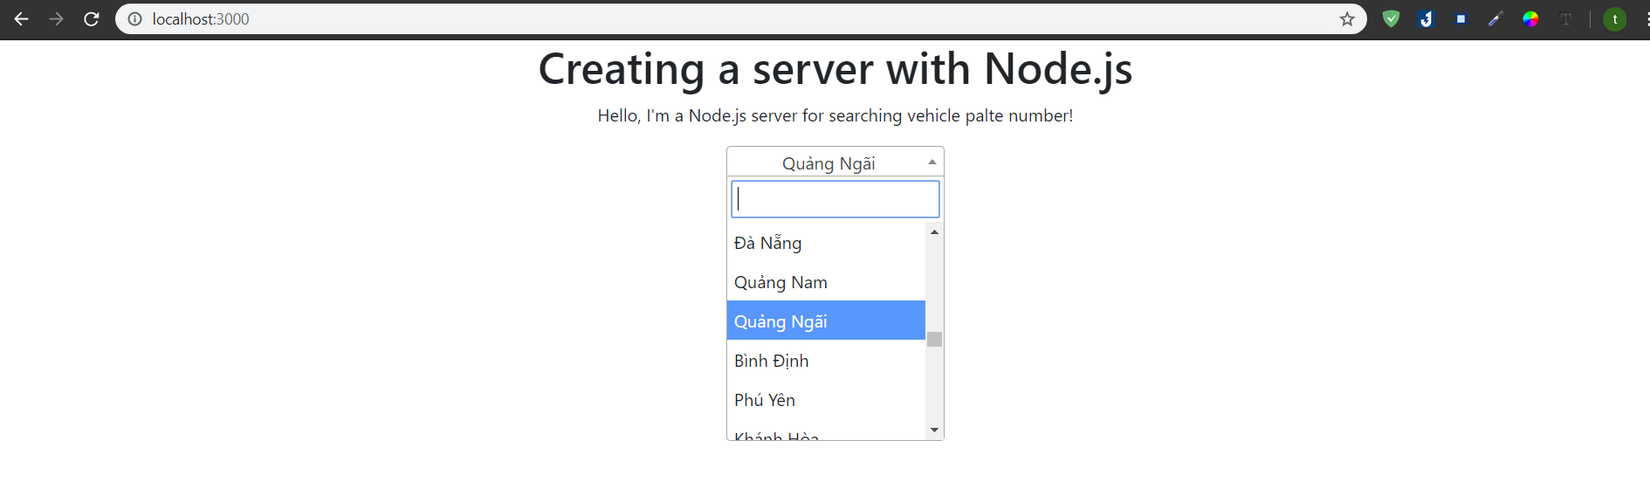
Để mang tính thực tế hơn, mình xây dựng web server đơn giản dùng tra cứu biển số xe Việt Nam. Trước hết mình cũng tạo module app.js, file index.html (giao diện), file vehicle_plates.json.
Giao diện sử dụng bootstrap 4, jquery 3.4.1, select2.js để thực hiện các chức năng trên giao diện chính. Code giao diện như sau:
index.html
<!DOCTYPE html>
<head>
<meta charset="utf-8">
<meta name="viewport" content="width=device-width">
<title>Creating a server with Node.js</title>
<link rel="stylesheet" href="https://maxcdn.bootstrapcdn.com/bootstrap/4.0.0/css/bootstrap.min.css"
integrity="sha384-Gn5384xqQ1aoWXA+058RXPxPg6fy4IWvTNh0E263XmFcJlSAwiGgFAW/dAiS6JXm" crossorigin="anonymous">
<script src="https://code.jquery.com/jquery-3.4.1.min.js"
integrity="sha256-CSXorXvZcTkaix6Yvo6HppcZGetbYMGWSFlBw8HfCJo=" crossorigin="anonymous"></script>
<script src="https://cdnjs.cloudflare.com/ajax/libs/popper.js/1.12.9/umd/popper.min.js"
integrity="sha384-ApNbgh9B+Y1QKtv3Rn7W3mgPxhU9K/ScQsAP7hUibX39j7fakFPskvXusvfa0b4Q" crossorigin="anonymous"></script>
<script src="https://maxcdn.bootstrapcdn.com/bootstrap/4.0.0/js/bootstrap.min.js"
integrity="sha384-JZR6Spejh4U02d8jOt6vLEHfe/JQGiRRSQQxSfFWpi1MquVdAyjUar5+76PVCmYl" crossorigin="anonymous"></script>
<link href="https://cdn.jsdelivr.net/npm/select2@4.0.13/dist/css/select2.min.css" rel="stylesheet" />
<script src="https://cdn.jsdelivr.net/npm/select2@4.0.13/dist/js/select2.min.js"></script>
</head>
<body>
<div class="container text-center">
<h1>Creating a server with Node.js</h1>
<div>
<p>Hello, I'm a Node.js server for searching vehicle plate number!</p>
</div>
<select class="js-select2" style="width: 200px; height: 30px;">
<option value="">Please Select City</option>
</select>
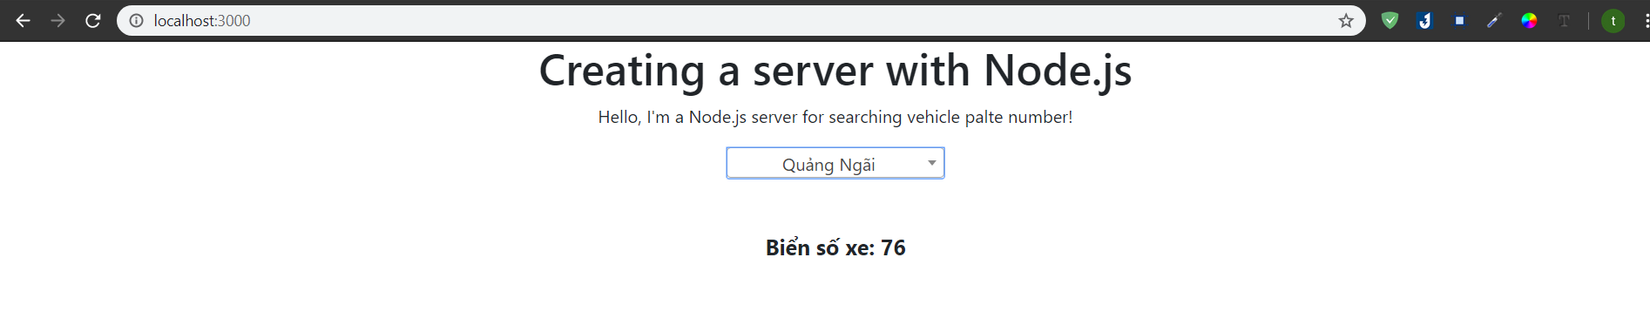
<div class="mt-5">
<p style="font-size: 20px; font-weight: bold;">Biển số xe: <span id="plateNo"></span></p>
</div>
</div>
<script>
$(document).ready(function() {
$.ajax({
url: "http://localhost:3000/api/vehicle_plates/cities",
success: function(data, status, xhr){
console.log("success: ", data);
$('.js-select2').select2({
data: data
});
$('.js-select2').select2("val", 0);
},
error: function(jqXhr, textStatus, errorMessage) {
console.log("errors: ", errorMessage);
}
})
$('.js-select2').on('select2:select', function (e) {
console.log('select event', e.params.data.id);
if (e.params.data.id == "") return;
$.ajax({
url: "http://localhost:3000/api/vehicle_plates/findCityPlate",
method: "POST",
data: {id: e.params.data.id},
success: function(data, status, xhr){
console.log("success find plate: ", data);
$("#plateNo").html(data);
},
error: function(jqXhr, textStatus, errorMessage) {
console.log("errors find plate no: ", errorMessage);
}
})
});
});
</script>
</body>
</html>

Sau khi xong phần giao diện, mình tiến hành xử lý bên server. Code module app.js:
var http = require("http");
var fs = require("fs");
var qs = require('querystring');
var vehiclePlates = JSON.parse(fs.readFileSync(__dirname + "/vehicle_plates.json"));
var idx = 1;
vehiclePlates.forEach(vp => {
  vp.id = idx++;
}); // Do file data json mình chưa thêm id, nên mình tạm xử lý id cho data ở đây để thuận tiện việc tìm kiếm.

http.createServer(function(req, res) {
  if (req.url === "/" || req.url === "/index.html") {//Nếu req từ root hoặc /index.html thì sẽ chuyển đến giao diện chính
    res.writeHead(200, {'Content-Type': 'text/html'});

    fs.createReadStream(__dirname + "/index.html").pipe(res);
  } else if (req.url === "/api/vehicle_plates/cities") {//url dùng để request json lấy dữ liệu build select2 cities.
    console.log("request to cities");

    var cities = [];
    var idx = 1;
    vehiclePlates.forEach(vp => {
      cities.push({id: vp.id, text: vp.city});
    });

    res.writeHead(200, {'Content-Type': 'application/json'});
    res.write(JSON.stringify(cities));
    res.end();
  } else if (req.url === "/api/vehicle_plates/findCityPlate") {//url dùng để tìm kiếm biển số xe theo id của tỉnh thành được lựa chọn ở client
    console.log("request to city plate");
    var result = "";
    var body='';
    var params = "";

    req.on('data', function (data) {//phần này dùng để lấy params truyền từ method POST.
        body +=data;
    }).on('end', function (data) {
      params = qs.parse(body);
      vehiclePlates.forEach(vp => {
        if (vp.id == params.id) {
          console.log("found");
          result = vp.plate_no;
          return false;
        }
      });
      res.end(result);
    });
  } else {// các request khác không thuộc các url trên sẽ hiển thị nội dung này
    res.writeHead(404, {'Content-Type': "text/plain-text"});
    res.end("Not found the page you requested.");
  }
}).listen(3000);

console.log("Listening on port 3000... ");
Cấu trúc của web app như sau:
- Về routes: Sẽ trả về giao diện chính nếu request đến root "/" hoặc "/index.html". 2 routes dùng để xử lý request ajax client lấy thông về cities để lựa chọn trên select2 và tìm kiếm thông tin biển số xe theo thành phố được lựa chọn ở client. Và 1 route dùng hứng mọi request nằm ngoài các routes (đã nêu). Trong routes, mình không thực hiện check method gọi đến là GET/POST/... để đơn giản hóa ứng dụng.
- Về các functions:
- Gồm function xử lý thêm id cho dữ liệu json, nhằm thuận tiện cho việc tìm kiếm biển số xe.
- Function xử lý lấy params được truyền lên bằng ajax POST request.
- Function xử lý tìm kiếm biển số xe theo id của thành phố được lựa chọn.
Khởi chạy ứng dụng và chúng ta có 1 web app đơn giản để tra cứu biển số xe.
- Gồm function xử lý thêm id cho dữ liệu json, nhằm thuận tiện cho việc tìm kiếm biển số xe.
3. Lời kết:
Cảm ơn các bạn đã theo dõi loạt bài viết làm quen với Node.js suốt thời gian qua.
Qua loạt bài viết làm quen này sẽ giúp các bạn có được một vài nền tảng kiến thức trước khi bước vào loạt bài với về Web Framework Express cho Node.js.
Bài viết không thể tránh khỏi những sai xót, mong nhận được góp ý của các bạn để bài viết được hoàn thiện hơn. Cảm ơn các bạn.
File json biển số xe: vehiclePlates
All rights reserved
