[IOS - Swift] Custom tableViewCell
Bài đăng này đã không được cập nhật trong 8 năm
UITableView thường xuyên được sử dụng trong ứng dụng ios để biểu diễn thông tin dưới dạng bảng. Hôm nay mình sẽ hướng dẫn các bạn cách để custom TableViewCell như hình dưới đây!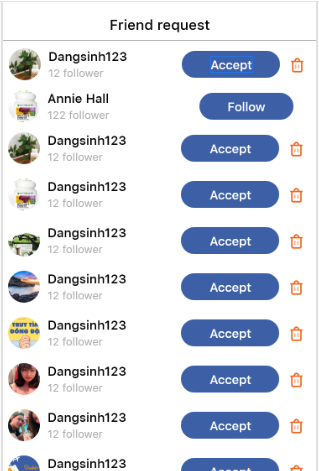
Tạo TableView và các class controller
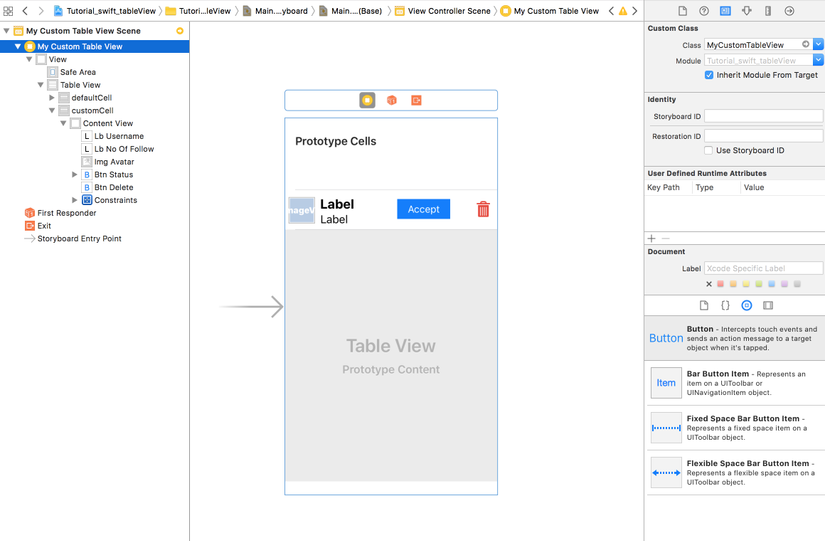
Trước tiên mình đã tạo sẵn 1 TableView như bên dưới, My Custom Table View được controll bằng class MyCustomTableView
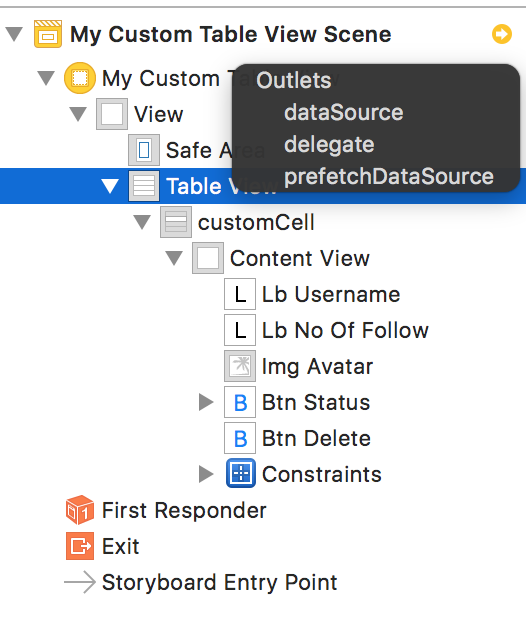
 Tiếp theo gắn dataSource và delegate của customCell cho ViewController
 Trong class MyCustomTableView chúng ta cần extend UITableViewDataSource và UITableViewDelegate,
chúng ta cũng phải implement 2 protocol của UITableViewDataSource là numberOfRowsInSection và cellForRowAt
Trong class MyCustomTableView chúng ta cần extend UITableViewDataSource và UITableViewDelegate,
chúng ta cũng phải implement 2 protocol của UITableViewDataSource là numberOfRowsInSection và cellForRowAt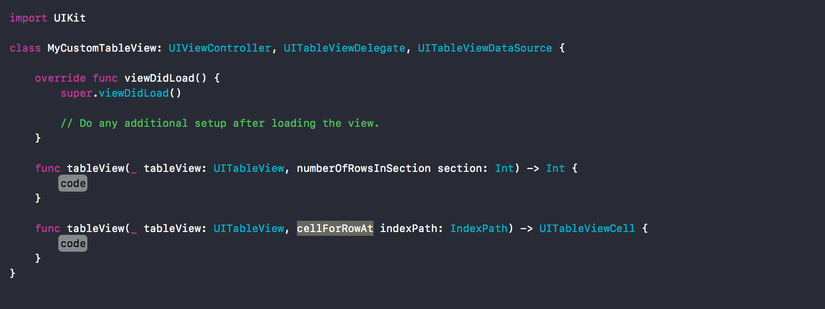 Khởi tạo 1 custom cell trong storyboard thêm các thành phần cần thiết vào cell(label, image, button...)
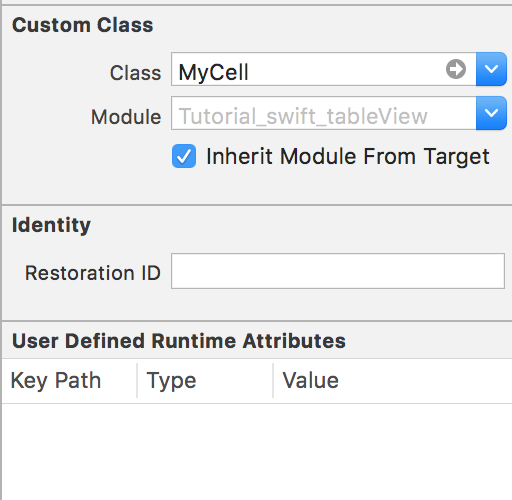
Tạo class custom cell có tên là MyCell trong MyCustomTableView.swift và add MyCell là custom class của customCell sau đó kéo các ánh xạ tương ứng từ storyboard sang class MyCell
Khởi tạo 1 custom cell trong storyboard thêm các thành phần cần thiết vào cell(label, image, button...)
Tạo class custom cell có tên là MyCell trong MyCustomTableView.swift và add MyCell là custom class của customCell sau đó kéo các ánh xạ tương ứng từ storyboard sang class MyCell
class MyCell: UITableViewCell {
    @IBOutlet weak var lbUsername: UILabel!
    @IBOutlet weak var lbFollower: UILabel!
    @IBOutlet weak var imgAvatar: UIImageView!
    @IBOutlet weak var btnDelete: UIButton!
}
Custom TableCell
Tiến hành sửa code 2 function numberOfRowsInSection và cellForRowAt để custom cell:
 var userData = ["Box Fan", "Ceiling Fan", "Desk Fan", "Fish Tank", "Floor Lamp", "Front Door","Box Fan", "Ceiling Fan", "Desk Fan",  "Garege Door", "Box Fan", "Ceiling Fan", "Desk Fan", "Lava Lamp", "Box Fan", "Ceiling Fan", "Desk Fan", "Fish Box"]

    override func viewDidLoad() {
        super.viewDidLoad()

        // Do any additional setup after loading the view.
    }

    func tableView(_ tableView: UITableView, numberOfRowsInSection section: Int) -> Int {
        return userData.count
    }

    func tableView(_ tableView: UITableView, cellForRowAt indexPath: IndexPath) -> UITableViewCell {
        let cell = tableView.dequeueReusableCell(withIdentifier: "customCell", for: indexPath) as! MyCell
        cell.lbUsername.text = userData[indexPath.row]
        cell.imgAvatar.layer.cornerRadius = 20
        cell.imgAvatar.image = UIImage(named: userData[indexPath.row])
        let randomNum:UInt32 = arc4random_uniform(1000)
        let random = Int(randomNum)
        cell.lbFollower.text = "Follower \(random)"
        return cell
    }
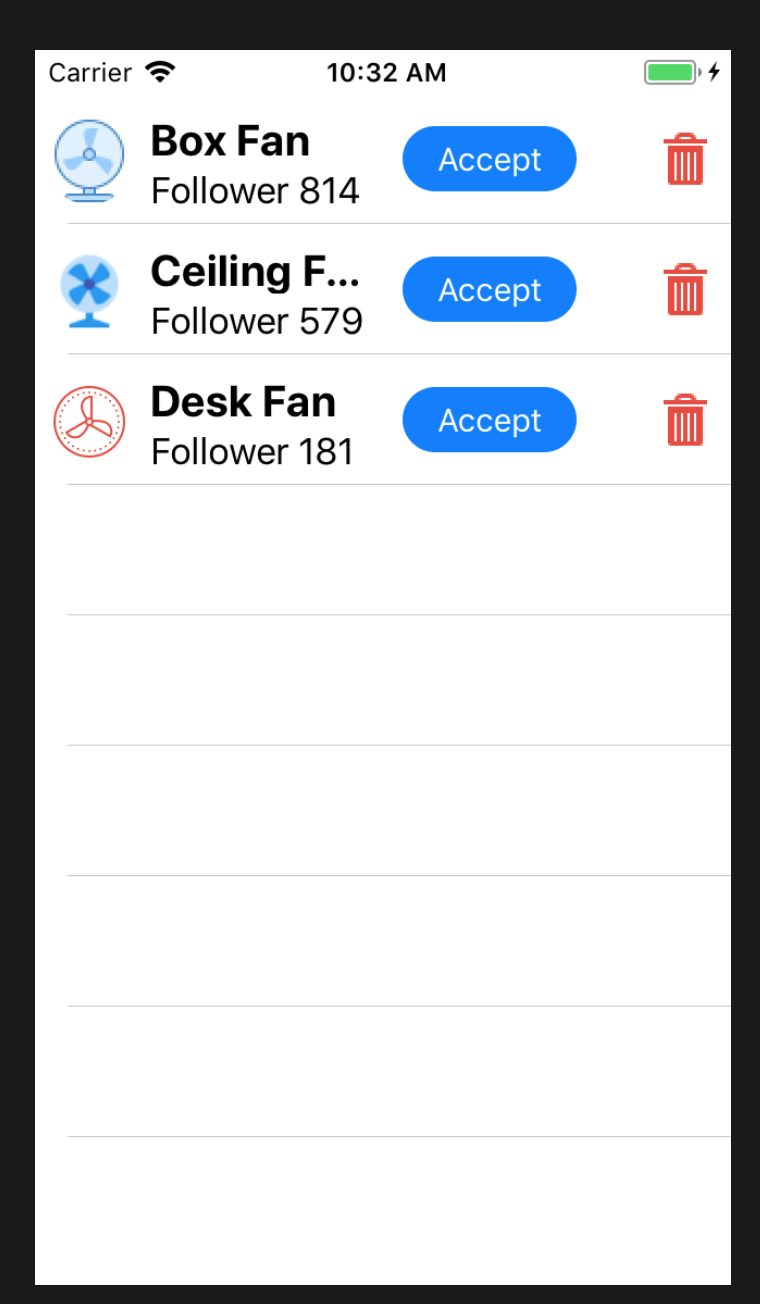
Build thử và kết chúng ta nhận được:
Xử lý sự kiện xoá Cell(Truyền data từ cell sang ViewController bằng protocol/delegate)
Kéo ánh xạ action button delete vào MyCell class. Để app biết khi click button delete sẽ xoá row nào của section nào chúng ta dùng protocol/ delegate để truyền data.
Khai báo 1 protocol CustomCellDelegte có funtion làm nhiệm vụ truyền data về chỉ số row và section của cell muốn xoá, sau đó MyCustomTableView sẽ extend nó và implement function này. Trong class MyCell sẽ khai báo thêm 1 biến delegate có kiểu là CustomCellDelegte, có nhiệm vụ sẽ uỷ quyền cho MyCustomTableView thực hiện function deleteRow khi button delete được click.
Khai báo delegate:
protocol CustomCellDelegte {
    func deleteRow(section : Int, row : Int) -> Void
}
Khai báo biến delegate và các chỉ số index cell trong MyCell:
 var delegate : CustomCellDelegte?
 var section : Int = 0
 var row : Int = 0
sự kiện onclick button delete trong MyCell :
@IBAction func onClickBtnDelete(_ sender: Any) {
         delegate?.deleteRow(section: self.section, row: self.row)
    }
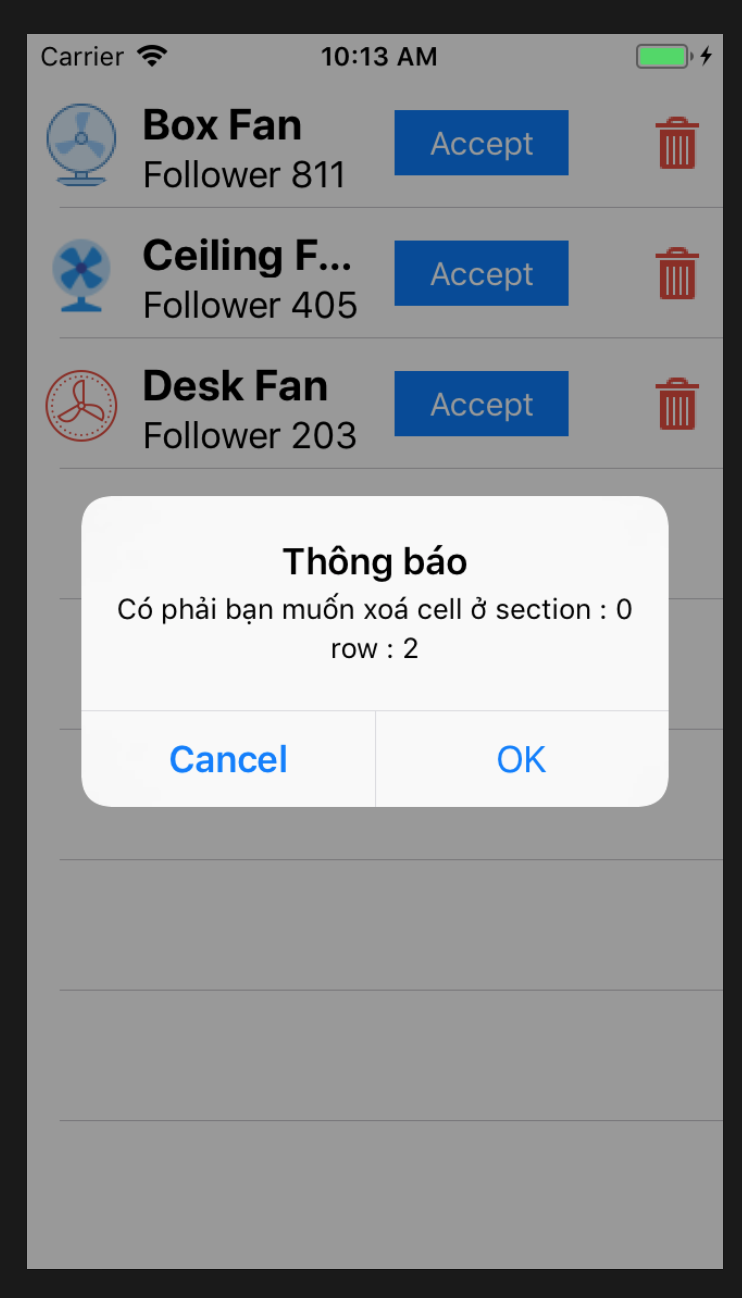
Implement function deleteRow trong MyCustomTableView :
 func deleteRow(section: Int, row: Int) {
        let alertView = UIAlertController(title: "Thông báo", message: "Có phải bạn muốn xoá cell ở section : \(section) row : \(row)", preferredStyle: UIAlertControllerStyle.alert)

        let alertCancelAction = UIAlertAction(title: "Cancel", style: UIAlertActionStyle.cancel, handler: nil)
        let alertConfirmAction = UIAlertAction(title: "OK", style: UIAlertActionStyle.default, handler: { _ in
            let indexPath = IndexPath(row: row, section: section)
            self.listUserDatas.remove(at: row)
            self.myTable.deleteRows(at: [indexPath], with: UITableViewRowAnimation.automatic)
        })

        alertView.addAction(alertCancelAction)
        alertView.addAction(alertConfirmAction)

        self.present(alertView, animated: true, completion: nil)
    }
Uỷ quyền cho MycustomTableView:
cell.section = indexPath.section
cell.row = indexPath.row
cell.delegate = self
Build lại project kết quả nhận được:
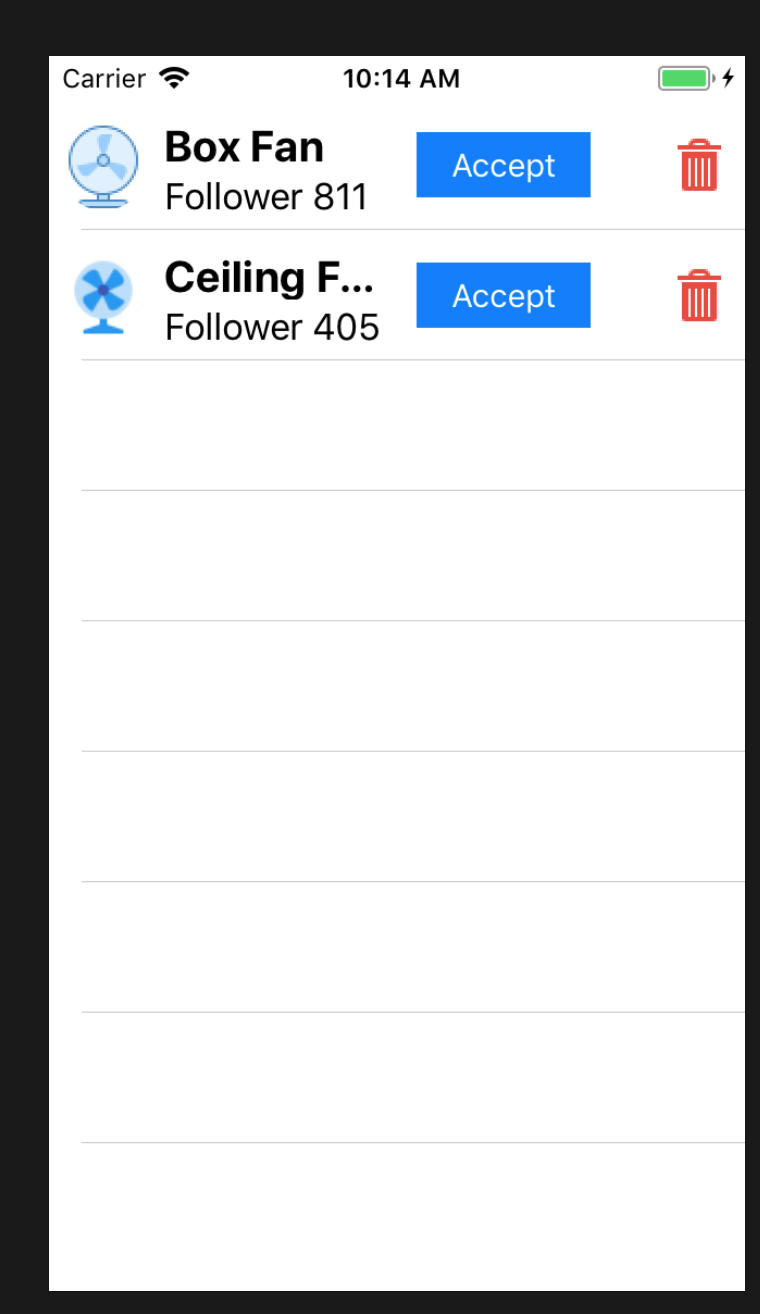
Sau khi ấn Ok Desk Fan đã được xoá khỏi TableView
Kết luận
Trên đây mình đã hướng dẫn cách để custom 1 tableCell hy vọng sẽ giúp ích được cho các bạn.
Example : Tutorial_swift_tableView
All rights reserved
