iOS Performance Tips - Part 1: Shadow
Bài đăng này đã không được cập nhật trong 4 năm
iOS Performance Tips
Để mở đầu cho chuỗi bài iOS Performance Tips, tôi xin giới thiệu một vấn đề mà có lẽ rất nhiều bạn đã gặp phải một lần trong quãng đời coder của mình - SHADOW
Hẳn các bạn cũng đã code qua một chương trình hiển thị thumbnail của các ảnh trong My Library như hình dưới đây

Để đơn giản tôi sẽ hướng dẫn các bạn tạo một project đơn giản sử dụng CollectionView hiển thị 1000 ảnh trong resources
B1. Tạo project mới
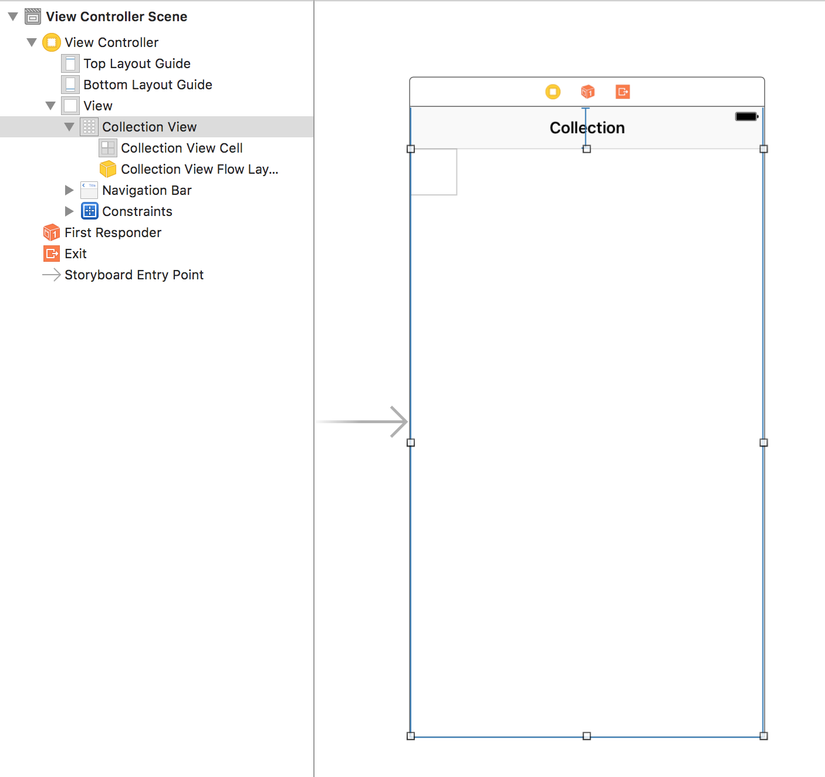
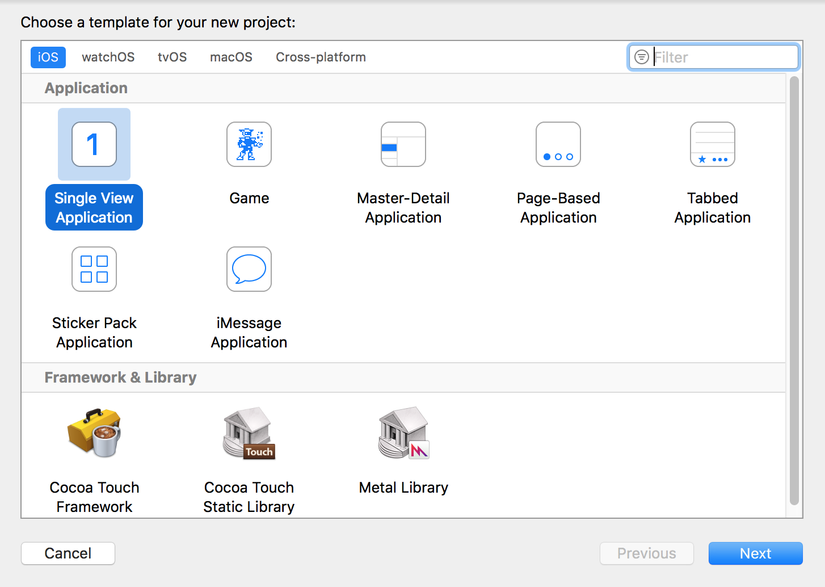 B2. Kéo thả vào Main.storyboard một collection view
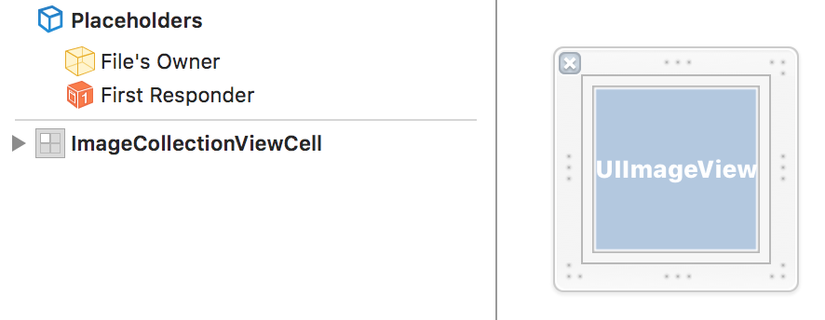
 B3. Tạo một collection view cell mới và đặt tên là ImageCollectionViewCell và kéo vào content view một UIImageView
 B4. Code
ViewController.swift
B4. Code
ViewController.swift
import UIKit

class ViewController: UIViewController {

    @IBOutlet weak var collectionView: UICollectionView!

    let cellWidth = (CommonUtils.getPortraitScreenSize().width - 40) / 3
    let cellHeight = (CommonUtils.getPortraitScreenSize().width - 40) / 3

    fileprivate var images = [String]()

    override func viewDidLoad() {
        super.viewDidLoad()
        // Do any additional setup after loading the view, typically from a nib.
        collectionView.dataSource = self
        collectionView.delegate = self
        collectionView.register(UINib(nibName: "ImageCollectionViewCell", bundle: nil), forCellWithReuseIdentifier: ImageCollectionViewCell.identifier)

        for _ in 0..<1000 {
            images.append("hatchlings.jpg")
        }

        collectionView.reloadData()
    }

    override func didReceiveMemoryWarning() {
        super.didReceiveMemoryWarning()
        // Dispose of any resources that can be recreated.
    }


}

extension ViewController: UICollectionViewDelegate, UICollectionViewDataSource {
    func numberOfSections(in collectionView: UICollectionView) -> Int {
        return 1
    }

    func collectionView(_ collectionView: UICollectionView, numberOfItemsInSection section: Int) -> Int {
        return images.count
    }

    func collectionView(_ collectionView: UICollectionView, cellForItemAt indexPath: IndexPath) -> UICollectionViewCell {
        var cell = collectionView.dequeueReusableCell(withReuseIdentifier: ImageCollectionViewCell.identifier, for: indexPath) as? ImageCollectionViewCell
        if cell == nil {
            cell = Bundle.main.loadNibNamed("ImageCollectionViewCell", owner: nil, options: nil)![0] as? ImageCollectionViewCell
        }

        cell?.imageView.image = UIImage(named: images[indexPath.item])

        return cell!
    }

    func collectionView(_ collectionView: UICollectionView, didSelectItemAt indexPath: IndexPath) {

    }

    func collectionView(_ collectionView: UICollectionView, didDeselectItemAt indexPath: IndexPath) {
        let cell = collectionView.cellForItem(at: indexPath)
        cell?.isSelected = false
    }
}

extension ViewController: UICollectionViewDelegateFlowLayout {
    func collectionView(_ collectionView: UICollectionView, layout collectionViewLayout: UICollectionViewLayout, sizeForItemAt indexPath: IndexPath) -> CGSize {
        return CGSize(width: cellWidth, height: cellHeight)
    }

    func collectionView(_ collectionView: UICollectionView, layout collectionViewLayout: UICollectionViewLayout, minimumLineSpacingForSectionAt section: Int) -> CGFloat {
        return 10
    }

    func collectionView(_ collectionView: UICollectionView, layout collectionViewLayout: UICollectionViewLayout, minimumInteritemSpacingForSectionAt section: Int) -> CGFloat {
        return 10
    }

    func collectionView(_ collectionView: UICollectionView, layout collectionViewLayout: UICollectionViewLayout, insetForSectionAt section: Int) -> UIEdgeInsets {
        return UIEdgeInsetsMake(10, 10, 0, 10)
    }
}
ImageCollectionViewCell.swift
import UIKit

class ImageCollectionViewCell: UICollectionViewCell {

    @IBOutlet weak var imageView: UIImageView!

    override func awakeFromNib() {
        super.awakeFromNib()
        // Initialization code
    }

    static let identifier = "ImageCollectionViewCell"

}
Trên đây tôi chỉ tóm tắt việc tạo project dùng UICollectionView. Sau khi chạy project, chúng ta sẽ có kết quả thu được như hình đầu tiên. Có vẻ trông nó hơi đơn điệu
 Và đó là lúc chúng ta sẽ nghĩ tới việc thêm vào đó shadow cho những bức ảnh
Chúng ta sửa code của ImageCollectionViewCell như sau
Và đó là lúc chúng ta sẽ nghĩ tới việc thêm vào đó shadow cho những bức ảnh
Chúng ta sửa code của ImageCollectionViewCell như sau
import UIKit

class ImageCollectionViewCell: UICollectionViewCell {

    @IBOutlet weak var imageView: UIImageView!

    override func awakeFromNib() {
        super.awakeFromNib()
        // Initialization code
        self.layer.shadowColor = UIColor.lightGray.cgColor
        self.layer.shadowRadius = 5
        self.layer.shadowOffset = CGSize(width: 2, height: 2)
        self.layer.shadowOpacity = 0.75
    }

    static let identifier = "ImageCollectionViewCell"

}
Và đây là kết quả
 It's look good. Và các bạn thử cuộn màn hình
Chuyện gì đang xảy ra vậy? Và nếu mà bạn đang cầm trên tay một chiếc điện thoại iphone 4s
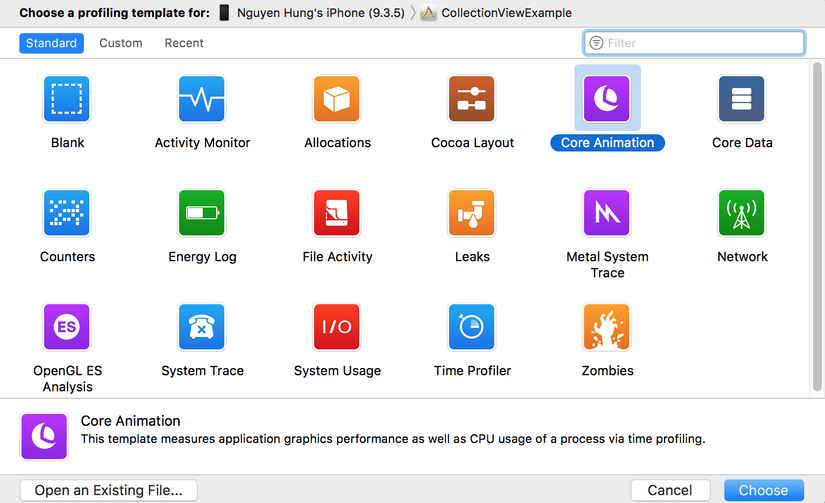
Các bạn hãy build app ra device và sử dụng tool Instrument đi kèm với xcode. Các bạn chọn Core Animation profiling
It's look good. Và các bạn thử cuộn màn hình
Chuyện gì đang xảy ra vậy? Và nếu mà bạn đang cầm trên tay một chiếc điện thoại iphone 4s
Các bạn hãy build app ra device và sử dụng tool Instrument đi kèm với xcode. Các bạn chọn Core Animation profiling
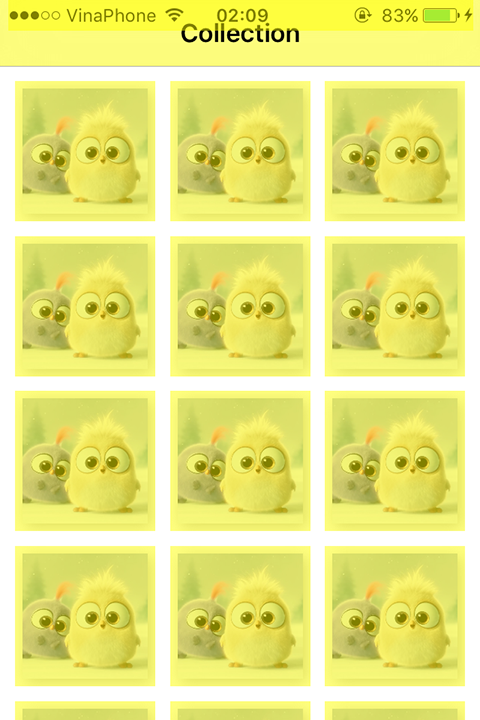
 Các bạn vào setting và tick chọn Color Offscreen-Rendered Yellow.
 Sau khi chạy profiling, vùng hiển thị màu vàng là chính là vùng workload lên performance của app
 Để giải quyết vấn đề này, các bạn add thêm vào imageView một shadowPath
self.layer.shadowPath = UIBezierPath(rect: self.bounds).cgPath
Sau khi chạy lại profiling, vùng màu vàng trên các thumbnail đã biến mất
 Trên đây tôi đã hướng dẫn các bạn sử dụng shadowPath nhằm giảm thiểu workload render màn hình khi vẽ shadow. Hy vọng bài viết có thể giúp ích cho các bạn trong quá trình xây dựng app và biết cách sử dụng Instrument để tìm ra vùng gây ảnh hưởng đến performance của app
All rights reserved
