iOS - Image Processing using GPUImage
Bài đăng này đã không được cập nhật trong 4 năm
1. Overview
The GPUImage framework is a BSD-licensed iOS library that lets you apply GPU-accelerated filters and other effects to images, live camera video, and movies. In comparison to Core Image (part of iOS 5.0), GPUImage allows you to write your own custom filters, supports deployment to iOS 4.0, and has a simpler interface. However, it currently lacks some of the more advanced features of Core Image, such as facial detection.
Link GitHub: https://github.com/BradLarson/GPUImage
2. Adding the static library to your iOS project
-
Get the latest source code for the framework.
-
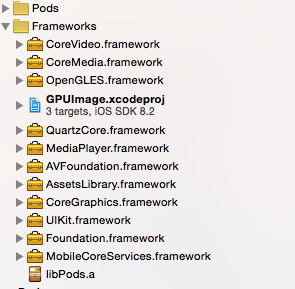
Drag the GPUImage.xcodeproj file into your application's Xcode project to embed the framework in your project
-
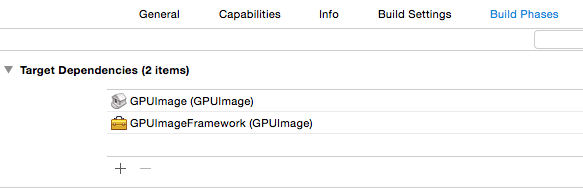
Go to your application's target and add GPUImage as a Target Dependency
-
GPUImage needs a few other frameworks to be linked into your application, so you'll need to add the following as linked libraries in your application target:
CoreMedia CoreVideo OpenGLES AVFoundation QuartzCore -
Set the Header Search Paths to the relative path from your application to the framework/ subdirectory within the GPUImage source directory. Make this header search path recursive.
-
To use the GPUImage classes within your application, simply include the core framework header using the following:
import "GPUImage.h"
3. Using Filter
    UIImage *inputImage=YOUR_IMAGE;
    image_p=[[GPUImagePicture alloc]initWithImage:inputImage];

    YOUR_FILTER *filter=[[YOUR_FILTER alloc]init];
    filter.SETTING_FILTER;
    [image_p addTarget:filter];
    [image_p processImage];

    UIImageWriteToSavedPhotosAlbum([filter imageFromCurrentlyProcessedOutput], self, @selector(image:didFinishSavingWithError:contextInfo:), nil);
Now we will apply filter for original photo:

3.1 Built-in filters
-
GPUImageBrightnessFilter: Adjusts the brightness of the image brightness:
brightness: The adjusted brightness (-1.0 - 1.0, with 0.0 as the default)
Result for brightness = 0.5

-
GPUImageExposureFilter: Adjusts the exposure of the image
exposure: The adjusted exposure (-10.0 - 10.0, with 0.0 as the default)
Result for exposure = 2.0

-
GPUImageContrastFilter: Adjusts the contrast of the image
contrast: The adjusted contrast (0.0 - 4.0, with 1.0 as the default)
Result for contrast = 3.0

-
GPUImageSaturationFilter: Adjusts the saturation of an image
saturation: The degree of saturation or desaturation to apply to the image (0.0 - 2.0, with 1.0 as the default)
Result with saturation = 1.5

What will we do from here?
You will find 125 built-in filters in GPUImage framework. Choose which filter you are looking for and appy to image with its setting. But in some cases the result is not satisfied you.
For example, for motion blur, is you want to make a motion-blur image with blurAngel = 180 and blurRadius = 5.0. The result will be:

It's not exactly motion blur that you expected. So you can use CIKernel for creating motion effect:
    NSString * const kKernelSource = @"kernel vec4 motionBlur(sampler image, vec2 velocity, float numSamplesInput) {\
    \
        int numSamples = int(floor(numSamplesInput));\
        vec4 sum = vec4(0.0), avg = vec4(0.0);\
        vec2 dc = destCoord(), offset = -velocity;\
    \
        for (int i=0; i < (numSamples * 2 + 1); i++) {\
            sum += sample (image, samplerTransform (image, dc + offset));\
            offset += velocity / float(numSamples);\
        }\
    \
        avg = sum / float((numSamples * 2 + 1));\
        return avg;\
    }\
    ";
    - (CIImage *)outputImage
    {
        float r = 10;
        float a = M_PI;
        CIVector *velocity = [CIVector vectorWithX:r*cos(a) Y:r*sin(a)];
        CGRect dod = regionOf(self.inputImage.extent, velocity);

        return [[CIKernel kernelWithString:kKernelSource] applyWithExtent:dod
                                    roiCallback:^CGRect(int index, CGRect rect) {
                                        return regionOf(rect, velocity);
                                    } arguments: @[self.inputImage, velocity, self.numSamples]];
    }
The result will be:

So, depending on the purpose of use, choosing the method and parameters for the filter that you need.
Good luck
All rights reserved
