Introduce 3D touch programming in ios 9
Bài đăng này đã không được cập nhật trong 4 năm
Giới thiệu
Với iphone6s và iphone6s Plus, Apple giới thiệu một phương thức mới để tương tác với idevice gọi là 3D touch. 3D Touch làm việc bằng các nhận dạng cảm ứng lực tức độ mạnh yếu của ngón tay khi chạm vào màn hình, qua đó có thể thực hiện nhiều hành vi hơn, thuận tiện hơn. Ở bài viết này tôi sẽ giới thiệu với các bạn làm thế nào để lập trình cho app nhận dạng 3D touch.
Yêu cầu
- Xcode 7.1
- Device iphone 6s hoặc iphone 6sPlus (vì ios simulator ko thể giả lập được 3d touch)
Giới thiệu về peek và pop trong touch 3d
- Peek là phương thức cho phép user xem trước item và thực hiện hành động mà không làm ảnh hược đến bối cảnh hiện tại của item.
- Peek xuất hiện khi user nhấn ngón tay của họ lên item và biến mất khi user nhấc ngón tay khỏi item.
- peek ở một detail view của tiem gọi là pop khi user ấn mạnh hơn một chút trên peekView
- gọi hành động tương ứng khi user swipe up trong peekView
1. Peek và Pop trong storyboards
-
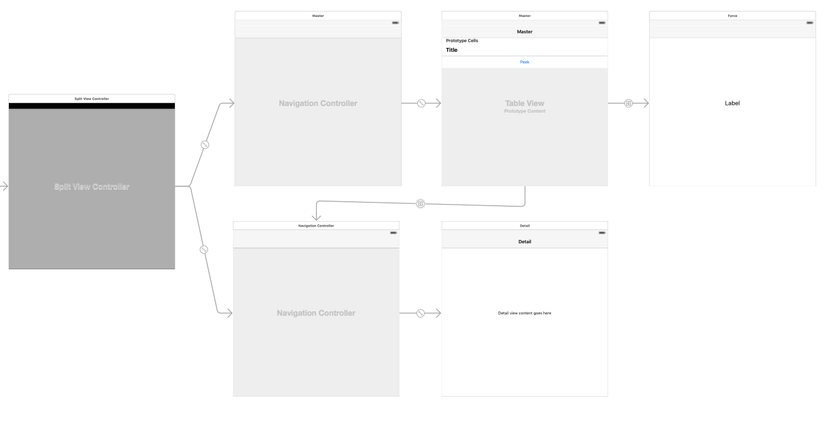
Tạo project xcode với storyboard như sau
-
Chọn segue, mở Attributes Inspector và nhìn vào mục Peek and Pop. Đánh dấu vào ô checkbox 'Peek&Pop' và cấu hình như sau:
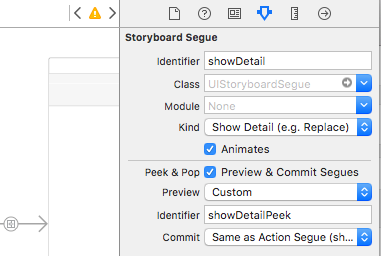
- Ở lựa chọn này bạn gán custom identifiers cho cả Peek(preview) và Pop(commit) segues. Commit segue cũng có tuỳ chọn để cấu hình mọi thứ như một seugue bình thường trong storyboard như Class, Module và Kind
- Chạy app trên iPhone ấn nút + ở góc bên phải để tạo 1 item.
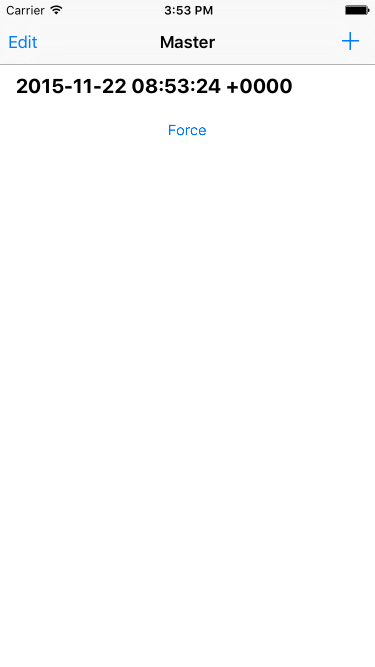
Nhấn vào item và bạn sẽ được preview detail view controller:

2. Lập trình cho peek và pop
Peek và pop được handle bởi UIViewControllerPreviewingDelegate protocol. Trong project của bạn, tạo một file swift đặt tên là **MasterPreviewing
Add đoạn code sau vào MasterPreviewing.swift:
import UIKit

extension MasterViewController: UIViewControllerPreviewingDelegate {

   func previewingContext(previewingContext: UIViewControllerPreviewing, viewControllerForLocation location: CGPoint) -> UIViewController? {

		guard let viewController = self.storyboard?.instantiateViewControllerWithIdentifier("forceViewController") as? ForceViewController else { return nil }
		viewController.preferredContentSize = CGSize(width: 0, height: 0)

		return viewController
}

func previewingContext(previewingContext: UIViewControllerPreviewing, commitViewController viewControllerToCommit: UIViewController) {
	showViewController(viewControllerToCommit, sender: self)
}

}
ở phương thức previewingContext(_:viewControllerForLocation:) , khởi tạo một ForceViewController từ storyboard và return object đó. Property preferredContentSize xác định kích thước của Peek trên màn hình. Nếu set contentSize là (0,0), peek tự động scale hết mức có thể.
Để sử dụng đoạn code mới này, bạn cũng phải register những views này khi tạo preview cho hành động touch3D.
if traitCollection.forceTouchCapability == .Available {
  self.registerForPreviewingWithDelegate(self, sourceView: forceButton)
}
Đầu tiên chúng ta kiểm tra nếu touch3D availabel trên device. Trong trường hợp đó, chúng ta đăng ký 1 forceButton như một view thích hợp để peek và pop.
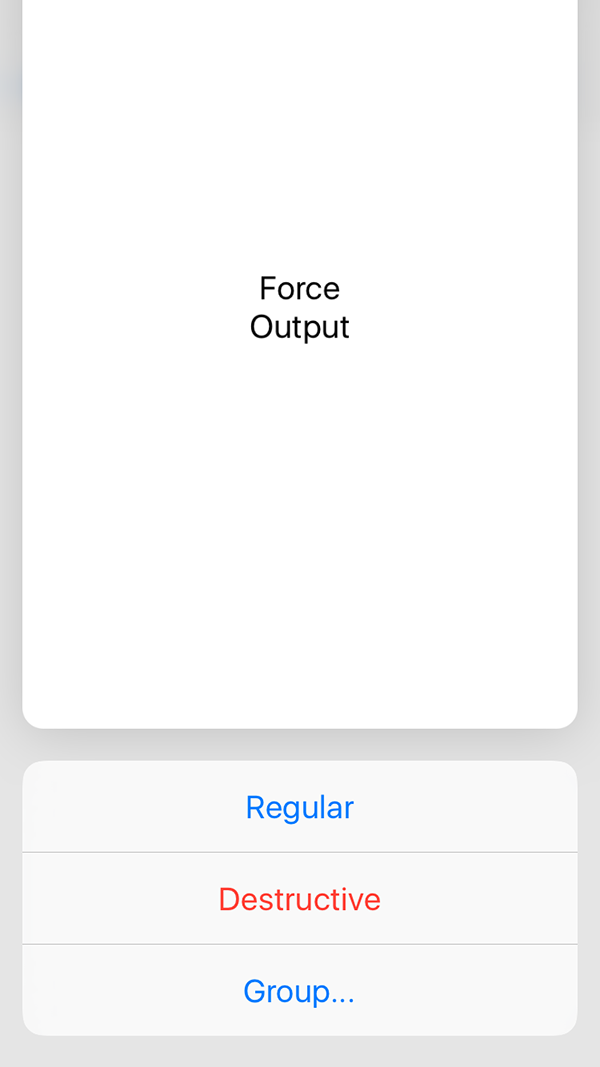
Cuối cùng add các hành động để preview. bạn cần định nghĩa chúng trong view controller sẽ preview. Mở ForceViewController.swift và add đoạn code sau
override func previewActionItems() -> [UIPreviewActionItem] {
	let regularAction = UIPreviewAction(title: "Regular", style: .Default) { (action: UIPreviewAction, vc: UIViewController) -> Void in
 }
	let destructiveAction = UIPreviewAction(title: "Destructive", style: .Destructive) { (action: UIPreviewAction, vc: UIViewController) -> Void in
 }
	let actionGroup = UIPreviewActionGroup(title: "Group...", style: .Default, actions: [regularAction, destructiveAction])

	return [regularAction, destructiveAction, actionGroup]
}
Chúng ta đã tạo 3 hành động để display ForceViewController preview.
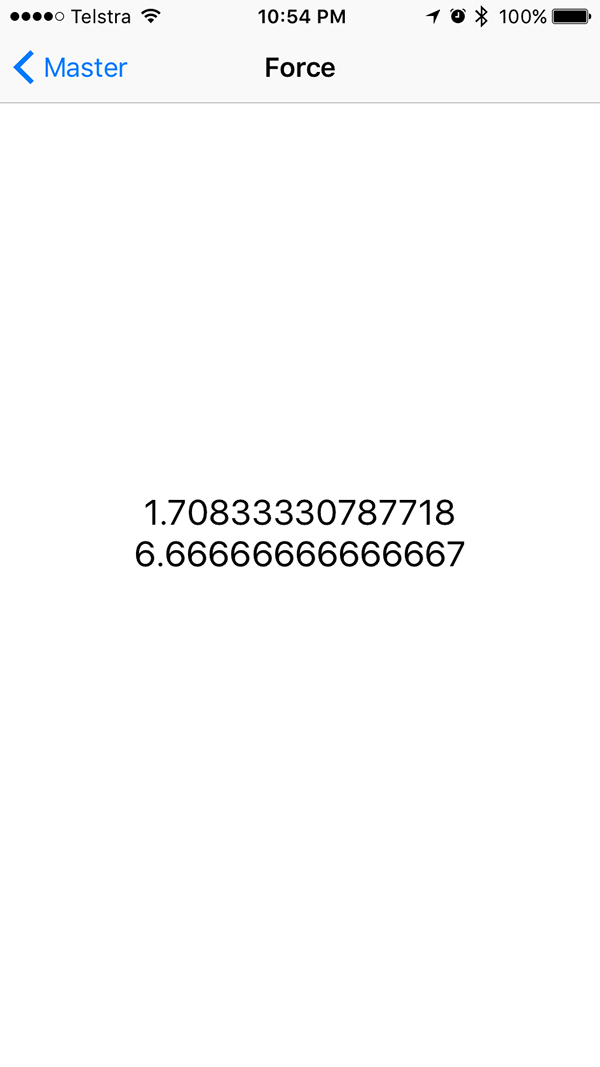
3. Detect Force qua UITouch
Ở 3d touch device, UITouch có 1 vài function mới với 2 properties, force và maximumPossibleForce .Những properties này rất hữu dụng trong việc bạn muốn đo lực nhấn lên màn hình.
Add đoạn code sau vào ForceViewController
override func touchesMoved(touches: Set<UITouch>, withEvent event: UIEvent?) {
  if let touch = touches.first where traitCollection.forceTouchCapability == .Available {
      self.forceOutput.text = "\(touch.force)\n\(touch.maximumPossibleForce)"
   }
}
Ở phương thức này chũng ta hiển thị vale của touch lên màn hình. Chạy app trên device mà nhấn Force button để mở ForceViewController.
4. Home Screen Quick Actions
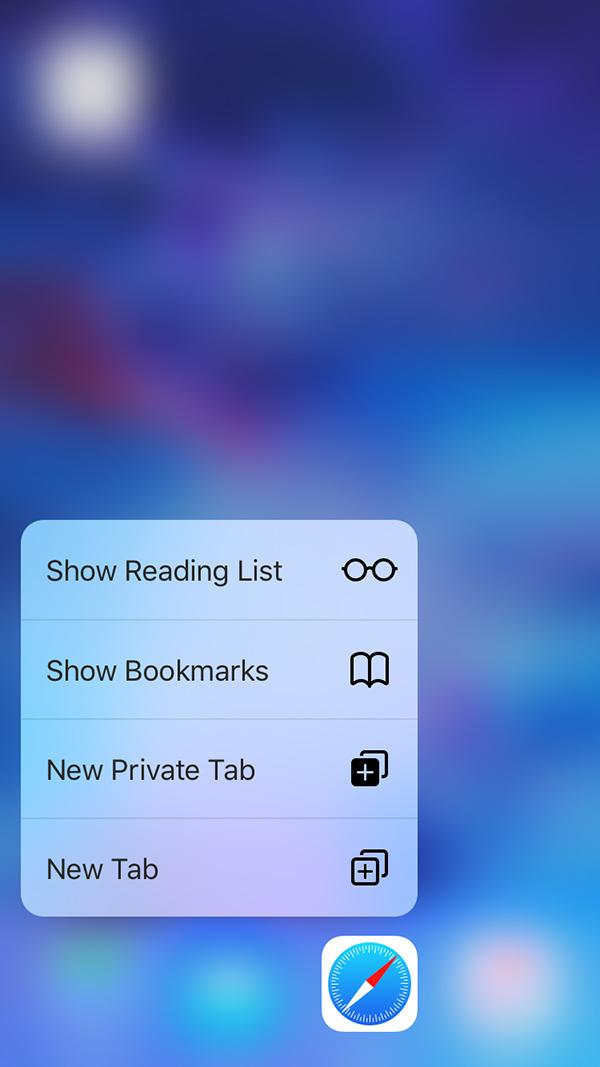
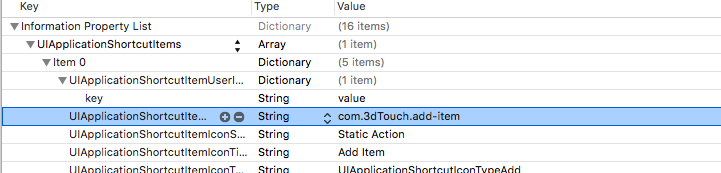
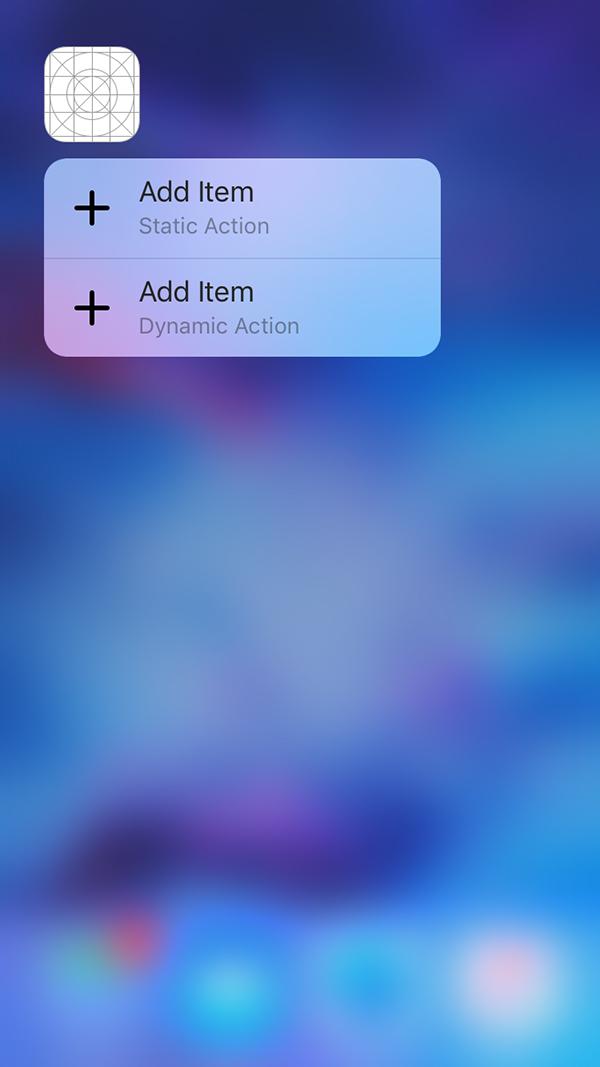
Có 2 loại quick actions bạn có thể tạo cho app, **staic **và dynamic. Staic quick actions được định nghĩa trong file Info.plist của app và hoạt động ngay ở mọi thời điểm cho app của bạn.
Cho app đang sử dụng trong bài viết này, cần cả static và dynamic quick actions.
Quick actions được biểu diễn bởi class UIApplicationShortcutItem với những properties sau:
- localizedTitle: main title cho quick action
- localizedSubtitle: subtitle cho quick action
- type: unique string xac định quick action đã selected
- icon: icon cho quick action
- userInfo: chứa data phù hợp với quick action
Tiếp theo tạo dynamic action.
Mở MasterViewController.swift và add 2 dòng code sau trong viewDidLoad
let shortcut = UIApplicationShortcutItem(type: "com.tutsplus.Introducing-3D-Touch.add-item", localizedTitle: "Add Item", localizedSubtitle: "Dynamic Action", icon: UIApplicationShortcutIcon(type: .Add), userInfo: nil)
UIApplication.sharedApplication().shortcutItems = [shortcut]
Như vậy bạn đã tạo cả static và dynamic quick action cho app của bạn.
Cuối cùng chúng ta handle logic của app khi được selected từ homescreen, thông qua application(_:performActionForShortcutItem:completionHandler:) delegate. Mở AppDelegate.swift add đoạn code sau:
func application(application: UIApplication, performActionForShortcutItem shortcutItem: UIApplicationShortcutItem, completionHandler: (Bool) -> Void) {
  if shortcutItem.type == "com.3dTouch.add-item" {
     let splitViewController = self.window!.rootViewController as! UISplitViewController
      let navigationController = splitViewController.viewControllers[splitViewController.viewControllers.count-1] as! UINavigationController
     let masterViewController = navigationController.viewControllers[0] as! MasterViewController
    	masterViewController.insertNewObject(UIButton())

  	  completionHandler(true)
	}

 completionHandler(false)
}
Đoạn code trên kiểm tra quick action type. nếu đúng item identifier thì masterviewcontroller insert 1 item vào table view.
** Kết luận**
Để chạy được đoạn code trên bạn cần iphone6s hoặc iphone6s plus. Nói thật mình cũng ko có device nên chỉ đọc code để hiểu. Việc adaptive touch3d trong ứng dụng của bạn khá phức tạp nên nếu thiết kế app bạn nên nêu nó ra từ ban đầu. Cám ơn vì đã theo dõi =))
** Tài liệu tham khảo**
Code mẫu:
http://www.mediafire.com/download/o54fsl52rsp1f79/touch3d.zip
http://code.tutsplus.com/tutorials/ios-9-an-introduction-to-3d-touch--cms-25115
All rights reserved
