Hướng dẫn sử dụng Animations trong Android cho người mới bất đầu
Bài đăng này đã không được cập nhật trong 4 năm
Android Framework cung cấp 2 hệ thống Animation là : Property animation và View animation. Ta có thể sử dụng dễ dàng 2 hệ thống animations, nhưng Property animation được các developer sử dụng nhiều bởi vì nó linh hoạt và cung cấp nhiều tính năng hơn. Ngoài 2 hệ thống animation này, bạn có thể sử dụng thêm Drawable animation, nó cho phép bạn load tất cả các drawable resources và hiển thị chúng ở một khung hình khác.
Có 3 loại Animations là:
- Property Animations : Được giới thiệu trong Android 3.0 ( API level 11). Chúng được sử dụng để thay đổi thuộc tính của các đổi tượng ( View or non view objects ). Chúng ta có thể xác định rõ các thuộc tính nhất định như
translateX, TextScaleXcủa các đối tượng và thay đổi chúng. Các đặc tính khác của animations có thể thiêt lập thời gian cho các animation, cho dù nó đảo ngược và bao nhiêu lần chúng ta muốn lặp lại nó. - View Animations : Chúng được sử dụng để làm các animations đơn giản như thay đổi kích thước, vị trí , xoay và kiểm soát độ trong suốt. Nó tương đối dễ dàng để thiết lập và cung cấp đủ khả năng để đáp ứng nhu cầu của nhiều ứng dụng, tuy nhiên nó vẫn có những hạn chế riêng.
- Drawable Animations : Chúng được sử dụng để làm các animations bằng các
Drawables resource. Phương thúc này rất hữu ích nếu bạn muốn tạo ra những điều dễ dàng hơn vớiDrawable resourcevàbitmaps.
Sử dụng Animations theo từng trường hợp:
- Nếu bạn chỉ muốn làm các hình động đơn giản trên chế độ xem mà không phải xử lý các chi tiết khác như chạm hoặc nhấp thì sử dụng
View Animations. Vấn đề ở đây vớiView Animationslà mặc dù trạng thái củaViewthay đổi, nhưng nó vẫn còn ở vị trí ban đầu, Điều đó có nghĩa, nếuImageButtonđược di chuyển từ 0 -> 100 pixel ở bên phải, mặc dù nó sẽ hoạt động ở bên phải, nút chạm củaImageButtonvẫn sẽ ở vị trí thứ 0. - View Animations có thể được sử dụng trong màn hình
Splash Screens. Khi sử dụng View Animations, ta nên sử dụngXMLthay vì thiết lập nó trong code. Nên sử dụng các tệpXML, nó dễ đọc hơn và có thể được sử dụng lại nhiều ở các màn hình khác nhau. - Nếu bạn muốn xử lý về cảm ứng, nhấp sau animations thì nên sử dụng Property Animations bởi vì nó sẽ giúp chúng ta thay đổi trạng thái cũng như hành vi.
Animations sử dụng ValueAnimator:
ValueAnimatorlà lớp cho phép các giá trị animate của một số loại duration của một animations được thiết lập bởi một tập hợp giá trị int, float, hoặc màu sắc để làm animation sinh động hơn. Bạn sẽ nhận được mộtValueAnimatorbằng cách gọi một trong những phương thức:ofInt(), ofFloat(), or ofObject(). Dưới đây là code demo
@Override
    protected void onCreate(Bundle savedInstanceState) {
        super.onCreate(savedInstanceState);
        setContentView(R.layout.activity_main);
        Button button = (Button) findViewById(R.id.button);
        button.setOnClickListener(new View.OnClickListener() {
            @Override
            public void onClick(View view) {
                setUpAnimation();
            }
        });
    }

    private void setUpAnimation(){
        final TextView textAnimation = (TextView) findViewById(R.id.text_animation);
        ValueAnimator valueAnimator = ValueAnimator.ofFloat(0f, 500f);
        valueAnimator.setInterpolator(new AccelerateDecelerateInterpolator());
        // Nó sẽ tăng tốc độ ở lần đầu và sau đó giảm dần

        valueAnimator.setDuration(2000);
        valueAnimator.addUpdateListener(new ValueAnimator.AnimatorUpdateListener() {
            @Override
            public void onAnimationUpdate(ValueAnimator animation) {
                float progress = (float) animation.getAnimatedValue();
                textAnimation.setTranslationY(progress);
            }
        });
        valueAnimator.start();
    }
Hoặc cũng có thể làm như vậy bằng cách sử dụng file XML:
- Tạo file /res/animator/value_animator_ex.xml
<?xml version="1.0" encoding="utf-8"?>
<animator xmlns:android="http://schemas.android.com/apk/res/android"
    android:duration="2000"
    android:interpolator="@android:anim/accelerate_decelerate_interpolator"
    android:valueFrom="0f"
    android:valueTo="500f"
    android:valueType="floatType" />
 private void setUpAnimation(){
        final TextView textAnimation = (TextView) findViewById(R.id.text_animation);
        ValueAnimator valueAnimator = (ValueAnimator) AnimatorInflater.loadAnimator(
                this, R.animator.value_animator_ex);

        valueAnimator.addUpdateListener(new ValueAnimator.AnimatorUpdateListener() {
            @Override
            public void onAnimationUpdate(ValueAnimator animation) {
                float progress = (float) animation.getAnimatedValue();
                textAnimation.setTranslationY(progress);
            }
        });
        valueAnimator.start();
    }
Animations sử dụng ObjectAnimator:
- ObjectAnimator là một subclass của ValueAnimator và kết hợp với
timing enginevà giá trị tính toán của ValueAnimator với khả năng tạo ra một thuộc tính mới. Điều này làm cho animating bất kỳ đổi tượng nào cũng dễ dàng sử dung hơn nhiều , vì bạn không cần phải thực hiện cácValueAnimator.AnimatorUpdateListener. Chúng ta có thể tạo ra 1 ObjectAnimator như sau:
 private void setUpAnimation(){
        final TextView textAnimation = (TextView) findViewById(R.id.text_animation);
        ObjectAnimator
                textViewAnimator = ObjectAnimator.ofFloat(textAnimation, "translationY",0f,500f);
        textViewAnimator.setDuration(2000);
        textViewAnimator.setInterpolator(new AccelerateDecelerateInterpolator());
        textViewAnimator.start();
    }
-
Như có thể thấy, chúng ta không phải sử dụng
listenerđể update vị trí củatextvewvì nó đã được thực hiện bởi ObjectAnimator . -
Chúng ta cũng có thể thực hiện như vậy bằng cách sử dụng XML: Tạo file /res/animator/object_animator_ex
<?xml version="1.0" encoding="utf-8"?>
<objectAnimator xmlns:android="http://schemas.android.com/apk/res/android"
    android:duration="2000"  android:interpolator="@android:anim/accelerate_decelerate_interpolator"
    android:propertyName="translationY"
    android:valueFrom="0f"
    android:valueTo="500f"
    android:valueType="floatType" />
 private void setUpAnimation(){
        final TextView textAnimation = (TextView) findViewById(R.id.text_animation);
        ObjectAnimator textViewAnimator = (ObjectAnimator) AnimatorInflater.loadAnimator(this,
                R.animator.object_animator_ex);
        textViewAnimator.setTarget(textAnimation);
        textViewAnimator.start();
    }
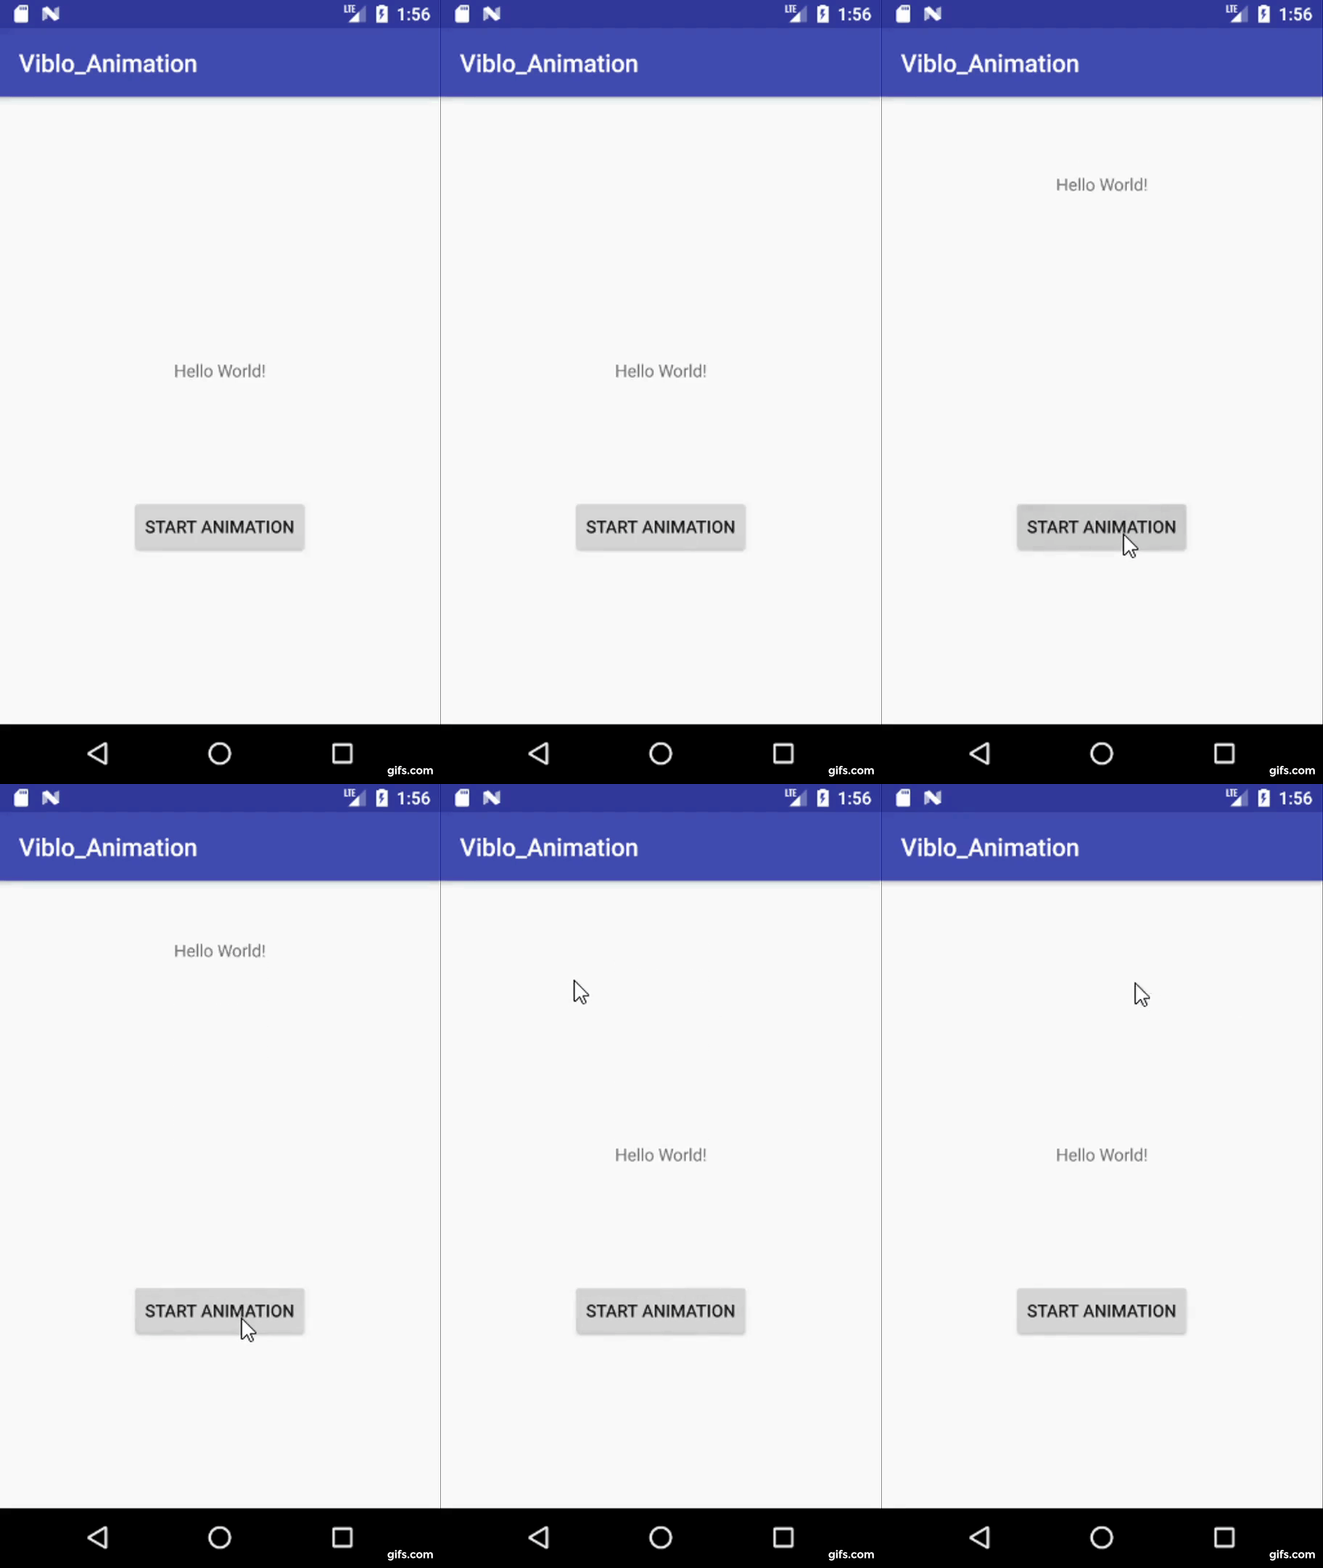
Đây là kết quả của 2 demo trên

Sử dụng nhiều Animations cùng 1 lúc:
- Chúng ta có thể sử dụng nhiều ObjectAnimators bắt đầu cùng 1 lúc và trong cùng khoảng thời gian để thực hiện nhiêu animations, nhưng nó không hiệu quả vì không có kiến thức nào về bất kỳ khung nhìn nào khác. Để làm tương tự chúng ta có thể sử dụng lớp AnimatorSet.
public class MainActivity extends AppCompatActivity {

    private EditText mEditTextSearch;
    private ImageView mImageViewLogo;
    private ImageView mImageSearch;
    private ImageView mImageCancel;
    int SEARCH_ANIMATION_DURATION = 1000;

    @Override
    protected void onCreate(Bundle savedInstanceState) {
        super.onCreate(savedInstanceState);
        setContentView(R.layout.activity_main);

        mEditTextSearch = (EditText) findViewById(R.id.edit_text);
        mImageViewLogo = (ImageView) findViewById(R.id.image_logo);
        mImageSearch = (ImageView) findViewById(R.id.ic_search);
        mImageCancel = (ImageView) findViewById(R.id.ic_delete);
        mImageCancel.setVisibility(View.GONE);

        Button buttonSearch = (Button) findViewById(R.id.button_search);
        buttonSearch.setOnClickListener(new View.OnClickListener() {
            @Override
            public void onClick(View view) {
                setUpAnimationSearch();
                mImageCancel.setVisibility(View.VISIBLE);
            }
        });

        Button buttonCancel = (Button) findViewById(R.id.button_cancel);
        buttonCancel.setOnClickListener(new View.OnClickListener() {
            @Override
            public void onClick(View view) {
                setUpAnimationCancel();
                mImageCancel.setVisibility(View.GONE);
            }
        });
    }

    private void setUpAnimationSearch() {
        DisplayMetrics displayMetrics = getResources().getDisplayMetrics();
        int modifierX = -(displayMetrics.widthPixels - mImageSearch.getWidth());
        ObjectAnimator searchIconLeftAnimation =
                ObjectAnimator.ofFloat(mImageSearch, "translationX", modifierX);
        searchIconLeftAnimation.setDuration(SEARCH_ANIMATION_DURATION);

        ObjectAnimator logoFadeOutAnimator =
                ObjectAnimator.ofFloat(mImageViewLogo, "alpha", 1f, 0f);
        logoFadeOutAnimator.setDuration(SEARCH_ANIMATION_DURATION);

        ObjectAnimator cancelImageFadeInAnimator =
                ObjectAnimator.ofFloat(mImageCancel, "alpha", 0f, 1f);
        cancelImageFadeInAnimator.setDuration(SEARCH_ANIMATION_DURATION);

        ObjectAnimator searchEditTextAnimator =
                ObjectAnimator.ofFloat(mEditTextSearch, "alpha", 0f, 1f);
        searchEditTextAnimator.setDuration(SEARCH_ANIMATION_DURATION);

        AnimatorSet animatorSet = new AnimatorSet();
        animatorSet.play(searchIconLeftAnimation).with(logoFadeOutAnimator);
        animatorSet.play(searchIconLeftAnimation).with(cancelImageFadeInAnimator);
        animatorSet.play(searchIconLeftAnimation).with(searchEditTextAnimator);

        animatorSet.start();
    }

    private void setUpAnimationCancel() {

        ObjectAnimator searchIconRightAnimation =
                ObjectAnimator.ofFloat(mImageSearch, "translationX", 0);
        searchIconRightAnimation.setDuration(SEARCH_ANIMATION_DURATION);

        ObjectAnimator logoFadeInAnimator = ObjectAnimator.ofFloat(mImageViewLogo, "alpha", 0f, 1f);
        logoFadeInAnimator.setDuration(SEARCH_ANIMATION_DURATION);

        ObjectAnimator cancelImageFadeOutAnimator =
                ObjectAnimator.ofFloat(mImageCancel, "alpha", 1f, 0f);
        cancelImageFadeOutAnimator.setDuration(SEARCH_ANIMATION_DURATION);

        ObjectAnimator searchEditTextFadeInAnimator =
                ObjectAnimator.ofFloat(mEditTextSearch, "alpha", 1f, 0f);
        searchEditTextFadeInAnimator.setDuration(SEARCH_ANIMATION_DURATION);

        AnimatorSet animatorSet = new AnimatorSet();
        animatorSet.play(searchIconRightAnimation).with(logoFadeInAnimator);
        animatorSet.play(searchIconRightAnimation).with(cancelImageFadeOutAnimator);
        animatorSet.play(searchIconRightAnimation).with(searchEditTextFadeInAnimator);

        animatorSet.start();
    }
}
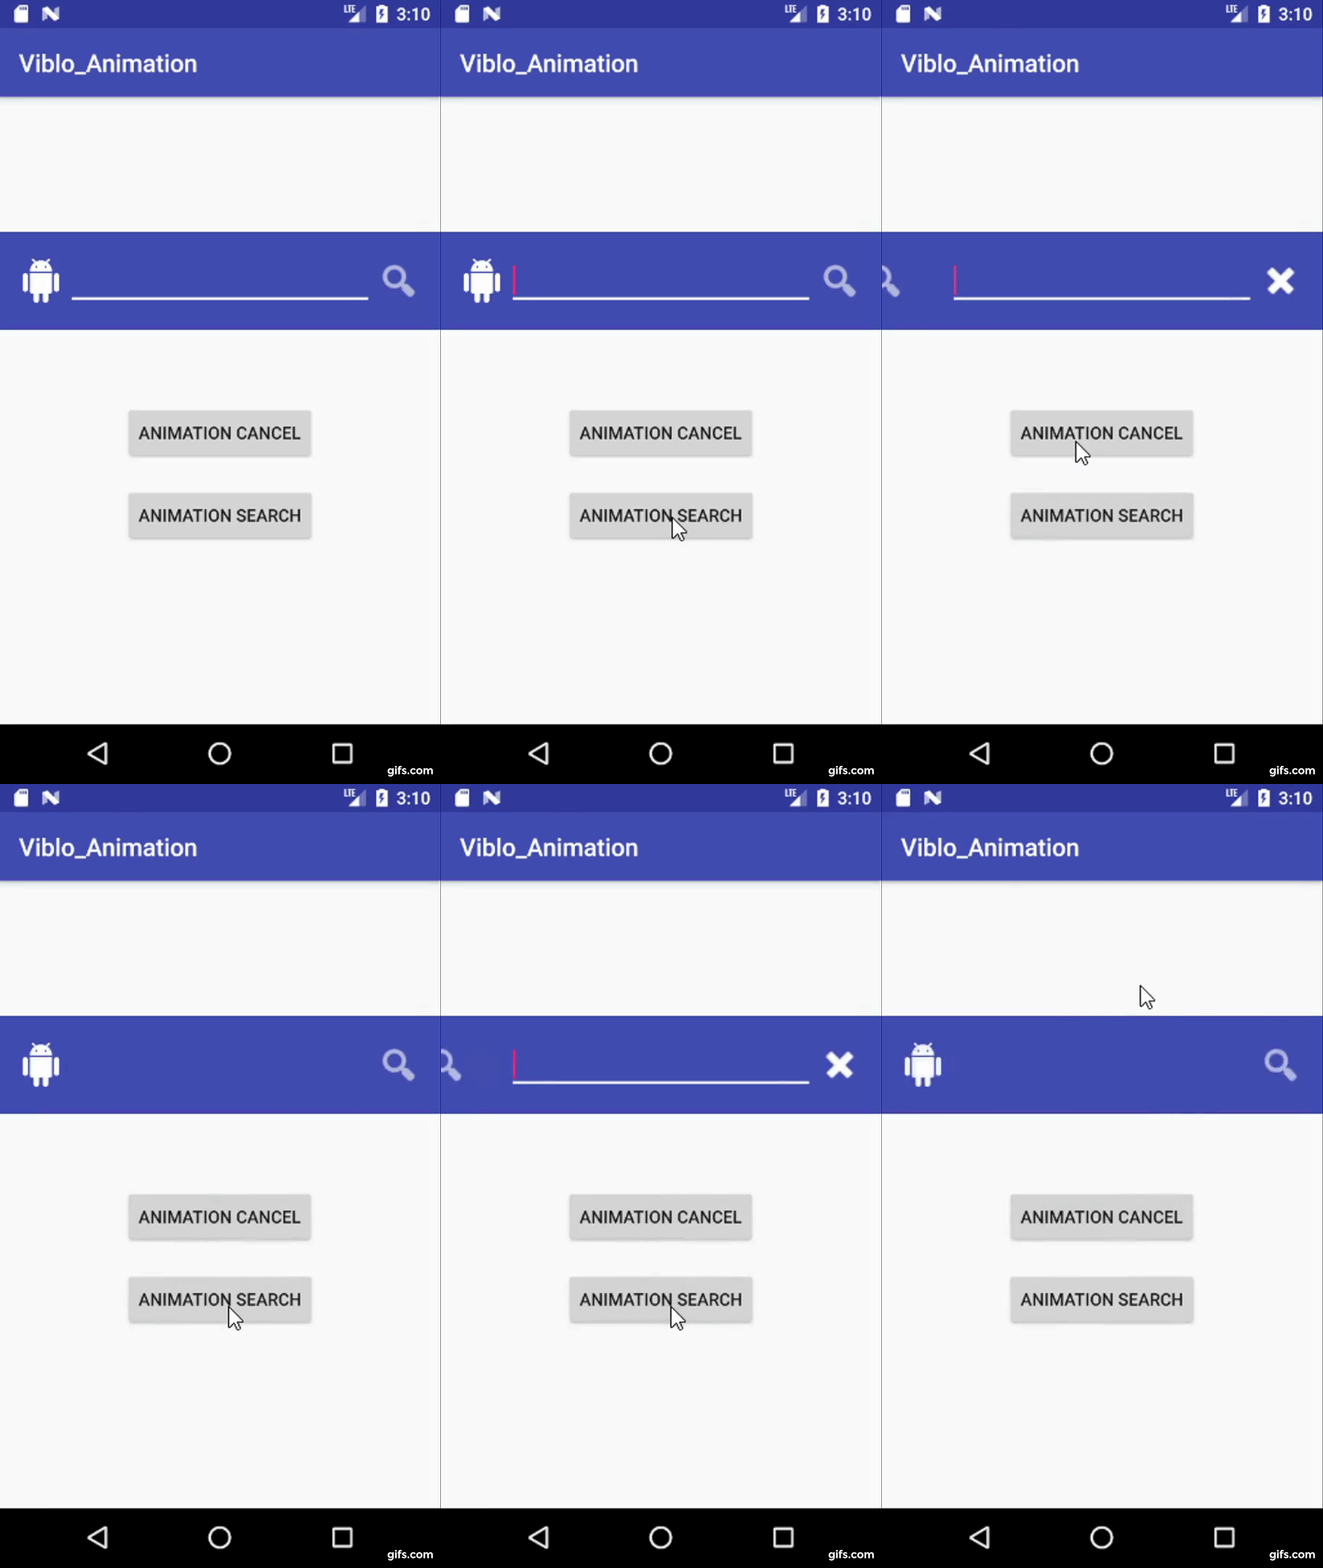
Và đây là kết quả:

Khi chúng ta thực hiện nhiều animations trên chế độ xem duy nhất:
Chúng ta đã thực hiện các animations trên các đối tượng xem khác nhau. Chúng ta có thể thực hiện nhiều animations trên một single view bằng cách sử dụng các phương pháp thiết lập các bộ animator. nhưng nó là một hiệu suất trên cao như có phí xử lý của thiết lập các AnimatorSet và chạy hai Animators song song. Cách tiếp cận tốt hơn là sử dụng ViewPropertyAnimator.
 @Override
    protected void onCreate(Bundle savedInstanceState) {
        super.onCreate(savedInstanceState);
        setContentView(R.layout.activity_main);
        Button button = (Button) findViewById(R.id.button);
        button.setOnClickListener(new View.OnClickListener() {
            @Override
            public void onClick(View view) {
                setUpAnimatio();
            }
        });
    }

    private void setUpAnimatio() {
        TextView textAnimation = (TextView) findViewById(R.id.text_animation);
        textAnimation.animate().rotation(360f).y(500f).setDuration(2000);

        ObjectAnimator rotationAnimator = ObjectAnimator.ofFloat(textAnimation, "rotation", 360f);
        rotationAnimator.setDuration(2000);
        ObjectAnimator translateAnimator =
                ObjectAnimator.ofFloat(textAnimation, "translationY", 500f);
        translateAnimator.setDuration(2000);

        AnimatorSet set = new AnimatorSet();
        set.playTogether(rotationAnimator, translateAnimator);
        set.start();
    }
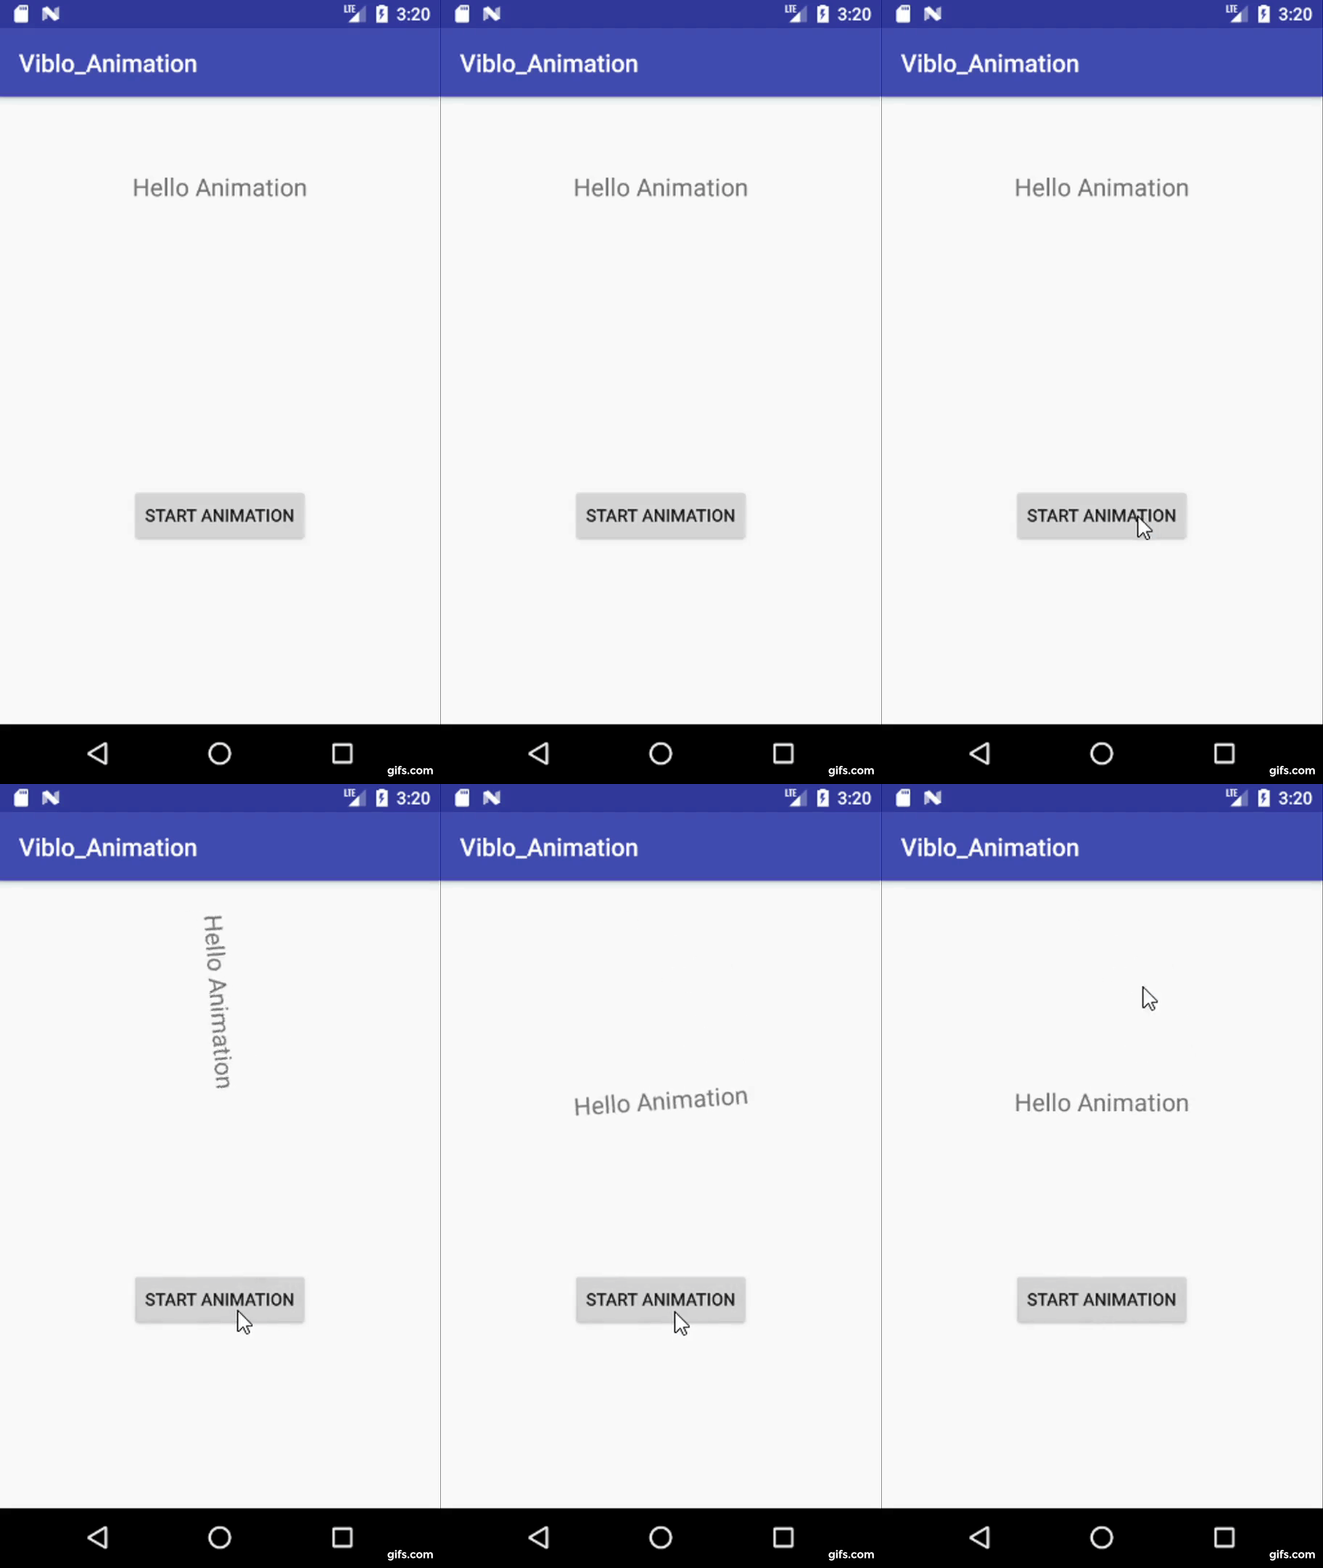
Đây là kết quả

Chúc các bạn thành công!
All rights reserved