Hướng dẫn dùng Overnightjs + Sequelize bằng Typescipt để tạo ứng dụng Nodejs
Bài đăng này đã không được cập nhật trong 4 năm
Chào mọi người !
Bài viết này sẽ hướng dẫn các bạn một cách chi tiết cách sử dụng Sequelize và Overnightjs bằng Typescript để tạo một dứng dụng Nodejs
1. Giới thiệu
- Nodejs thì hiện khá phổ biến hiện nay, nó được xây dựng dựa trên JavaScript runtime. Trước khi bắt đầu mọi thứ thì bạn hãy download về và cài đặt vào máy nhé
- Sequelize là một ORM library, dùng để xây dựng các model trong cở sở dữ liệu cũng như việc tương tác với chúng. Hiện nay Sequelize có nhiều version, bài viết sẽ sử dụng version 6 cũng là version mới nhất
- Expressjs là một framework dùng để xây dựng ứng dụng Nodejs.
- Typescript là một phiên bản nâng cao của Javascript, nó bổ sung kiểu, lớp và hướng đối tượng giúp cho bạn code dễ hơn và tránh sai sót các lỗi về kiểu
- Overnightjs là một thư viện cho phép ta dùng các decorators để định nghĩa các route của Expressjs
2. Yêu cầu hệ thống
- Node.js 12.0 trở lên
- MacOS, Windows (bao gồm WSL), và Linux cũng được hỗ trợ
3. Bắt đầu
3.1 Khởi tạo project
Sau khi cài đặt Nodejs, bạn tạo 1 folder rỗng và dùng command line gõ lệnh npm init để tạo file tạo file package.json
3.2 Cấu hình Typescript
Đâu tiền bạn gõ các lệnh sau để cài đặt các package dùng để build Typescript
npm i --save-dev npm-run-all tsc tsc-watch rimraf
npm install typescript
Sau đó, bạn tạo file tsconfig.json trong root folder với nội dung cấu hình như bên dưới
{
  "compilerOptions": {
    "target": "es6",
    "module": "commonjs",
    "lib": [
      "dom",
      "es6",
    ] /* Specify library files to be included in the compilation. */,
    "sourceMap": true /* Generates corresponding '.map' file. */,
    "outDir": "dist" /* Redirect output structure to the directory. */,
    "rootDir": "src" /* Specify the root directory of input files. Use to control the output directory structure with --outDir. */,
    /* Module Resolution Options */
    "moduleResolution": "node" /* Specify module resolution strategy: 'node' (Node.js) or 'classic' (TypeScript pre-1.6). */,
    "experimentalDecorators": true /* Enables experimental support for ES7 decorators. */,
    "emitDecoratorMetadata": true /* Enables experimental support for emitting type metadata for decorators. */,
    "skipLibCheck": true,
    "esModuleInterop": true
  },
  "compileOnSave": true,
  "exclude": ["node_modules"],
  "include": ["src/**/*.ts"]
}
- Property
includechỉ đường dẫn các file ts sẽ được compile,outDirlà chỉ đường các file js được compile ra, bạn có thể sửa chổ này theo cách của bạn, còn không thì xài mặc định như mình. rootDirchỉ ra root folder của tất cả files ts. Ở đây là thư mục src, vì thế bạn hãy tạo folder này trong thư mục root của bạncompileOnSave: truesẽ tự động build lại các file ts của bạn sau khi save- Bạn có thể xem thêm ý nghĩa của các properties khác ở đây https://www.typescriptlang.org/tsconfig
Bạn mở file package.json, và update lại thuộc tính scripts như sau, Lưu ý là chỉ update chổ thuộc tính scripts thôi nha
"scripts": {
    "test": "echo \"Error: no test specified\" && exit 1",
    "clean": "rimraf dist/*",
    "tsc": "tsc",
    "dev": "npm-run-all build watch",
    "build": "npm-run-all clean tsc",
    "watch": "tsc-watch --onSuccess \"node dist/index\" --onFailure \"echo Beep! Compilation Failed\" --compiler typescript/bin/tsc"
 }
3.3 Thiết lập ứng dụng
Bạn gõ các lệnh sau để cài Express và Sequelize
npm i express sequelize reflect-metadata sequelize-typescript mysql2 body-parser
npm i --save-dev @types/express @types/node @types/validator
Sau đó, bạn tạo file src/models/index.ts để cấu hình kết nối database
import { Sequelize } from "sequelize-typescript";

const sequelize = new Sequelize({
  host: "localhost",
  database: "overnight_sequelize",
  dialect: "mysql",
  username: "root",
  password: "root",
});

export const initDB = async () => {
  await sequelize.authenticate();
  await sequelize.sync({ alter: true });
};
- Hàm
authenticateđể kiểm tra kết nối có đúng không - Hàm
syncđể đồng bộ các models với database, ở đây minh set options làalter: truenghĩa là khi mình chỉnh sửa các Model Class (bạn sẽ được biết ở phần Thiết Lập Models), Sequelize sẽ tự động modify các table trong database của bạn
Tiếp theo, bạn tạo file src/app.ts để tạo ứng dụng bằng Expressjs và gọi hàm initDB
import express from "express";
import { initDB } from "./models";

export class App {
  private app;

  constructor() {
    this.app = express();
    this.boostrap();
  }

  public start(): void {
    const port = process.env.PORT || 3000;

    this.app.listen(port, () => {
      console.log("Server listening on port: " + port);
    });
  }

  private async boostrap() {
    // Connect to db
    await initDB();
  }
}
Cuối cùng, chúng ta sẽ tạo file src/index.ts để chạy ứng dụng và kiểm tra kết nối database
import { App } from "./app";

const app = new App();
app.start();
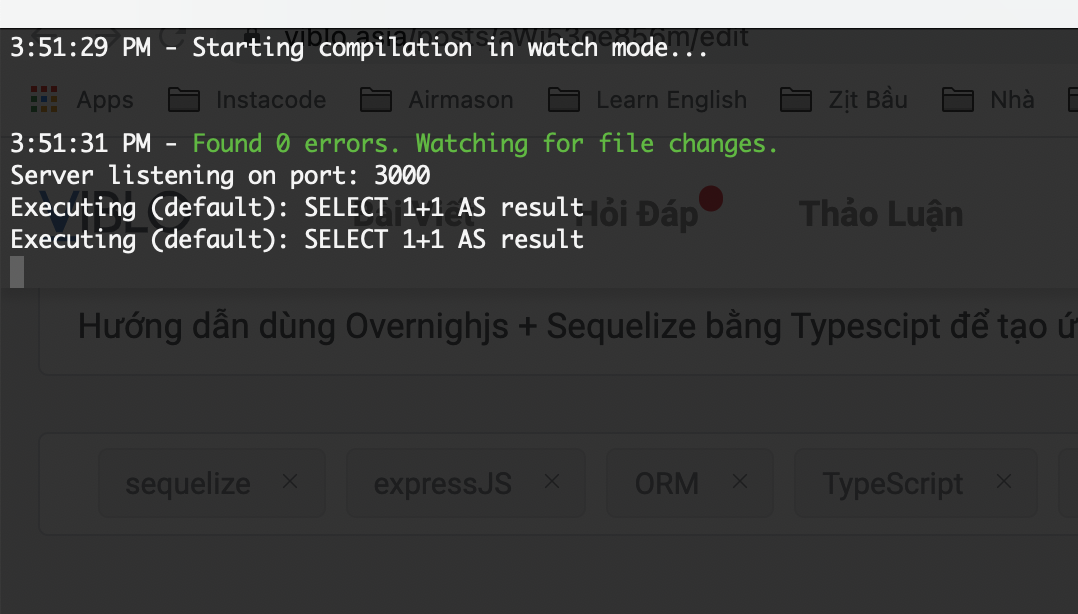
Ở root foler, bạn gõ lệnh sau để chạy ứng dụng
npm run dev

Nếu giao không hiển thị bất kỳ lỗi gì, nghĩa là bạn đã chạy ứng dụng và kết nối database thành công ^^!
Lưu ý chổ này, nếu bạn mở http://localhost:3000/ sẽ gặp lỗi Cannot GET / bởi vì mình chỉ mới chạy ứng dụng thôi ngoài ra chưa set up cho nội dung ứng dụng cả.
4. Thiết lập Models bằng Sequelize
4.1 Tạo Models
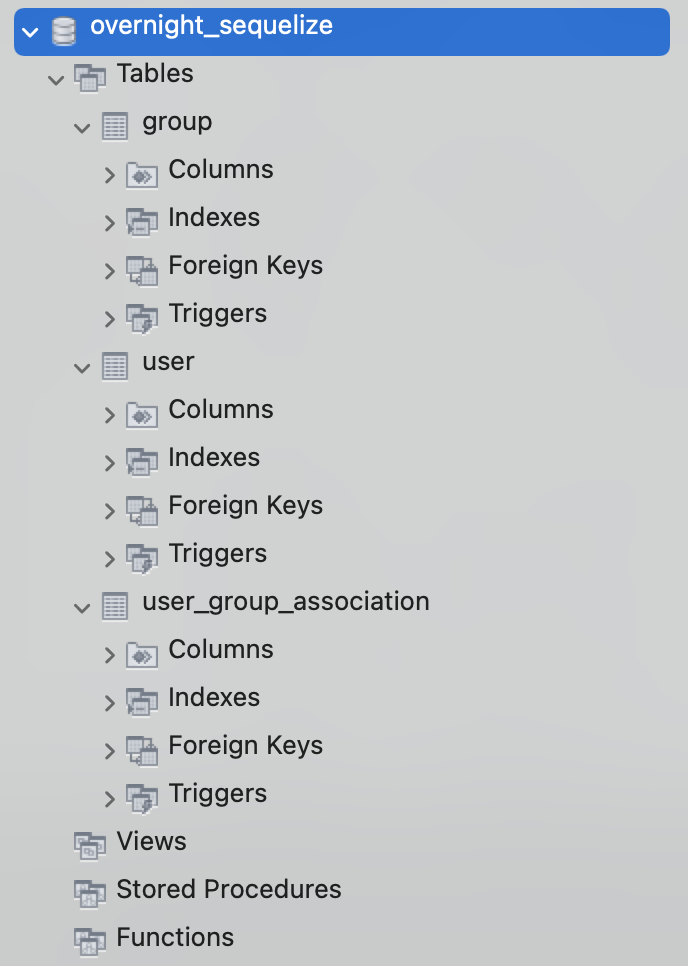
Chúng ta sẽ tạo lần lượt 3 models đó là src/models/User.ts, src/models/Group.ts và src/models/UserGroupAssociation.ts
Model UserGroupAssociation thể hiện mối quan hệ nhiều - nhiều giữa User và Group
src/models/User.ts
import {
  Table,
  Column,
  DataType,
  IsEmail,
  HasMany,
  Model,
} from "sequelize-typescript";
import { UserGroupAssociation } from "./UserGroupAssociation";

@Table({
  tableName: "user",
})
export class User extends Model {
  @Column({ type: DataType.STRING })
  public name!: string;

  @IsEmail
  @Column({ type: DataType.STRING })
  public email!: string;

  @Column({ type: DataType.STRING })
  public password!: string;

  @HasMany(() => UserGroupAssociation)
  public userGroupAssociation?: UserGroupAssociation[];
}
src/models/Group.ts
import { Table, Column, DataType, Model, HasMany } from "sequelize-typescript";
import { UserGroupAssociation } from "./UserGroupAssociation";

@Table({
  tableName: "group",
})
export class Group extends Model {
  @Column({ type: DataType.STRING })
  public name!: string;

  @HasMany(() => UserGroupAssociation)
  public userGroupAssociation?: UserGroupAssociation[];
}
src/models/UserGroupAssociation.ts
import {
  Table,
  Column,
  DataType,
  BelongsTo,
  ForeignKey,
  Model,
} from "sequelize-typescript";
import { User } from "./User";
import { Group } from "./Group";

@Table({
  tableName: "user_group_association",
})
export class UserGroupAssociation extends Model {
  @BelongsTo(() => User)
  public user!: User;

  @ForeignKey(() => User)
  @Column({ type: DataType.INTEGER })
  public userId!: number;

  @BelongsTo(() => Group)
  public group!: Group;

  @ForeignKey(() => Group)
  @Column({ type: DataType.INTEGER })
  public groupId!: number;
}
- Tất cả các Class phải thừa kế class
Modelcủa Sequelize @Tabledecorator để định nghĩa các thiết lập về table@Columndecorator để định nghĩa các thiết lập về column như type, primaryKey, unique ...@IsEmaildùng để valiate giá trị của field có phải là email không trươc khi thực hiện lưu data@HasManytrong model User có nghĩa là một thực thể User có thể có nhiều UserGroupAssociation. Vì thế mình định nghĩa field này ở dạng arrayUserGroupAssociation[], tương tự với Group@BelongsTotrong model UserGroupAssociation có nghĩa là một thực thể UserGroupAssociation chỉ thuộc về một thực thể User duy nhất, vì thế mình định nghĩa field này ở dạng Object mà ở trường hợp này là User@ForeignKeytrong model UserGroupAssociation định nghĩa column là một khoá ngoại liên kết với bảng quan hệ, trường hợp này là bảngUservà khoá ngoại có tên làuserId
Xem thêm tại https://www.npmjs.com/package/sequelize-typescript
4.2 Liên kết Models với Sequelize
Bây giờ các bạn mở file src/models/index.ts và import các Models này vào. Sau đó dùng method addModels liên kết chúng với Sequelize, nếu không chúng ta sẽ không thể tương tác được với database
import { Sequelize } from "sequelize-typescript";
import { User } from "./User";
import { Group } from "./Group";
import { UserGroupAssociation } from "./UserGroupAssociation";

const sequelize = new Sequelize({
  host: "localhost",
  database: "overnight_sequelize",
  dialect: "mysql",
  username: "root",
  password: "root",
});

sequelize.addModels([User, Group, UserGroupAssociation]);

export const initDB = async () => {
  await sequelize.authenticate();
  await sequelize.sync({ alter: true });
};

export { User, Group, UserGroupAssociation };
Chú ý: Ở cuối file mình có thêm lệnh export lại các models đã import ở đầu file. Các models nãy đã được thay đổi bởi hàm addModels, ở nơi khác nếu muốn sử dụng các models này bạn phải import từ đây, còn nếu bạn import ở vị trí định nghĩa thì mình không thể sử dụng được các method của Sequelize và có khi sẽ gặp lỗi
import sai
import { User } from "src/models/User"
import đúng
import { User } from "src/models"

// hoặc

import { User } from "src/models/index"
Sau khi save file này lại, nếu trên command line không xuất hiện bất kỳ lỗi gì thi bạn đã thành công. Mở database ra xem, bạn sẽ thấy các bảng mới được tạo có các config như Model Class

5. Áp dụng Overnightjs
5.1 Cài đặt
Đầu tiên, bạn gõ lệnh sau để cài package Overnightjs (nghe cái tên là thấy có mùi OT nồng nặc  ). Nhưng mình rất thích xài thằng này vì nó cấu hình route đơn giản, code sạch và dễ đọc.
npm install --save @overnightjs/core
5.2 Tạo Controller
Bạn tạo folder src/controllers và tạo file UserController.ts bên trong. Trong đây mình làm ví dụ để tạo 1 user
import { Controller, Post } from "@overnightjs/core";
import { Request, Response } from "express";

import { User } from "../models";

@Controller("api/user")
export class UserController {
  @Post("signup")
  public async signup(req: Request, res: Response): Promise<Response> {
    const { email, password } = req.body;

    // find user
    let user = await User.findOne({
      where: { email },
    });

    if (user) {
      return res.status(400).send("User is existing");
    }

    user = await User.create({
      email,
      password,
    });

    return res.send(user);
  }
}
@Controllerđịnh nghĩa một route cơ sở, tất các các method bên trong UserController sẽ có route bắt đầu làapi/user@Postđịnh nghĩa API có method Post với route làsignup. Tuy nhiên, khi call bạn phải gọi đầy đủ với route làapi/user/signup
5.3 Thêm Controller vào ứng dụng
Bây giờ chúng ta sẽ update lại file src/app.ts, để ứng dụng hiểu các controllers. Các thay đổi chính đó là
- extends class
Servercủa Overnightjs - delete thuộc tính app, bơi vì nó đã có sẵn trong class
Server. Chúng ta có thể sử dụng trực tiếp nó - add UserController vào ứng dụng bằng method
super.addControllers - apply middleware bodyParser để nhận data dễ dàng hơn. Nếu bạn nào chưa biết middleware là gì thì tìm hiểu tại đây
import { Server } from "@overnightjs/core";

import { initDB } from "./models";
import { UserController } from "./controllers/UserController";
import * as bodyParser from "body-parser";

export class App extends Server {
  constructor() {
    super();
    this.applyMiddleWares();
    this.boostrap();
  }

  public start(): void {
    const port = process.env.PORT || 3000;

    this.app.listen(port, () => {
      console.log("Server listening on port: " + port);
    });
  }

  private applyMiddleWares() {
    this.app.use(bodyParser.json());
    this.app.use(bodyParser.urlencoded({ extended: true }));
  }

  private async boostrap() {
    // Connect to db
    await initDB();

    // add Controllers
    super.addControllers([new UserController()]);
  }
}
5.4 Testing
Bây giờ bạn mở Postman hoặc tool nào bạn thích để call thử API http://localhost:3000/api/user/signup nha


Bây giờ bạn thử viết thêm GroupController để tạo group xêm như practice nha ^^!
5.5 Tạo relation data
Tiếp theo đây, Mình sẽ hướng dẫn các bạn cách tạo UserGroupAssociation record. Đầu tiên hãy import Group & UserGroupAssociation vào UserController
import { User, Group, UserGroupAssociation } from "../models";
Chúng ta sẽ thêm method joinGroup vào UserController với nội dung như sau
@Post("join-group")
public async joinGroup(req: Request, res: Response): Promise<Response> {
    const { userId, groupId } = req.body;

    const user = await User.findOne(userId);
    const group = await Group.findOne(groupId);

    if (!user || !group) {
      return res.status(400).send("User or Group is not existing");
    }

    const userGroupAssociation = await UserGroupAssociation.create({
      userId: user.id,
      groupId: group.id,
    });

    return res.send(userGroupAssociation);
 }
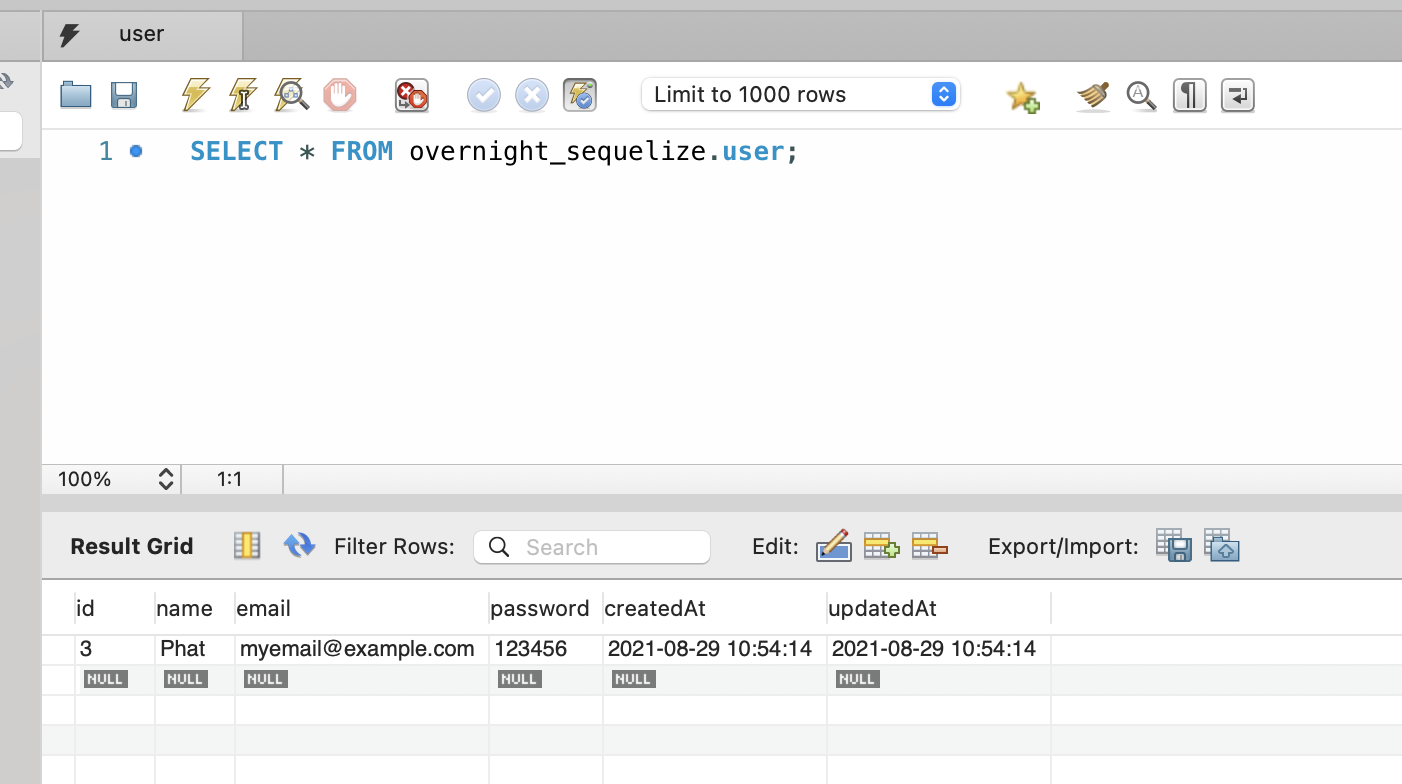
Sau đó bạn thử call API http://localhost:3000/api/user/join-group với data như bên dưới sẽ tạo được 1 record trong bảng user_group_association.
{
    "userId": 3,
    "groupId": 1
}
5.6. Áp dụng Middleware
Đầu tiên, bạn folder src/middlewares và tạo file validateUser.ts như bên dưới
import { Request, Response, NextFunction } from "express";

export default async (req: Request, res: Response, next: NextFunction) => {
  const { email, password, name } = req.body;

  if (!email || !password || !name) {
    return res.status(400).send("Missing data");
  }

  next();
};
Sau đó bạn mở lại UserController, import Middleware decorator của Overnightjs và middleware bạn vừa tạo
import { Middleware } from "@overnightjs/core";
import validateUser from "../middlewares/validateUser";
Sử dụng middleware bằng cách thêm @Middleware decorator ngay method signup như bên dưới
@Post("signup")
@Middleware(validateUser)
public async signup(req: Request, res: Response): Promise<Response> {
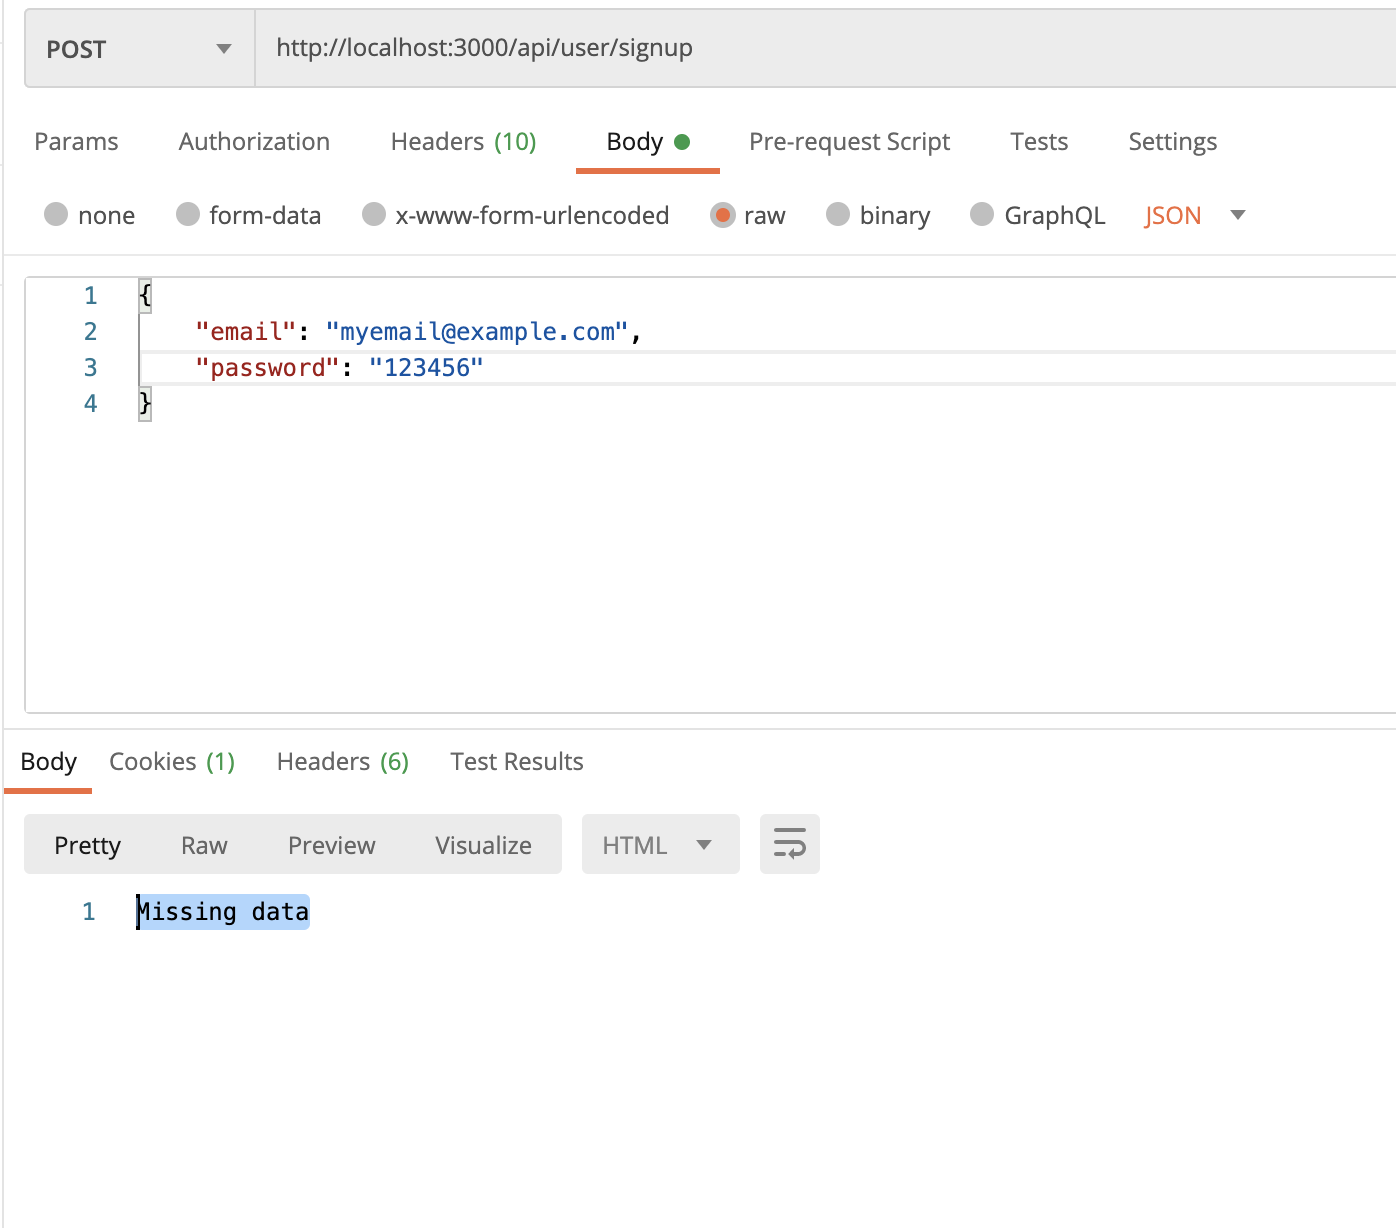
Sau đó bạn call lại API http://localhost:3000/api/user/signup mà không gửi kèm data hoặc data không đầy đủ, bạn sẽ nhận được message "Missing data" như hình bên dưới

- Bạn có thể apply nhiều middleware bằng cách truyền vào
@Middlewaremột array như sau:@Middleware([middleware1, middleware2, ...]) - Overnightjs cũng hỗ trợ
ClassMiddlewaređể áp dụng cho toàn bộ các method của Class, bạn có thể sử dụng như sau@Controller("api/user") @ClassMiddleware([myMiddleware]) export class UserController {
Xem thêm tại https://www.npmjs.com/package/@overnightjs/core
6. Source code
Đây là full source code sau khi làm xong các bước trên (dành cho những bạn nào muốn run trước learn sau 😄). Sau khi tải về bạn chỉ cần run 2 lệnh sau để cài đặt và chạy ứng dụng
npm i
npm run dev
Enjoy!!
All rights reserved