Hướng dẫn cài đặt unisharp/laravel-filemanager thư viện upload ảnh cho ckeditor.js trong laravel
Bài đăng này đã không được cập nhật trong 7 năm
Như các bạn đã biết việc quản lý file trên hệ thống website là điều vô cùng quan trọng, nhất là việc tạo ra 1 store quản lý file được người dùng ưa thích. Do đó việc tích hợp các plugin quản lý file là điều rất cần thiết. Tuy nhiên có rất nhiều plugin quản lý file hiện nay mà mình chưa thể tìm hiểu hết được. Và do đó mình chỉ đề cập đến một plugin mà mình đã sử dụng và thấy nó khá tốt, và được sử dụng để tích hợp khá phổ biến trong các dự án TMĐT. Open source đó là responsive file manager. Mục đích của mình là hưỡng dẫn các bạn tích hợp plugin responsive file manager vào ckeditor để quản lý file dựa trên kiến trúc của FrameWork laravel.
1.Cài đặt package
composer require unisharp/laravel-filemanager
Bạn có thể tham khảo thêm tại : https://www.responsivefilemanager.com/
2.Chỉnh sửa file config/app.php
- Thêm vào providers
Unisharp\Laravelfilemanager\LaravelFilemanagerServiceProvider::class,
Intervention\Image\ImageServiceProvider::class,
- và thêm vào aliases
'Image' => Intervention\Image\Facades\Image::class,
Tiếp theo mở file filemanager/config/config.php để cấu hình: Sửa giá trị USE_ACCESS_KEYS này thành TRUE, giá trị này dùng để ngăn chặn trường hợp người khác truy cập vào responsive file manager trên website.
define('USE_ACCESS_KEYS', TRUE);
3.Publish package’s config và assets :
php artisan vendor:publish --tag=lfm_config
php artisan vendor:publish --tag=lfm_public
4.Chạy commands để xóa cache
php artisan route:clear
php artisan config:clear
Chỉ định đường dẫn của thư mục upload:
/*
	|--------------------------------------------------------------------------
	| DON'T TOUCH (base url (only domain) of site).
	|--------------------------------------------------------------------------
	|
	| without final / (DON'T TOUCH)
	|
	*/
	'base_url' => ((isset($_SERVER['HTTPS']) && $_SERVER['HTTPS'] == "on") ? "https" : "http"). "://". @$_SERVER['HTTP_HOST'],
	/*
	|--------------------------------------------------------------------------
	| path from base_url to base of upload folder
	|--------------------------------------------------------------------------
	|
	| with start and final /
	|
	*/
	'upload_dir' => '/uploads/',
	/*
	|--------------------------------------------------------------------------
	| relative path from filemanager folder to upload folder
	|--------------------------------------------------------------------------
	|
	| with final /
	|
	*/
	'current_path' => '../uploads/',

	/*
	|--------------------------------------------------------------------------
	| relative path from filemanager folder to thumbs folder
	|--------------------------------------------------------------------------
	|
	| with final /
	| DO NOT put inside upload folder
	|
	*/
	'thumbs_base_path' => '../thumbs/',


	/*
	|--------------------------------------------------------------------------
	| FTP configuration BETA VERSION
	|--------------------------------------------------------------------------
	|
	| If you want enable ftp use write these parametres otherwise leave empty
	| Remember to set base_url properly to point in the ftp server domain and
	| upload dir will be ftp_base_folder + upload_dir so without final /
	|
	*/
	'ftp_host'         => false, //put the FTP host
	'ftp_user'         => "user",
	'ftp_pass'         => "pass",
	'ftp_base_folder'  => "base_folder",
	'ftp_base_url'     => "http://site to ftp root",
	// Directory where place files before to send to FTP with final /
	'ftp_temp_folder'  => "../temp/",
	/*
	|---------------------------------------------------------------------------
	| path from ftp_base_folder to base of thumbs folder with start and final /
	|---------------------------------------------------------------------------
	*/
	'ftp_thumbs_dir' => '/thumbs/',
	'ftp_ssl' => false,
	'ftp_port' => 21,
- Có lưu ý là các bạn nên config tới thư mục cho chính xác nhé, nếu ko sẽ lỗi đấy.
Tiếp theo là dowload bộ CkEditor:
Install CKEditor In Laravel
composer require unisharp/laravel-ckeditor
- Thêm đoạn config này vào providers
Unisharp\Ckeditor\ServiceProvider::class,
Sau đó chạy :
php artisan vendor:publish --tag=ckeditor
- Cuối cùng thay đổi thông tin cấu hình của ckeditor như sau: ta tạo 1 file html để test
<textarea id="my-editor" name="content" class="form-control">{!! old('content', 'test editor content') !!}</textarea>

<script src="//cdn.ckeditor.com/4.6.2/standard/ckeditor.js"></script>

<script>
  var options = {
    filebrowserImageBrowseUrl: '/laravel-filemanager?type=Images',
    filebrowserImageUploadUrl: '/laravel-filemanager/upload?type=Images&_token=',
    filebrowserBrowseUrl: '/laravel-filemanager?type=Files',
    filebrowserUploadUrl: '/laravel-filemanager/upload?type=Files&_token='
  };
</script>
ở đoạn code này tạo 1 textarea với id là 'my-editor' đây là vùng hiển thị của ckeditor tiếp theo là import thư viện từ cdn và khai báo cấu hình option đến thư viện mà ta đã cài đặt và cuối cùng là khởi tạo một ckeditor với id và option đã tạo
<script>
CKEDITOR.replace('my-editor', options);
</script>
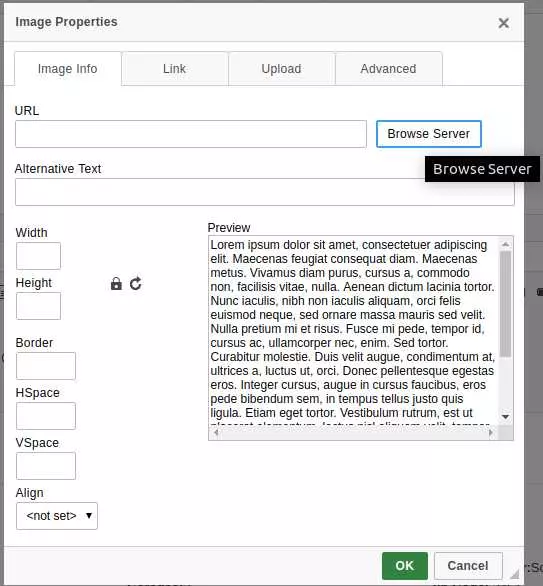
Đây là chức năng upload hình ảnh của ckeditor khi chúng ta chưa cài đặt thư viện:

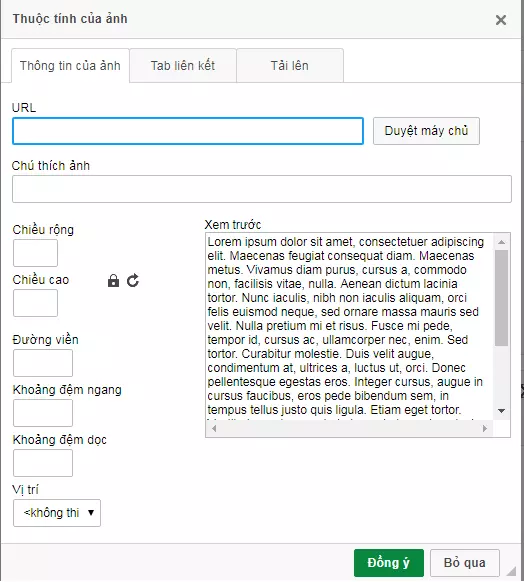
Và đây là thành quả sau khi chúng ta đã cài đặt xong :

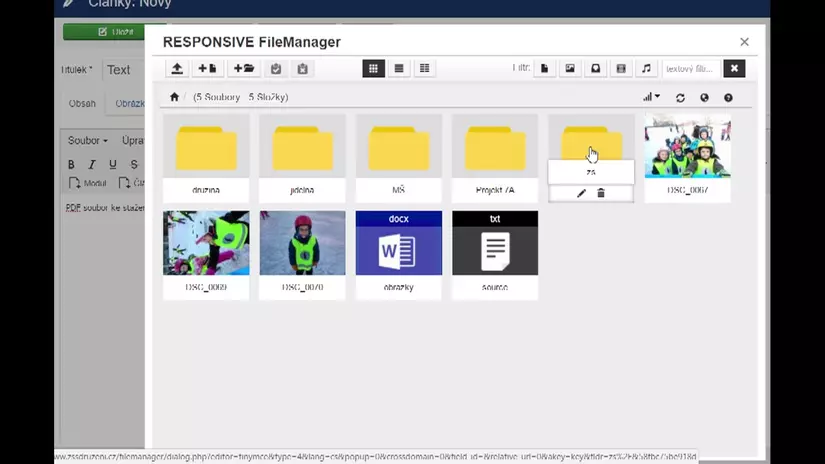
Và đây là giao diện File-Manager :

OK thế là xong, khá đơn giản đúng ko ạ. Chúc các bạn thành công và có trải nghiệm tốt với store upload images này nhé !
All rights reserved