Hot Module Replacement (HMR) hoạt động như thế nào
Hot Module Replacement (HMR) là một kỹ thuật cho phép chúng ta có thể cập nhật code của ứng dụng mà không cần phải tải lại toàn bộ trang. Điều này có thể cải thiện đáng kể trải nghiệm của dev khi tiết kiệm được rất nhiều thời gian so với những framework dùng model MVC như JavaEE khi mà mỗi lần muốn apply thay đổi, bạn phải build ra 1 file war và deploy nó lên 1 web server và nguyên process mất 5p chỉ để thay đổi 1 dòng code,...
Cách Hoạt Động Của HMR
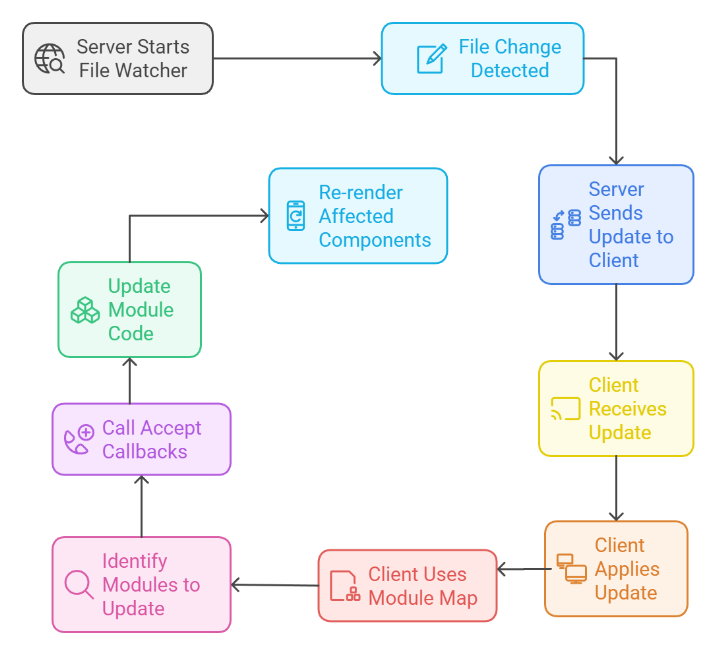
Cơ chế HMR hoạt động dựa trên sự kết hợp giữa các thành phần phía server và client, giúp phát hiện các thay đổi trong source code và áp dụng các cập nhật đó vào ứng dụng mà không cần tải lại toàn bộ trang. Điều này giúp giảm thời gian chờ đợi và tránh mất trạng thái của ứng dụng.
Cách thức hoạt động của HMR gồm những bước chính sau:
- File Watcher: Server bắt đầu start 1 service (Chokidar) với nhiệm vụ giám sát các thay đổi trong files (JS, CSS, HTML,.....)
- Change Detection: Khi trong file có sự thay đổi, Chokidar sẽ phát hiện được changes và tạo 1 request để update module
- Update Transmission: Server sẽ gửi bản update module qua cho client thông qua Websocket
- Client-side Handling: client sẽ có 1 Hashmap chứa tất cả các module của nó, hashmap này sẽ giúp client update được đúng module cần thiết khi nhận data từ server thông qua Websocket
- Accept Callbacks: mỗi 1 module có thể define một accept callback, đây sẽ là 1 hàm được triggered khi nhận được update. hàm callback này sẽ chịu trách nhiệm update module và cập nhật lại cây DOM mà không cần phải trigger reload trên toàn trang

Thử implement nào 💪
App demo này sẽ gồm 1 server NodeJS listen ở port 8080 với path là /, khi ta access qua browser, app sẽ trả về 1 file index.html, trong file html đấy sẽ gọi lên module main.js
--> app.js --> child.js
Về phía client
File index.html sẽ nhìn như sau, file html này khá đơn giản, nhiệm vụ chính chỉ import file main.js
<body>
  <h1>Hello!</h1>
  <div id="app"></div>
  <script type="module" src="/src/main.js"></script>
</body>
Tiếp đến là file main.js, file này cũng chưa có gì nhiều, chỉ import module app
//main.js
import { mount } from "./app.js";

mount();
Tiếp theo là app.js, file này sẽ show lên thời gian hiện tại và tiếp tục append nội dung từ module con Child
//app.js
import { Child } from "./child.js";

export function mount() {
  const $app = document.querySelector("#app");
  const now = new Date().toLocaleTimeString();
  $app.innerText = `Hello, it is ${now}\n\n`;
  $app.appendChild(Child());
}
Và cuối cùng là child.js, đây là file ta sẽ thực hiện demo Hot Module Replacement, khi được initialized, nó sẽ set callback function cho Hot Module để có thể trigger khi nhận được update từ server thông qua Websocket
//child.js
if (import.meta.hot) { // check nếu module đã được initialize với Hot Module
  console.log("IN HERE");
  // set callback cho Hot Module
  import.meta.hot.accept((newModule) => {
    if (newModule) {
      console.log(`Handling hot reload accept for ${import.meta.url}`);
      document.querySelector("#child").replaceWith(newModule.Child()); // update code mới
    }
  });
}

/** @param {HTMLElement} parent */
export function Child() {
  const $el = document.createElement("div");
  $el.id = "child";
  $el.textContent = `Hello my ID is ${(Math.random() * 100).toFixed(0)}`;
  return $el;
}
Và quan trọng nhất , File client.js gồm những chức năng sau
- Initialize các
HotModule - lưu toàn bộ các
HotModulevàoMap() - nhận update module từ server thông qua Websocket, lấy đúng module cần update từ
Map()và gọi callback function
class HotModule {
  file;
  cb;

  constructor(file) {
    this.file = file;
  }

  accept(cb) {
    this.cb = cb;
  }

  handleAccept() {
    if (!this.cb) {
      return;
    }

    console.log(`${this.file}?t=${Date.now()}`)

    import(`${this.file}?t=${Date.now()}`).then((newMod) => {
      this.cb(newMod);
    });
  }
}

// initialize HotModule thông qua import.meta
function hmrClient(mod) {
  const url = new URL(mod.url);
  const hot = new HotModule(url.pathname);
  import.meta.hot = hot;
  window.hotModules.set(url.pathname, hot);
}

/** @type {Map<string, HotModule>} */
window.hotModules ??= new Map(); // map để lưu trữ tất cả các HotModules

//listen data từ websocket
window.ws;
if (!window.ws) {
  const ws = new window.WebSocket("ws://localhost:8080");

  ws.addEventListener("message", (msg) => {
    const data = JSON.parse(msg.data);
    const mod = window.hotModules.get(data.file);
    mod.handleAccept();
  });

  window.ws = ws;
}
Về phía server
Ta sẽ bắt đầu từ file server.js, bước đầu tiên này ta sẽ tạo 1 app NodeJS cơ bản
const app = express();
const server = http.createServer(app);
sau đấy là initialize Websocket
const ws = new WebSocketServer({
  server,
});
let socket;

ws.on("connection", (_socket) => {
  console.log("Connected...");
  socket = _socket;
});
Tiếp theo đấy sẽ tạo 1 instance của Chokidar và cho nó giám sát tất cả files js trong folder src
const watcher = chokidar.watch("src/*.js");
watcher.on("change", (file) => {
  const normalizedFile = file.replace(/\\/g, '/');
  console.log("File changed: ", normalizedFile);
  const payload = JSON.stringify({
    type: "file:changed",
    file: `/${normalizedFile}`,
  });
  socket.send(payload);
});
Đến bước quan trọng, ta sẽ tạo 1 middleware hmrMiddleware, middleware này sẽ import module client.js, ta sẽ append thêm module này vào content của file trước khi gửi response về lại cho browser
const hmrMiddleware = async (req, res, next) => {
  if (!req.url.endsWith(".js")) {
    return next();
  }

  let client = await fs.readFile(path.join(__dirname, "client.js"), "utf8");
  let content = await fs.readFile(path.join(__dirname, req.url), "utf8");

  content = `
  ${client}

  hmrClient(import.meta)

  ${content}
  `;

  res.type(".js");
  res.send(content);
};
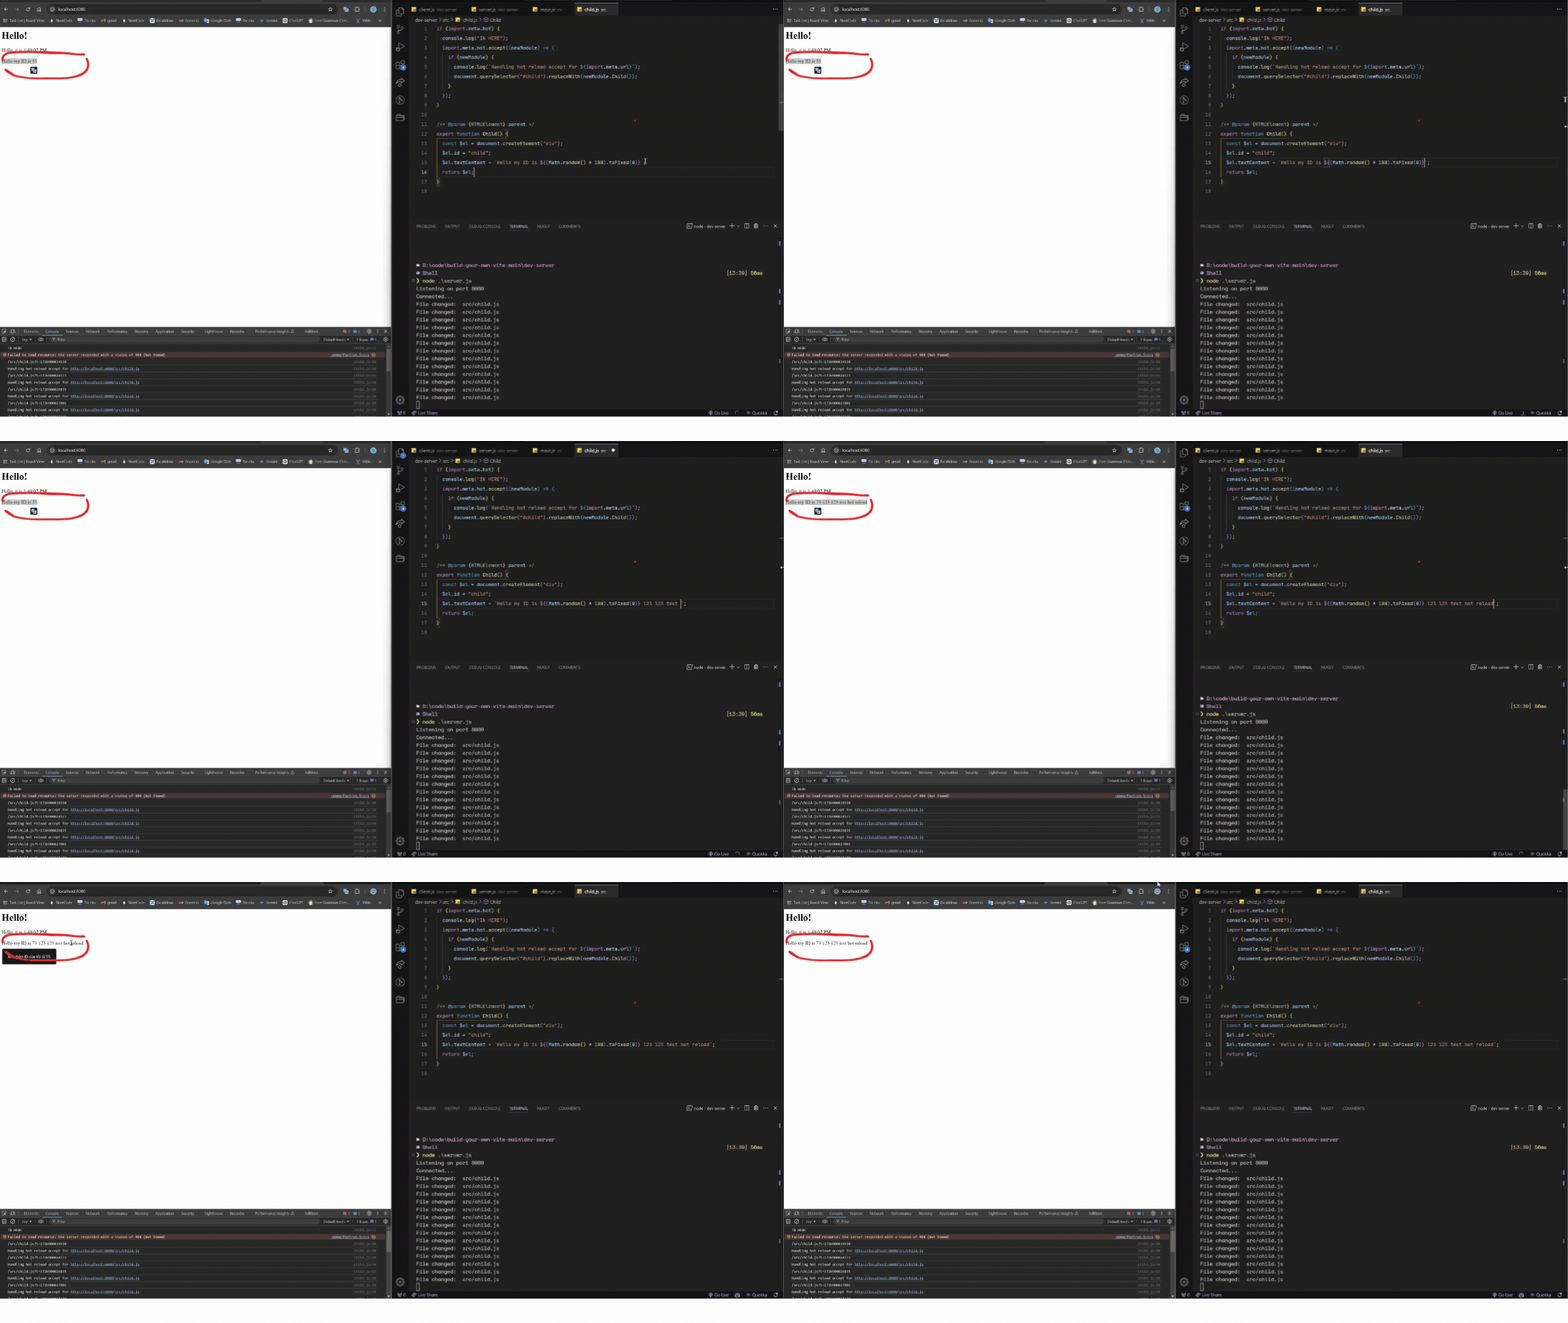
Và kết quả ...
 Như đã thấy, ta chỉ cần save code là mọi changes đã được apply ngay lập tức mà không cần phải hard reload lại toàn trang web
Hy vọng các bạn sẽ thấy bài viết này thú vị, hẹn gặp lại vào blog tới 😊
All rights reserved