Học Bloc Pattern theo cách dễ hiểu nhất
Bài đăng này đã không được cập nhật trong 5 năm
Lời mở đầu
Sau khi mình đã chia sẻ xong series về Stream, RxDart thì mình tiếp tục chia sẻ về Bloc Pattern. Mình chia sẻ theo lộ trình như vậy là vì để hiểu được Bloc Pattern thì bạn nên hiểu về Stream trước. Bạn có thể tham khảo series về Stream mình viết khá đầy đủ:
Chinh phục Stream và RxDart trong 3 nốt nhạc
Ok, giờ chúng ta bắt đầu thôi.
1. Bloc Pattern là gì
Tất nhiên nó là một Pattern rồi, mục đích của Pattern này là tách code business logic ra khỏi UI thay vì code gộp chung cả logic và UI vô cùng 1 file, để sau này spec mới có yêu cầu sửa code business logic hay sửa UI sẽ dễ dàng sửa hơn. Code business logic được tách ra đó người ta đặt tên là Bloc (Business Logic Component). Bên cạnh đó, nó còn giúp chúng ta quản lý state của 1 màn hình tốt hơn vì các state sẽ được quản ở Bloc tách biệt với UI. Chính vì vậy, mỗi màn hình trong app flutter chúng ta nên tạo ra 1 bloc để xử lý logic của màn hình đó và quản lý state của cả màn hình đó.
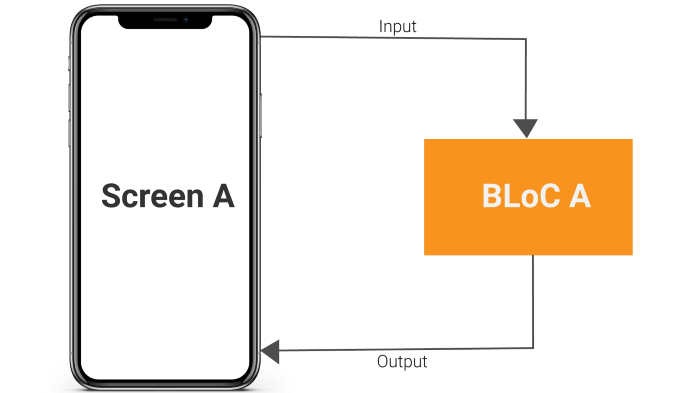
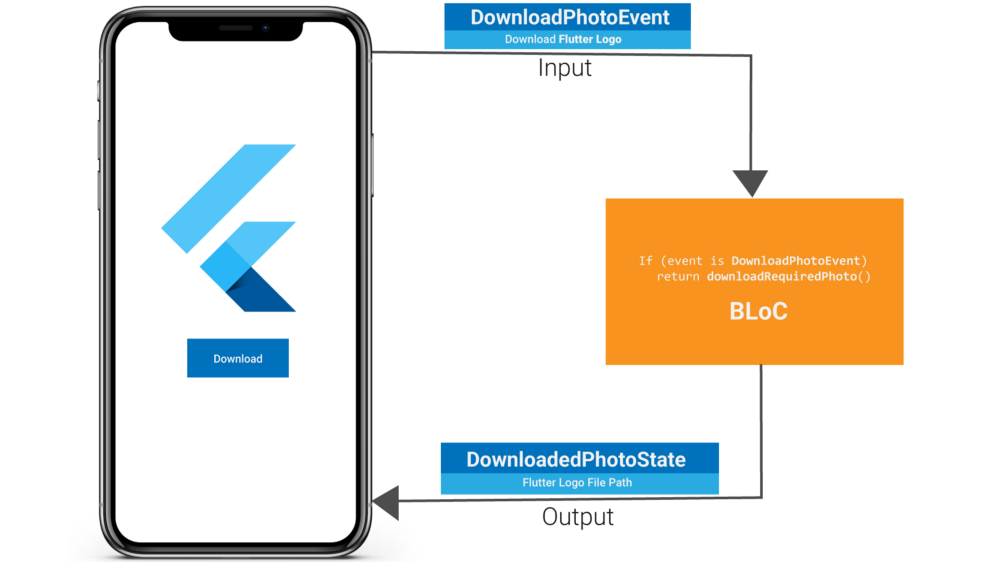
Lấy ví dụ trong dự án thực tế lun nha, khi user click vào button download tức là user gửi cái link URL của ảnh vào Bloc, Bloc sẽ nhận link URL đó và xử lý download thành cái ảnh và truyền cho UI để UI hiển thị lên màn hình.
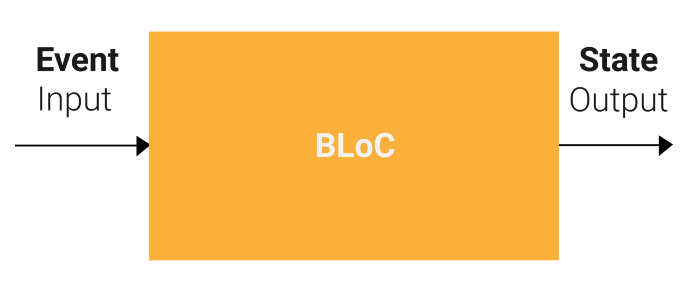
Tóm lại, mô hình của Bloc trông sẽ thế này. Truyền event vào bloc, bloc xử lý và cho ra output là State của UI.
Ok, ý tưởng của Bloc chỉ đơn giản vậy thôi. Ý tưởng đó nó khá là phù hợp với Stream Controller. Vì vậy để triển khai ý tưởng đó, người ta sử dụng đến StreamController
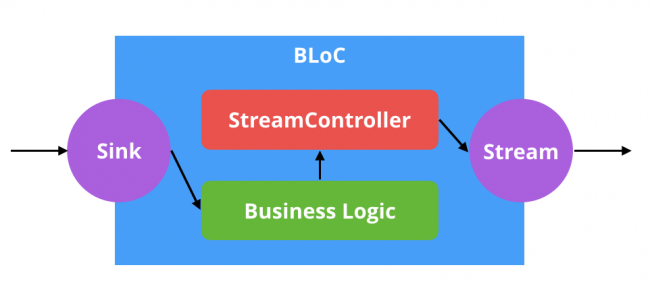
Input sẽ được thêm vào sink của StreamController và phía UI sẽ sử dụng stream để lắng nghe nhận state mỗi khi có event được add vào sink. (Nếu bạn chưa hiểu về cách hoạt động của StreamController, bạn có thể tìm đọc tại đây)
2. Code minh họa
Để minh họa cho bloc pattern, mình sẽ sử dụng code Dart chay trước để lượt bỏ bớt code UI rườm rà rồi tiếp đến mình sẽ xây dựng app Flutter từ code minh họa này.
Bài toán ở đây là giả lập cái remote điều khiển TV với 3 button đơn giản là: tăng âm lượng, giảm âm lượng và mute (tắt tiếng)
Để triển khai bloc thông thường qua 4 bước được chia ra 4 file:
Bước 1: Định nghĩa các Event
Tạo 1 file là remote_event.dart và định nghĩa các event sau: event tăng âm lượng, giảm âm lượng và mute.
abstract class RemoteEvent {}

// event tăng âm lượng, user muốn tăng lên bao nhiêu thì truyền vào biến increment
class IncrementEvent extends RemoteEvent {
  IncrementEvent(this.increment);

  final int increment;
}

// event giảm âm lượng, user muốn giảm bao nhiêu thì truyền vào biến decrement
class DecrementEvent extends RemoteEvent {
  DecrementEvent(this.decrement);

  final int decrement;
}

// event mute
class MuteEvent extends RemoteEvent {}
Bước 2: Định nghĩa các State
Tạo 1 file là remote_state.dart, ở đây app mình chỉ quan tâm đến data duy nhất là (volume) âm lượng để update UI.
class RemoteState {
  RemoteState(this.volume);

  final int volume;
}
Bước 3: Code business logic trong Bloc
Tạo 1 file là remote_bloc.dart để code business logic. Như mình đã giới thiệu ở trên, nhiệm vụ của bloc là nhận event từ UI, phân biệt UI vừa gửi cho mình event gì (có thể là event tăng âm lượng hoặc mute, ...) để xử lý chúng và truyền state lại cho UI.
import 'dart:async';

import 'remote_event.dart';
import 'remote_state.dart';

class RemoteBloc {
  var state = RemoteState(70); // init giá trị khởi tạo của RemoteState. Giả sử TV ban đầu có âm lượng 70

  // tạo 2 controller
  // 1 cái quản lý event, đảm nhận nhiệm vụ nhận event từ UI
  final eventController = StreamController<RemoteEvent>();

  // 1 cái quản lý state, đảm nhận nhiệm vụ truyền state đến UI
  final stateController = StreamController<RemoteState>();

  RemoteBloc() {
    // lắng nghe khi eventController push event mới
    eventController.stream.listen((RemoteEvent event) {
      // người ta thường tách hàm này ra 1 hàm riêng và đặt tên là: mapEventToState
      // đúng như cái tên, hàm này nhận event xử lý và cho ra output là state

      if (event is IncrementEvent) {
        // nếu eventController vừa add vào 1 IncrementEvent thì chúng ta xử lý tăng âm lượng
        state = RemoteState(state.volume + event.increment);
      } else if (event is DecrementEvent) {
        // xử lý giảm âm lượng
        state = RemoteState(state.volume - event.decrement);
      } else {
        // xử lý mute
        state = RemoteState(0);
      }

      // add state mới vào stateController để bên UI nhận được
      stateController.sink.add(state);
    });
  }

  // khi không cần thiết thì close tất cả controller
  void dispose() {
    stateController.close();
    eventController.close();
  }
}
Bước 4: apply bloc vào UI
Cuối cùng sẽ code vào file có UI, giả sử là file main.dart
import 'remote_bloc.dart';
import 'remote_event.dart';
import 'remote_state.dart';

void main() async {
  // tạo đối tượng bloc
  final bloc = RemoteBloc();

  // UI lắng nghe state thay đổi để update UI
  bloc.stateController.stream.listen((RemoteState state) {
    print('Âm lượng hiện tại: ${state.volume}');
  });

  // giả sử 1s sau, user click vào tăng âm lượng thêm 5
  await Future.delayed(Duration(seconds: 1));
  bloc.eventController.sink.add(IncrementEvent(5)); // từ UI push event đến bloc

  // giả sử 2s sau, user click vào giảm âm lượng đi 10
  await Future.delayed(Duration(seconds: 2));
  bloc.eventController.sink.add(DecrementEvent(10)); // từ UI push event đến bloc

  // giả sử 3s sau, user click vào mute luôn
  await Future.delayed(Duration(seconds: 3));
  bloc.eventController.sink.add(MuteEvent()); // từ UI push event đến bloc
}
Run chương trình và chúng ta nhận được output là:
Âm lượng hiện tại: 75 // từ 70 tăng thêm 5
Âm lượng hiện tại: 65 // từ 75 giảm xuống 10
Âm lượng hiện tại: 0 // mute
Code chạy ra sao
Ở đây ta có 2 StreamController là eventController và stateController. Khi user thực hiện thao tác gì đó (ví dụ click vào mute) thì chúng ta sẽ push event input đó vào eventController.sink và đăng ký lắng nghe event đó tại eventController.stream (ngay khi khởi tạo đối tượng RemoteBloc là mình đã cho lắng nghe nhận event ngay). Vậy là chúng ta đã nhận được event input từ user input, chúng ta sẽ xử lý event đó (nếu là tăng âm lượng thì xử lý tăng, giảm thì xử lý giảm và mute thì xử lý mute). Xử lý xong cho ra output là state chúng ta sẽ push event state đó vào stateController.sink và ở phía UI sẽ đăng ký nhận event từ stateController.streamđể update UI.
Event từ user input ->
add vào eventController.sink ->
eventController.stream nhận event đó ->
code logic xử lý event đó cho ra output là state ->
add state đó vào stateController.sink ->
stateController.stream nhận state đó ->
ở UI đăng ký lắng nghe stateController.stream và update UI
3. Build app flutter đơn giản từ code minh họa
Giờ chúng ta sẽ áp dụng code mô phỏng cái remote TV trên vào app thật. Có 1 widget hỗ trợ chúng ta làm update UI là StreamBuilder. 3 file remote_event.dart, remote_state.dart, remote_bloc.dart sẽ được tái sử dụng lại nhé. Chúng ta sẽ chỉ replace code trong main.dart
Vì nhìn code UI hơi rối rắm nên mình có đánh dấu code <=== new đó là những chỗ apply code minh họa ở phần 2 vào UI nha. Chỉ cần chú ý đến nó là đủ 
import 'package:bloc_remote_demo/remote_bloc.dart';
import 'package:bloc_remote_demo/remote_event.dart';
import 'package:bloc_remote_demo/remote_state.dart';
import 'package:flutter/material.dart';
void main() {
runApp(MyApp());
}
class MyApp extends StatelessWidget {
Widget build(BuildContext context) {
return MaterialApp(
title: 'Flutter Demo',
theme: ThemeData(
primarySwatch: Colors.blue,
visualDensity: VisualDensity.adaptivePlatformDensity,
),
home: MyHomePage(title: 'Flutter Demo Home Page'),
);
}
}
class MyHomePage extends StatefulWidget {
MyHomePage({Key key, this.title}) : super(key: key);
final String title;
_MyHomePageState createState() => _MyHomePageState();
}
class _MyHomePageState extends State<MyHomePage> {
final bloc = RemoteBloc(); // khởi tạo bloc <=== new
Widget build(BuildContext context) {
return Scaffold(
body: Center(
child: StreamBuilder<RemoteState>( // sử dụng StreamBuilder để lắng nghe Stream <=== new
stream: bloc.stateController.stream, // truyền stream của stateController vào để lắng nghe <=== new
initialData: bloc.state, // giá trị khởi tạo chính là volume 70 hiện tại <=== new
builder: (BuildContext context, AsyncSnapshot<RemoteState> snapshot) {
return Text('Âm lượng hiện tại: ${snapshot.data.volume}'); // update UI <=== new
},
),
),
floatingActionButton: Row(
mainAxisAlignment: MainAxisAlignment.end,
children: <Widget>[
FloatingActionButton(
onPressed: () => bloc.eventController.sink.add(IncrementEvent(5)), // add event <=== new
child: Icon(Icons.volume_up),
),
FloatingActionButton(
onPressed: () => bloc.eventController.sink.add(DecrementEvent(10)), // add event <=== new
child: Icon(Icons.volume_down),
),
FloatingActionButton(
onPressed: () => bloc.eventController.sink.add(MuteEvent()), // add event <=== new
child: Icon(Icons.volume_mute),
)
],
),
);
}
void dispose() {
super.dispose();
bloc.dispose(); // dispose bloc <=== new
}
}
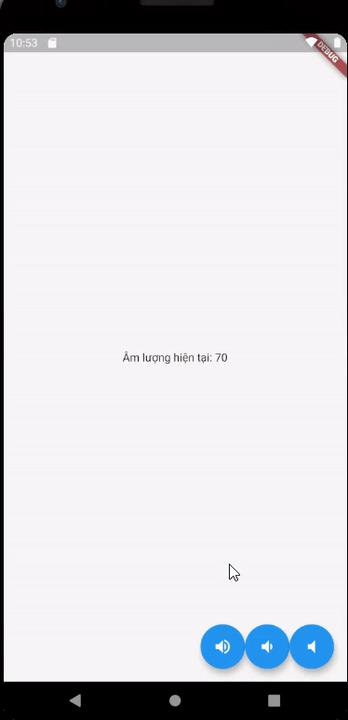
Đây là thành quả:
Kết luận
Như vậy, mình đã giới thiệu về gốc gác của Bloc Pattern, bây giờ để có thể tăng tốc độ code các bạn có thể học cách sử dụng các package như flutter_bloc.
Nguồn tham khảo: https://medium.com/flutterpub/bloc-state-management-with-easy-approach-b53fb6d15829
All rights reserved
