Gửi Web Push Notification với Onesignal and Rails
Bài đăng này đã không được cập nhật trong 4 năm
Trong bài này, chúng ta sẽ cùng tìm hiểu và build web push notification một cách đơn giản và dễ dàng với Onesignal và Rails. Chúng ta sẽ làm theo step như dưới này.
Tạo và config App mới trên Onesignal
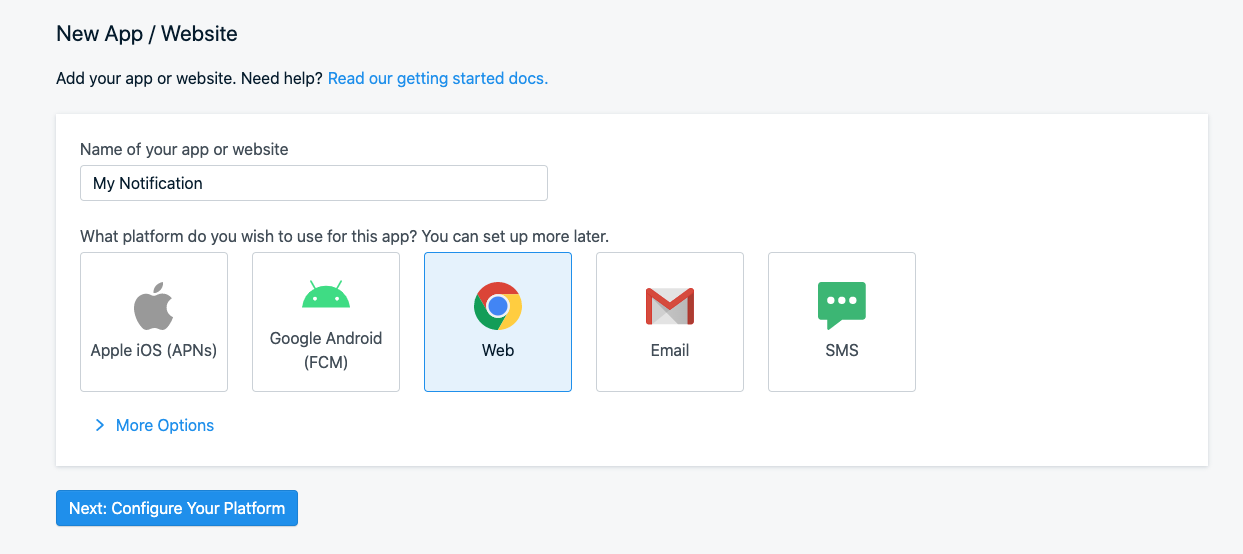
Đầu tiên, tạo tài khoản với OneSignal và ấn vào "New App/Website"
- Điền tên vào và chọn Web
-
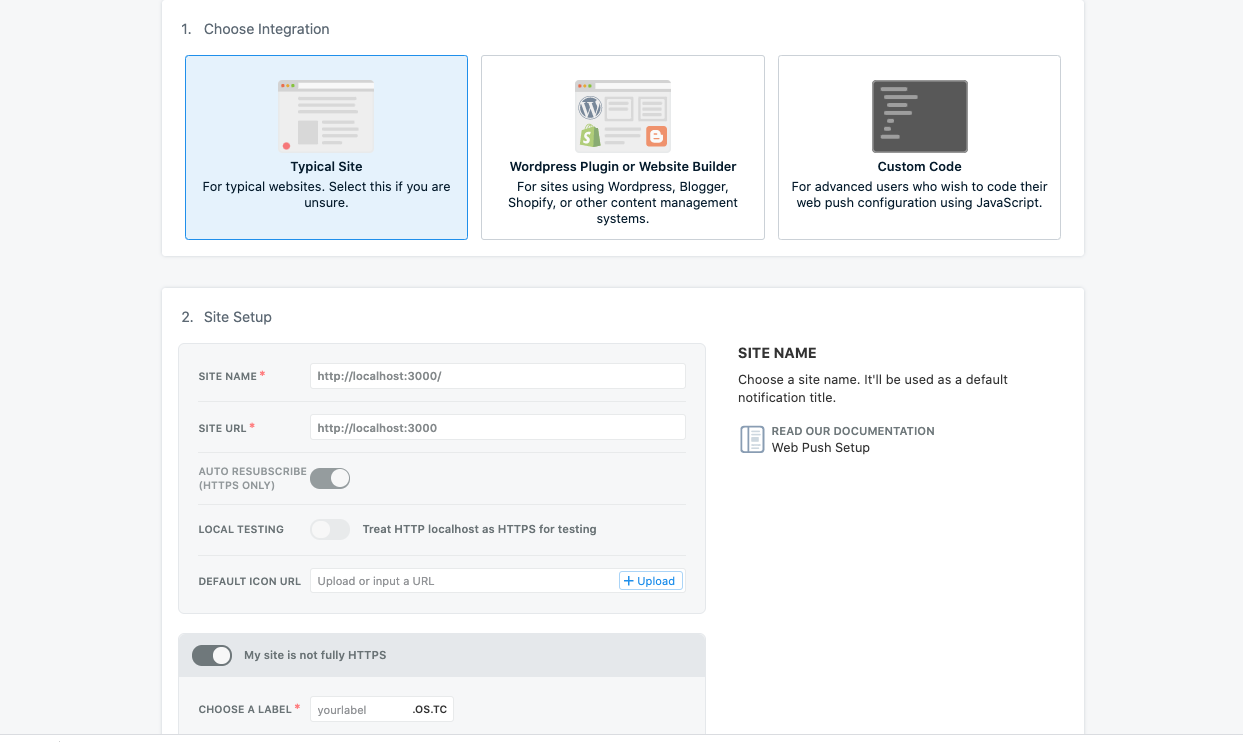
Chọn Typical Site. Trong Site setup, điền Site name, site url, và để test trên localhost, chúng ta phải enable option: "My site is not fully HTTPS" và điền label vào.
![]()
-
Add javascript code
Phần tiếp theo là add OneSignal javascript code to HTML page của mình. Ở đây mình sẽ để trong head.
<script>
  window.OneSignal = window.OneSignal || [];
  OneSignal.push(function() {
    OneSignal.init({
      appId: "3d543914-428e-4ba4-91f1-12ce9cbb6f46",
    });

    OneSignal.on('subscriptionChange', function (isSubscribed) {
      if (isSubscribed) {
        OneSignal.getUserId(function(userId) {
          var user_params = { onesignal_id: userId };

          // request lên server để lưu userId vào database ...

        });
      }
    });
  });
</script>
Sau khi page load xong, nó sẽ popup để hỏi user Allow notification. Nếu user Allow, chúng ta sẽ lấy được userId trên OneSignal của user đó. Chúng ta có thể request lên server để lưu userId vào database để lúc push notification mình biết sẽ phải gửi đến user nào.

Send Notification từ Rails
Ở trên chúng ta đã config xong phần js của OneSignal rồi. Tiếp theo chúng ta cần phải thực hiện việc gửi notification đến user nào đó từ backend.
- Để hỗ trợ trong việc gọi API của OneSignal, mình sẽ sử dụng gem:
https://github.com/tbalthazar/onesignal-ruby
gem 'one_signal', '~> 0.0.8'
- Tạo file trong initializers để init one_signal gem:
config/initializers/onesignal.rbvà điền api_key và user_auth_key của mình vào như sau:
require 'one_signal'

OneSignal::OneSignal.api_key = ""
OneSignal::OneSignal.user_auth_key = ""
- Send Push Notification
params = {
  app_id: "", # điền vào APP_ID
  contents: {
    en: 'Hi, This is my notification.'
  },
  include_player_ids: [player_id] # select player_id từ database ra. Nó là userId mình get từ OneSignal ở trên
}
begin
  response = OneSignal::Notification.create(params: params)
  notification_id = JSON.parse(response.body)["id"]
rescue OneSignal::OneSignalError => e
  puts "--- OneSignalError  :"
  puts "-- message : #{e.message}"
  puts "-- status : #{e.http_status}"
  puts "-- body : #{e.http_body}"
end
Vào console và thử xem nhé. Đến đây là xong, chúng ta đã gửi được Web Push Notification rồi.
References:
https://github.com/tbalthazar/onesignal-ruby
https://sweetcode.io/web-push-notifications-onesignal-ruby-rails/
All rights reserved
