Gửi email trong ứng dụng Rails
Bài đăng này đã không được cập nhật trong 6 năm
Giới thiệu
Thông qua ứng dụng Rails với ActionMailer, ActionMailer Preview và thông qua nhà cung cấp dịch vụ email của bên thứ ba như Gmail. Bài viết này là hướng dẫn cơ bản để xây dựng chức năng gửi email trong Rails.
Gửi email bằng ActionMailer và Gmail
Chuẩn bị
Đầu tiên xây dựng một ứng dụng gửi email cho người dùng mới tạo.
$ rails new app_send_email
$ rails g scaffold user name:string email:string
$ rake db:migrate
Tiếp theo
rails g mailer example_mailer
Vào app/mailers/application_mailer.rb thay đổi địa chỉ email mặc định thành địa chỉ email bạn muốn sử dụng để làm địa chỉ người gửi.
class ApplicationMailer < ActionMailer::Base
  default from: "from@example.com"
  layout "mailer"
end
Tiếp theo tạo một method trong app/mailers/example_mailer.rb để có thể tùy chỉnh việc gửi email
def sample_email(user)
  @user = user
  mail(to: @user.email, subject: "Sample Email")
end
Bước tiếp theo viết nội dung muốn gửi đến User
app/views/example_mailer/sample_email.html.erb
<!DOCTYPE html>
<html>
  <head>
    <meta content='text/html; charset=UTF-8' http-equiv='Content-Type' />
  </head>
  <body>
    <h1>Hi <%= @user.name %></h1>
    <p>
       Sample mail sent using smtp.
    </p>
  </body>
</html>
Có thể tạo thêm phần văn bản cho email app/views/example_mailer/sample_email.text.erb
Hi <%= @user.name %>
Sample mail sent using smtp.
Giờ thì ta có thể test với ActionMailer Preview để kiểm tra bố cục email như thế nào.
test/mailers/previews/example_mailer_preview.rb
class ExampleMailerPreview < ActionMailer::Preview
  def sample_mail_preview
    ExampleMailer.sample_email(User.first)
  end
end
Truy cập http://localhost:3000/rails/mailers/example_mailer/sample_mail_preview bạn sẽ thấy bản xem trước của email.
Cấu hình
Theo mặc định, Rails sẽ gửi email qua SMTP. Giờ thì chúng ta sẽ thiết lập các biến môi trường và cấu hình cho ứng dụng để có thể gửi email.
Ở đây là môi trường development /config/environments/development.rb.
config.action_mailer.default_url_options = {host: "localhost:3000"}
config.action_mailer.perform_deliveries = true
config.action_mailer.delivery_method = :smtp
config.action_mailer.smtp_settings = {
    address: "smtp.gmail.com",
    port: 587,
    user_name: ENV["gmail_username"],
    password: ENV["gmail_password"],
    authentication: :plain,
    enable_starttls_auto: true
}
Cài thêm gem "dotenv-rails" để thiết lập biến môi trường .env
gmail_username: "username@gmail.com"
gmail_password: "Gmail password"
Nếu bạn gặp lỗi Net::SMTPAuthenticationError thì vào https://support.google.com/mail/answer/185833?hl=en tạo một password theo hướng dẫn,
thay thế cho biến môi trường gmail_password
Chạy thử
OK giờ chúng ta sẽ kích hoạt sự kiện gửi email sau khi User vừa được tạo thành công đến email của người dùng.
def create
    @user = User.new(user_params)

    respond_to do |format|
      if @user.save

        ExampleMailer.sample_email(@user).deliver

        format.html { redirect_to @user, notice: 'User was successfully created.' }
        format.json { render :show, status: :created, location: @user }
      else
        format.html { render :new }
        format.json { render json: @user.errors, status: :unprocessable_entity }
      end
    end
 end
Cuối cùng test xem chức năng đã chạy đúng hay chưa.
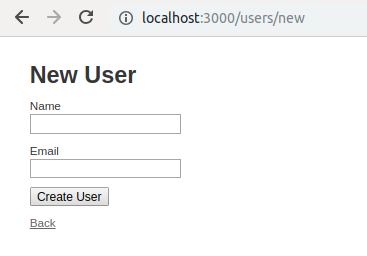
Ở form New User nhập username và email và bấm submit
Check email xem kết quả nhận được.

Kết luận
Trên là hướng dẫn cơ bản cho việc gửi email trong ứng dụng Rails. Các bạn có thể tham khảo thêm gửi email bằng ActionMailer và Mailgun ở link sau https://launchschool.com/blog/handling-emails-in-rails
All rights reserved
