Free App Chat with PubNub and AngularJS - Part 1
Bài đăng này đã không được cập nhật trong 4 năm

PubNub AngularJS SDK giúp chúng ta đơn giản việc tích hợp PubNub vào trong app web chỉ bằng những API đơn giản mà PubNub cung cấp. SDK cũng support cho hệ thống lắng nghe sự kiện của AngularJS, giúp cho AngularJS app dễ dàng hơn trong việc lắng nghe sự kiện của PubNub
Bài viết này là bài viết đầu tiền trong chuỗi các bài viết giúp các bạn tạo ra một chat app bằng AngularJS. Trong bài này, chúng ta sẽ tập trung vào các chức năng: publishing and subcribing.
Installing PubNub AngularJS SDK
Để làm việc với angularjs chắc chắn chúng ta sẽ dùng những công cụ như npm hay bower để quản lý các package. Tuy nhiên chúng ta vẫn có thể sử dụng được các package một cách trực tiếp đó là add chúng vào bằng script tag.
- Sử dụng PubNub CDN:
<script src="https://cdn.pubnub.com/pubnub-3.7.21.js"></script>
<script src="https://cdn.pubnub.com/sdk/pubnub-angular/pubnub-angular-3.2.1.js"></script>
- Sử dụng NPM
npm install --save pubnub pubnub-angular
- Sử dụng bower
bower install --save pubnub pubnub-angular
Creating a simple chat room
Chúng ta sẽ tạo ra các user với id khác nhau để có thể chát live với các user khác
Step 1: Initiating PubNub
Thêm vào Angular app đoạn code dưới đây:
angular.module('app', ["pubnub.angular.service"])
 .controller('ChatCtrl', function($scope, Pubnub) {
   $scope.channel = 'messages-channel';
   // Generating a random uuid between 1 and 100 using an utility function from the lodash library.
   $scope.uuid = _.random(100).toString();
   Pubnub.init({
         publish_key: 'YOUR-PUBNUB-PUBLISH-KEY',
         subscribe_key: 'YOUR-PUBNUB-SUBSCRIBE-KEY',
         uuid: $scope.uuid
       });
 });
Chúng ta vừa set up PubNub với app keys mà các bạn có thể lấy được từ đây. Làm theo hướng dẫn bạn sẽ có được app keys để chạy SDK  . Trong đoạn code có một đoạn
 $scope.uuid = _.random(100).toString(); đoạn này có nghĩa là sinh ra một Uid bất kì để định danh User, nếu bạn quên mất bước này thì không sao, PubNub SDK sẽ giúp bạn tạo ra một Uid 
Step 2: Sending messages
Để có thể gửi được messages đi thì bạn sẽ phải định nghĩa một function ở trong app controller. Những message này sẽ được gửi thông qua mạng của PubNub:
    // Send the messages over PubNub Network
    $scope.sendMessage = function() {
       // Don't send an empty message
       if (!$scope.messageContent || $scope.messageContent === '') {
            return;
        }
        Pubnub.publish({
            channel: $scope.channel,
            message: {
                content: $scope.messageContent,
                sender_uuid: $scope.uuid,
                date: new Date()
            },
            callback: function(m) {
                console.log(m);
            }
        });
        // Reset the messageContent input
        $scope.messageContent = '';

    }
Sau đó chúng ta add html chứa input và button để có thể nhập message từ bán phím và gửi nó đi bằng button có trigger là sendMessage().
<div ng-controller="ChatCtrl">
     <form ng-submit="sendMessage()">
        <input ng-model="messageContent" type="text" placeholder="Type your message" />
        <button type="submit">Send</button>
     </form>
</div>
Step 3: Receiving and displaying messages
Từ bước trên chúng ta đã có thể gửi được message đi, giờ chúng ta sẽ xử lý để nhận được messages. Để làm được điều đó chúng ta cần subcribe messages-channel channel và nhảy đến callback khi mà messages được gửi lên, rồi lưu chúng vào $scope.messages array.
$scope.messages = [];

// Subscribing to the ‘messages-channel’ and trigering the message callback
Pubnub.subscribe({
    channel: $scope.channel,
    triggerEvents: ['callback']
});

// Listening to the callbacks
$scope.$on(Pubnub.getMessageEventNameFor($scope.channel), function (ngEvent, m) {
    $scope.$apply(function () {
        $scope.messages.push(m)
    });
});

// A function to display a nice uniq robot avatar
$scope.avatarUrl = function(uuid){
    return 'http://robohash.org/'+uuid+'?set=set2&bgset=bg2&size=70x70';
};
Giờ chúng ta sẽ thêm html để hiển thị những messages đã được gửi lên:
<ul>
     <li ng-repeat="message in messages">
       <img src="{{avatarUrl(message.sender_uuid)}}" alt="{{message.sender_uuid}}">
       <span class="title">Anonymous robot #{{ message.sender_uuid }}</span>
       <p>{{ message.date | date:"MM/dd/yyyy 'at' h:mma"}}</br> {{ message.content }}</p>
     </li>
</ul>
Vậy là chúng ta đã hoàn thành một app chat đơn giản với PubNub AngulaJS SDK.
Ở phần tiếp theo, chúng ta sẽ học cách làm sao có thể load được previuos messages.
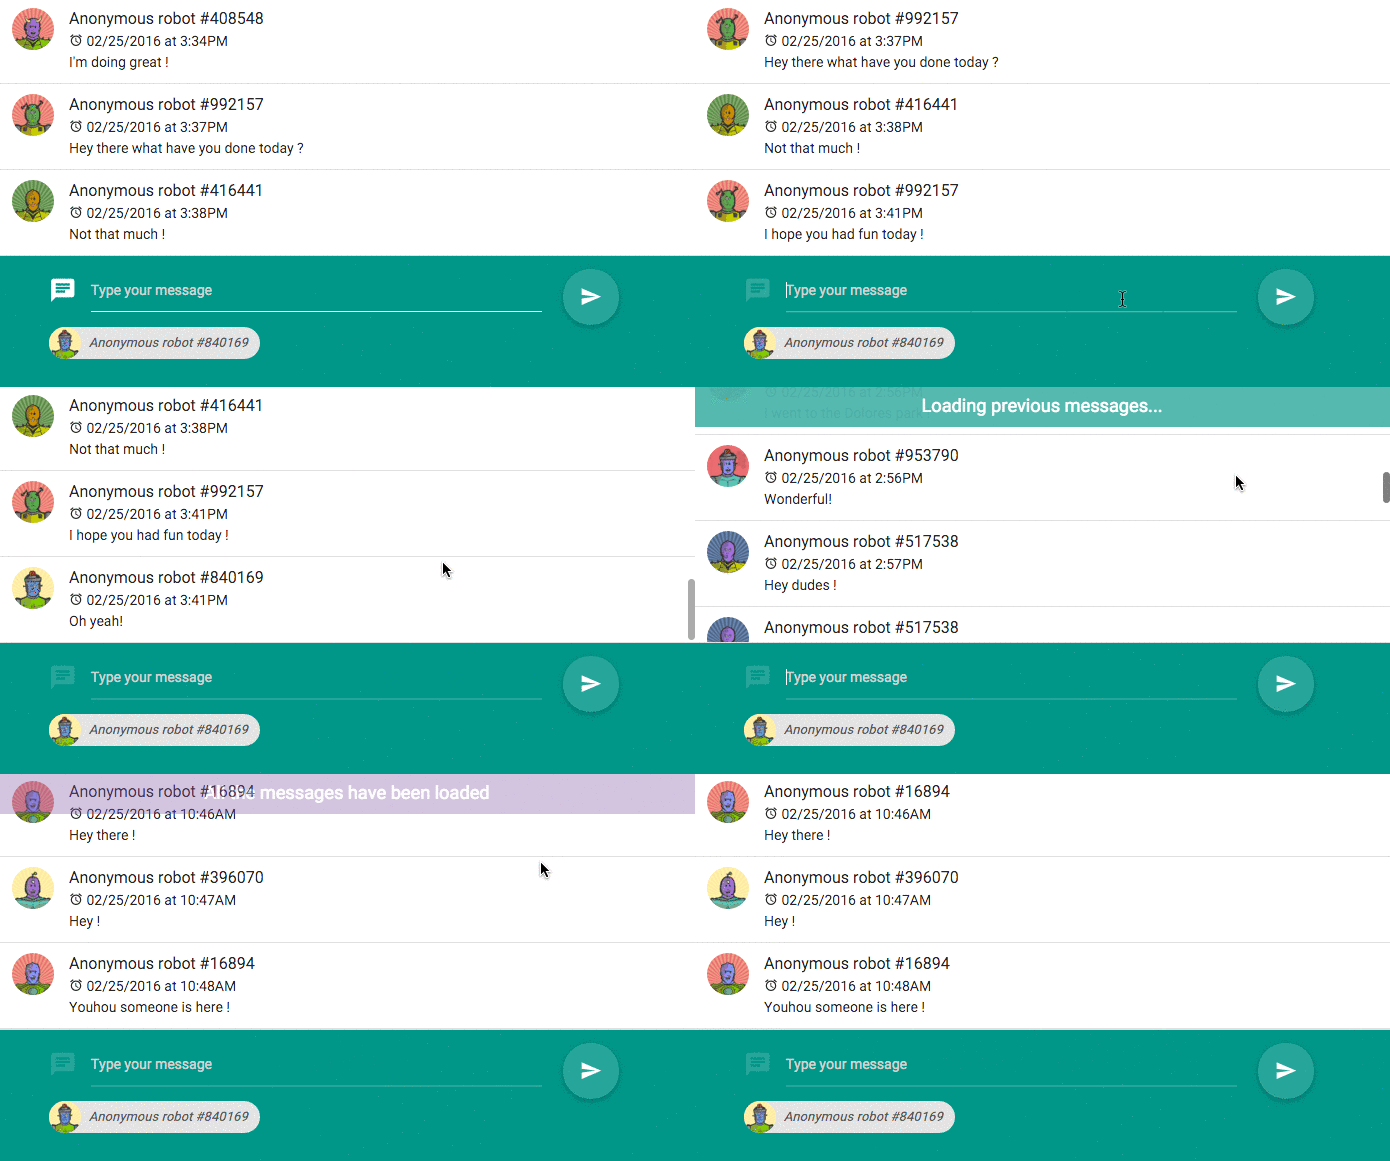
Và đây là thành quả:

Xem tiếp Part 2
All rights reserved