[Flutter] Một số tips giúp cải thiện performance của Flutter App
Bài đăng này đã không được cập nhật trong 5 năm
Thông thường, các ứng dụng Flutter đã có performant tốt theo mặc định, bạn chỉ cần tránh những lỗi phổ biến sau để giữ được hiệu suất đó.
Kiểm soát hàm build của bạn
Tránh công việc tính toán lặp đi lặp lại và các tốn kém trong hàm build
Vì phương thức build có thể được gọi thường xuyên khi các ancestor Widget của nó rebuild lại. Bạn có thể tạo 1 biến để lưu lại kết quả tính toán để sử dụng cho những lần build sau.
Tránh 1 hàm build quá lớn, tách nhỏ các thành Widget thay vì một method
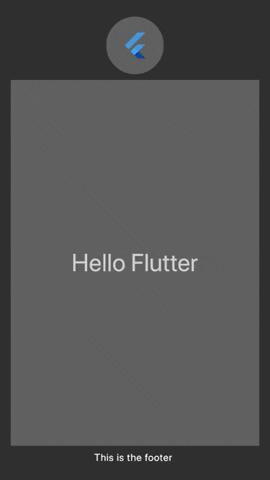
Khi chúng ta có một layout phức tạp, ta thường chia nhỏ bằng các method cho từng phần của layout. Như ví dụ sau, ta có 1 screen chứa 1 header, 1 body và 1 footer:
class MyHomePage extends StatelessWidget {
Widget _buildHeaderWidget() {
final size = 40.0;
return Padding(
padding: const EdgeInsets.all(8.0),
child: CircleAvatar(
backgroundColor: Colors.grey[700],
child: FlutterLogo(
size: size,
),
radius: size,
),
);
}
Widget _buildMainWidget(BuildContext context) {
return Expanded(
child: Container(
color: Colors.grey[700],
child: Center(
child: Text(
'Hello Flutter',
style: Theme.of(context).textTheme.display1,
),
),
),
);
}
Widget _buildFooterWidget() {
return Padding(
padding: const EdgeInsets.all(8.0),
child: Text('This is the footer '),
);
}
Widget build(BuildContext context) {
return Scaffold(
body: Padding(
padding: const EdgeInsets.all(15.0),
child: Column(
mainAxisSize: MainAxisSize.min,
children: [
_buildHeaderWidget(),
_buildMainWidget(context),
_buildFooterWidget(),
],
),
),
);
}
}
Khi chúng ta thay đổi một phần state trên màn hình, hàm build sẽ được gọi lại, và nó cũng sẽ build lại toàn bộ các widget có trong method. Trong khi điều này là không cần thiết, gây lãng phí tài nguyên CPU.
Những gì chúng ta nên làm là cân nhắc chuyển đổi các method đó thành Widget theo cách sau:
class MyHomePage extends StatelessWidget {
Widget build(BuildContext context) {
return Scaffold(
body: Padding(
padding: const EdgeInsets.all(15.0),
child: Column(
mainAxisSize: MainAxisSize.min,
children: [
HeaderWidget(),
MainWidget(),
FooterWidget(),
],
),
),
);
}
}
class HeaderWidget extends StatelessWidget {
Widget build(BuildContext context) {
final size = 40.0;
return Padding(
padding: const EdgeInsets.all(8.0),
child: CircleAvatar(
backgroundColor: Colors.grey[700],
child: FlutterLogo(
size: size,
),
radius: size,
),
);
}
}
class MainWidget extends StatelessWidget {
Widget build(BuildContext context) {
return Expanded(
child: Container(
color: Colors.grey[700],
child: Center(
child: Text(
'Hello Flutter',
style: Theme.of(context).textTheme.display1,
),
),
),
);
}
}
class FooterWidget extends StatelessWidget {
Widget build(BuildContext context) {
return Padding(
padding: const EdgeInsets.all(8.0),
child: Text('This is the footer '),
);
}
}
Stateful/Stateless widgets có cơ chế cache đặc biệt (dựa trên key, type, attributes), điều này giúp widget chỉ được create lại khi thực sự cần thiết. Điều này cũng bản địa hóa lời gọi setState () vào trong 1 widget con có UI cần thực sự thay đổi, tránh được việc gọi setState() ở quá cao trong khi thay đổi chỉ là 1 phần nhỏ trong Widget tree.
Tránh rebuild tất cả các widget một cách không cần thiết
Chúng ta đều biết rằng việc rebuild lại toàn bộ widget không phải là 1 phương án hay, chúng ta chỉ nên cập nhật những gì cần thiết. Ngoài việc bản địa hóa các lời gọi setState(), ta còn có thể cải thiện hơn bằng các package quản lý state như flutter_bloc, provider, mobx ...
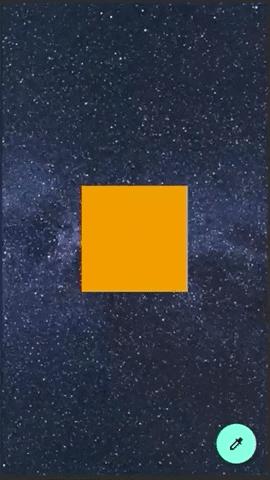
Xem xét ví dụ sau:
class _MyHomePageState extends State<MyHomePage> {
Color _currentColor = Colors.grey;
Random _random = new Random();
void _onPressed() {
int randomNumber = _random.nextInt(30);
setState(() {
_currentColor = Colors.primaries[randomNumber % Colors.primaries.length];
});
}
Widget build(BuildContext context) {
print('building `MyHomePage`');
return Scaffold(
floatingActionButton: FloatingActionButton(
onPressed: _onPressed,
child: Icon(Icons.colorize),
),
body: Stack(
children: [
Positioned.fill(
child: BackgroundWidget(),
),
Center(
child: Container(
height: 150,
width: 150,
color: _currentColor,
),
),
],
),
);
}
}
class BackgroundWidget extends StatelessWidget {
Widget build(BuildContext context) {
print('building `BackgroundWidget`');
return Image.network(
'https://cdn.pixabay.com/photo/2017/08/30/01/05/milky-way-2695569_960_720.jpg',
fit: BoxFit.cover,
);
}
}
Ta sẽ thấy 2 log sau được in ra mỗi khi click FloatingActionButton
flutter: building `MyHomePage`
flutter: building `BackgroundWidget`
Việc bản địa hóa lợi gọi setState() vào Container là không thể, do state được thay đổi bên ngoài nó => cần phải lưu state ở cha của nó là MyHomePageState. Dẫn đến việc toàn bộ các widget khác cũng bị rebuild khi gọi setState(). Điều này có thể được giải quyết bằng các package quản lý state.Ví dụ với ValueNotifier có sẵn của Framework.
class _MyHomePageState extends State<MyHomePage> {
final _colorNotifier = ValueNotifier<Color>(Colors.grey);
Random _random = new Random();
void _onPressed() {
int randomNumber = _random.nextInt(30);
_colorNotifier.value =
Colors.primaries[randomNumber % Colors.primaries.length];
}
void dispose() {
_colorNotifier.dispose();
super.dispose();
}
Widget build(BuildContext context) {
print('building `MyHomePage`');
return Scaffold(
floatingActionButton: FloatingActionButton(
onPressed: _onPressed,
child: Icon(Icons.colorize),
),
body: Stack(
children: [
Positioned.fill(
child: BackgroundWidget(),
),
Center(
child: ValueListenableBuilder(
valueListenable: _colorNotifier,
builder: (_, value, __) => Container(
height: 150,
width: 150,
color: value,
),
),
),
],
),
);
}
}
class BackgroundWidget extends StatelessWidget {
Widget build(BuildContext context) {
print('building `BackgroundWidget`');
return Image.network(
'https://cdn.pixabay.com/photo/2017/08/30/01/05/milky-way-2695569_960_720.jpg',
fit: BoxFit.cover,
);
}
}
Sử dụng từ khóa const khi có thể
Dùng keyword const càng nhiều càng tốt cho các widget, điều này cho phép chúng ta sử dụng lại các widget để tránh việc rebuild không cần thiết do tổ tiên của chúng gây ra. Cũng với ví dụ trên nhưng ta thêm từ khóa const vào trước BackgroundWidget
class _MyHomePageState extends State<MyHomePage> {
int _counter = 0;
void _onPressed() {
setState(() {
_counter++;
});
}
Widget build(BuildContext context) {
print('building `MyHomePage`');
return Scaffold(
floatingActionButton: FloatingActionButton(
onPressed: _onPressed,
child: Icon(Icons.colorize),
),
body: Stack(
children: [
Positioned.fill(
child: const BackgroundWidget(),
),
Center(
child: Text(
_counter.toString(),
style: Theme.of(context).textTheme.display4.apply(
color: Colors.white,
fontWeightDelta: 2,
),
)),
],
),
);
}
}
class BackgroundWidget extends StatelessWidget {
const BackgroundWidget();
Widget build(BuildContext context) {
print('building `BackgroundWidget`');
return Image.network(
'https://cdn.pixabay.com/photo/2017/08/30/01/05/milky-way-2695569_960_720.jpg',
fit: BoxFit.cover,
);
}
}
Khi click FloatingActionButton, BackgroundWidget sẽ không được build lại
building `MyHomePage`
building `MyHomePage`
Sử dụng thuộc tính itemExtent trong một ListView rất dài
Đôi khi khi chúng ta có một danh sách rất dài và chúng ta muốn thực hiện jump đến một vị trí nào đó vs scroll, việc sử dụng itemExtent là rất quan trọng, hãy xem một ví dụ đơn giản sau.
Một list với 10 nghìn phần tử. Khi nhấn nút, chúng ta sẽ jump đến phần tử cuối cùng. Trong ví dụ này, chúng ta sẽ không sử dụng itemExtent mà sẽ để các con xác định kích thước của nó.
class MyHomePage extends StatelessWidget {
final widgets = List.generate(
10000,
(index) => Container(
height: 200.0,
color: Colors.primaries[index % Colors.primaries.length],
child: ListTile(
title: Text('Index: $index'),
),
),
);
final _scrollController = ScrollController();
void _onPressed() async {
_scrollController.jumpTo(
_scrollController.position.maxScrollExtent,
);
}
Widget build(BuildContext context) {
return Scaffold(
floatingActionButton: FloatingActionButton(
onPressed: _onPressed,
splashColor: Colors.red,
child: Icon(Icons.slow_motion_video),
),
body: ListView(
controller: _scrollController,
children: widgets,
),
);
}
}
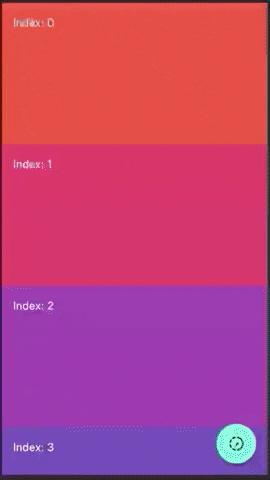
Như kết quả ở trên, việc jump xảy ra rất chậm (~ 10 giây). Điều này là do chi phí để cho children tự xác định kích thước của chúng.Gây block UI!
Để tránh điều này, chúng ta sẽ thuộc tính itemExtent, sử dụng thuộc tính này, scroll có thể sử dụng khả năng biết trước về kick thước của children để giảm bớt việc tính toán.
class MyHomePage extends StatelessWidget {
final widgets = List.generate(
10000,
(index) => Container(
color: Colors.primaries[index % Colors.primaries.length],
child: ListTile(
title: Text('Index: $index'),
),
),
);
final _scrollController = ScrollController();
void _onPressed() async {
_scrollController.jumpTo(
_scrollController.position.maxScrollExtent,
);
}
Widget build(BuildContext context) {
return Scaffold(
floatingActionButton: FloatingActionButton(
onPressed: _onPressed,
splashColor: Colors.red,
child: Icon(Icons.slow_motion_video),
),
body: ListView(
controller: _scrollController,
children: widgets,
itemExtent: 200,
),
);
}
}
 Nhanh hơn rất nhiểu rồi phải không
Chỉ áp dụng các hiệu ứng khi cần thiết
Tránh việc rebuild các widgets không cần thiết trong AnimatedBuilder
Hãy tận dụng thuộc tính child trong AnimatedBuilder để tránh rebuild lại những phần không cần thiết. Ví dụ
class _MyHomePageState extends State<MyHomePage>
with SingleTickerProviderStateMixin {
AnimationController _controller;
int counter = 0;
void _onPressed() {
setState(() {
counter++;
});
_controller.forward(from: 0.0);
}
void initState() {
_controller = AnimationController(
vsync: this, duration: const Duration(milliseconds: 600));
super.initState();
}
void dispose() {
_controller.dispose();
super.dispose();
}
Widget build(BuildContext context) {
return Scaffold(
floatingActionButton: FloatingActionButton(
onPressed: _onPressed,
splashColor: Colors.red,
child: Icon(Icons.slow_motion_video),
),
body: AnimatedBuilder(
animation: _controller,
builder: (_, child) => Transform(
alignment: Alignment.center,
transform: Matrix4.identity()
..setEntry(3, 2, 0.001)
..rotateY(360 * _controller.value * (pi / 180.0)),
child: CounterWidget(
counter: counter,
),
),
),
);
}
}
class CounterWidget extends StatelessWidget {
final int counter;
const CounterWidget({Key key, this.counter}) : super(key: key);
Widget build(BuildContext context) {
print('building `CounterWidget`');
return Center(
child: Text(
counter.toString(),
style: Theme.of(context).textTheme.display4.apply(fontWeightDelta: 3),
),
);
}
}
Log
flutter: building `CounterWidget`
flutter: building `CounterWidget`
flutter: building `CounterWidget`
flutter: building `CounterWidget`
flutter: building `CounterWidget`
...
flutter: building `CounterWidget`
Chúng ta thấy rằng trong khi xoay AnimatedBuilder đang xây dựng lại CounterWidget. Tuy nhiên nếu dùng child:
Widget build(BuildContext context) {
return Scaffold(
floatingActionButton: FloatingActionButton(
onPressed: _onPressed,
splashColor: Colors.red,
child: Icon(Icons.slow_motion_video),
),
body: AnimatedBuilder(
animation: _controller,
child: CounterWidget(
counter: counter,
),
builder: (_, child) => Transform(
alignment: Alignment.center,
transform: Matrix4.identity()
..setEntry(3, 2, 0.001)
..rotateY(360 * _controller.value * (pi / 180.0)),
child: child,
),
),
);
}
Chúng ta có cùng một kết quả tương tự nhưng CounterWidget không bị rebuild lại => đã tối ưu hóa animation.
Hạn chế sử dụng Opacity trong animation
Thay vì sử dụng Opacity (dùng nó sẽ khiến việc render chậm trên các đời GPU cũ: doc)
Thay vào đó hãy sử dụng: FadeTransition hoặc AnimatedOpacity
Tổng kết
Flutter đủ mạnh để chạy các ứng dụng của chúng ta mà không gặp vấn đề gì. Tuy nhiên bạn cũng có thể lưu ý những tips trên để tối ưu hóa ứng dụng của mình nhiều nhất có thể.
Tham khảo:
Flutter Europe: Optimizing your Flutter App
All rights reserved
