Flexbox trong React Native
Bài đăng này đã không được cập nhật trong 6 năm
Mục đích chủ yếu của Flexbox là cung cấp bố cục cố định trên các kích thước màn hình khác nhau. Các thuộc tính chính trong Flexbox sẽ được giới thiệu trong bài viết này:
- flexDirection
- justifyContent
- alignItems
- flex
- flexWrap
- alignSelf
FlexDirection:
Đầu tiên tạo một component và sử dụng bốn view để sắp xếp trong component đó. Thuộc tính flexDrirection sẽ quyết định hướng trục chính( main axis direction) trong component đó.
flexDirection: 'row' | 'column'
flexDirection có hai giá trị 'row' và 'column'. Giá trị mặc định là 'column'. Nếu giá trị là 'row' đều đó có nghĩa là hướng trục chính(main axis direction) theo kiểu 'row', các view sẽ được sắp xếp theo chiều ngang. Ngược lại, nếu giá trị là 'column' các view sẽ được sắp xếp theo chiều dọc của component.
Ví dụ:
import React, { Component } from 'react';
import { View } from 'react-native';
export default class Example extends Component {
render() {
return (
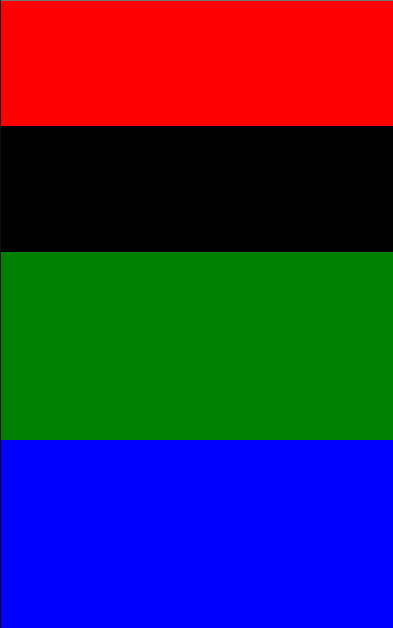
<View style={{ flexDirection: 'row' }}>
<View style={{ height: 50, width: 50, backgroundColor: 'red' }} />
<View style={{ height: 50, width: 50, backgroundColor: 'blue' }} />
<View style={{ height: 50, width: 50, backgroundColor: 'green' }} />
<View style={{ height: 50, width: 50, backgroundColor: 'black' }} />
</View>
);
}
}
Ví dụ trên mình sử dụng thuộc tính flexDirection có giá trị là row. Vậy nên các view bên trong sẽ được sắp xếp theo chiều ngang của component cha.

Sau khi quyết định hướng trục chính(main axis direction), chúng ta sẽ có thuộc tính để căn chỉnh các view con trong component. Đối với điều này, chúng ta chủ yếu có hai thuộc tính để sử dụng
justifyContent:
justifyContent: 'flex-start', 'center', 'flex-end', 'space-around', 'space-between'
Hãy giả sử rằng hướng trục chính là 'row', sau đó thuộc tính justifyContent căn chỉnh các view. Bằng cách sử dụng 'flex-start', 'flex-end', 'center', chúng ta có thể sắp xếp các view theo trong hàng và bằng cách sử dụng 'space-around' và 'space-between' chúng ta có thể tạo khoảng trống giữa các view.
import React, { Component } from 'react';
import { View } from 'react-native';

export default class Example extends Component {
  render() {
    return (
      <View style={{ flexDirection: 'row', justifyContent: 'center' }}>
        <View style={{ height: 50, width: 50, backgroundColor: 'red' }} />
        <View style={{ height: 50, width: 50, backgroundColor: 'black' }} />
        <View style={{ height: 50, width: 50, backgroundColor: 'green' }} />
        <View style={{ height: 50, width: 50, backgroundColor: 'blue' }} />
      </View>
    );
  }
}
-
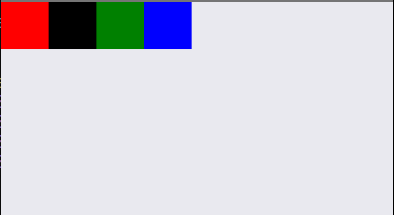
justifyContent: 'flex-start'
![justifyContent: 'flex-start']()
-
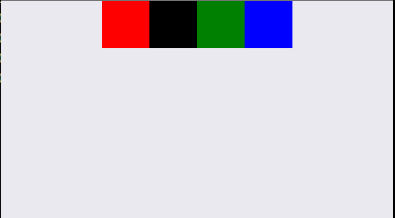
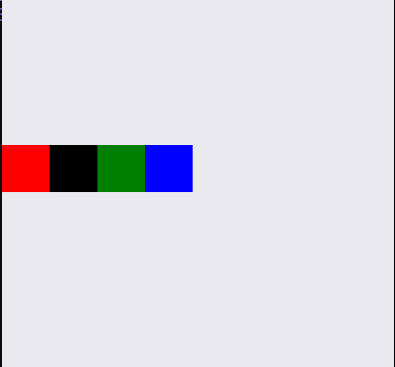
justifyContent: 'center'
![]()
-
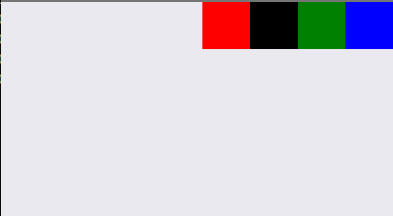
justifyContent: 'flex-end'
![]()
-
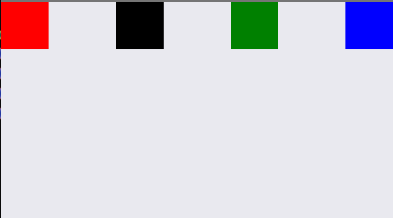
justifyContent: 'space-between'
![]()
-
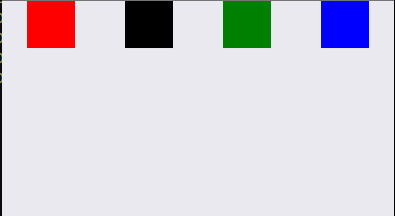
justifyContent: 'space-around'
![]()
alignItems:
alignItems: 'flex-start', 'center', 'flex-end', 'stretch'
Ở đây, hướng trục chính(main axis direction) là 'row'(Horizontal), do đó thuộc tính alignItems sẽ sắp xếp các view với hướng ngược lại của trục chính (Vertical).
- flex-start: sẽ căn chỉnh view trên top subview
- flex-end: sẽ căn chỉnh view ở bottom subview
- center: sẽ căn chỉnh view ở giữa subview
- stretch: Nó sẽ fill những view với subview. Nó sẽ chỉ sử dụng được khi hướng fill không có view cố định khoảng cách
import React, { Component } from 'react';
import { View } from 'react-native';

export default class Example extends Component {
  render() {
    return (
      <View style={{ flexDirection: 'row', alignItems: 'center' }}>
        <View style={{ height: 50, width: 50, backgroundColor: 'red' }} />
        <View style={{ height: 50, width: 50, backgroundColor: 'black' }} />
        <View style={{ height: 50, width: 50, backgroundColor: 'green' }} />
        <View style={{ height: 50, width: 50, backgroundColor: 'blue' }} />
      </View>
    );
  }
}
import React, { Component } from 'react';
import { View } from 'react-native';

export default class Example extends Component {
  render() {
    return (
      <View style={{ flex: 1, alignItems: 'stretch' }}>
        <View style={{ height: 60, backgroundColor: 'red' }} />
        <View style={{ height: 60, backgroundColor: 'black' }} />
        <View style={{ height: 60, backgroundColor: 'green' }} />
        <View style={{ height: 60, backgroundColor: 'blue' }} />
      </View>
    );
  }
}
-
alignItems: 'flex-start'
![]()
-
alignItems: 'center'
![]()
-
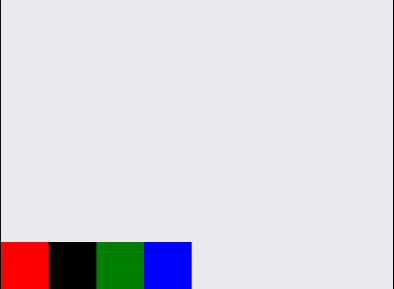
alignItems: 'flex-end'
![]()
-
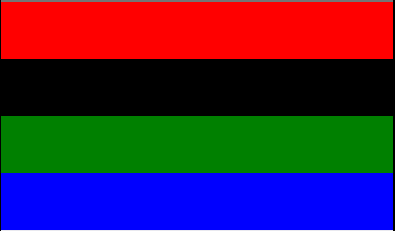
alignItems: 'stretch'
![]()
flex:
Một thuộc tính khác của flexbox là flex và nó là một giá trị số. Giả sử subview là một view có giá trị flex 1 và trong subview nếu chúng ta muốn cung cấp 20% không gian cho view thứ nhất, 20% không gian cho view thứ 2 và 60% cho view. Chúng ta có thể làm như sau
flex: 0,2, flex : 0,2, flex: 0,6.
import React, { Component } from 'react';
import { View } from 'react-native';

export default class Example extends Component {
  render() {
    return (
      <View style={{ flex: 1 }}>
        <View style={{ flex: 0.2, backgroundColor: 'red' }} />
        <View style={{ flex: 0.2, backgroundColor: 'black' }} />
        <View style={{ flex: 0.3, backgroundColor: 'green' }} />
        <View style={{ flex: 0.3, backgroundColor: 'blue' }} />
      </View>
    );
  }
}
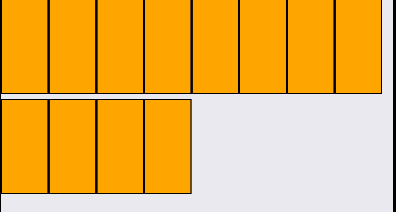
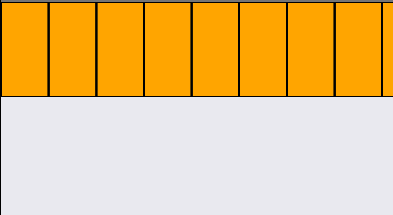
flexWrap:
Nó sẽ hoạt động như flex-wrap trong CSS. Ví dụ: nếu có rất nhiều view và không sử dụng thuộc tính flexWrap: 'wrap'. Thì tất cả các view sẽ hiển thị trong subview nhưng chúng ta sẽ chỉ thấy số lượng view được fit trên màn hình, không phải tất cả các view đều hiển thị.
Giá trị mặc định của flexWrap là 'nowrap'.
import React, { Component } from 'react';
import { View, StyleSheet } from 'react-native';

export default class Example extends Component {
  render() {
    return (
      <View style={{ flex: 1, flexDirection: 'row', flexWrap: 'wrap' }}>
        <View style={styles.boxStyle} />
        <View style={styles.boxStyle} />
        <View style={styles.boxStyle} />
        <View style={styles.boxStyle} />
        <View style={styles.boxStyle} />
        <View style={styles.boxStyle} />
        <View style={styles.boxStyle} />
        <View style={styles.boxStyle} />
        <View style={styles.boxStyle} />
        <View style={styles.boxStyle} />
        <View style={styles.boxStyle} />
        <View style={styles.boxStyle} />
      </View>
    );
  }
}

const styles = StyleSheet.create({
  boxStyle: {
    height: 100,
    width: 50,
    borderWidth: 1,
    backgroundColor: 'orange',
    marginBottom: 5
  },
});
- flexWrap: 'wrap'
- flexWrap:'nowrap'
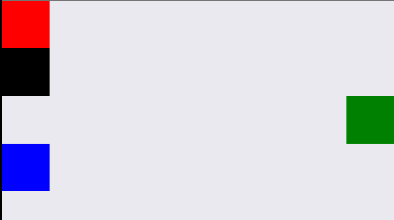
alignSelf:
Bất cứ khi nào chúng ta muốn tạo kiểu cho một phần tử con cụ thể trong một view hoặc subview, chúng ta có thể sử dụng thuộc tính alignSelf. Thuộc tính này có tất cả các giá trị của alignItems.
alignSelf: 'flex-start', 'center', 'flex-end', 'stretch'
import React, { Component } from 'react';
import { View } from 'react-native';

export default class Example extends Component {
  render() {
    return (
      <View style={{ flex: 1, justifyContent: 'flex-start' }}>
        <View style={{ height: 50, width: 50, backgroundColor: 'red' }} />
        <View style={{ height: 50, width: 50, backgroundColor: 'black' }} />
        <View style={{ height: 50, width: 50, alignSelf: 'flex-end', backgroundColor: 'green' }} />
        <View style={{ height: 50, width: 50, backgroundColor: 'blue' }} />
      </View>
    );
  }
}
- alignSelf: 'flex-end'
Trên đây là những thuộc tính sẽ hay sử dụng trong quá trình làm layout trong React-Native.
Thanks for reading!

All rights reserved
