Firebase App Distribution + fastlane
Bài đăng này đã không được cập nhật trong 5 năm
Mục đích của project
 Project này sẽ hướng dẫn bạn distribute app sử dụng Firebase App Distribution và fastlane.


Firebase App Distribution via fastlane
Công cụ và thành phần
Firebase App Distribution
🔥 Firebase App Distribution giúp việc phân phối ứng dụng của bạn đến testers trở nên dễ dàng. Bằng cách đưa ứng dụng của bạn lên thiết bị của testers một cách nhanh chóng, bạn sẽ nhận được phản hồi sớm và thường xuyên. Và nếu bạn sử dụng Crashlytics trong ứng dụng của mình, bạn sẽ tự động nhận được các chỉ số về độ ổn định cho tất cả các bản build của app, để biết khi nào app sẵn sàng release. Vui lòng truy cập Firebase App Distribution page để biết thêm chi tiết.
fastlane
🚀 fastlane tự động build archive, deployment các bản development, release cho các ứng dụng iOS và Android của bạn. 🚀 fastlane xử lý tất cả các tác vụ tạo ảnh chụp màn hình (screenshots), code signing, và release app. Vui lòng truy cập fastlane page để biết thêm chi tiết.
Các bước thực hiện
Phần này có 5 bước cần thực hiện. Bạn sẽ hiểu cách hoạt động của cả Firebase và iOS
Firebase side
Tạo mới Firebase project
- Tại phần Firebase console, chọn Add project, sau đó chọn cũ hoặc thêm mới Project name.
 2. Click Continue.
3. Click Create project.
2. Click Continue.
3. Click Create project.
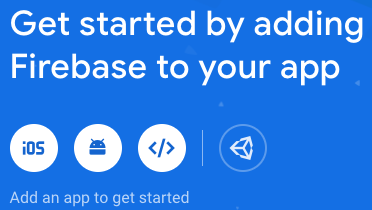
Đăng ký app sử dụng Firebase
Ở phần này, bạn sẽ biết làm thế nào đăng ký ứng dụng của bạn qua Firebase Console
- Chọn iOS icon tiếp tục cài đặt.
- Nhập các mục tuỳ chọn thông tin app, sau đó chọn Register app icon
- Nhập iOS bundle ID của app, có định dạng như mẫu (com.company.appname).
- Tuỳ chọn nhập App nickname biệt hiệu sẽ được sử dụng trong bảng Firebase Console để đại diện cho ứng dụng này. Biệt hiệu không hiển thị với người dùng.
- Tuỳ chọn nhập App Store ID của mình trong URL của ứng dụng. Trong ví dụ dưới đây, 123456789 là ID của App Store.
Thêm file cấu hình Firebase
- Chọn Download GoogleService-Info.plist
- Kéo configuration file .plist vào thư mục XCode app, và save lại file.
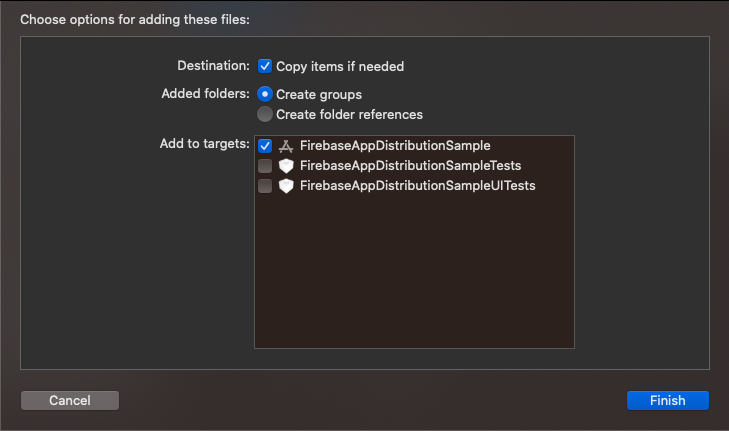
Cài đặt Firebase SDKs
Google Service sử dụng CocoaPods để cài đặt và quản lý dependencies. Cài đặt gói Firebase SDK theo hướng dẫn Firebase side. Mở terminal và điều hướng đến thư mục Project-Xcode của app
-
Tạo pod file trong thư mục Xcode-Project:
pod init -
Mở và thêm dòng lệnh sau vào Podfile:
pod 'Firebase' -
Chạy lệnh
pod installcài đặt dependencies firebase. -
Để kết nối Firebase khi ứng dụng của bạn khởi động, hãy thêm mã khởi tạo bên dưới vào lớp AppDelegate chính của bạn, sau đó chọn Next icon.
import UIKit import Firebase @UIApplicationMain class AppDelegate: UIResponder, UIApplicationDelegate { var window: UIWindow? func application(_ application: UIApplication, didFinishLaunchingWithOptions launchOptions: [UIApplicationLaunchOptionsKey: Any]?) -> Bool { FirebaseApp.configure() return true } } -
Build app để kết nối đến Firebase Console, sau đó chọn Continue to console icon
iOS side
Cài đặt fastlane trên macOS
- Cài đặt fastlane
- RubyGems (macOS/Linux/Windows), chạy mã lệnh sau:
sudo gem install fastlane -NV - Homebrew (macOS), chạy mã lệnh sau:
brew install fastlane
- RubyGems (macOS/Linux/Windows), chạy mã lệnh sau:
Cài đặt fastlane lên App
-
Điều hướng terminal đến XCode-Project của app, ví dụ như mã lệnh dưới
cd /Volumes/Data/IT/iOS/FirebaseAppDistributionExample -
Chạy lệnh
fastlane initđể cài đặt và thiết lập các dependencies- Tham khảo thêm các tuỳ chọn cài đặt khác tại đây.
- Chọn option 4 vì chúng ta không triển khai app lên Testflight hay AppStore
1. 📸 Automate screenshots
2. 👩✈️ Automate beta distribution to TestFlight
3. 🚀 Automate App Store distribution
4. 🛠 Manual setup - manually setup your project to automate your tasks
? 4
-
Để thêm App Distribution vào cấu hình fastlane của bạn, hãy chạy lệnh sau từ thư mục gốc của dự án iOS:
fastlane add_plugin firebase_app_distribution -
Cài đăt xong các bạn, thư mục project bao gồm:
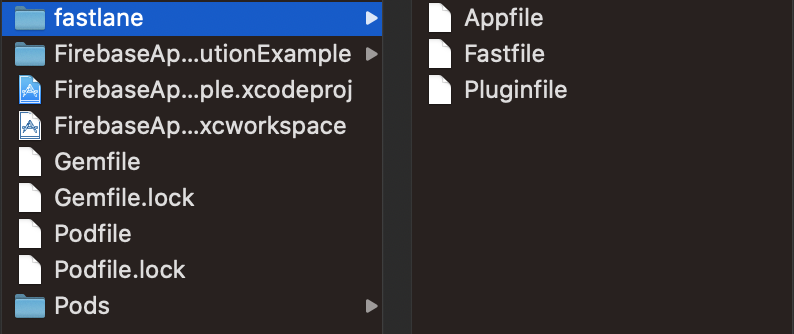
Appfile khai báo các thông tin liên quan tới việc build app và nó cũng sẽ tự động sinh ra một số trường nếu bạn chọn 1 trong số 3 option phía trên
Fastfile sẽ giao tiếp qua các đoạn script để cấu hình cho fastlane.
Để viết được script cho fastlane thì tốt nhất là bạn nên đọc qua Fastlane Documentation để hiểu cú pháp, nó rất là dễ và ít thôi nên bạn hãy xem qua nó để tránh việc mất thời gian để dò lỗi cú pháp.
Để mở Fastfile thì bạn có thể dùng vim, TextEdit.
Xác thực với Firebase
- Trước khi có thể sử dụng plugin Fastlane, bạn phải xác thực với dự án Firebase của mình. Có ba cách để đạt thực hiện điều này:
- Chạy lệnh
fastlane run firebase_app_distribution_login, chúng ta sẽ được đường link xác thực như hình ảnh sau :
[23:05:25]: ---------------------------------------------
[23:05:25]: --- Step: firebase_app_distribution_login ---
[23:05:25]: ---------------------------------------------
[23:05:25]: Open the following address in your browser and sign in with your Google account:
[23:05:25]: https://accounts.google.com/o/oauth2/auth?access_type=offline&approval_prompt=force&client_id=563584335869-fgrhgmd47bqnekij5i8b5pr03ho849e6.apps.googleusercontent.com&include_granted_scopes=true&redirect_uri=urn:ietf:wg:oauth:2.0:oob&response_type=code&scope=https://www.googleapis.com/auth/cloud-platform
[23:05:25]: Enter the resulting code here:
-
Copy đường link và dán vào trình duyệt web (Safari, Chrome, IE), để lấy mã xác thực paste vào line
Enter the resulting code here:, ví dụ như đoạn mã sau:Enter the resulting code here: 4/4wH0fTw-lWD7g5VjX4Bot24Z8bUf9dg1XAhhLt1ZpERE4fT0FEC2n1c -
Kết quả cuối cùng sẽ thu được firebase_cli_token, sử dụng cấu hình Fastlane file sau này
    [23:05:25]: Enter the resulting code here: 4/4wH0fTw-lWD7g5VjX4Bot24Z8bUf9dg1XAhhLt1ZpERE4fT0FEC2n1c
    [23:13:22]: Set the refresh token as the FIREBASE_TOKEN environment variable
    [23:13:22]: Refresh Token: 1//0eFiUnmw0hkpYCgYIARAAGA4SNwF-L9Ir0gcX5P_qPkX7PaWFEsMMzQR_vdtEt0vJanCluQ5C4Y21O1jkcagBNVWAfmHeQCxizR4
    [23:13:22]: Result: true
Cấu hình fastlane file để distribute application
-
fastlane đảm nhận việc build IPA ứng dụng của bạn với hướng dẫn sau:
- Mở file Fastfile
- Thêm đoạn mã như sau để fastlane build file IPA
default_platform(:ios) platform :ios do desc "Description of what the lane does" lane :distribution do build_app(scheme: "FirebaseAppDistributionExample", workspace: "FirebaseAppDistributionExample.xcworkspace", include_bitcode: true, export_method: "development") firebase_app_distribution( app: "1:386673329896:ios:b6f2e329f726dd9b7bab5d", firebase_cli_token: "1//0eFiUnmw0hkpYCgYIARAAGA4SNwF-L9Ir0gcX5P_qPkX7PaWFEsMMzQR_vdtEt0vJanCluQ5C4Y21O1jkcagBNVWAfmHeQCxizR4", testers: "example@gmail.com", release_notes: "Lots of amazing new features to test out!") end end -
Mô tả options:
- default_platform: Khai báo môi trường sử dụng là iOS hoặc Android
- scheme: The project's scheme
- workspace: Đường dẫn đến file làm việc
- export_method: Phương thúc sử dụng để xuất ra file archive (app-storre, ad-hoc, package, enterprise, development)
- app: Firebase App ID, có thể được tìm thấy trong GoogleService-Info.plist
- firebase_cli_token: Refresh token tạo ra trong quá trình chạy plugin's login action
- testers/testers_file: Địa chỉ email testers bạn muốn gửi link invite
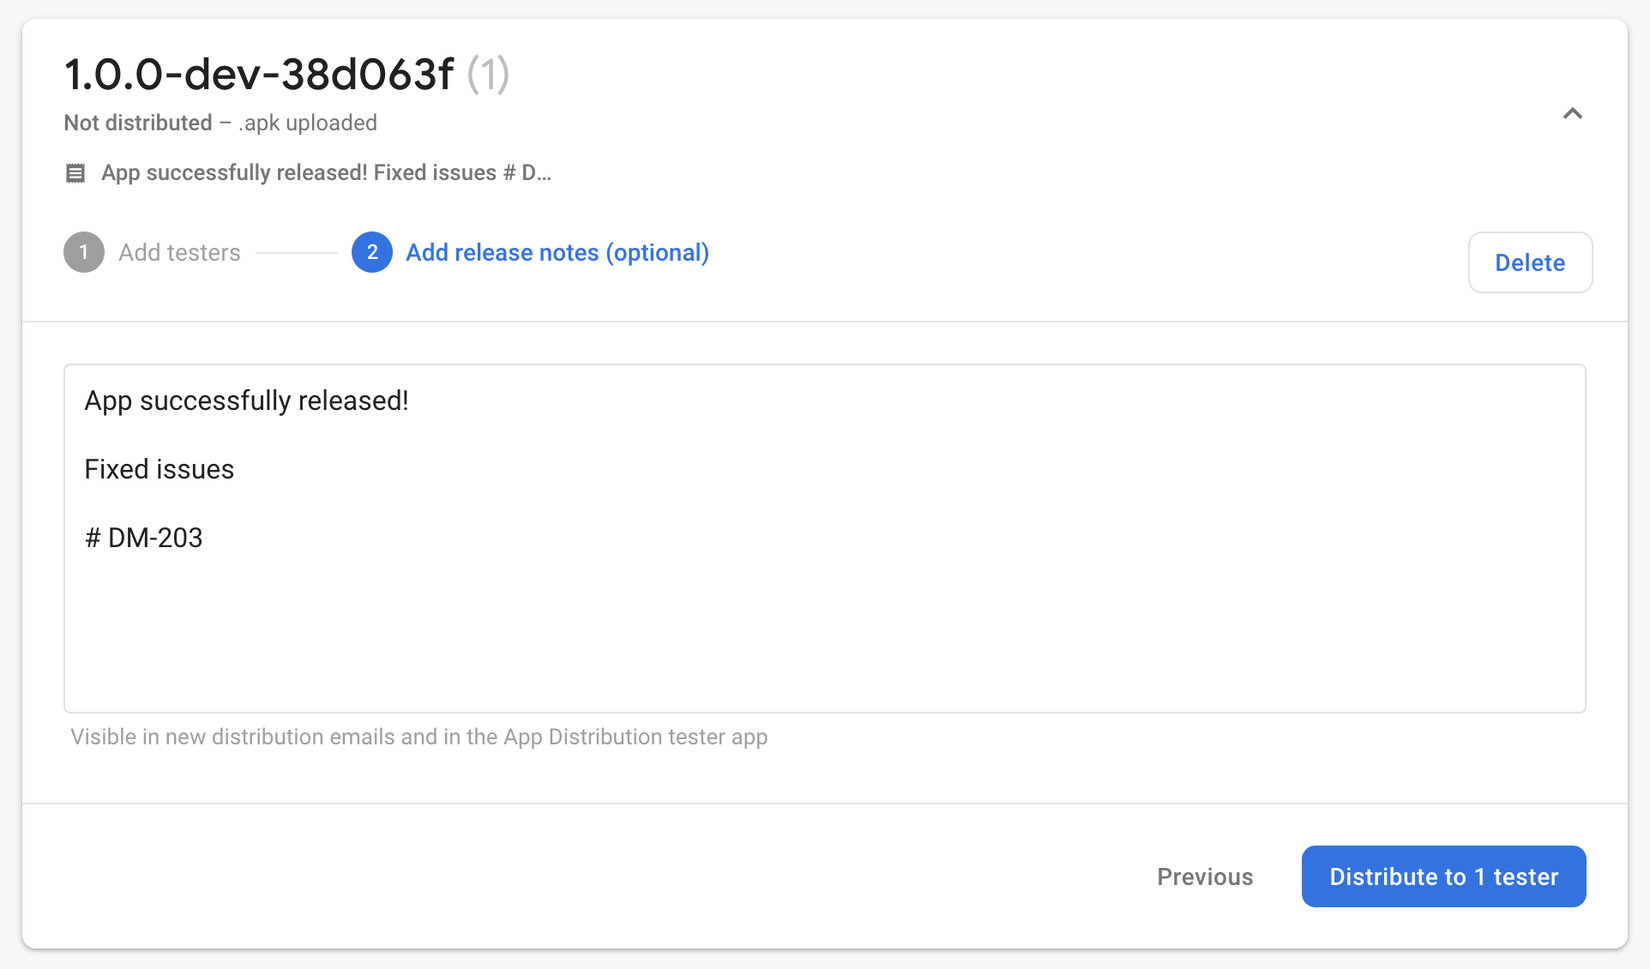
- releases_notes/release_notes_file: Thông tin bản build
-
Bước cuối cùng là chạy lệnh lane, đây là bước cuối cùng. Xem hướng dẫn
Firebase Console side
Chúng ta cần settings tester, group, invite link trên Firebase console để distribute app
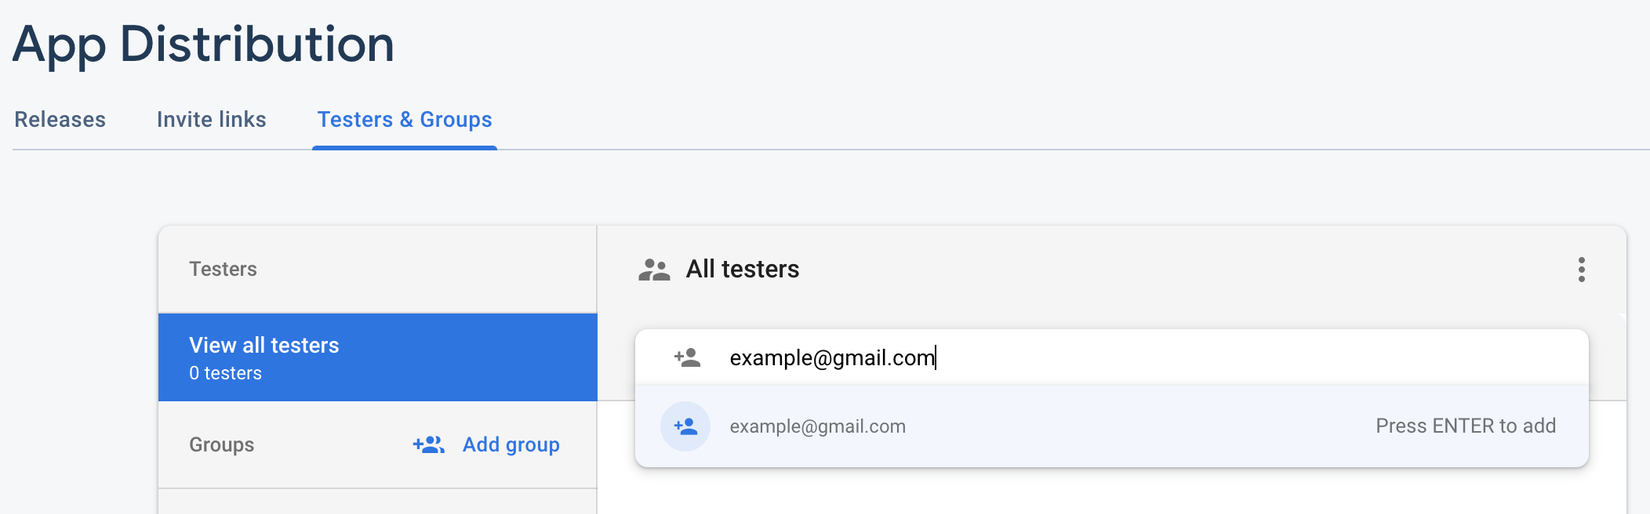
Thêm testers và group
- Điều huớng đến phần App Distribution trong Firebase console.
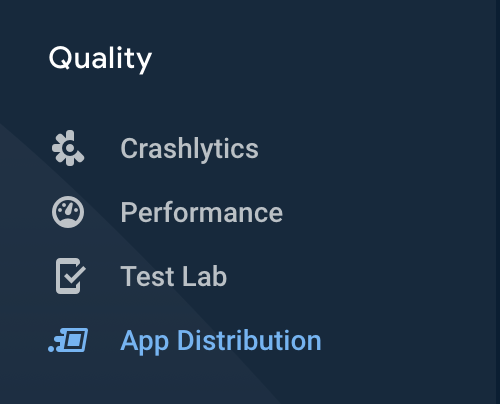
- Điều huớng đến Testers & Groups để tạo testers hoặc groups sẽ nhận được bản cập nhật ứng dụng thông qua App Tester.
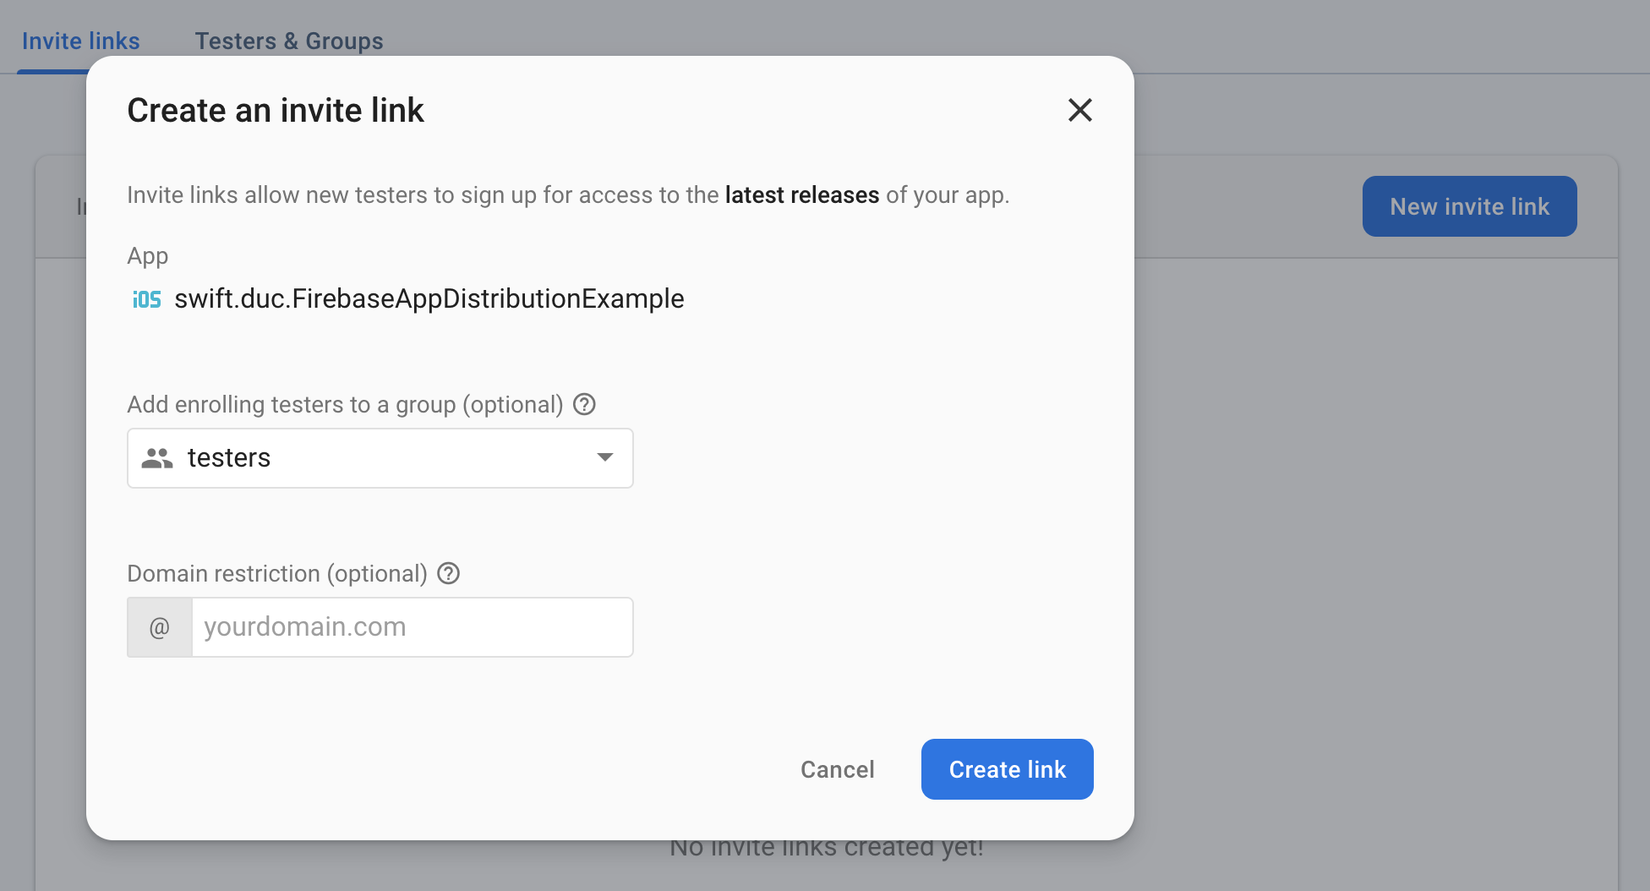
Tạo link invite
- Bạn có thể tạo liên kết invite cho phép testers đăng ký qua liên kết này
Distribute app đến testers
- Thay vì bạn cung cấp IPA file thủ công, fastlane sẽ archive và upload files khi bạn chạy mã lệnh
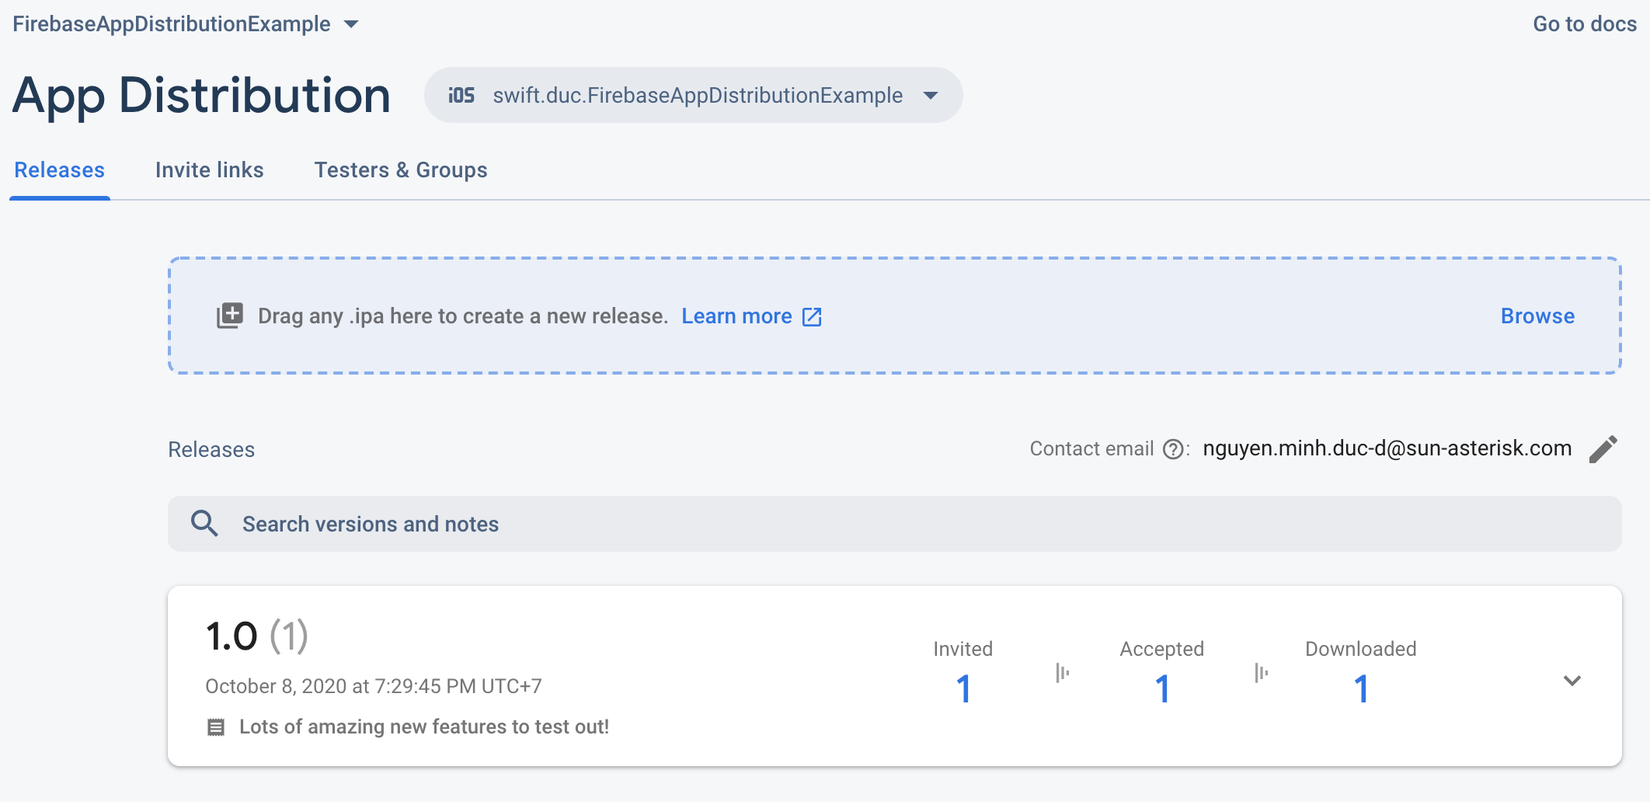
Khi bạn expand bất kỳ bản build nào sẽ thấy các địa chỉ email đã được mời và release notes.
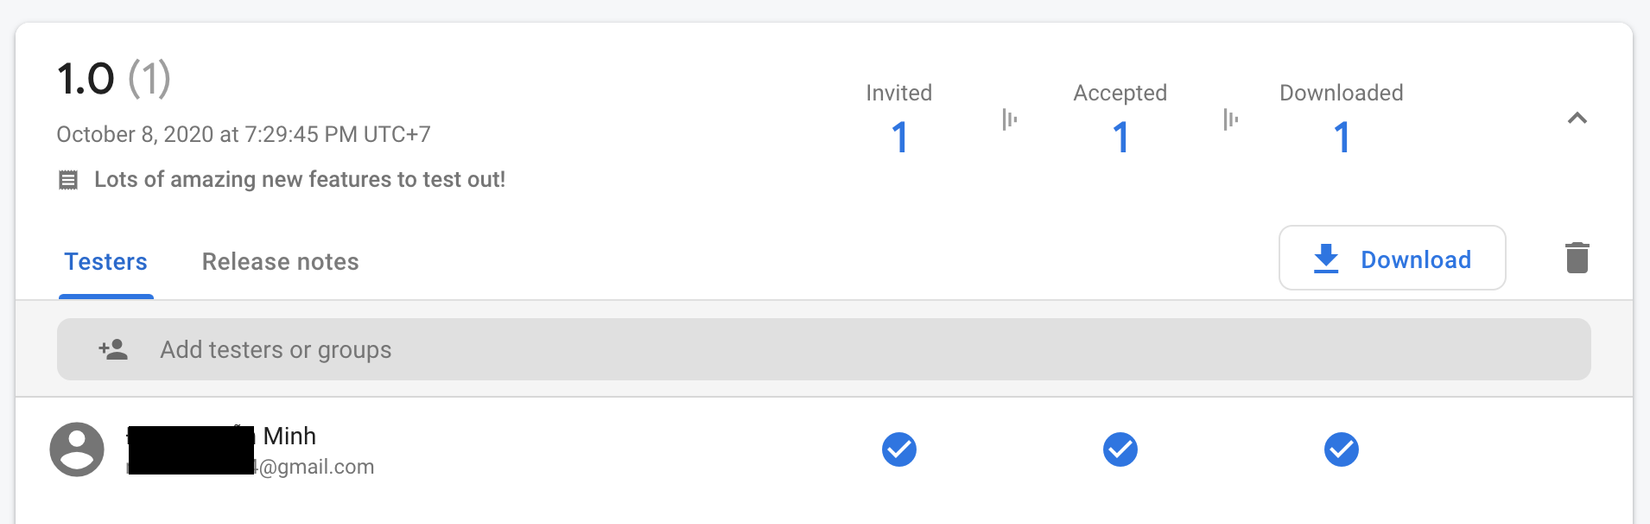
- Phần quan trọng nhất, khi upload bản build lên Firebase console, bạn cần thêm email testers:
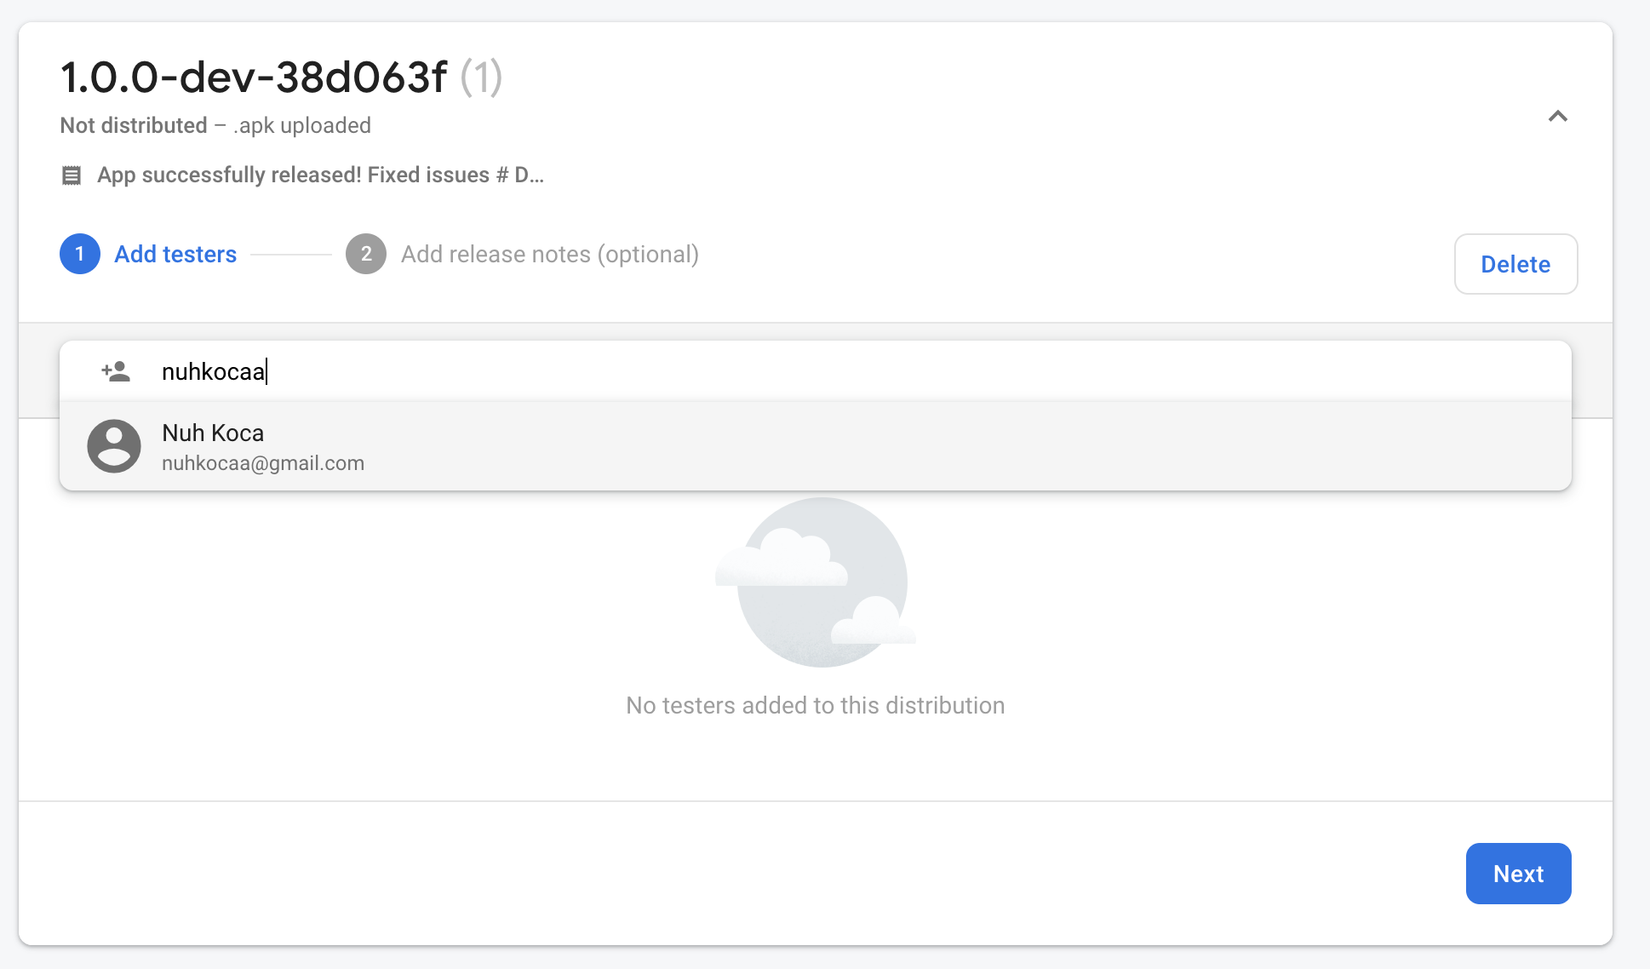
Sau khi thêm testers, click Next.
- Chọn Distribute to N tester icon.
- Distribution thành công. Giờ hãy check lại lời mời trong email của bạn. Chi tiết tại iOS Device side
iOS Device side
Tải app thông qua email
- Mở địa chỉ email đăng ký với Firebase console.
- Đia chỉ email có giao diện như sau

- Chọn Get setup, để tiến hành tải và cài đặt ứng bản build
- 🎊 Yay! Vậy là bạn đã cài đặt được bản build lên thiết bị của bạn !
Chạy lệnh lane
💥 Chạy lệnh sau bắt đầu tiến trình distribute ứng dụng 🎊
fastlane distribution
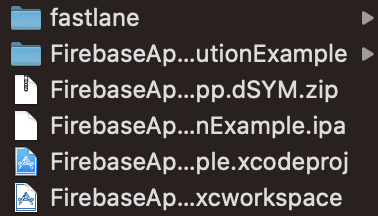
🎊 Nếu tiến trình chạy thành công, thư mục Xcode-Project sẽ có thêm 2 file IPA và dSYM, như hình sau:
...Và kết quả !
[10:46:53]: Successfully exported and compressed dSYM file
[10:46:53]: Successfully exported and signed the ipa file:
[10:46:53]: /Volumes/Data/IT/iOS/FirebaseAppDistributionExample/FirebaseAppDistributionExample.ipa
[10:46:53]: ---------------------------------------
[10:46:53]: --- Step: firebase_app_distribution ---
[10:46:53]: ---------------------------------------
[10:46:53]: Authenticating with --firebase_cli_token parameter
[10:46:53]: 🔐 Authenticated successfully.
[10:46:56]: ⌛ Uploading the IPA.
[10:47:02]: ✅ Uploaded the IPA.
[10:47:03]: ✅ Posted release notes.
[10:47:04]: ✅ Added testers/groups.
[10:47:04]: 🎉 App Distribution upload finished successfully.
[10:47:04]: ----------------------
[10:47:04]: --- Step: chatwork ---
[10:47:04]: ----------------------
[10:47:04]: Successfully sent notification to ChatWork right now 📢

+------+---------------------------+-------------+
|                fastlane summary                |
+------+---------------------------+-------------+
| Step | Action                    | Time (in s) |
+------+---------------------------+-------------+
| 1    | default_platform          | 0           |
| 2    | build_app                 | 141         |
| 3    | firebase_app_distribution | 10          |
| 4    | chatwork                  | 0           |
+------+---------------------------+-------------+

[10:47:04]: fastlane.tools finished successfully 🎉
Plugins - Bonus*
Chatwork
Tích hợp chatwork API với fastlane
- API Token
Chọn Account -> Integrations -> API Token -> Enter Password -> Display icon

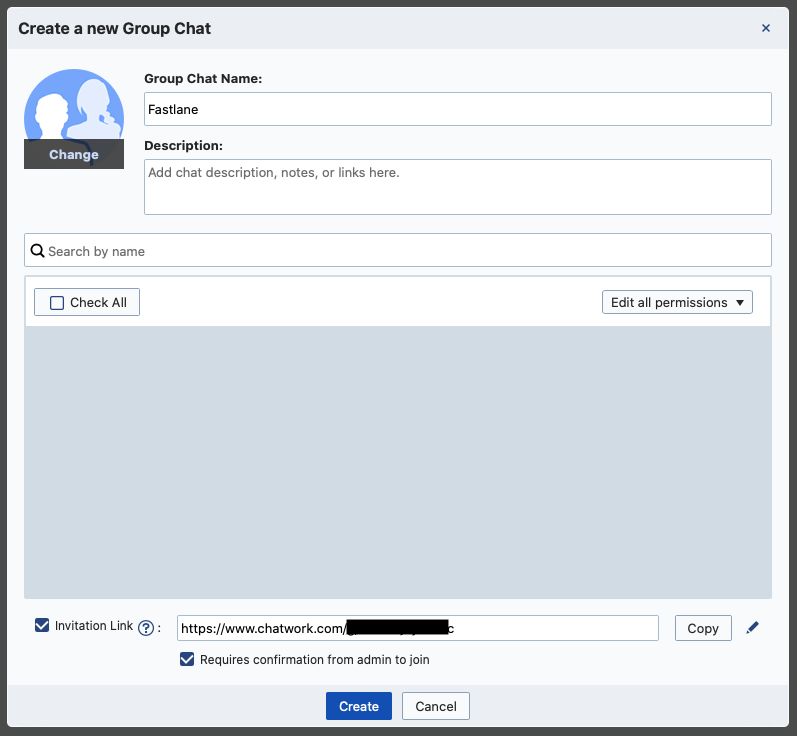
- Group Chat
- Cấu hình Fastfile
default_platform(:ios)

platform :ios do
  desc "Description of what the lane does"
  lane :distribution do
     build_app(...)

     firebase_app_distribution(...)

     chatwork(message: "App successfully released!",
             roomid: 123456,
             success: true,
             api_token: "ab173ca1b420a318ca78c37a319a0279se")

  end
end
...Và kết quả !

Tài liệu tham khảo
- Firebase App Distribution Page
- Firebase App Distribution and Fastlane, too fast too furious!
- Fastlane Page
- Add Firebase to your iOS project
- Increment version code plugin
- Get version name plugin
- carbon.now.sh
Tác giả
⭐ Gặp khó khăn trong quá trình thực hiện Github, liên hệ nmduc251194@gmail.com để được giúp đỡ. 🤩
All rights reserved
