Document Golang RESTful API with Swagger
Bài đăng này đã không được cập nhật trong 6 năm
Getting Start
Building an API is not completed without meaningful documentation of our APIs as well as an ability to test its endpoints, users won’t even bother trying to use it. Solution to that is writing documentation. However, writing it may take lots of time. Fortunately there is a tool available to help us and that is Swagger.
Swagger in Go
Let’s start with libraries needed to create the Swagger docs. There are many packages that we could use but the two popular choices are go-swagger and swag. go-swageer seem to be a popular choice amongst the two, but the configuration and the learning curve is a bit complex so in this post we will go with swag.
swag let use generate swagger docs from documentation comment (godoc) and it is very simple to use. All we need to do is documented our handler function as we code and use the command line tool then we are good to go. I show you how to generate swagger doc by building a Todo application. The example project can be found in my github repository be sure to check that out.
Bootstraping
In order to get start we need to first install command line tool we needed by run
$ go get -u github.com/swaggo/swag/cmd/swag
After that cd into a project root and then run swag init. This command will expect that there is a file called main.go in current directory, but in our example the entrypoint is cmd/server/main.go so we need to pass in -g flag like this
$ swag init -g cmd/server/main.go
This will generate a new docs folder in the root project. Before we get to describing individual API endpoints, we need to first write general description for our whole project. This part of annotations lives in your main package, right before the main function
package main

import (
	_ "github.com/PrinceNorin/todo-go/docs"
	"github.com/PrinceNorin/todo-go/handler"
	echo "github.com/labstack/echo/v4"
	echoSwagger "github.com/swaggo/echo-swagger"
)

// @title Todo Application
// @description This is a todo list management application
// @version 1.0
// @host localhost:8081
// @BasePath /api/v1
func main() {
	e := echo.New()
	e.HTTPErrorHandler = handler.ErrorHandler

	v1 := e.Group("/api/v1")
	{
		todo := handler.NewHandler()
		v1.GET("/todos", todo.FindTodos)
		v1.POST("/todos", todo.CreateTodo)
		v1.GET("/todos/:id", todo.GetTodo)
		v1.PUT("/todos/:id", todo.UpdateTodo)
		v1.DELETE("/todos/:id", todo.DeleteTodo)
	}

	e.GET("/swagger/*", echoSwagger.WrapHandler)
	e.Logger.Fatal(e.Start(":8081"))
}
This will define General API Info, which includes things like name, version, base URL etc. There are few more fields that you can include and they are listed in swag github page.
Apart from the annotations, we also need to import necessary libraries including blank import of our docs package that we have generated. One more thing we need to do, is to actually mount the Swagger UI at some endpoint, here we use /swagger/*. Here I use echo but you can use swag with pretty much any framework you want.
Operation
To get a list of operation to show up in our UI we need to annotate and handler function. These annotations precede each handler function that we mount as our API endpoints and in this case they are todo.FindTodos, todo.CreateTodo, todo.GetTodo, todo.UpdateTodo, todo.DeleteTodo. There is what it looks like
// CreateTodo godoc
// @Summary Create a todo
// @Description Create a new todo item
// @Tags todos
// @Accept json
// @Produce json
// @Param todo body types.Todo true "New Todo"
// @Success 201 {object} types.Todo
// @Failure 400 {object} HTTPError
// @Router /todos [post]
func (h *Handler) CreateTodo(c echo.Context) error {
	return h.withLockContext(func() error {
		var todo types.Todo
		if err := c.Bind(&todo); err != nil {
			return errBadRequest
		}

		if todo.Name == "" {
			return errBadRequest
		}

		h.lastID++
		todo.ID = h.lastID
		h.todos[todo.ID] = &todo
		return c.JSON(http.StatusCreated, &todo)
	})
}
Pretty much all of this is self-explainatory, so I'm going to skip of some of them and point out only the one that is important.
@Param: describe our request payload it must be in the form of{name} {type} {dataType} {required} {comment}each separated by space, so in this case it translated to param name todo which is in request body with field as defined in types.Todo struct, it is required and with description New Todo.@Success: must be in the form of{status} {returnType} {dataType} {comment}and in our case it is to return 200 status code with types.Todo as response object when api call is success.@Failure: is the same as@Successbut for the case when api call is failed.@Router: which is in the form of{path} [method].
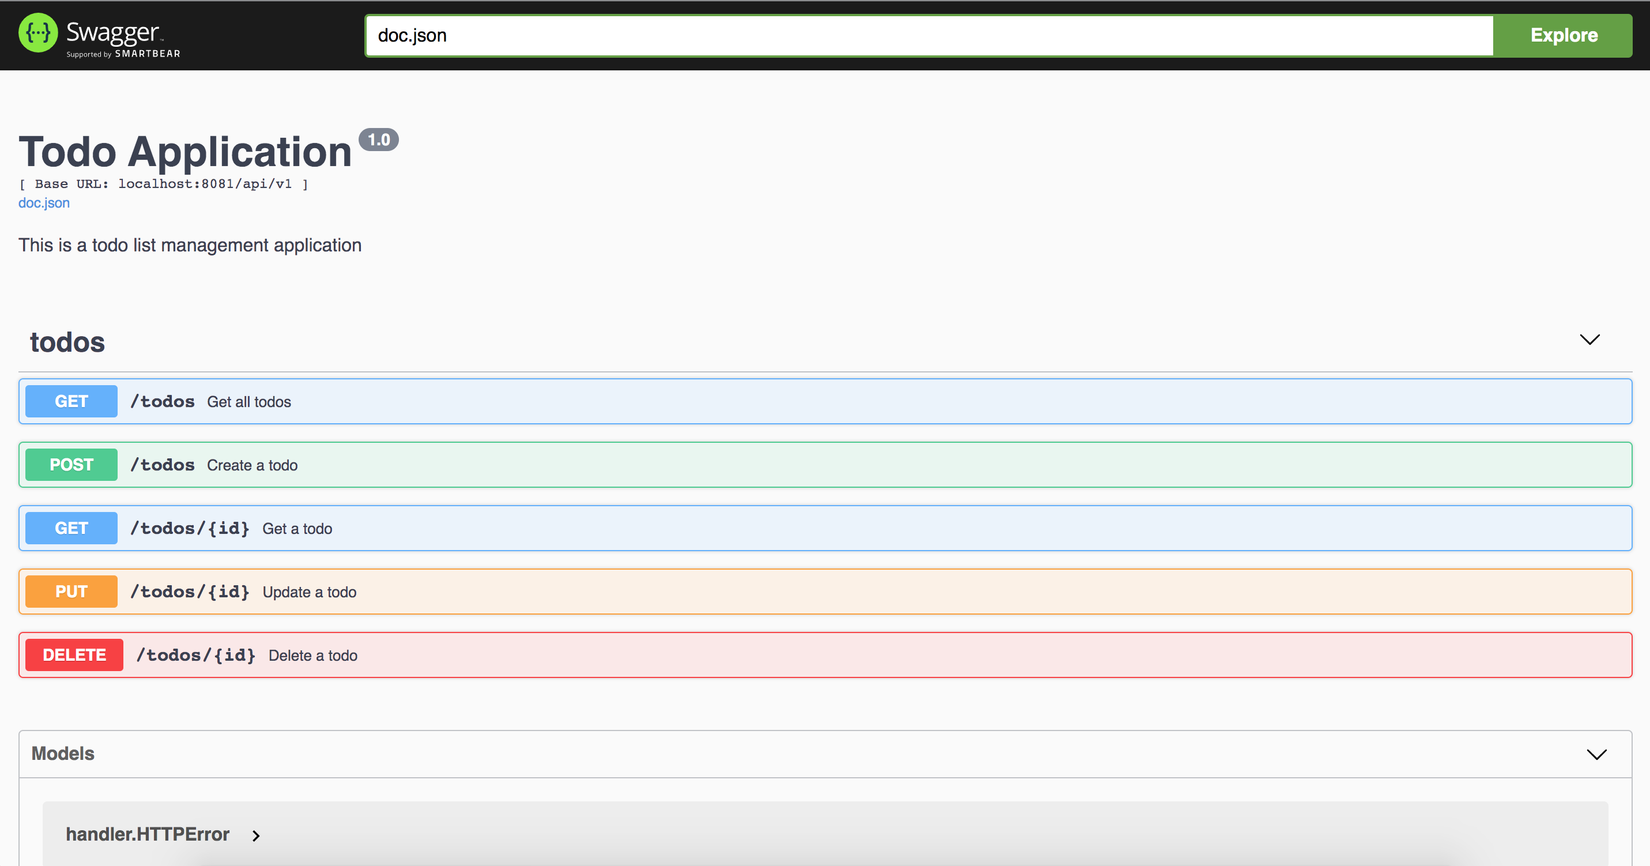
And this is pretty much all we need to describe a single endpoint now all that's left to update our docs with this new changes by call swag init -g cmd/server/main.go again. If everything went well then we can start our server with go run github.com/PrinceNorin/cmd/server then navigate to http://localhost:8081/swagger/index.html then you will see something like this
All rights reserved
