Docker: Tạo Docker Images từ Dockerfile
Bài đăng này đã không được cập nhật trong 4 năm
Ngày nay, thuật ngữ Docker chắc hẳn không còn xa lạ gì với các bạn làm lập trình viên. Nó là một nền tảng mở dành cho các lập trình viên, quản trị hệ thống dùng để xây dựng, chạy các ứng dụng phân tán. Dockerfile chứa tập hợp các lệnh để docker có thể đọc hiểu và thực hiện để đóng gói thành một image theo yêu cầu người dùng. Trong bài viết này, dựa vào kinh nghiệm làm việc bản thân cùng với một số nguồn tài liệu tham khảo, tôi sẽ hướng dẫn các bạn cách build một docker image từ Dockerfile để phục vụ theo yêu cầu công việc của chính các bạn.
Trước hết, để viết được một Dockerfile hoàn chỉnh, các bạn cần hiểu được các command của Dockerfile:
- FROM: Là base image để chúng ta tiến hành build một image mới. Command này phải được đặt trên cùng của Dockerfile
- MAINTAINER: Command này là tùy chọn, có thể có hoặc không. Nó chưa thông tin của người tiến hành xây dựng lên images.
- RUN: Sử dụng khi muốn thực thi một command trong quá trình build image
- COPY: Copy một file từ host machine tới docker image. Có thể sử dụng URL cho tệp tin cần copy, khi đó docker sẽ tiến hành tải tệp tin đó đến thư mục đích.
- ENV: Định nghĩa các biến môi trường
- CMD: Sử dụng khi muốn thực thi (execute) một command trong quá trình build một container mới từ docker image
- ENTRYPOINT: Định nghĩa những command mặc định, cái mà sẽ được chạy khi container running.
- WORKDIR: Định nghĩa directory cho CMD
- USER: Đặt user hoặc UID cho container được tạo bởi image
- VOLUME: Cho phép truy cập / liên kết thư mục giữa các container và máy chủ (host machine)
Bây giờ, hãy thực hành bằng việc build một image thao tác với các câu lệnh trên.
Trước khi tiến hành các bước sau, hãy đảm bảo rằng trên máy của bạn đã được cài đặt Docker.
Bước 1: Tạo Dockerfile
Trong bước này, chúng ta sẽ tạo một directory mới cho dockerfile và tiến hành định nghĩa những thứ chúng ta muốn làm với dockerfile này. Tạo một đường dẫn chứa Dockerfile mới theo các bước sau:
$ mkdir viblo
$ cd viblo
$ touch Dockerfile
Trong bài này, tôi sẽ tiến hành cài đặt Nginx và PHP-FPM 7 dựa trên image Ubuntu16.04 của Docker. Ngoài ra, tồi cần thêm Supervisord cho phép khởi động Nginx và Php-fpm mỗi khi chúng ta start container trong cùng một command. Mở Dockerfile được tạo từ bước trên bằng editor quen thuộc của bạn và bắt đầu chỉnh sửa: Dòng đầu tiên của file, hãy thêm base image mà chúng ta muốn sử dụng bằng lệnh FROM ở đây là image Ubuntu16.04.
#Download base image ubuntu 16.04
FROM ubuntu:16.04
Tiến hành update Ubuntu software bên trong Dockerfile bằng lệnh RUN:
# Update Ubuntu Software repository
RUN apt-get update
Tiếp đến, tiền hành cài đặt Nginx, php-fpm, supervisord cho image của chúng ta bằng câu lệnh sau:
# Install nginx, php-fpm and supervisord from ubuntu repository
RUN apt-get install -y nginx php7.0-fpm supervisor && \
   rm -rf /var/lib/apt/lists/*
Ở giai đoạn này, tất cả các ứng dụng đã được cài đặt, việc chúng ta cần làm tiếp theo là tiến hành config cho chúng. Chúng ta sẽ tiến hành config Nginx để nó có thể sử lý các ứng dụng PHP bằng cách chỉnh sửa config của default virtual host. Chúng ta có thể thay thế mới hoàn toàn bằng file config của mình hoặc có thể chỉnh sửa với lệnh 'sed'.
#Define the ENV variable
ENV nginx_vhost /etc/nginx/sites-available/default
ENV php_conf /etc/php/7.0/fpm/php.ini
ENV nginx_conf /etc/nginx/nginx.conf
ENV supervisor_conf /etc/supervisor/supervisord.conf

# Enable php-fpm on nginx virtualhost configuration
COPY default ${nginx_vhost}
RUN sed -i -e 's/;cgi.fix_pathinfo=1/cgi.fix_pathinfo=0/g' ${php_conf} && \
    echo "\ndaemon off;" >> ${nginx_conf}
Tiếp theo, tiến hành config Supervisord cho Nginx và PHP-FPM. Chúng ta sẽ thay thế file config default của Supervisord bằng một file config mới sử dụng lệnh 'COPY của Dockerfile
#Copy supervisor configuration
COPY supervisord.conf ${supervisor_conf}
Bây giờ, tạo một đường đẫn mới để lưu php-fpm sock file và cấp quyền owner cho /var/www/html và PHP thành www-data
RUN mkdir -p /run/php && \
    chown -R www-data:www-data /var/www/html && \
    chown -R www-data:www-data /run/php
Tiếp theo, định nghĩa volumn để chúng ta có thể mount list directory vào host machine:
# Volume configuration
VOLUME ["/etc/nginx/sites-enabled", "/etc/nginx/certs", "/etc/nginx/conf.d", "/var/log/nginx", "/var/www/html"]
Cuối cùng, định nghĩa default command cho container và mở port cho http và https. Chúng ta sẽ tạo một file start.sh cho default CMD command khi mà container được khởi chạy.
# Configure Services and Port
COPY start.sh /start.sh
CMD ["./start.sh"]

EXPOSE 80 443
Sau khi hoàn tất các bước trên, bạn có được file Dockerfile như sau:
#Download base image ubuntu 16.04
FROM ubuntu:16.04

# Update Software repository
RUN apt-get update

# Install nginx, php-fpm and supervisord from ubuntu repository
RUN apt-get install -y nginx php7.0-fpm supervisor && \
    rm -rf /var/lib/apt/lists/*

#Define the ENV variable
ENV nginx_vhost /etc/nginx/sites-available/default
ENV php_conf /etc/php/7.0/fpm/php.ini
ENV nginx_conf /etc/nginx/nginx.conf
ENV supervisor_conf /etc/supervisor/supervisord.conf

# Enable php-fpm on nginx virtualhost configuration
COPY default ${nginx_vhost}
RUN sed -i -e 's/;cgi.fix_pathinfo=1/cgi.fix_pathinfo=0/g' ${php_conf} && \
    echo "\ndaemon off;" >> ${nginx_conf}

#Copy supervisor configuration
COPY supervisord.conf ${supervisor_conf}

RUN mkdir -p /run/php && \
    chown -R www-data:www-data /var/www/html && \
    chown -R www-data:www-data /run/php

# Volume configuration
VOLUME ["/etc/nginx/sites-enabled", "/etc/nginx/certs", "/etc/nginx/conf.d", "/var/log/nginx", "/var/www/html"]

# Configure Services and Port
COPY start.sh /start.sh
CMD ["./start.sh"]

EXPOSE 80 443
Tiếp theo, tạo các file default, supervisord.conf, start.sh cùng directory với Dockerfile
$ touch default
$ touch supervisord.conf
$ touch start.sh
Trong file default, thêm nội dung sau:
server {
    listen 80 default_server;
    listen [::]:80 default_server;

    root /var/www/html;
    index index.html index.htm index.nginx-debian.html;

    server_name localhost;

    error_log /var/log/nginx/error.log;
    access_log /var/log/nginx/access.log;

    location / {
        try_files $uri $uri/ =404;
    }

    location ~ \.php$ {
        include snippets/fastcgi-php.conf;
        fastcgi_pass unix:/run/php/php7.0-fpm.sock;
    }

    # deny access to .htaccess files, if Apache's document root
    # concurs with nginx's one
    #
    #location ~ /\.ht {
    #    deny all;
    #}
}
Trong file supervisord.conf, thêm nội dung sau:
[unix_http_server]
file=/dev/shm/supervisor.sock   ; (the path to the socket file)

[supervisord]
logfile=/var/log/supervisord.log ; (main log file;default $CWD/supervisord.log)
logfile_maxbytes=50MB        ; (max main logfile bytes b4 rotation;default 50MB)
logfile_backups=10           ; (num of main logfile rotation backups;default 10)
loglevel=info                ; (log level;default info; others: debug,warn,trace)
pidfile=/tmp/supervisord.pid ; (supervisord pidfile;default supervisord.pid)
nodaemon=false               ; (start in foreground if true;default false)
minfds=1024                  ; (min. avail startup file descriptors;default 1024)
minprocs=200                 ; (min. avail process descriptors;default 200)
user=root             ;

; the below section must remain in the config file for RPC
; (supervisorctl/web interface) to work, additional interfaces may be
; added by defining them in separate rpcinterface: sections
[rpcinterface:supervisor]
supervisor.rpcinterface_factory = supervisor.rpcinterface:make_main_rpcinterface

[supervisorctl]
serverurl=unix:///dev/shm/supervisor.sock ; use a unix:// URL  for a unix socket

; The [include] section can just contain the "files" setting.  This
; setting can list multiple files (separated by whitespace or
; newlines).  It can also contain wildcards.  The filenames are
; interpreted as relative to this file.  Included files *cannot*
; include files themselves.

[include]
files = /etc/supervisor/conf.d/*.conf


[program:php-fpm7.0]
command=/usr/sbin/php-fpm7.0 -F
numprocs=1
autostart=true
autorestart=true

[program:nginx]
command=/usr/sbin/nginx
numprocs=1
autostart=true
autorestart=true
Trong file start.sh, thêm nội dung:
#!/bin/sh

/usr/bin/supervisord -n -c /etc/supervisor/supervisord.conf
Thêm câu lệnh sau vào file Dockerfile để có thể file start.sh có thể thực hiện được.
RUN chmod +x start.sh
Đến đây, việc tạo Dockerfile coi như hoàn tất.
Bước 2: Build Docker image và tạo container mới trên image vừa tạo
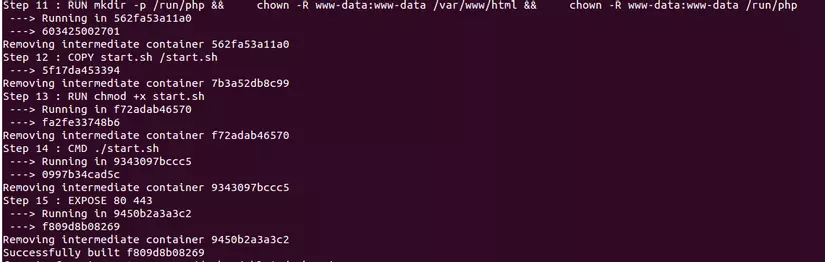
Chạy command sau để build image từ Dockerfile đã được tạo ở trên:
docker build -t nginx_image .
Câu lệnh trên sẽ tạo ra 1 image mới có tên là nginx_image. Sau khi câu lệnh hoàn tất, trên màn hình của bạn sẽ hiển thị.
Tiến hành kiểm tra image bằng lệnh
$ docker images
Kết quả thu được:

Như vậy là chúng ta đã build thành công 1 Docker image. Bây giờ hãy build một container mới dựa trên image đó. Để tiện cho việc test, hãy tạo thêm thư mục webroot.
mkdir -p /webroot
Bây giờ, chạy lệnh sau để tạo container mới từ nginx_image ở trên:
docker run -d -v /webroot:/var/www/html -p 9000:80 --name viblo_test nginx_image

Note:
- --name viblo_test nginx_image :Tạo mới container với tên 'viblo_test', dựa trên docker image 'nginx_images'.
- -p 9000:80 : 'viblo_test' container chạy trên cổng 9000 của host machine
- -v /webroot:/var/www/html: Thư mục /webroot ở trên host machine sẽ được rewrite vào thư mục /var/www/html ở trong container.
Bước 3: Testing Nginx and PHP-FPM in the Container
Tạo file index.html trong thư mục /webroot với nội dung sau:
<h1>Nginx and PHP-FPM 7 inside Docker Container</h1>
Tiếp đến, truy cập vào địa chỉ http://localhost:9000/index.html, kết quả hiện ra sẽ là:
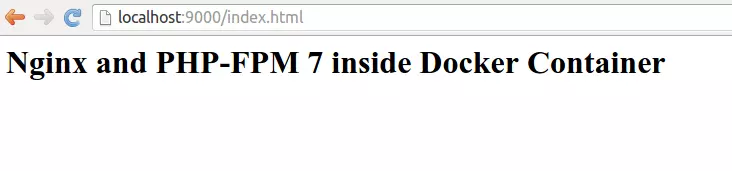
Bây giờ, hãy thử thay đổi nội dung của file index.html và reload lại trình duyệt của bạn nhé. ^^. Chúc mọi người thành công!
All rights reserved
