Django framework part 2
Bài đăng này đã không được cập nhật trong 4 năm
** Creating an admin user **
Đầu tiên chúng ta sẽ tạo 1 user có thể login vào admin site. Chạy dòng lệnh sau :
$ python manage.py createsuperuser
Điền username, Email address, Password vào
Username: admin
Email address: admin@example.com
Password: *********
Password (again): *********
Superuser created successfully.
Start the development server
site admin của Django sẽ được activate theo mặc định. Chạy server develop.
$ python manage.py runserver
Vào link sau http://127.0.0.1:8000/admin/. Bạn sẽ thây màn hình login admin
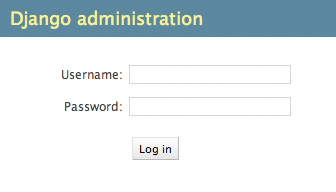
Hệ thống dịch sẽ được mở theo mặc định,màn hình login có thể được hiển thị trong ngôn ngữ của máy mình đang sử dụng, cái này sẽ phụ thuộc vào setting ở trình duyệt.
** Enter the admin site **
Sau khi login vào bạn sẽ thấy mình hình như sau:
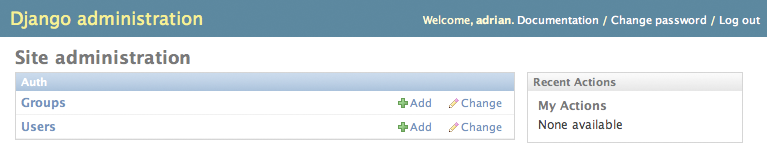
Bạn sẽ thấy 2 type content là groups và users. Đây là những giá trị mặc định đượ cung cấp bởi c django.contrib.auth.
Make the poll app modifiable in the admin
Tiếp, chúng ta set Question object vào admin.
Mở polls/admin.py thay nội dung như sau:
polls/admin.py
from django.contrib import admin
from polls.models import Question

admin.site.register(Question)
Explore the free admin functionality
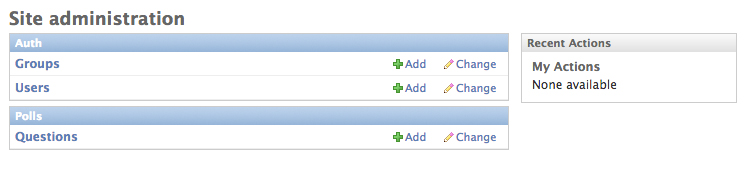
Django sẽ cho phep Questions được hiển thị trên admin page :
Click vào “Questions”.
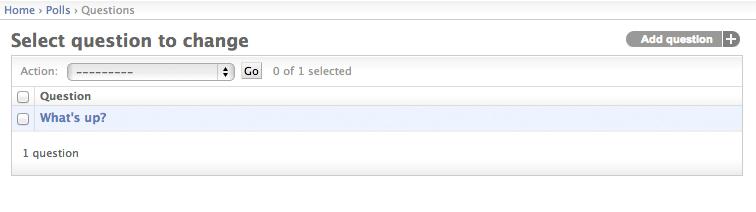
Page này sẽ hiển thị tất cả các question trong DB và cho phép bạn chọn để thay đổi nó.
Ở đây có mục question“What’s up?” mình đã tạo ở tutorial 1. Chọn question “What’s up?” để edit nó :
Customize the admin form
Bằng việc đăng kí model Question trong admin.site.register(Question), Django có thể tự xây dụng 1 form mặc định, nhưng trong trường hợp bạn muốn thay đổi nó. Bạn có thể làm như sau.
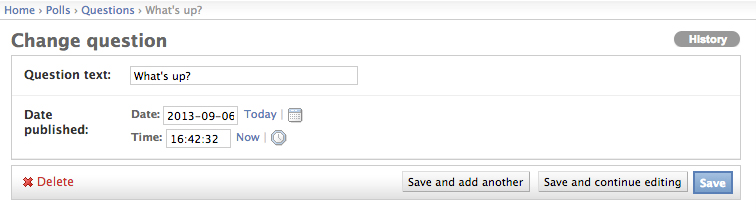
Ở đây mình sẽ thay đổi thứ tự của fields trong form edit.
Thay đổi dòngadmin.site.register(Question):
polls/admin.py
from django.contrib import admin
from polls.models import Question

class QuestionAdmin(admin.ModelAdmin):
    fields = ['pub_date', 'question_text']

admin.site.register(Question, QuestionAdmin)
Cách thức làm là như sau - bạn tạo 1 object model admin sau đấy truyền nó như argument thứ 2 vào admin.site.register().
Việc này sẽ giúp cho Publication date xuât hiện trước Question
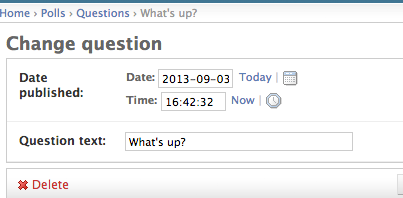
Tiếp tục, chúng ta sẽ tách form thành những field tách biệt:
polls/admin.py
from django.contrib import admin
from polls.models import Question

class QuestionAdmin(admin.ModelAdmin):
    fieldsets = [
        (None,               {'fields': ['question_text']}),
        ('Date information', {'fields': ['pub_date']}),
    ]

admin.site.register(Question, QuestionAdmin)
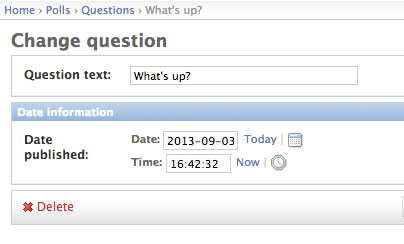
Chúng ta sẽ có form như sau :
Bạn có thể gán class HTML vào mỗi fieldset. Django cung cấp class cho phép "collapse" các fieldset.
polls/admin.py
from django.contrib import admin
from polls.models import Question

class QuestionAdmin(admin.ModelAdmin):
    fieldsets = [
        (None,               {'fields': ['question_text']}),
        ('Date information', {'fields': ['pub_date'], 'classes': ['collapse']}),
    ]

admin.site.register(Question, QuestionAdmin)

** Adding related objects **
Tiếp theo chúng ta sẽ tạo Choice. Mỗi question sẽ có nhiều choices.
Chúng ta sẽ có 2 cách để tạo Choice. Cách thứ 1 là ta đăng ký Choice trong admin như đã làm ở trên với Question.
polls/admin.py
from django.contrib import admin
from polls.models import Choice, Question
# ...
admin.site.register(Choice)
“Add choice” form sẽ như dưới đây.
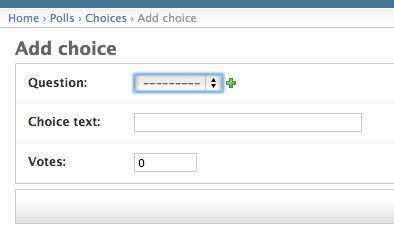
Trong form này thì Question sẽ nằm trong select box chứa tất cả mọi question trong DB. Django nhận thức đc rằng 1 ForeignKey sẽ được hiển thị trong admin như 1 selectbox.
Tuy nhiên cách làm này rất ko hiệu quả vì mình ko thể add nhiều câu hỏi ngay sau khi mình tạo 1 Question mới.
Xóa register() cho Choice model. Sau đấy edit code đăng kí Question như sau:
polls/admin.py
from django.contrib import admin
from polls.models import Choice, Question

class ChoiceInline(admin.StackedInline):
    model = Choice
    extra = 3

class QuestionAdmin(admin.ModelAdmin):
    fieldsets = [
        (None,               {'fields': ['question_text']}),
        ('Date information', {'fields': ['pub_date'], 'classes': ['collapse']}),
    ]
    inlines = [ChoiceInline]

admin.site.register(Question, QuestionAdmin)
Load lại trang “Add question” :
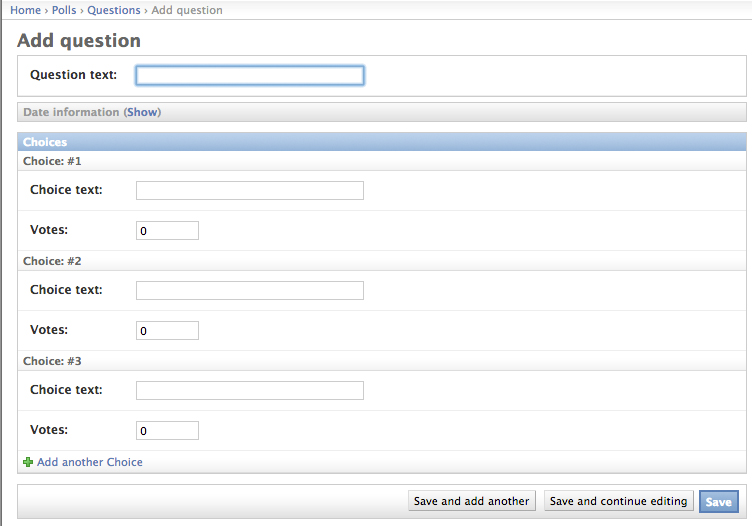
Ở đây chúng ta sẽ thấy tốn khá nhiều ko gian để hiển thị tất cả các fields cho việc điền Choice. Django cũng cấp cho ta 1 cách để hiển thị object inline. Bạn thay đổi như sau:
polls/admin.py
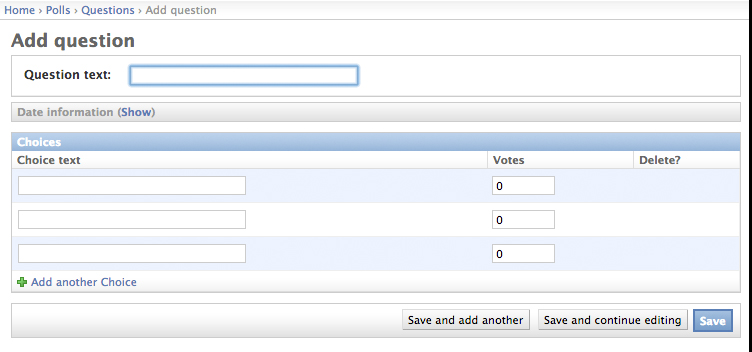
class ChoiceInline(admin.TabularInline):
#...
Với TabularInline thay vì StackedInline, object sẽ được hiển thi như sau:

** Customize the admin change list **
Tiếp theo sẽ thay đổi list hiển thị tất cả các câu hỏi.
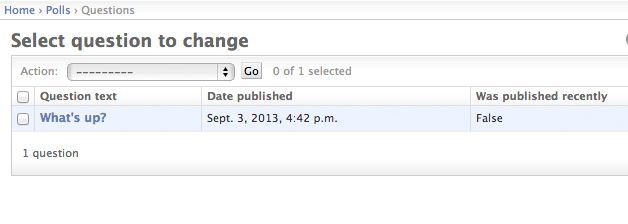
Tại thời điểm hiện tại chúng ta có :
add thêm đoạn lệnh sau
polls/admin.py
class QuestionAdmin(admin.ModelAdmin):
    # ...
    list_display = ('question_text', 'pub_date', 'was_published_recently')
Chúng ta sẽ có như sau:
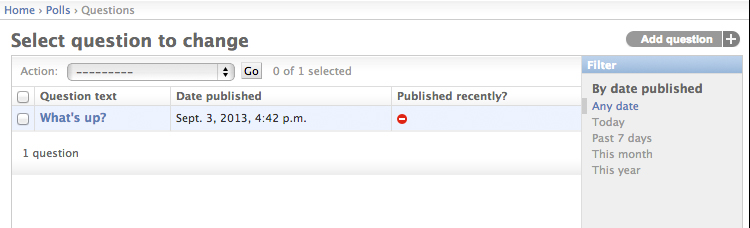
Chúng ta có thể cải thiện phần hiển thị was_published_recently tốt hơn như sau :
polls/models.py
class Question(models.Model):
    # ...
    def was_published_recently(self):
        return self.pub_date >= timezone.now() - datetime.timedelta(days=1)
    was_published_recently.admin_order_field = 'pub_date'
    was_published_recently.boolean = True
    was_published_recently.short_description = 'Published recently?'
Ngoài ra để add thêm sidebar Filter theo pub_date, mình có thể add thêm vào polls/admin.py như sau :
list_filter = ['pub_date']
Add thêm 1 search box vào top của change list.
search_fields = ['question_text']
** Customize the admin index page **
Trong trường hợp bạn muốn customize admin index page thì template để thay thế layout là admin/index.html.
Nguồn: https://docs.djangoproject.com/en/1.7/intro/tutorial02/
All rights reserved
