Đăng nhập bằng tài khoản gmail với Rails
Bài đăng này đã không được cập nhật trong 7 năm
1. Tạo google project
Để có chức năng đăng nhập bằng tài khoản gmail bạn cần có thông tin CLIENT ID và CLIENT SECRET của google project. Nếu bạn chưa có google project bạn có thể làm theo các bước sau đây.
-
Đầu tiên bạn đăng nhập vào Google Developers Console (tài khoản đăng nhập chính là tài khoản gmail của bạn).
-
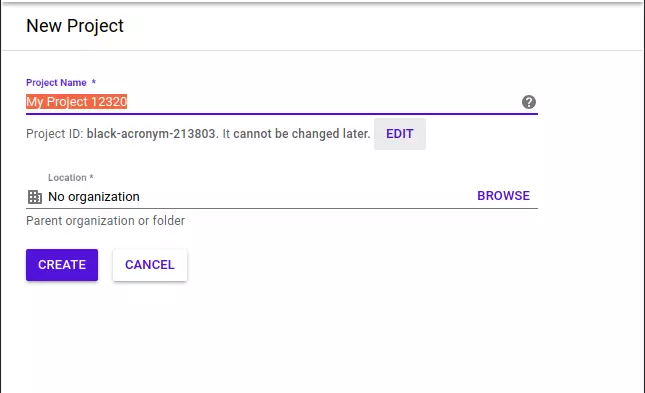
Chọn Create Project > Điền thông tin project vào form rồi click vào nút CREATE
-
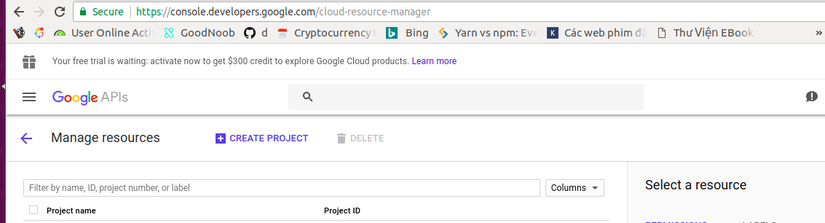
Sau đó bạn đợt một lát project vừa mới tạo sẽ hiển thị tại cloud-resource-manager
-
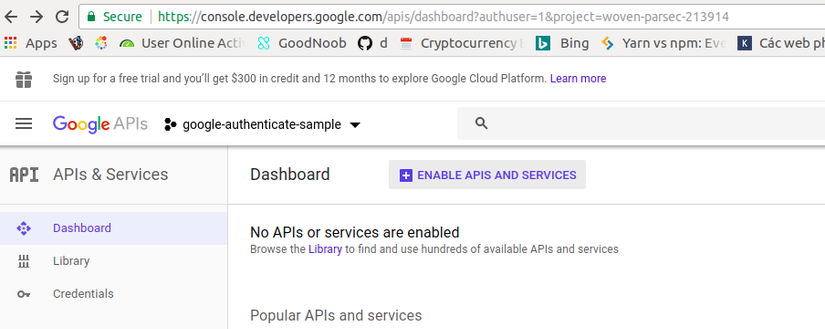
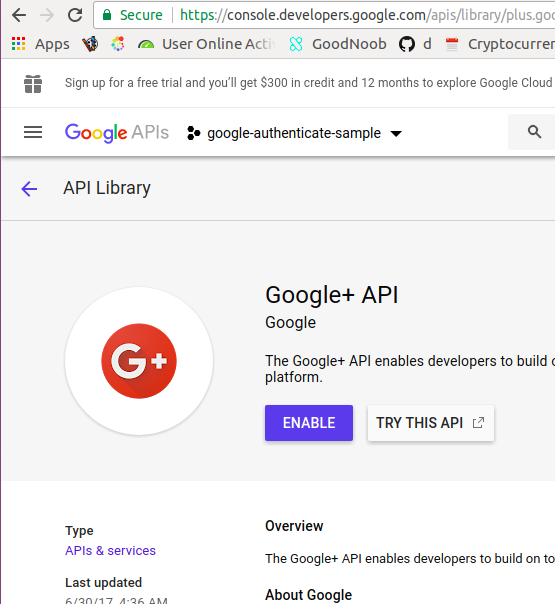
Tiếp đó bạn cần enable chức năng API của google project Bạn click vào Enabled APIs and services
Chọn Google+ API
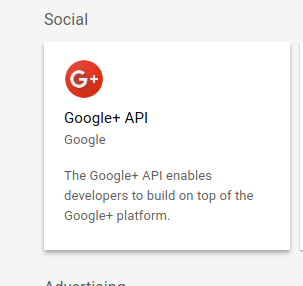
Click vào ENABLE
- Bước tiếp theo ta sẽ chọn project vừa tạo và sinh ra Client ID và Client secret của project này như sau
- Chọn APIs & Services > Credentials
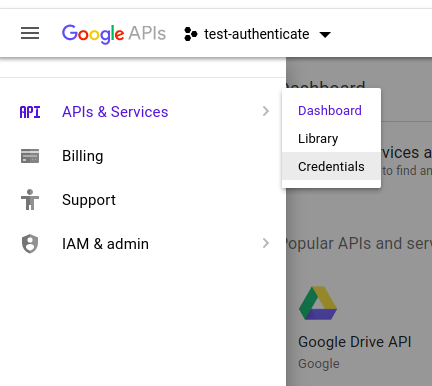
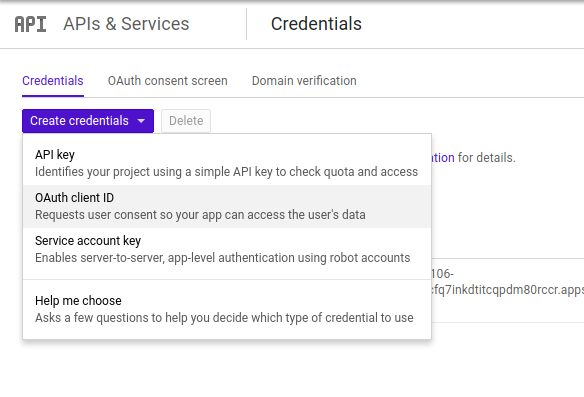
- Sau khi vào trang Credentials bạn chọn
create crednetials > OAuth client ID
- Tiếp đó bạn chọn tạo
Web applicationvà điền thông tinNamecủa application này vàAuthorized redirect URIs. Bấm crete là bạn đã tạo được mộtOAuth client ID
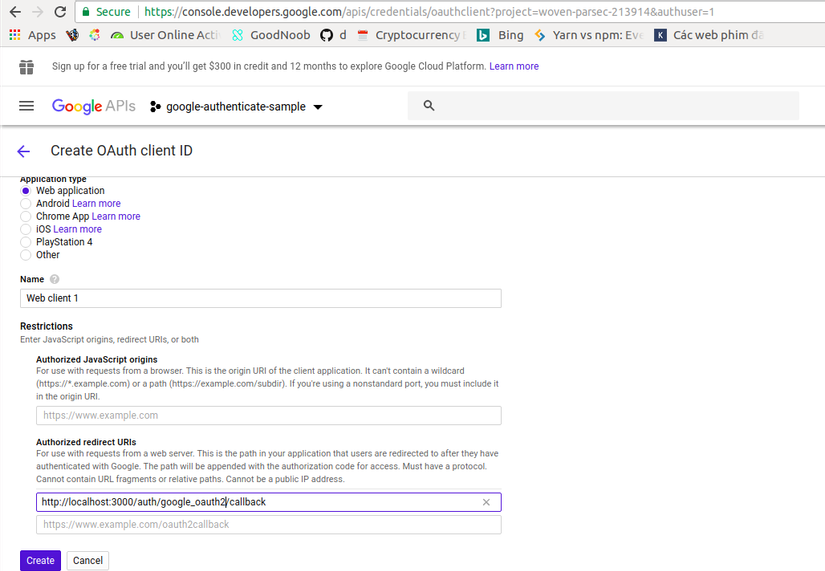 Chú ý: Bạn cần điền
 uthorized redirect URIs cẩn thận, đây là url sẽ nhận kết quả authenticate trả về từ google. Trong ví dụ trên tôi set giá trị là http://localhost:3000/auth/google_oauth2/callback tương ứng với môi trường develop. Khi chạy trên production bạn cần thêm uthorized redirect URIs tương ứng với domain của bạn sẽ là <your domain>/auth/google_oauth2/callback
Vậy là bạn đã có được client ID và client secret của app rồi
Tiếp theo ta sẽ dùng client ID và client secret để làm chức năng đăng nhập với gmail với Rails
2. Đăng nhập bằng tài khoản gmail với Rails
Đầu tiên bạn cần thêm gem omniauth-google-oauth2 vào Gemfile và chạy bundle install
gem 'omniauth-google-oauth2'
Tiếp theo đó ta tạo một file omniauth.rb ở trong thư mục initializers để khởi tạo OmniAuth với client ID và client secret đã được tạo ở trên
# config/initializers/omniauth.rb
Rails.application.config.middleware.use OmniAuth::Builder do
  provider :google_oauth2,
    ENV['GOOGLE_CLIENT_ID'],
    ENV['GOOGLE_SECRET'],
    scope: "email"
end
Tiếp theo ta tạo model user dùng để lưu lại thông tin người dùng cho việc authenticate
rails g model user provider uid name oauth_token oauth_expires_at:datetime
rake db:migrate
Tiếp đó ta tạo 2 controller mới là home và sessions để thực hiện việc log in và log out của user.
rails g controller home show
rails g controller Sessions create destroy
Tiếp đó ta sửa lại routes như sau
# config/routes.rb
GoogleAuthExample::Application.routes.draw do
  get 'auth/:provider/callback', to: 'sessions#create'
  get 'auth/failure', to: redirect('/')
  get 'signout', to: 'sessions#destroy', as: 'signout'

  resources :sessions, only: [:create, :destroy]
  resource :home, only: [:show]

  root to: "home#show"
end
Ta thấy get 'auth/:provider/callback', to: 'sessions#create' sẽ dùng để nhận kết quả authenticate từ google trả về trong trường hợp thành công. Còn get 'auth/failure', to: redirect('/') tương ứng với trường hợp authenticate gặp lỗi. Route get 'signout', to: 'sessions#destroy', as: 'signout' là link cho phép người dùng đăng xuất.
Tiếp theo chúng ta sẽ viết đoạn code để tạo mới user hoặc tìm user theo thông tin provider và uid google trả về. Để đơn giản tôi sẽ viết ở model User như sau
# app/models/user.rb:
class User < ActiveRecord::Base
  def self.from_omniauth(auth)
    where(provider: auth.provider, uid: auth.uid).first_or_initialize.tap do |user|
      user.provider = auth.provider
      user.uid = auth.uid
      user.name = auth.info.name
      user.oauth_token = auth.credentials.token
      user.oauth_expires_at = Time.at(auth.credentials.expires_at)
      user.save!
    end
  end
end
Tiếp theo ta định nghĩa thêm một helper method là current_user để lấy user hiện tại nó sử dụng được cả ở controller và views. Chúng ta sẽ tìm user dựa vào thông tin lưu ở session[:user_id]
# app/controllers/application_controller.rb
class ApplicationController < ActionController::Base
  protect_from_forgery with: :exception
  helper_method :current_user

  def current_user
    @current_user ||= User.find(session[:user_id]) if session[:user_id]
  end
end
Tiếp theo ta sẽ sửa sessions controller để thực hiện phần đăng nhập đăng xuất
# app/controllers/sessions_controller.rb
class SessionsController < ApplicationController
  def create
    user = User.from_omniauth(env["omniauth.auth"])
    session[:user_id] = user.id
    redirect_to root_path
  end

  def destroy
    session[:user_id] = nil
    redirect_to root_path
  end
end
Đến phần cuối ta sửa lại view của layout application
# app/views/layouts/application.html.erb
<!DOCTYPE html>
<html>
  <head>
    <title>Google Auth Example App</title>
    <%= stylesheet_link_tag    "application", media: "all", "data-turbolinks-track" => true %>
    <%= javascript_include_tag "application", "data-turbolinks-track" => true %>
    <%= csrf_meta_tags %>
  </head>
  <body>
    <div>
      <% if current_user %>
        Signed in as <strong><%= current_user.name %></strong>!
        <%= link_to "Sign out", signout_path, id: "sign_out" %>
      <% else %>
        <%= link_to "Sign in with Google", "/auth/google_oauth2", id: "sign_in" %>
      <% end %>
    </div>
    <div>
    <%= yield %>
    </div>
  </body>
</html>
như vậy ta đã hoàn thành xong ứng dụng đơn giản login/logout với tài khoản gmail cũng tương đối đơn giản
Cảm ơn bạn đã theo dõi bài viết
Tham khảo
All rights reserved
