Custom UIPageViewController
Bài đăng này đã không được cập nhật trong 5 năm
Đặt vấn đề
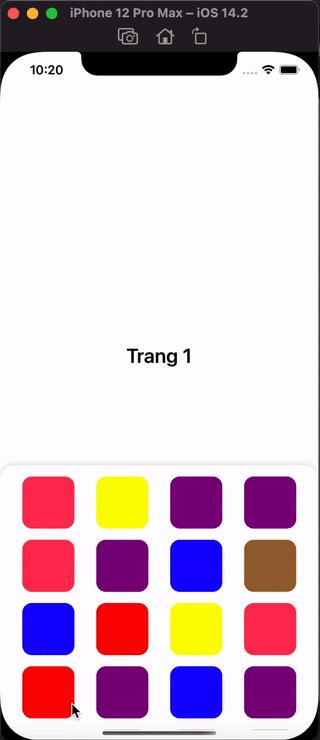
Trong quá trình xây dựng ứng dụng, chắc hẳn chúng ta sẽ gặp UI/UX như thế này
Để giải quyết bài toán này, đa phần mọi người sẽ chọn cách đưa một CollectionView vào trong một CollectionView. Cách tiếp cận này rất tốt, giải quyết được nhiều trường hợp. Tuy nhiên nếu các bạn xử lý không khéo về Layout cũng như quản lý Reuse của CollectionView, sẽ gây ra nhiều Bugs khó chịu về UI. Trong bài viết hôm nay, mình sẽ giới thiệu một cách tiếp cận khác để giải quyết vấn đề trên, đó là sử dụng UIPageViewController.
Giới thiệu UIPageViewController
UIPageViewController là một Component thuộc UIKit. UIPageViewController có thể hiểu là một mảng các ViewController và tại một thời điểm sẽ chỉ hiển thị 1 Controller (chính xác là view của ViewController đó, nhưng trong bài viết này mình xin phép gọi luôn là Controlller cho ngắn gọn  ) và các Controller này có thể chuyển qua lại (sang trái, phải) theo các hiệu ứng transition khác nhau trong lúc khởi tạo.
UIPageViewController có thể sử dụng trong nhiều trường hợp. Tuy nhiên theo mình thấy, khi tìm kiếm về cách sử dụng UIPageViewController lại không ra nhiều tài liệu. Swift cũng không hỗ trợ nhiều cho components này. Nếu bạn implement UIPageViewController mặc định của Appple sẽ thấy rõ điều đó. UIPageViewControllerDelegate cũng chỉ có 2 hàm được gọi khi view của một controller chuẩn bị transition sang view của controller tiếp theo trong Pages.
Để tiện sử dụng cũng như mở rộng tiện ích cho UIPageViewController, chúng ta sẽ phải thêm một số hàm Custom. Phần tiếp theo của bài viết mình sẽ đi vào từng bước cụ thể.
Custom UIPageViewController
Đầu tiên mình muốn nhận được sự kiện khi nào Controller hiển thị trên Page thay đổi kèm Index tương ứng. Ở trên mình đã nói đến 2 hàm trong Delegate mặc định nhưng 2 hàm này không phải lúc nào cũng được gọi. Do đó, mình sẽ tạo một Delegate để bắt được sự kiện này.
protocol CustomPageViewControllerDelegate: AnyObject {
    func pageViewController(pageViewController: CustomPageViewController, didUpdatePageIndex index: Int)
}
Tạo ra class CustomPageViewController kế thừa UIPageViewController
class CustomPageViewController: UIPageViewController {
    override func viewDidLoad() {
        super.viewDidLoad()
    }
 }
Mình sẽ khai báo thuộc tính controllers chứa một mảng Controller chính là những Controller được hiển thị trên UIPageViewController và một delegate thuộc kiểu CustomPageViewControllerDelegate mình đã định nghĩa ở trên. Nhớ để weak để tránh Retain Cycle.
class CustomPageViewController: UIPageViewController {
    weak var customDelegate: CustomPageViewControllerDelegate?
    var controllers = [UIViewController]()

    override func viewDidLoad() {
        super.viewDidLoad()
    }
 }
Cơ chế của UIPageViewController tại một thời điểm set một Controller, và tạo sẵn Controller trước (Sẽ hiển thị khi vuốt sang trái) và Controller sau (Sẽ hiển thị khi vuốt sang phải) của Controller đó. Do đó, khi cho CustomPageViewController conform UIPageViewControllerDataSource, ta sẽ phải khai báo 2 hàm
extension CustomPageViewController: UIPageViewControllerDataSource {
    func pageViewController(_: UIPageViewController, viewControllerBefore viewController: UIViewController) -> UIViewController? {
    }

    func pageViewController(_: UIPageViewController, viewControllerAfter viewController: UIViewController) -> UIViewController? {
    }
}
Bổ sung đoạn code sau vào 2 hàm đó. Logic của đoạn code này tương đối đơn giản, ta sẽ kiểm tra xem Controller được hiển thị đang ở index bao nhiêu. Lấy indext trừ đi 1 để ra index của Controller trước đó (previousController) trong mảng controlles, nếu index hợp lệ thì trả ra element tương ứng, còn không thì trả về nil. Tương tự với logic tìm afterController.
extension CustomPageViewController: UIPageViewControllerDataSource {
    func pageViewController(_: UIPageViewController, viewControllerBefore viewController: UIViewController) -> UIViewController? {
        guard let controllerIndex = controllers.firstIndex(of: viewController) else {
            return nil
        }
        let previousIndex = controllerIndex - 1
        if previousIndex >= 0 {
            return controllers[previousIndex]
        }
        return nil
    }

    func pageViewController(_: UIPageViewController, viewControllerAfter viewController: UIViewController) -> UIViewController? {
        guard let controllerIndex = controllers.firstIndex(of: viewController) else {
            return nil
        }
        let nextIndex = controllerIndex + 1
        if nextIndex < controllers.count {
            return controllers[nextIndex]
        }
        return nil
    }
}
Khai báo hàm notifyfNewIndex() để trigger cho delegate khi Controller mới được hiển thị, index thay đổi.
private func notifyfNewIndex() {
    if let firstViewController = viewControllers?.first,
       let index = controllers.firstIndex(of: firstViewController) {
        customDelegate?.pageViewController(pageViewController: self, didUpdatePageIndex: index)
    }
}
Khai báo hàm scrollToViewController. Mục đich cảu hàm này được gọi trong trường hợp chúng ta muốn chỉ định hiển thị một ViewController nào đó. Khi đó ta phải gọi hàm setViewControlles của UIPageViewController. Hàm này chúng ta sẽ không sử dụng trực tiếp, nên sẽ khai báo Private.
private func scrollToViewController(viewController: UIViewController,
                                        direction: UIPageViewController.NavigationDirection = .forward) {
    setViewControllers([viewController],
                       direction: direction,
                       animated: true,
                       completion: { _ in
                        self.notifyfNewIndex()
                       })
}
Các Controller của chúng ta nằm trong một mảng với các index tương ứng, trong quá trình sử dụng chúng ta muốn truy cập tới viewController cụ thể thông qua index. Do đó ta sẽ khai báo hàm func scrollToViewController(index newIndex: Int) viewControllers?.first trả về Controller đang được hiển thị. Tìm index tương ứng của firstViewController đó trong mảng controllers. So sánh newIndex so với index vừa tìm được để quyết định hướng scroll là forward hay reverse. Sau đó gọi hàm scrollToViewController vừa khai báo ở đoạn trên để set lại controller được hiển thị
func scrollToViewController(index newIndex: Int) {
    if let firstViewController = viewControllers?.first,
       let currentIndex = controllers.firstIndex(of: firstViewController) {
        let direction: UIPageViewController.NavigationDirection = newIndex >= currentIndex ? .forward : .reverse
        let nextViewController = controllers[newIndex]
        scrollToViewController(viewController: nextViewController, direction: direction)
    }
}
Conform UIPageViewControllerDelegate. Và khai báo đoạn mã sau. Hàm này sẽ được gọi khi viewController được gọi khi ta vuốt tuần tự giữa các Controller. Nhưng sẽ không đi vào khi ta gọi hàm setViewController của UIPageViewController. Do đó ta cần xử lý cả 2 trường hợp, gọi hàm notifyfNewIndex() để delegate bắt sự kiện.
extension CustomPageViewController: UIPageViewControllerDelegate {
    func pageViewController(_: UIPageViewController,
                            didFinishAnimating _: Bool,
                            previousViewControllers _: [UIViewController],
                            transitionCompleted _: Bool) {
        notifyfNewIndex()
    }
}
Bổ sung một số hàm trong viewDidLoad. Chúng ta cần set controller mặc định hiển thị cho PageViewController, mình sẽ chọn là controller đầu tiên trong mảng.
override func viewDidLoad() {
    super.viewDidLoad()
    dataSource = self
    delegate = self
    if let initialViewController = controllers.first {
        scrollToViewController(viewController: initialViewController)
    }
}
Sử dụng CustomPageViewController
Kịch bản ở đây sẽ giống như ví dụ ở đầu bài viết. Do đó mình sẽ tạo 1 Controller đơn giản gồm 1 CollectionView và random Color hiển thị
class ColorViewController: UIViewController {
    private var collectionView: UICollectionView!
    private let randomColors: [UIColor] = [.red, .yellow, .blue, .orange, .purple, .systemPink, .brown]

    override func viewDidLoad() {
        configView()
    }

    private func configView() {
        let layout = UICollectionViewFlowLayout()
        layout.itemSize = CGSize(width: 70, height: 70)
        layout.minimumLineSpacing = 15
        layout.minimumInteritemSpacing = 15
        layout.sectionInset = UIEdgeInsets(top: 0, left: 15, bottom: 0, right: 15)
        collectionView = UICollectionView(frame: .zero, collectionViewLayout: layout)
        view.addSubview(collectionView)
        collectionView.snp.makeConstraints {
            $0.edges.equalToSuperview()
        }
        collectionView.backgroundColor = .clear
        collectionView.dataSource = self
        collectionView.register(UICollectionViewCell.self, forCellWithReuseIdentifier: "Cell")
    }
}

extension ColorViewController: UICollectionViewDataSource {
    func collectionView(_ collectionView: UICollectionView, numberOfItemsInSection section: Int) -> Int {
        return 20
    }

    func collectionView(_ collectionView: UICollectionView, cellForItemAt indexPath: IndexPath) -> UICollectionViewCell {
        let cell = collectionView.dequeueReusableCell(withReuseIdentifier: "Cell", for: indexPath)
        cell.contentView.backgroundColor = randomColors.randomElement()
        cell.contentView.cornerRadius = 13
        return cell
    }
}
Bây giời mình sẽ tạo một CustomPageViewController gồm một mảng ColorViewController vừa tạo ở trên trong ViewController. Mình sẽ khởi tạo từ trong Code pageViewController vì khi kéo trực tiếp từ Storyboard, Swift sẽ mặc định transitionStyle là dạng .pageCurl
pageViewController = CustomPageViewController(transitionStyle: .scroll, navigationOrientation: .horizontal, options: nil)
    pageViewController.customDelegate = self
    pageViewController.controllers = [ColorViewController(), ColorViewController(), ColorViewController()]
    addChild(pageViewController)
    contentView.addSubview(pageViewController.view)
    pageViewController.view.snp.makeConstraints {
        $0.top.leading.equalToSuperview().offset(15)
        $0.trailing.bottom.equalToSuperview().inset(15)
}
Tiếp đến mình sẽ cho ViewController conform CustomPageViewControllerDelegate
extension ViewController: CustomPageViewControllerDelegate {
    func pageViewController(pageViewController: CustomPageViewController, didUpdatePageIndex index: Int) {
        pageLabel.text = "Trang \(index + 1)"
    }
}
Build và Run Project mình sẽ thu được kết quả như ví dụ ở đầu bài viết
Source Code
https://github.com/buixuanhuy5798/DemoCustomPageViewController
All rights reserved
