Custom SideMenu (Hambuger Menu) bằng Swift
Bài đăng này đã không được cập nhật trong 5 năm
Trong quá trình phát triển các ứng dụng iOS, rất dễ gặp các trường hợp có sử dụng SideMenu. Đây tuy là hướng Design đã cũ, nhưng vì tính tiện lợi, tới nay dạng thiết kế này vẫn được sử dụng phổ biến. Trong bài viết hôm nay, mình sẽ custom một SideMenu đơn giản.
Tạo giao diện
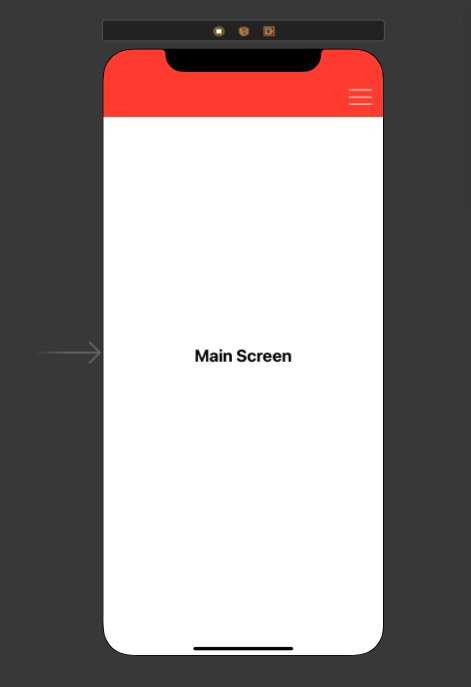
Đầu tiên, tạo MainController và layout trong Storyboard theo các bước sau
Bước 1: Mình sẽ kéo 1 Label vào giữa màn hình, đại diện cho content của màn hình chính. 1 view đại diện cho Navigation Bar, kèm button để hiển thị Menu
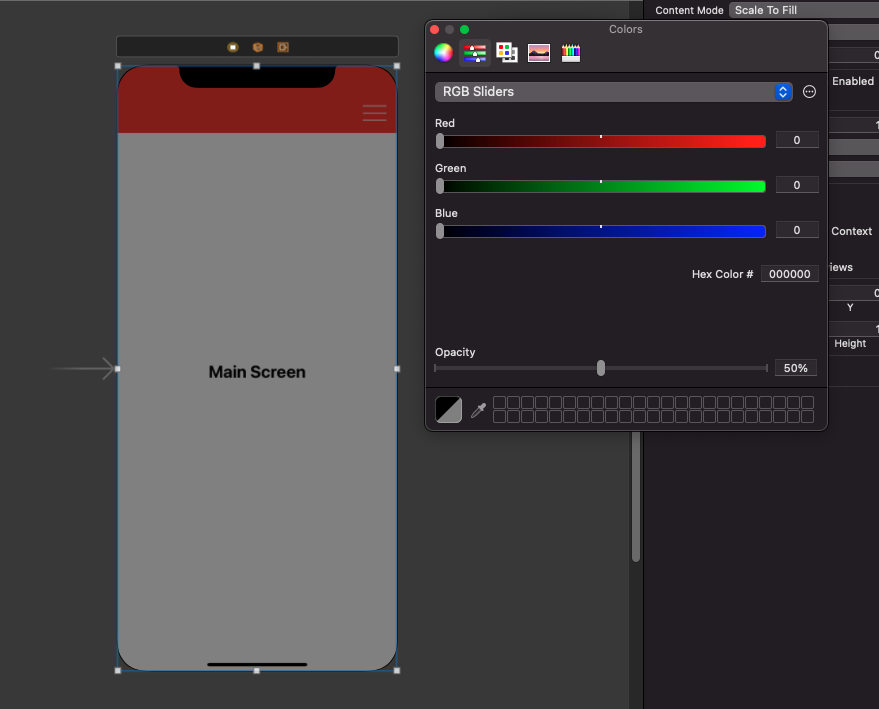
Bước 2: Kéo một View, set màu tương ứng với kiểu blur mà chúng ta muốn. Ở đây mình sẽ set màu đen, opacity bằng 0.5. Đây là phần tạo hiệu ứng blur, hiển thị lên trên content của view và nằm dưới menu
Bước 3: Kéo một View tương ứng với phần hiển thị Menu bạn muốn. Ở đây mình tạo một menu đi từ phải vào, có độ rộng bằng 2/3 kích thước màn hình. Do đó mình sẽ layout như sau
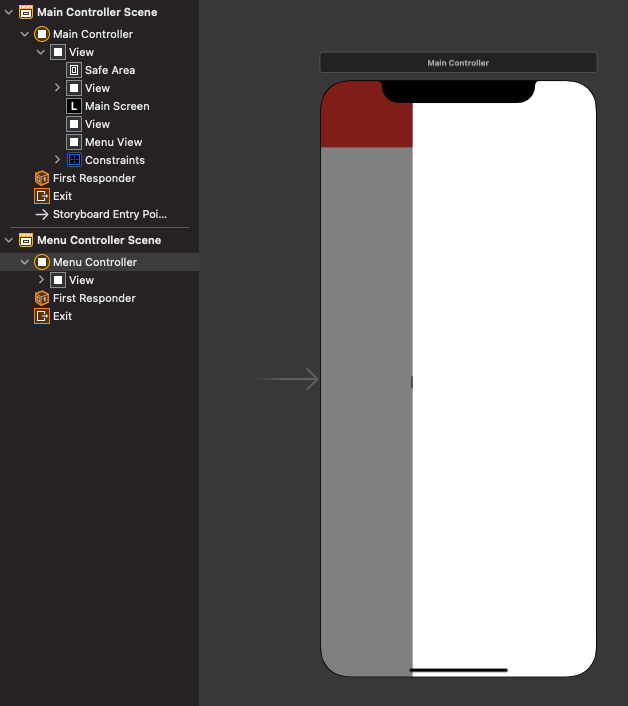
Lưu ý: Layout MenuView nằm trên BlurMenuView (Không phải là view con của BlurView)
Bước 4: Tuỳ thuộc vào phức tạp về Logic trong Menu của bạn, mà chúng ta sẽ có 2 hướng giải quyết ở bước này
Cách 1: Kéo View (hoặc TableView, CollectionView,..) tuỳ thuộc vào giao diện menu chúng ta mong muốn trực tiếp vào View chúng ta vừa layout ở trên. Và thực hiện setup logic cho View đó trực tiếp trong MainController
- Ưu điểm: Cách này phù hợp với những Menu đơn giản, thường lấy data local hiển thị hoặc chỉ có vài options cố định, ít có sự thay đổi
- Nhược điểm: Toàn bộ logic hiển thị, lấy data update UI cho menu phải thực hiện hoàn toàn trong MainController. Trường hợp phải call nhiều API để xử lý logic (Chẳng hạn Menu được dùng để hiển thị Notifications, phải hanlde rất nhiều action như load data, pull to refresh, load more, mark as readed, ...). Việc đẩy những logic đó vào MainController làm phình to Module, việc maintain sẽ gặp khó khăn. Để giải quyết bài toán này, chúng ta có cách số 2
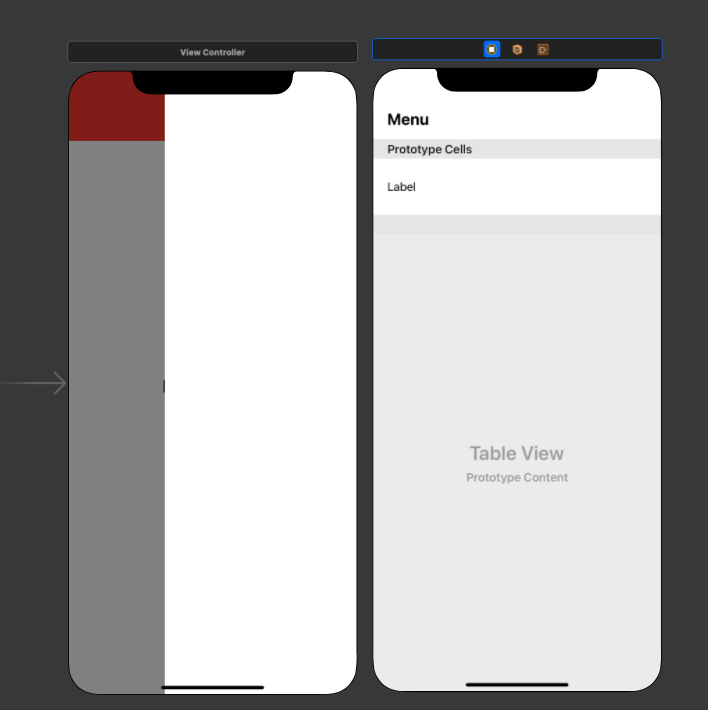
Cách 2: Tách Menu thành một module riêng biệt. Coi View đã add ở bước 3 là một Container View. Chúng ta sẽ add MenuController vào trong Container View này.
Trong bài viết này, mình sẽ sử dụng cách số 2 để thực hiện demo, đây là cách tổng quát hơn và có thể áp dụng tốt cho nhiều trường hợp. Do đó, mình sẽ vào một ViewController mới và đặt tên là MenuController. Thực hiện layout content cho MenuController. Ở đây mình sẽ kéo vào một tableView
Xử lý Logic
Sau khi hoàn thành các bước layout, chúng ta sẽ chuyển sang xử lý Logic
Đầu tiên, mình sẽ xử lý việc hiển thị data cho MenuController
import UIKit

class MenuController: UIViewController {

    @IBOutlet private weak var tableView: UITableView!
    private var items: [MenuItem] = [.toScreen1, .toScreen2, .toScreen3]

    override func viewDidLoad() {
        super.viewDidLoad()
        setUpView()
    }

    func setUpView() {
        tableView.dataSource = self
        tableView.rowHeight = UITableView.automaticDimension
    }
}

extension MenuController: UITableViewDataSource {
    func tableView(_ tableView: UITableView, numberOfRowsInSection section: Int) -> Int {
        return items.count
    }

    func tableView(_ tableView: UITableView, cellForRowAt indexPath: IndexPath) -> UITableViewCell {
        guard let cell = tableView.dequeueReusableCell(withIdentifier: "MenuItemCell") as? MenuItemCell else {
            return UITableViewCell()
        }
        cell.setContentForCell(item: items[indexPath.row])
        return  cell
    }
}
Kéo các component cần thiết vào MainController. Cách làm của mình sẽ là thay đổi trailingConstraint của menuView so với superView để hiển thị hoặc ẩn view này đi kèm hiệu ứng trượt. Do đó, mình sẽ kéo cả trailing constraint của menuView vào MainController
import UIKit

class MenuController: UIViewController {

    @IBOutlet private weak var tableView: UITableView!
    private var items: [MenuItem] = [.toScreen1, .toScreen2, .toScreen3]

    override func viewDidLoad() {
        super.viewDidLoad()
        setUpView()
    }

    func setUpView() {
        tableView.dataSource = self
        tableView.rowHeight = UITableView.automaticDimension
    }

    @IBAction private func plusButtonTapped(_ sender: Any) {
        let randomItem = items.randomElement()
        items.append(randomItem ?? .toScreen1)
        tableView.reloadData()
    }
}

extension MenuController: UITableViewDataSource {
    func tableView(_ tableView: UITableView, numberOfRowsInSection section: Int) -> Int {
        return items.count
    }

    func tableView(_ tableView: UITableView, cellForRowAt indexPath: IndexPath) -> UITableViewCell {
        guard let cell = tableView.dequeueReusableCell(withIdentifier: "MenuItemCell") as? MenuItemCell else {
            return UITableViewCell()
        }
        cell.setContentForCell(item: items[indexPath.row])
        return  cell
    }
}
Tiếp đó là sử dụng menuView như một Container View, add MenuController thành childViewController
private func setUpUI() {
    let storyboard = UIStoryboard(name: "Main", bundle: nil)
    guard let menuController = storyboard.instantiateViewController(identifier: "MenuController") as? MenuController else {
        return
    }
    menuController.view.frame = menuView.bounds
    menuView.addSubview(menuController.view)
    addChild(menuController)
    menuController.didMove(toParent: self)
}
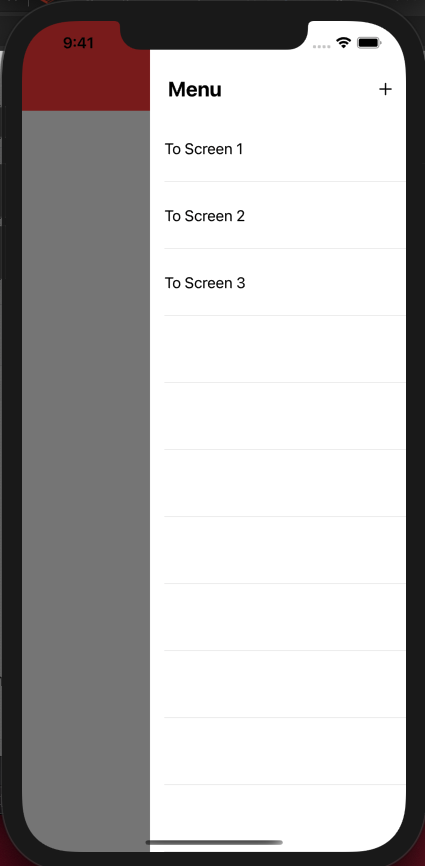
Build và Run Project, ta thu được kết quả như sau
Khi nhấn button add ở trong giao diện Menu, 1 item mới sẽ được thêm vào và reload trên giao diện. Có thể thấy việc xử lý logic hoàn toàn được thực hiện trong MenuController thay vì Main
Xử lý animation và Swipe Gesture
Tạo biến isOpenMenu để đánh dấu trạng thái hiển thị của MenuView. Ban đầu menuView sẽ không hiển thị, nên sẽ set lại trailingConstraint để menuView biến mất khỏi giao diện chính và ẩn blurView đi
private var isOpenMenu = false

override func viewDidLoad() {
    super.viewDidLoad()
    setUpUI()
    menuViewTrailingConstraint.constant = -(UIScreen.main.bounds.width * 2 / 3)
    blurMenuView.isHidden = true
}
Ấn button trên NavigationBar, menuView hiển thị từ phải vào, độ rộng bằng 2/3 kích thước màn hình
@IBAction private func openMenuButtonTapped(_ sender: Any) {
    displayMenu()
}

func displayMenu() {
    isOpenMenu.toggle()
    blurMenuView.alpha = isOpenMenu ? 0.5 : 0
    blurMenuView.isHidden = !isOpenMenu
    UIView.animate(withDuration: 0.2) {
        self.menuViewTrailingConstraint.constant = self.isOpenMenu ? 0 : -(UIScreen.main.bounds.width * 2 / 3)
        self.view.layoutIfNeeded()
    }
}
Build và Run Project, chúng ta sẽ thu được kết quả như mong muốn.
Tuy nhiên hiện tại mới chỉ hiển thị ra, bây giờ cần xử lý để ẩn Menu đi.
Ở đây mình mong muốn, khi người dùng chạm vào phần bên ngoài giao diện chính của menu, hoặc khi vuốt Menu sang phải (khoảng cách từ lúc bất đầu vuốt đến khi thả tay lớn hơn một nửa độ rộng Menu) thì sẽ ẩn Menu đi. Trường hợp vuốt không đủ yêu cầu cần thiết để ẩn đi, Menu sẽ quay về trạng thái hiển thị bình thường.
Để giải quyết bài toán đó, mình xử lý như sau
extension MainController {
    // Lưu lại toạ độ x điểm bắt đầu chạm
    override func touchesBegan(_ touches: Set<UITouch>, with event: UIEvent?) {
        super.touchesBegan(touches, with: event)
        if isOpenMenu {
            if let touch = touches.first {
                let location = touch.location(in: blurMenuView)
                beginPoint = location.x
            }
        }
    }

    // Tính khoảng cách người dùng vuốt theo trục x để thay đổi toạ độ Menu, tạo hiệu ứng trượt theo cử chỉ của người dùng
    override func touchesMoved(_ touches: Set<UITouch>, with event: UIEvent?) {
        super.touchesMoved(touches, with: event)
        if isOpenMenu, let touch = touches.first {
            let location = touch.location(in: blurMenuView)
            let differenceFromBeginPoint = location.x - beginPoint
            if differenceFromBeginPoint > 0, differenceFromBeginPoint < Constant.widthNotificationView {
                difference = differenceFromBeginPoint
                menuViewTrailingConstraint.constant = -differenceFromBeginPoint
                blurMenuView.alpha = 0.5 * (1 - differenceFromBeginPoint / Constant.widthNotificationView)
            }
        }
    }

    // Sau khi người dùng thả tay, tính toán khoảng cách điểm kết thúc so với điểm bắt đầu theo trục x để quyết định ẩn hay vẫn hiển thị Menu
    override func touchesEnded(_ touches: Set<UITouch>, with event: UIEvent?) {
        super.touchesEnded(touches, with: event)
        if isOpenMenu {
            if difference == 0, let touch = touches.first {
                // Trường hợp người dùng chỉ chạm, không vuốt, nếu điểm chạm nằm ngoài MenuView, sẽ ẩn MenuView đi
                let location = touch.location(in: blurMenuView)
                if !menuView.frame.contains(location) {
                    displayNotification(isShown: false)
                }
            } else if difference > Constant.widthNotificationView / 2 {
                // Trường hợp khoảng cách lớn 1/2 độ rộng Menu, ẩn Menu đi
                displayNotification(isShown: false)
            } else {
                // Trường hợp khoảng cách chưa đủ 1/2 độ rộng Menu, hiển thị lại Menu
                displayNotification(isShown: true)
            }
        }
        difference = 0
    }

    // Cập nhật constaint và opacity của BlurView theo trạng thái ẩn, hiện của Menu
    private func displayNotification(isShown: Bool) {
        blurMenuView.alpha = isShown ? 0.5 : 0
        blurMenuView.isHidden = !isShown
        UIView.animate(withDuration: 0.2) {
            self.menuViewTrailingConstraint.constant = isShown ? 0 : -Constant.widthNotificationView
            self.view.layoutIfNeeded()
        }
        isOpenMenu = isShown
    }
}
Build và Run Project, chúng ta đã thu được kết quả như mong muốn.
Bắt sự kiện người dùng tương tác với Menu
Ở đây mình đang sử dụng Container View và add MenuController thành child view controller của MainController. Có nhiều cách để bắt được sự kiện người dùng chọn một item trong Menu cho MainController xử lý như Delegate, Closure, Rx, ... Trong bài viết này, mình sẽ sử dụng Delegate Pattern
Tạo MenuDelegate và khai báo bên MenuController
protocol MenuDelegate: AnyObject {
    func selectMenuItem(with item: MenuItem)
}

class MenuController: UIViewController {

    @IBOutlet private weak var tableView: UITableView!
    private var items: [MenuItem] = [.toScreen1, .toScreen2, .toScreen3]
    weak var delegate: MenuDelegate?

    override func viewDidLoad() {
        super.viewDidLoad()
        setUpView()
    }

    func setUpView() {
        tableView.dataSource = self
        tableView.delegate = self
        tableView.rowHeight = UITableView.automaticDimension
    }

    @IBAction private func plusButtonTapped(_ sender: Any) {
        let randomItem = items.randomElement()
        items.append(randomItem ?? .toScreen1)
        tableView.reloadData()
    }
}

extension MenuController: UITableViewDataSource {
    func tableView(_ tableView: UITableView, numberOfRowsInSection section: Int) -> Int {
        return items.count
    }

    func tableView(_ tableView: UITableView, cellForRowAt indexPath: IndexPath) -> UITableViewCell {
        guard let cell = tableView.dequeueReusableCell(withIdentifier: "MenuItemCell") as? MenuItemCell else {
            return UITableViewCell()
        }
        cell.setContentForCell(item: items[indexPath.row])
        return  cell
    }
}

extension MenuController: UITableViewDelegate {
    func tableView(_ tableView: UITableView, didSelectRowAt indexPath: IndexPath) {
        delegate?.selectMenuItem(with: items[indexPath.row])
    }
}
MainController conform MenuDelegate, và cho menuController.delegate = self
extension MainController: MenuDelegate {
    func selectMenuItem(with item: MenuItem) {
        switch item {
        case .toScreen1:
            print("User select screen 1")
        case .toScreen2:
            print("User select screen 2")
        case .toScreen3:
            print("User select screen 3")
        }
    }
}
Build và Run Project, chúng ta thu được một Side Menu hoàn chỉnh
Tham khảo
https://www.youtube.com/watch?v=L6zB8xABwjs
Source code: https://github.com/buixuanhuy5798/SlideMenu
All rights reserved
