Crop ảnh sử dụng vue-cropper
Bài đăng này đã không được cập nhật trong 7 năm
1. Chuẩn bị
Cài đặt Vue sử dụng Vue CLI bằng một trong 2 câu lệnh sau:
npm install -g @vue/cli
or
yarn global add @vue/cli
Tạo project với scaffold dựng sẵn:
vue create demodropimage
 Cài đặt package vue-cropper, vue-js-modal
npm install vue-js-modal
npm install vue-cropper
Ta cần import css cho package trên bằng cách update file src/man.js:
import Vue from "vue";
import App from "./App.vue";
import router from "./router";
import store from "./store";
import VModal from 'vue-js-modal'
import BootstrapVue from 'bootstrap-vue'

Vue.config.productionTip = false;
Vue.use(BootstrapVue)
Vue.use(VModal, {dynamic: true, injectModalsContainer: true})

new Vue({
  router,
  store,
  render: h => h(App)
}).$mount("#app");
2. Vue Component
Tạo file Image.vue trong thư mục src/views/ với nội dung:
<template>
  <div
    class="col-xl-8 col-sm-12 form-group">
    <div class="bg-logo d-flex">
      <div>
        <p class="product-screen-shot">Show Image</p>
        <div class="box-add-image">
          <label for="uploadScreens">
            <i class="icon ion-md-add-circle">
            </i>
          </label>
          <input
            class="d-none"
            ref="uploadScreens"
            type="file"
            id="uploadScreens"
            accept="image/*"
            @change="uploadScreen">
        </div>
      </div>
      <div class="d-flex">
        <div class="d-flex" v-for="(image, index) in images" :key="index">
          <div v-if="hasImage(image)" class="image">
            <img :src="image.url" alt="image-url" class="img-logo" />
          </div>
        </div>
      </div>
    </div>
  </div>
</template>
<script>
import CropImage from '@/components/CropImage'

export default {
  components: {
    CropImage
  },

  data () {
    return {
      images: []
    }
  },

  methods: {
    uploadScreen (e) {
      let file = e.target.files[0]

      const data = URL.createObjectURL(file)
      this.$modal.show(CropImage,
        {
          imageUrl: data
        },
        {
          width: 710,
          height: 560
        },
        {
          'get-data': this.getData
        }
      )
      this.$refs.uploadScreens.value = null
    },
    getData (data) {
      this.listOfScreens.push({
        id: '',
        url: data
      })
    },

    hasImage (screenShot) {
      return image.url
    }
  }
}
</script>

<style type="text/scss">
  .img-logo {
    width: 150px;
  }

</style>
this.$modal.show là function của VModal mà chúng ta đã import ở main. Hàm này sẽ truyền tham số là 1 component là nội dung hiển thị khi popup modal được mở cùng với thuộc tính của nó như height, width, events,... Bạn có thể xem chi tiết ở thư viện
Tạo file CropImage.vue hiển thi modal trong thư mục src/components/ với nội dung:
<template>
  <div class="crop-image">
    <div class="action d-flex">
      <h2>Crop Image</h2>
      <div class="d-flex">
        <button class="btn-secondary" @click="closeCrop">
          Cancel
        </button>
        <button class="btn-secondary" @click="getCropImage">
          Save
        </button>
      </div>
    </div>
    <div class="crop-window">
      <vue-cropper
        ref="cropper"
        v-bind="options"
      />
      <div class="d-flex actions-wrapper">
        <range-slider
          class="slider"
          v-bind="sliderOptions"
          v-model="sliderValue">
        </range-slider>
        <div class="rotate-action d-flex">
          <!-- <button @click="rotateLeft" class="btn"> -->
            <span class="glyphicon glyphicon-arrow-left"></span>
          <!-- </button> -->
          <button @click="rotateRight" class="btn">
            <img src="@/assets/logo.png" alt="icon-export" class="icon-export">
          </button>
        </div>
      </div>
    </div>
  </div>
</template>

<script>
import { VueCropper } from 'vue-cropper'
import RangeSlider from 'vue-range-slider'

export default {
  props: ['imageUrl'],
  data () {
    return {
      sliderOptions: {
        min: 10,
        max: 100,
        step: 5
      },
      sliderValue: 15,
      options: {
        img: this.imageUrl,
        full: true,
        canMove: true,
        fixedBox: false,
        autoCropWidth: 280,
        autoCropHeight: 280,
        autoCrop: true,
        fixedNumber: [1, 1],
        fixed: true
      }
    }
  },
  components: {
    VueCropper,
    RangeSlider
  },
  methods: {
    rotateLeft () {
      this.$refs.cropper.rotateLeft()
    },
    rotateRight () {
      this.$refs.cropper.rotateRight()
    },
    closeCrop () {
      this.$emit('close')
    },
    getCropImage () {
      this.$refs.cropper.getCropData(data => {
        this.$parent.$emit('get-data', data)
        this.closeCrop()
      })
    }
  },
  watch: {
    sliderValue (newVal, oldVal) {
      return this.$refs.cropper.changeScale(newVal - oldVal)
    }
  }
}
</script>
Các <style> không là quá quan trọng đối với ví dụ này; nó chỉ làm sạch trang và không có bất kỳ ảnh hưởng thực sự nào từ thư viện.
Lưu ý imageUrl các biến xuất hiện trong <template>khối. Các biến này đại diện cho hình ảnh gốc, như được xác định thông qua props đã được xử lý. Chúng ta sẽ có thể truy cập hình ảnh nguồn trực tiếp thông qua biến ref, tương tự như sử dụng một querySelector là một đối tượng trong DOM.
Chúng ta sẽ định cấu hình crop image và các events trong methods, được kích hoạt sau khi tương tác với DOM.
Đến đây ta có thể khởi tạo server để test thử:
npm run serve
Truy cập vào đường link http://localhost:8000 trên trình duyệt để xem kết quả.
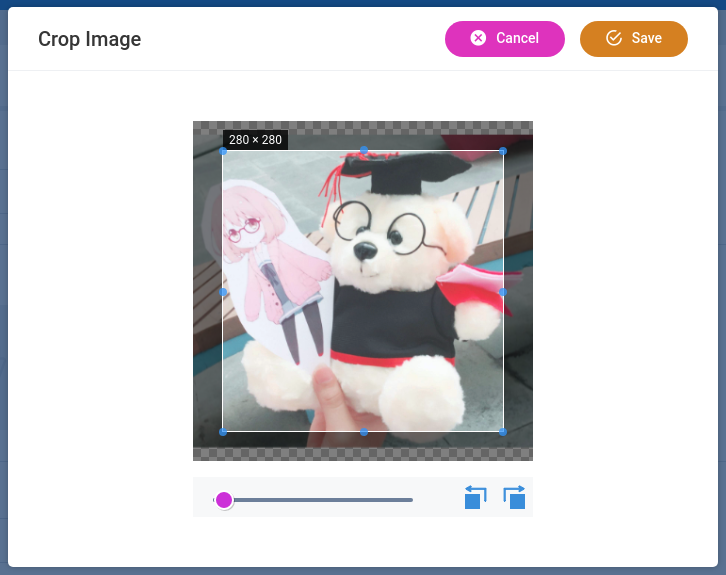
Modal crop image
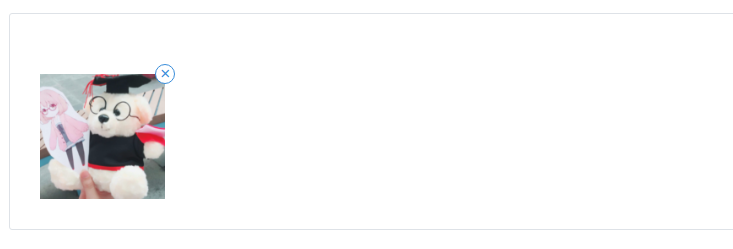
Hình ảnh sau khi crop
3. Phần kết luận
Bạn vừa thấy cách thao tác hình ảnh bằng thư viện vue-cropper từ trong ứng dụng web Vue.js. Điều này hữu ích nếu bạn cần lấy hình ảnh từ người dùng được sử dụng như một phần của hồ sơ của họ hoặc tương tự vì bạn muốn kích thước phù hợp để hình ảnh của bạn không bị hỏng.
All rights reserved
