Creating Auto Layout Constraints Programmatically
Bài đăng này đã không được cập nhật trong 4 năm
Introduction
I know most of us have used Auto Layout constraints using storyboards and xibs because it is much easier to visualise how the elements will be presented in the screen. But many developers prefer doing it in code rather than the interface. So now I am going to describe how to use Auto Layout programmatically.
Basic Steps
Okay now let's start with an example. We will create a function named setup() and call it in viewDidLoad(). The view creation and constraints setting will be done inside setup() method.
override func viewDidLoad() {
    super.viewDidLoad()
    view.backgroundColor = UIColor.yellowColor()
    setup()
}
Now inside setup() method -
-
We are going to create a view first.
-
Give it a background color so that we can easily track it in the screen.
-
We set the translatesAutoresizingMaskIntoConstraints property to false. This line should not be missed because the autoresizing mask constraints fully specify the view’s size and position; therefore, if we want to use Auto Layout to dynamically calculate the size and position of our view, we must set this property to false, and then provide a non ambiguous, nonconflicting set of constraints for the view.
-
We add the view as subView to the controller's view
func setup() {
    let blueView = UIView()
    blueView.backgroundColor = UIColor.blueColor()
    blueView.translatesAutoresizingMaskIntoConstraints = false
    view.addSubview(blueView)
}
Now, let's try to apply constraints to blueView. Let's say We want the width and height of the blueView to be 100px and position it in the center of the controller's view. Basically we can use two ways to define the constraints.
- We can use NSLayoutConstraint's instance method to define constraints to some variables and add those variables as constraints to the view.
OR
- We can use NSLayoutConstraint's class method to use Apple's visual format language which basically involves defining constraints with a string. This string is processed and returns appropriate constraints.
So we will see the example in both ways.
First Way
Now First let's define the constraint for the Width first.
let viewWidth = NSLayoutConstraint(item: blueView,
                              attribute: .Width,
                              relatedBy: .Equal,
                                 toItem: nil,
                              attribute: .NotAnAttribute,
                             multiplier: 1.0,
                               constant: 100.0)
Here, item is the element we want to add constraint, attribute is the property we want to put the constraint to, relatedBy defines the relationship, toItem is the element we are comparing to item for putting the constraint and its attribute it the property of toItem we want to compare to, multiplier and constant provide the values of constraints.
So if we translate the code in plain words we are setting the blueWidth's Width to be Equal to 100px. The toItem is nil and attribute is .NotAnAttribute because we are comparing blueWidth's width to nothing, it is applying on the blueWidth itself. The value calculation works like multiplier * (comparing item's attribute's value) + constant. But as there is no comparing item so multiplier is set to 1.0 and constant is 100.0. I will explain it a bit later.
We set the Height same as Width. Now we have
func setup() {
    ...

    let viewWidth = NSLayoutConstraint(item: blueView,
                                  attribute: .Width,
                                  relatedBy: .Equal,
                                     toItem: nil,
                                  attribute: .NotAnAttribute,
                                 multiplier: 1.0,
                                   constant: 100.0)

    let viewHeight = NSLayoutConstraint(item: blueView,
                                   attribute: .Height,
                                   relatedBy: .Equal,
                                      toItem: nil,
                                   attribute: .NotAnAttribute,
                                  multiplier: 1.0,
                                    constant: 100.0)
}
Now as the main concept is clear we can now postition the blueView in same way.
func setup() {
    ...

    let centerXPosition = NSLayoutConstraint(item: blueView,
                                        attribute: .CenterX,
                                        relatedBy: .Equal,
                                           toItem: view,
                                        attribute: .CenterX,
                                       multiplier: 1.0,
                                         constant: 0)

    let centerYPosition = NSLayoutConstraint(item: blueView,
                                        attribute: .CenterY,
                                        relatedBy: .Equal,
                                           toItem: view,
                                        attribute: .CenterY,
                                       multiplier: 1.0,
                                         constant: 0)
}
So the above code basically sets the blueView's center point x and y to be equal to view's center x and y.
So, now if we run the projec,we will see nothing because we have not added the constraints yet. We add the constraints by
func setup() {
    ...

    view.addConstraint(centerXPosition)
    view.addConstraint(centerYPosition)
    view.addConstraint(viewHeight)
    view.addConstraint(viewWidth)
}
OR
In short we can write this line instead of these 4 lines.
func setup() {
    ...
    view.addConstraints([centerXPosition, centerYPosition, viewHeight, viewWidth])
}
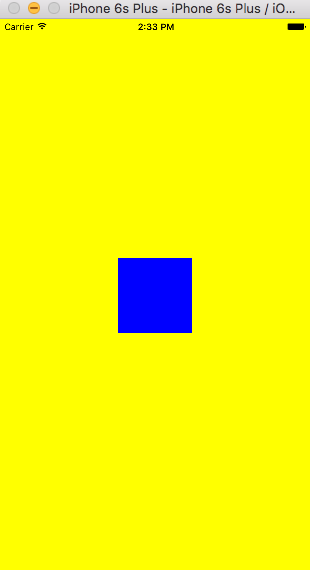
If we run the project again, we can see the blueView in center with 100.0 width and height like given below.

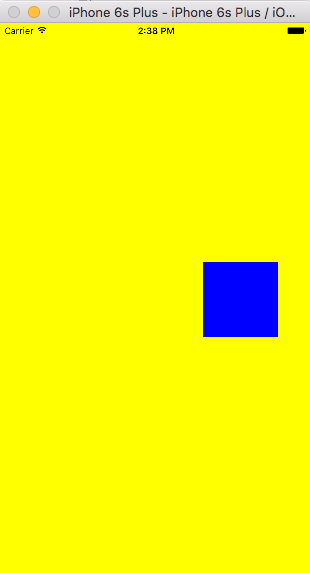
Earlier I told that I would explain the multiplier and constant. Now just for experiment,in case of the centerXPosition lets change its multiplier into 1.5 and constant into 10.0. If we run the project then we will see that the blueView's position has shifted to right and the amount is 1.5* centerX of view + 10.0

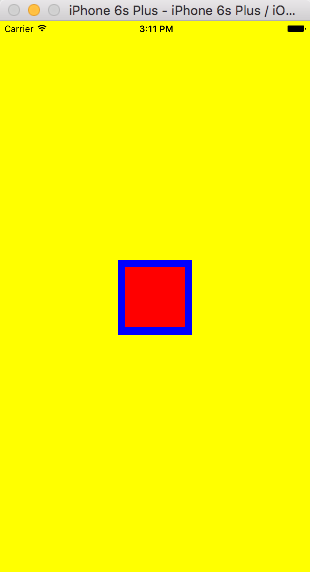
Now, coming back to original code let's try creating a redView inside blueView which always maintains 10px padding from blueView in top, bottom, leading and trailing direction.
func setup() {
    ...

    let redView = UIView()
    redView.translatesAutoresizingMaskIntoConstraints = false
    redView.backgroundColor = UIColor.redColor()
    blueView.addSubview(redView)

    let x = NSLayoutConstraint(item: redView,
                          attribute: .Leading,
                          relatedBy: .Equal,
                             toItem: blueView,
                          attribute: .Leading,
                         multiplier: 1.0,
                           constant: 10.0)
    let y = NSLayoutConstraint(item: redView,
                          attribute: .Trailing,
                          relatedBy: .Equal,
                             toItem: blueView,
                          attribute: .Trailing,
                         multiplier: 1.0,
                           constant: -10.0)
    let w = NSLayoutConstraint(item: redView,
                          attribute: .Top,
                          relatedBy: .Equal,
                             toItem: blueView,
                          attribute: .Top,
                         multiplier: 1.0,
                           constant: 10.0)
    let h = NSLayoutConstraint(item: redView,
                          attribute: .Bottom,
                          relatedBy: .Equal,
                             toItem: blueView,
                          attribute: .Bottom,
                         multiplier: 1.0,
                           constant: -10.0)

        blueView.addConstraints([x,y,w,h])
}
Now if we run the project we can see the result.

Second Way
Okay, now let's do the same constraints in visual format string.
override func viewDidLoad() {
    super.viewDidLoad()
    view.backgroundColor = UIColor.yellowColor()
   // setup()
    setupVisualFormat()
}

func setupVisualFormat() {
     let blueView = UIView()
     blueView.translatesAutoresizingMaskIntoConstraints = false
     blueView.backgroundColor = UIColor.blueColor()
     view.addSubview(blueView)

     let redView = UIView()
     redView.translatesAutoresizingMaskIntoConstraints = false
     redView.backgroundColor = UIColor.redColor()
     blueView.addSubview(redView)
}
We add the blueView and redView as subViews like before in a new method setupVisualFormat(), but now instead of using instance method we will use constraintsWithVisualFormat class method. We first define a dictionary where we will use the keys in the format string and the values will be the views that we are using to define constraints.
func setupVisualFormat(){
    ...

    let views = [
                "blue": blueView,
                "red" :redView
                ]
}
Let's take Width first.
let viewWidth = NSLayoutConstraint.constraintsWithVisualFormat("H:[blue(100)]",
                                                          options: [],
                                                          metrics: nil,
                                                            views: views)
H means we are defining in Horizontal perspective and V stands for Vertical. We write a colon and wrap the view in third brackets. We use the key blue instead of blueView in format string and provide the dictionary in the views parameter as source.
We can also use another dictionary for metrics.
func setupVisualFormat() {
    ...

    let metrics = [
                   "side": 100,
                   "padding": 10
                  ]
}
Now we can side instead of hard coded value 100.0 by providing the metrics dictionary in metrics parameter.
let viewWidth = NSLayoutConstraint.constraintsWithVisualFormat("H:[blue(side)]",
                                                          options: [],
                                                          metrics: metrics,
                                                            views: views)
Same goes for height contraint. Then we add the constraints to the code as follows
func setupVisualFormat(){
    ...
    let viewWidth = NSLayoutConstraint.constraintsWithVisualFormat("H:[blue(side)]",
                                                              options: [],
                                                              metrics: metrics,
                                                                views: views)
    let viewHeight = NSLayoutConstraint.constraintsWithVisualFormat("V:[blue(side)]",
                                                               options: [],
                                                               metrics: metrics,
                                                                 views: views)
    view.addConstraints(viewWidth)
    view.addConstraints(viewHeight)
}
About the position of the blueView there is no easy was to do this in visual format. So for simplicity we would use the previous codes for position.
func setupVisualFormat() {
    ...

    let centerXPosition = NSLayoutConstraint(item: blueView,
                                        attribute: .CenterX,
                                        relatedBy: .Equal,
                                           toItem: view,
                                        attribute: .CenterX,
                                       multiplier: 1.0,
                                         constant: 0)
    let centerYPosition = NSLayoutConstraint(item: blueView,
                                        attribute: .CenterY,
                                        relatedBy: .Equal,
                                           toItem: view,
                                        attribute: .CenterY,
                                       multiplier: 1.0,
                                         constant: 0)

        view.addConstraints([centerXPosition,centerYPosition])
}
We can apply constraints for the redView in the same way. Here padding is declared in the metrics for 10px. The | can be the superview's top,bottom,leading or trailing. For instance, "H:|-padding-[red]-padding-|" means that redview is going to maintain 10px leading and trailing space from it's superView which is blueView.
func setupVisualFormat() {
    ...

    let u = NSLayoutConstraint.constraintsWithVisualFormat("H:|-padding-[red]-padding-|",
                                                      options: [],
                                                      metrics: metrics,
                                                        views: views)
    let v = NSLayoutConstraint.constraintsWithVisualFormat("V:|-padding-[red]-padding-|",
                                                      options: [],
                                                      metrics: metrics,
                                                        views: views)
    blueView.addConstraints(u)
    blueView.addConstraints(v)
}
Hence we add the constraints to get the same result as the previous one - the redView inside of the blueView.
BONUS!!
iOS 9 introduced NSLayoutAnchor with anchor properties on UIView. We can now set up our views to be ‘anchored’ to other views. There are three subclasses of NSLayoutAnchor:
-
NSLayoutXAxisAnchor
-
NSLayoutYAxisAnchor
-
NSLayoutDimension
When We set up a view’s anchor to be constrained to another view’s anchor, it must be of the same subclass. For example, the compiler will reject constraining a leadingAnchor, a subclass of NSLayoutXAxisAnchor, to a heightAnchor which is a subclass of NSLayoutYAxisAnchor.
So we can add a new method another and add blueView and redView as subviews and do the same example in the way below(iOS9+)
override func viewDidLoad() {
    super.viewDidLoad()
    view.backgroundColor = UIColor.yellowColor()
   // setup()
   // setupVisualFormat()
    another()
}

func another() {
    ...
// Auto layout code using anchors (iOS9+)
    blueView.centerXAnchor.constraintEqualToAnchor(view.centerXAnchor).active = true
    blueView.centerYAnchor.constraintEqualToAnchor(view.centerYAnchor).active = true
    blueView.widthAnchor.constraintEqualToAnchor(nil, constant: 100).active = true
    blueView.heightAnchor.constraintEqualToAnchor(nil, constant: 100).active = true

    redView.topAnchor.constraintEqualToAnchor(newView.topAnchor, constant: 10.0).active = true
    redView.bottomAnchor.constraintEqualToAnchor(newView.bottomAnchor, constant: -10.0).active = true
    redView.leadingAnchor.constraintEqualToAnchor(newView.leadingAnchor, constant: 10.0).active = true
    redView.trailingAnchor.constraintEqualToAnchor(newView.trailingAnchor, constant: -10.0).active = true
}
P.S For further details please refer to documentation
GitHub link for the example : https://github.com/Tahia50/demo
All rights reserved