Coordinator Swift
Bài đăng này đã không được cập nhật trong 5 năm
Bối cảnh
Bạn đã bao giờ ở trong một tình huống, nơi mà các của bạn trở nên quá giống nhau và phụ thuộc vào nhau. Và điều hướng của bạn nằm rải rác trên mã của bạn.
Bạn cũng có thể đã nghe nói về vấn đề ViewController lớn. có liên quan đến thực tế là ViewController trong mẫu MVC thường làm quá nhiều thứ, bao gồm cả mã thiết lập chế độ xem. theo cách mà bộ điều khiển chế độ xem thực sự trở thành một chế độ xem (và hơn thế nữa…)
Một trong những tác vụ mà ViewController không được thực hiện là quản lý điều hướng màn hình(screens navigation) và luồng ứng dụng.
Coordinator là gì?
Nó là một object xử lý navigation flow, chung chuyển Data giữa các ViewController và không có liên quan gì đến business logic.
Sử dụng coordinator pattern giúp chúng ta giảm bớt công việc cho navgation từ viewcontroller của chúng ta, giúp chúng dễ quản lý và tái sử dụng tốt hơn, trong khi cho phép chúng ta điều chỉnh luồng ứng dụng bất kì lúc nào cần.
Nói cách khác: Thay vì đẩy và trình bày các ViewControllers của bạn từ các bộ điều khiển chế độ xem khác. Tất cả ViewController sẽ được quản lý bởi các Coordinator
Do đó, các ViewController sẽ bị cô lập và vô hình với nhau, đồng thời có thể được sử dụng lại một cách dễ dàng.
 Như minh họa trên lược đồ trên. Mô hình Coordinator có thể được mô tả như sau:
- có thể có một hoặc nhiều ViewController theo Coordinator.
- Mỗi bộ điều phối hiển thị (các) viewController của nó bằng cách sử dụng một phương thức thường được gọi là start() .
- Mỗi ViewController có 1 tham chiếu uỷ nhiệm (delegate) đến coordinator của nó.
- Mỗi Coordinator có 1 loạt các coordinator con (ChildCoordinators).
- Mỗi Coordinator con có 1 tham chiếu delegate cho Coordinator cha
Demo Coordinator
Ở đây ta có 2 Coordinator và 3 ViewController để cho thấy rằng 1 coordinator có thế có 1 hoặc nhiều View Tạo một dự án với 3 ViewController: FirstViewController, SecondViewController và ThirdViewController.
Trên mỗi ViewController thêm 1 nút để điều hướng đến ViewController khác
Đầu tiên ta sẽ tạo một giao thức Coordinator. Với 1 mảng Coordinator và 1 phương thức init nhận 1 bộ điều khiển hướng(navigationController) làm tham số.
public protocol Coordinator : class {

    var childCoordinators: [Coordinator] { get set }

    // All coordinators will be initilised with a navigation controller
    init(navigationController:UINavigationController)

    func start()
}
FirstCoordinator quản lý FirstViewController. Với việc triển khai phương pháp bắt đầu, thêm FirstViewController và FirstCoordinator:
import UIKit

class FirstCoordinator: Coordinator {

    var childCoordinators: [Coordinator] = []

    unowned let navigationController:UINavigationController

    required init(navigationController: UINavigationController) {
        self.navigationController = navigationController
    }

    func start() {
        let firstViewController : FirstViewController = FirstViewController()
        firstViewController.delegate = self
        self.navigationController.viewControllers = [firstViewController]
    }
}

extension FirstCoordinator: FirstViewControllerDelegate {

    // Navigate to next page
    func navigateToNextPage() {
       let secondCoordinator = SecondCoordinator(navigationController: navigationController)
       secondCoordinator.delegate = self
       childCoordinators.append(secondCoordinator)
       secondCoordinator.start()
    }
}

extension FirstCoordinator: BackToFirstViewControllerDelegate {

    // Back from third page
    func navigateBackToFirstPage(newOrderCoordinator: SecondCoordinator) {
        navigationController.popToRootViewController(animated: true)
        childCoordinators.removeLast()
    }
}
FirstCoordinator có 2 extension, 1 là sử dụng để điều hướng tới ViewController tiếp theo hai là dùng để điều hướng trở lại FirstCoordinator.
Chúng ta cần phải cập nhật mảng coordinator con với ngăn xếp là coordinator
var window: UIWindow?

    // Make the first coordinator with a strong reference
    var fisrtCoordinator : FirstCoordinator?

    func application(_ application: UIApplication, didFinishLaunchingWithOptions launchOptions: [UIApplicationLaunchOptionsKey: Any]?) -> Bool {

        window = UIWindow(frame: UIScreen.main.bounds)
        window?.rootViewController = UINavigationController()

        // Initialise the first coordinator with the main navigation controller
        fisrtCoordinator = FirstCoordinator(navigationController: window?.rootViewController as! UINavigationController)

        // The start method will actually display the main view
        fisrtCoordinator?.start()

        window?.makeKeyAndVisible()
        return true
    }
Sau đó thay vì trực tiếp tạo phương thức trong mainController. chúng ta tạo FirstCoordinator với tham số navigationController. và phương thức start() sẽ phụ trách hiển thị ViewController đầu tiên.
Đối với AppDelegate
public protocol FirstViewControllerDelegate: class {
func navigateToNextPage()
}
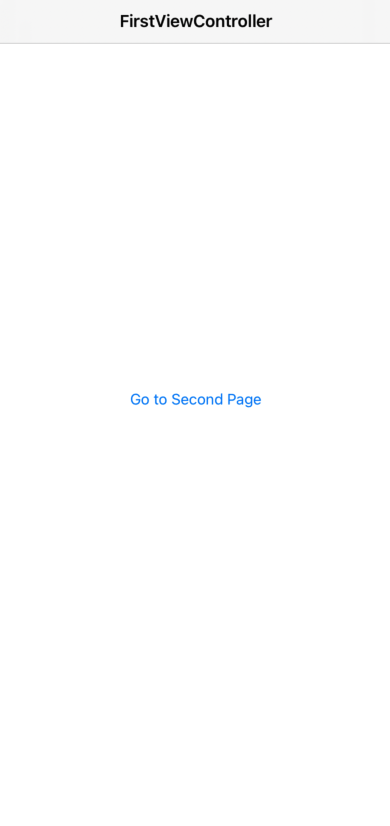
class FirstViewController: UIViewController {
public weak var delegate: FirstViewControllerDelegate?
override func viewDidLoad() {
super.viewDidLoad()
title = "FirstViewController"
}
@IBAction func goToSecondPageAction(_ sender: Any) {
self.delegate?.navigateToNextPage()
}
}
Đối với SceneDelegate
    var window: UIWindow?
    var fisrtCoordinator : FirstCoordinator?

    func scene(_ scene: UIScene, willConnectTo session: UISceneSession, options connectionOptions: UIScene.ConnectionOptions) {

        guard let windowScene = (scene as? UIWindowScene) else { return }

        window = UIWindow(frame: windowScene.coordinateSpace.bounds)

        window?.windowScene = windowScene

        window?.rootViewController = UINavigationController()

        fisrtCoordinator = FirstCoordinator(navigationController: window?.rootViewController as! UINavigationController)

        fisrtCoordinator?.start()

        window?.makeKeyAndVisible()
    }
Để điều hướng đến ViewController tiếp theo. Chúng ta sẽ phải gọi Coordinator được đại diện bởi FirstViewControllerDelegate.
protocol BackToFirstViewControllerDelegate: class {

    func navigateBackToFirstPage(newOrderCoordinator: SecondCoordinator)

}

class SecondCoordinator: Coordinator {

    var childCoordinators: [Coordinator] = []

    unowned let navigationController:UINavigationController

    // We use this delegate to keep a reference to the parent coordinator
    weak var delegate: BackToFirstViewControllerDelegate?

    required init(navigationController: UINavigationController) {
        self.navigationController = navigationController
    }

    func start() {
        let secondViewController : SecondViewController = SecondViewController()
        secondViewController.delegate = self
        self.navigationController.pushViewController(secondViewController, animated: true)
    }
}

extension SecondCoordinator : SecondViewControllerDelegate {

    // Navigate to third page
    func navigateToThirdPage() {
        let thirdViewController : ThirdViewController = ThirdViewController()
        thirdViewController.delegate = self
        self.navigationController.pushViewController(thirdViewController, animated: true)
    }

    // Navigate to first page
    func navigateToFirstPage() {
        self.delegate?.navigateBackToFirstPage(newOrderCoordinator: self)
    }
}
Như được đề cập ở trên. Một coordinator có thể quản lý một hoặc nhiều ViewController. Vì vậy, ở đây SecondCoordinator sẽ xử lý cả SecondViewController và ThirdViewControllers.
public protocol SecondViewControllerDelegate: class {
    func navigateToFirstPage()
    func navigateToThirdPage()
}

class SecondViewController: UIViewController {

    public weak var delegate: SecondViewControllerDelegate?


    override func viewDidLoad() {
        super.viewDidLoad()

        title = "SecondViewController"

        // Use custom back button to pass through coordinator.
        let backButton = UIBarButtonItem(title: "Back", style: .plain, target: self, action: #selector(navigateBackToFirstpage))
        self.navigationItem.leftBarButtonItem = backButton
    }

    @objc func navigateBackToFirstpage() {
        self.delegate?.navigateToFirstPage()
    }

    @IBAction func navigateToThirdPageAction(_ sender: Any) {
        self.delegate?.navigateToThirdPage()
    }
}
Đầu tiên ta tạo 1 nút quay lại tuỳ chỉnh gọi 1 phương thức coordinator điều phối NavigateToFirstpage: Lưu ý quan trọng : khi chuyển đổi giữa các coordinator. nút quay lại của bộ điều khiển điều hướng mặc định sẽ phá vỡ logic của bộ điều phối nếu hành động không bị ghi đè. chúng ta hoàn toàn nên gọi hành động quay lại của chính mình bằng cách sử dụng phương thức coordinator để đảm bảo mảng coordinator con được cập nhật tốt
Và sau đó chúng tôi thêm phương thức khác để chuyển đến ThirdViewController:
public class ThirdViewController: UIViewController {

    public weak var delegate: SecondViewControllerDelegate?

    override public func viewDidLoad() {
        super.viewDidLoad()

        title = "ThirdViewController"
    }

    @IBAction func navigateToFirstPageAction(_ sender: Any) {
        self.delegate?.navigateToFirstPage()
    }
}
Và cuối cùng, ThirdViewController gọi người đại diện của nó delegate (SecondCoordinator) để điều hướng về FirstViewController. Và ở đây không cần ghi đè nút quay lại navigationController, vì nó sẽ không thay đổi coordinator hiện tại.
Và bằng cách này chúng ta có thể điều hướng vòng lặp: FirstViewController -> SecondViewController -> ThirdViewController.
All rights reserved
