Cách tạo hiệu ứng như Tinder Card với React Native Animation
Bài đăng này đã không được cập nhật trong 4 năm
Giới thiệu
Hãy cùng tìm hiểu cách hoạt động của các hoạt ảnh. Chúng ta sẽ có một mảng các thẻ và sẽ render 2 thẻ cùng một lúc.
Thẻ trên cùng sẽ ghi lại các cử chỉ và di chuyển sang trái hoặc sang phải dựa trên thao tác vuốt của người dùng. Thẻ bên dưới sẽ bật lên trước khi thẻ trên cùng được quẹt.
Sẽ có một khoảng ngang nhất định mà chúng ta gọi là SWIPE_THRESHOLD. Nếu vuốt dưới ngưỡng này thì thẻ sẽ quay về vị trí ban đầu. Nếu không thì thẻ sẽ di chuyển ra khỏi màn hình.
Tiếp theo sẽ có 3 giá trị cho hoạt ảnh: animation, opacity và scale. Hoạt ảnh sẽ lưu vị trí XY và được cập nhật khi người dùng có thao tác vuốt. Sau đó opacity sẽ dần dần chuyển từ 1 sang 0 trong khi vuốt. Cuối cùng thì scale sẽ là tỉ lệ cho thẻ thứ 2, lúc đầu nó sẽ là 0.9, sẽ được cập nhật là 1 khi nó lên trên cùng, điều này sẽ tạo ra hiệu ứng popup.
Bước 1: Boilerplate
Bắt đầu với những thiết lập cần thiết và container nới sẽ chứa phần thẻ ở trung tâm. Chúng ta cần khởi tạo các biến, mảng và các giá trị.
import React, { useRef, useState, useEffect } from 'react';
import {
    StyleSheet,
    View,
    Animated,
    PanResponder,
    Text,
    Platform,
    Dimensions,
    Image,
} from 'react-native';

// decide a threshold after which card will be swiped
const { width } = Dimensions.get('screen');
const SWIPE_THRESHOLD = 0.25 * width;

// import images of cute animals
import Bobo from './bobo.jpg';
import Dolly from './dolly.jpg';
import Giraffe from './giraffe.jpg';
import Goat from './goat.jpg';

function App() {
  // initialize deck to render
  const [data, setData] = useState([
    {
      image: Bobo,
      id: 1,
      name: "Bobo",
      animal: 'Cat',
    },
    {
      image: Dolly,
      id: 2,
      name: "Dolly",
      animal: 'Dog',
    },
    {
      image: Giraffe,
      id: 3,
      name: "Milo",
      animal: 'Giraffe',
    },
    {
      image: Goat,
      id: 4,
      name: "Ollie",
      animal: 'Goat'
    },
  ]);

  // initialize animation values for position and opacity of top card
  // and scale of next cards
  const animation = useRef(new Animated.ValueXY()).current;
  const opacity = useRef(new Animated.Value(1)).current;
  const scale = useRef(new Animated.Value(0.9)).current;

  return (
    <View style={styles.container}>
      // render cards here
    </View>
  );
}

const styles = StyleSheet.create({
  // add container styles and place the cards to center
  container: {
    flex: 1,
    justifyContent: 'center',
    alignItems: 'center',
    padding: 10,
  },
});

export default App;
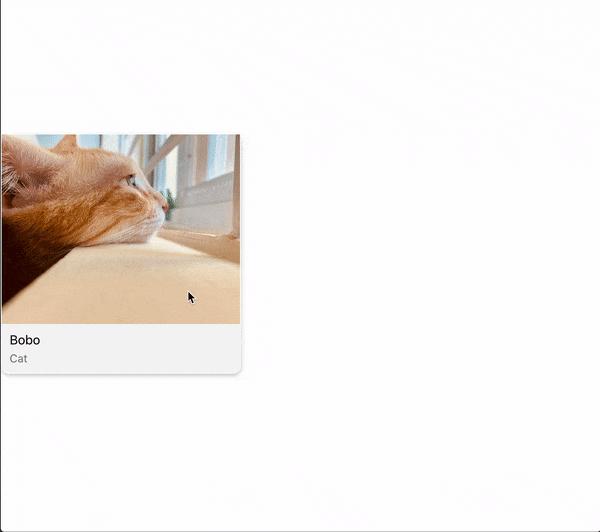
Bước 2: Render card với position absolute
Trên màn hình hãy render thẻ và thêm một số style cho nó. Chúng ta sẽ lấy ra 2 thẻ cùng một lúc từ mảng đã được đinh nghĩa trước đó. Các thẻ này sẽ được đặt position absolute để làm sao có thể che hết được thẻ thứ 2.
COPY
function App () {
    return (
        <View style={styles.container}>
          {data
           .slice(0, 2)
           .reverse()
           .map((item, index, items) => {
             return (
               <Animated.View
                 style={[styles.card]}
                 key={item.id}>
                 <View style ={styles.imageContainer}>
                   <Image resizeMode="cover" source={item.image} style={styles.image} />
                 </View>
                 <View style={styles.textContainer}>
                   <Text style={styles.nameText}>{item.name}</Text>
                   <Text style={styles.animalText}>{item.animal}</Text>
                 </View>
               </Animated.View>
             );
          })}
        </View>
    );
}

const styles = StyleSheet.create({
  container: {
    flex: 1,
    justifyContent: 'center',
    alignItems: 'center',
    padding: 10,
  },
  card: {
    width: '100%',
    height: 300,
    backgroundColor: '#f4f4f4',
    position: 'absolute',
    borderRadius: 10,
    ...Platform.select({
      android: {
        elevation: 1,
      },
      ios: {
        shadowColor: '#000',
        shadowOffset: {
          width: 0,
          height: 3,
        },
        shadowOpacity: 0.25,
        shadowRadius: 3,
      },
      web: {
        boxShadow: '0 3px 5px rgba(0,0,0,0.10), 1px 2px 5px rgba(0,0,0,0.10)',
      },
    }),
    borderWidth: 1,
    borderColor: '#FFF',
  },
  imageContainer: {
    flex: 1
  },
  image: {
    width: '100%',
    height: '100%'
  },
  textContainer: {
    padding: 10
  },
  nameText: {
    fontSize: 16,
  },
  animalText: {
    fontSize: 14,
    color: '#757575',
    paddingTop: 5
  }
});

export default App;
Bước 3: Thiết lập PanResponder để ghi lại các thao tác
const _panResponder = useRef(
    PanResponder.create({
      onStartShouldSetPanResponder: () => true,
      onMoveShouldSetPanResponder: () => true,
      onPanResponderMove: (event, gesture) => {
        animation.setValue({ x: gesture.dx, y: gesture.dy });
      },
      onPanResponderRelease: (e, { dx, dy, vx, vy }) => {
        let velocity;
        if (vx >= 0) {
          velocity = clamp(vx, 4, 5);
        } else if (vx < 0) {
          velocity = clamp(Math.abs(vx), 4, 5) * -1;
        }
        if (Math.abs(dx) > SWIPE_THRESHOLD) {
          Animated.parallel([
            Animated.decay(animation, {
              velocity: { x: velocity, y: vy },
              deceleration: 0.99,
              useNativeDriver: false,
            }),
            Animated.spring(scale, {
              toValue: 1,
              friction: 4,
              useNativeDriver: false,
            }),
          ]).start(transitionNext);
          if (velocity > 0) {
            handleRightDecay();
          } else {
            handleLeftDecay();
          }
        } else {
          Animated.spring(animation, {
            toValue: { x: 0, y: 0 },
            friction: 4,
            useNativeDriver: false,
          }).start();
        }
      },
    })
  ).current;
Như chúng ta đã đề cập trước đó onPanResponderMove được dùng để nhận biết được sự khác biệt giữa các thao tác theo chiều ngang với thao tác theo chiều dọc và đặt lại giá trị cho vị trí của thẻ.
Bây giờ sẽ có hai trường hợp khi người dùng nhấc ngón tay lên trong khi vuốt:
Nếu dx lớn hơn ngưỡng, chúng ta sẽ lấy vận tốc vuốt vx và làm cho thẻ đi cùng hướng và tiếp tục di chuyển ra khỏi màn hình cho đến khi tốc độ giảm xuống 0 và cuối cùng sẽ unmount. Trong khi thẻ trên cùng trượt ra khỏi màn hình, chúng ta sẽ chuyển tỉ lệ thành 1 để thẻ sau có hiệu ứng nhảy ra phía trước. Hai hoạt ảnh này sẽ chạy song song.
Nếu dx nhỏ hơn ngưỡng chúng ta sẽ đưa ảnh trở về vị trí ban đầu
Bây giờ chúng ta sẽ reset lại giá trị khi thẻ trở về vị trí ban đầu
Bước 4: Thiết lập chuyển động cho thẻ tiếp theo
Bạn có thể thấy chúng ta đang gọi hàm transitionNext sau Animation.parallel() ở phần trên. Hãy xem chuyện gì xảy ra:
const transitionNext = function () {
    Animated.parallel([
      Animated.timing(opacity, {
        toValue: 0,
        duration: 300,
        useNativeDriver: false,
      }),
      Animated.spring(scale, {
        toValue: 1,
        friction: 4,
        useNativeDriver: false,
      }),
    ]).start(() => {
      setData((data) => {
        return data.slice(1)
      });
    });
 };
Hai cái này sẽ chạy song song. Trông nó sẽ như thế này
Cuối cùng khi animation song song này đã hoàn thành chúng ta sẽ loại bỏ thẻ trên cùng ra khỏi mảng. Vậy thẻ thứ 2 tiếp theo sẽ là thẻ trên cùng.
Chúng ta sẽ sử dụng hook useEffect để thêm dữ liệu. Mỗi khi dữ liệu thay đổi, hook sẽ đặt lại giá trị
useEffect(() => {
 scale.setValue(0.9);
 opacity.setValue(1);
 animation.setValue({ x: 0, y: 0 });
}, [data]);
Bước 5: Thiết lập style cho animation
Thẻ trên cùng và thẻ tiếp sau sẽ có style khác nhau. Ngoài ra PanResponder sẽ chỉ được dùng trên thẻ trên cùng. Chúng ta cần kiểm tra và sẽ áp dụng vào từng thẻ tương ứng.
scale, opacity, và position có thể dùng được trực tiếp nhưng còn khi xoay thì sao? Thẻ của chúng ta phải xoay khi chúng ta có thao tác vuốt. Có thể dùng như sau:
return (
    <View style={styles.container}>
      {data
        .slice(0, 2)
        .reverse()
        .map((item, index, items) => {
          // check if it's top card
          const isLastItem = index === items.length - 1;
          // apply panHandlers if it's top card
          const panHandlers = isLastItem ? { ..._panResponder.panHandlers } : {};
          // check if it's next card
          const isSecondToLast = index === items.length - 2;
          // rotate from -30 degree to +30 degree for swipe distance of -200 to +200
          const rotate = animation.x.interpolate({
            inputRange: [-200, 0, 200],
            outputRange: ['-30deg', '0deg', '30deg'],
            extrapolate: 'clamp', // make sure the rotation doesn't go beyong 30 degrees.
          });

          // prepare card styles
          const animatedCardStyles = {
            transform: [{ rotate }, ...animation.getTranslateTransform()],
            opacity,
          };
          const cardStyle = isLastItem ? animatedCardStyles : undefined;
          const nextStyle = isSecondToLast
            ? { transform: [{ scale: scale }], borderRadius: 5 }
            : undefined;

          return (
            <Animated.View
              {...panHandlers}
              style={[styles.card, cardStyle, nextStyle]}  // apply styles
              key={item.id}>
              <View style ={styles.imageContainer}>
                <Image resizeMode="cover" source={item.image} style={styles.image} />
              </View>
              <View style={styles.textContainer}>
                <Text style={styles.nameText}>{item.name}</Text>
                <Text style={styles.animalText}>{item.animal}</Text>
              </View>
            </Animated.View>
          );
        })}
    </View>
  );
Bước 6: Tách thành custom hook để có thể tái sử dụng
Animation của chúng ta phụ thuộc rất nhiều vào đây. Dữ liệu sẽ thay đổi cùng các giá trị animation, opacity, và scale
// Create `useTinderCard` hook
import React, { useRef, useState, useEffect } from 'react';
import { StyleSheet, View, Animated, PanResponder, Text, Platform, Dimensions, Image } from 'react-native';
import clamp from 'clamp';
const { width } = Dimensions.get('screen');

const SWIPE_THRESHOLD = 0.25 * width;

export default function useTinderCard (deck) {
  const [data, setData] = useState(deck);

  const animation = useRef(new Animated.ValueXY()).current;
  const opacity = useRef(new Animated.Value(1)).current;
  const scale = useRef(new Animated.Value(0.9)).current;

  const transitionNext = function () {
    Animated.parallel([
      Animated.timing(opacity, {
        toValue: 0,
        duration: 300,
        useNativeDriver: false,
      }),
      Animated.spring(scale, {
        toValue: 1,
        friction: 4,
        useNativeDriver: false,
      }),
    ]).start(() => {
      setData((data) => {
        return data.slice(1)
      });
    });
  };

  useEffect(() => {
    scale.setValue(0.9);
    opacity.setValue(1);
    animation.setValue({ x: 0, y: 0 });
  }, [data])

  const _panResponder = useRef(
    PanResponder.create({
      onStartShouldSetPanResponder: () => true,
      onMoveShouldSetPanResponder: () => true,
      onPanResponderMove: (event, gesture) => {
        animation.setValue({ x: gesture.dx, y: gesture.dy });
      },
      onPanResponderRelease: (e, { dx, dy, vx, vy }) => {
        let velocity;
        if (vx >= 0) {
          velocity = clamp(vx, 4, 5);
        } else if (vx < 0) {
          velocity = clamp(Math.abs(vx), 4, 5) * -1;
        }
        if (Math.abs(dx) > SWIPE_THRESHOLD) {
          Animated.parallel([
            Animated.decay(animation, {
              velocity: { x: velocity, y: vy },
              deceleration: 0.99,
              useNativeDriver: false,
            }),
            Animated.spring(scale, {
              toValue: 1,
              friction: 4,
              useNativeDriver: false,
            }),
          ]).start(transitionNext);
          if (velocity > 0) {
            // handleRightDecay();
          } else {
            // handleLeftDecay();
          }
        } else {
          Animated.spring(animation, {
            toValue: { x: 0, y: 0 },
            friction: 4,
            useNativeDriver: false,
          }).start();
        }
      },
    })
  ).current;
  return [data, _panResponder, animation, scale, opacity];
}
Không có gì khác ở đây, chỉ cần copy-paste. Bây giờ import hook và nhận các giá trị
// other imports
import useTinderCard from './useTinderCard';

function App() {
  // passing deck array as initial data
  const [data, _panResponder, animation, scale, opacity] = useTinderCard([
    {
      image: Bobo,
      id: 1,
      name: "Bobo",
      animal: 'Cat',
    },
    {
      image: Dolly,
      id: 2,
      name: "Dolly",
      animal: 'Dog',
    },
    {
      image: Giraffe,
      id: 3,
      name: "Milo",
      animal: 'Giraffe',
    },
    {
      image: Goat,
      id: 4,
      name: "Ollie",
      animal: 'Goat'
    },
  ]);

  return (
    <View style={styles.container}>
      {data
        .slice(0, 2)
        .reverse()
        .map((item, index, items) => {
          const isLastItem = index === items.length - 1;
          const panHandlers = isLastItem ? { ..._panResponder.panHandlers } : {};
          const isSecondToLast = index === items.length - 2;
          const rotate = animation.x.interpolate({
            inputRange: [-200, 0, 200],
            outputRange: ['-30deg', '0deg', '30deg'],
            extrapolate: 'clamp',
          });

          const animatedCardStyles = {
            transform: [{ rotate }, ...animation.getTranslateTransform()],
            opacity,
          };

          const cardStyle = isLastItem ? animatedCardStyles : undefined;
          const nextStyle = isSecondToLast
            ? { transform: [{ scale: scale }], borderRadius: 5 }
            : undefined;

          return (
            <Animated.View
              {...panHandlers}
              style={[styles.card, cardStyle, nextStyle]}
              key={item.id}>
              <View style ={styles.imageContainer}>
                <Image resizeMode="cover" source={item.image} style={styles.image} />
              </View>
              <View style={styles.textContainer}>
                <Text style={styles.nameText}>{item.name}</Text>
                <Text style={styles.animalText}>{item.animal}</Text>
              </View>
            </Animated.View>
          );
        })}
    </View>
  );
}
Những thứ khác thì vẫn như cũ. Bạn có thể trực tiếp trả về các style và áp dụng chúng. Cả hai cách đều ổn. Xem demo ở đây: https://snack.expo.dev/@iamshadmirza/tinder-cards
Bài viết được dịch từ: https://iamshadmirza.com/react-native-animation-using-hooks-tinder-cards
All rights reserved
