Cách tạo các item expanding với animation trong Recyclerview kết hợp với Data binding
Bài đăng này đã không được cập nhật trong 6 năm
Nội dung
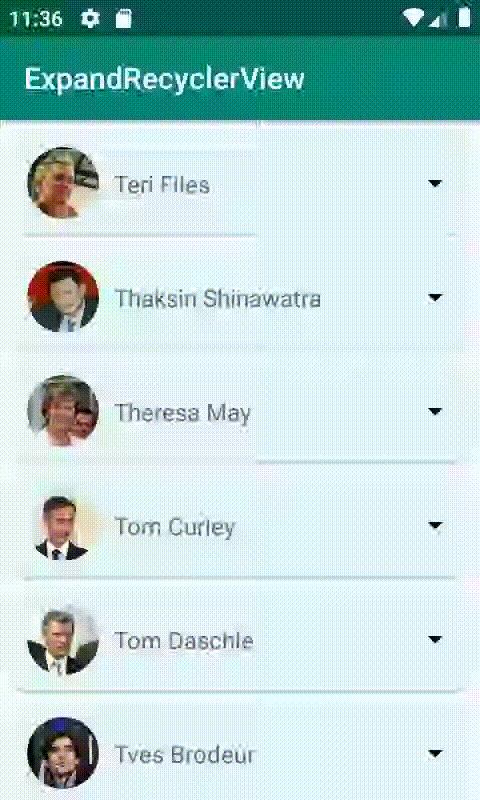
Trong bài viết này, chúng ta sẽ tìm hiểu các bước để tạo và hiển thị một danh sách các nhân vật với hình ảnh và tên của họ bằng RecyclerView. Khi chúng ta click mỗi item này thì sẽ có animation để hiện thì thông tin chi tiết của người đó, đồng thời mình có thể scroll để xem thông tin đó như hình minh họa bên dưới.
Bài viết này sử dụng ngôn ngữ chính là Kotlin và kĩ thuật Data binding trong xây dựng layout.
Bây giờ, chúng ta hãy cùng đi vào chi tiết các bước để tạo danh sách như đã mô tả.
Bước 1: thiết lập build.gradle
Trong bài viết này mình sử dụng các component như Recylerview, Cardview, CircleImageView, Glide cho việc load hình ảnh nên mình sẽ implement các thư viện này trong dependencies của file build.gradle như bên dưới
dependencies {
    implementation fileTree(dir: 'libs', include: ['*.jar'])
    implementation "org.jetbrains.kotlin:kotlin-stdlib-jdk7:$kotlin_version"
    implementation 'androidx.appcompat:appcompat:1.1.0'
    implementation 'androidx.core:core-ktx:1.1.0'
    implementation 'androidx.constraintlayout:constraintlayout:1.1.3'
    testImplementation 'junit:junit:4.12'
    androidTestImplementation 'androidx.test:runner:1.2.0'
    androidTestImplementation 'androidx.test.espresso:espresso-core:3.2.0'

    implementation 'androidx.recyclerview:recyclerview:1.1.0-beta05'
    implementation 'androidx.cardview:cardview:1.0.0'
    implementation 'de.hdodenhof:circleimageview:3.0.1' //create circle image layout
    implementation 'com.github.bumptech.glide:glide:4.9.0' //load image to imageview
}
Đồng thời mình cũng sử dụng Databinding nên mình cũng cần enable thuộc tính này trong file build.gradle
    dataBinding {
        enabled = true
    }
Bước 2: xây dựng lớp Person
Như hình minh họa ở trên mỗi item trong danh sách là 1 đối tượng Person. Ta tạo một class để lưu trữ thông tin của mỗi đối tượng. Tạo file Person.kt như bên dưới
data class Person(
    var name: String,
    var description: String,
    var imageResource: Int,
    var isExpanded: Boolean
) {
    fun reverseExpanded() {
        isExpanded = !isExpanded
    }
}
Class Person có 1 thuộc tính là isExpanded để giúp xác định đối tượng đang expand hay không.
Tại đây ta cũng tạo một BindingAdpater có tên là imageResource để giúp load hình ảnh trực tiếp vào trong ImageView. Để thực hiện ta tạo file BindingUitls.kt với nội dung như bên dưới
@BindingAdapter("imageResource")
fun ImageView.setImageUrl(resourceID: Int) {
    if (resourceID != -1)
        Glide.with(context).load(resourceID).into(this)
}
Bước 3: xây dựng UI cho ứng dụng
Ở bước này ta xây dựng một giao diện để hiển thị danh sách các Person. Ta sẽ định nghĩa file layout activity_main.xml chứa một RecyclerVIew
<?xml version="1.0" encoding="utf-8"?>
<layout xmlns:android="http://schemas.android.com/apk/res/android"
    xmlns:app="http://schemas.android.com/apk/res-auto"
    xmlns:tools="http://schemas.android.com/tools">

    <androidx.recyclerview.widget.RecyclerView
        android:id="@+id/recyclerPerson"
        android:layout_width="match_parent"
        android:layout_height="match_parent"
        android:clipToPadding="false"
        android:overScrollMode="never"
        android:paddingTop="4dp"
        android:paddingBottom="4dp"
        app:layoutManager="androidx.recyclerview.widget.LinearLayoutManager"
        tools:listitem="@layout/item_person" />
</layout>
Kế đến ta tạo file item_person.xml để tạo giao diện cho từng item, giao diện này có kết hợp data binding và các thành phần ta đã khai báo ở các bước trên
<?xml version="1.0" encoding="utf-8"?>
<layout xmlns:android="http://schemas.android.com/apk/res/android"
    xmlns:app="http://schemas.android.com/apk/res-auto"
    xmlns:tools="http://schemas.android.com/tools">

    <data>

        <variable
            name="person"
            type="com.example.expandrecyclerview.model.Person" />

        <import type="android.view.View" />
    </data>

    <androidx.cardview.widget.CardView
        android:layout_width="match_parent"
        android:layout_height="wrap_content"
        android:layout_marginStart="8dp"
        android:layout_marginTop="4dp"
        android:layout_marginEnd="8dp"
        android:layout_marginBottom="4dp"
        android:backgroundTint="#e0f7fa"
        android:elevation="8dp"
        app:cardCornerRadius="8dp">

        <androidx.constraintlayout.widget.ConstraintLayout
            android:id="@+id/constraintLayoutMain"
            android:layout_width="match_parent"
            android:layout_height="wrap_content"
            android:background="?attr/selectableItemBackground">

            <de.hdodenhof.circleimageview.CircleImageView
                android:id="@+id/circleImageView"
                android:layout_width="48dp"
                android:layout_height="48dp"
                android:layout_margin="10dp"
                app:imageResource="@{person.imageResource}"
                app:layout_constraintBottom_toTopOf="@id/constraintLayoutDescription"
                app:layout_constraintStart_toStartOf="parent"
                app:layout_constraintTop_toTopOf="parent"
                tools:src="@drawable/thaksin_shinawatra_0004" />

            <TextView
                android:id="@+id/textViewName"
                android:layout_width="0dp"
                android:layout_height="wrap_content"
                android:layout_marginStart="10dp"
                android:layout_marginEnd="10dp"
                android:maxLines="1"
                android:singleLine="true"
                android:text="@{person.name}"
                android:textSize="16sp"
                app:layout_constraintBottom_toBottomOf="@id/circleImageView"
                app:layout_constraintLeft_toRightOf="@id/circleImageView"
                app:layout_constraintRight_toLeftOf="@id/imageViewExpand"
                app:layout_constraintTop_toTopOf="@id/circleImageView"
                tools:text="Your user name" />

            <ImageView
                android:id="@+id/imageViewExpand"
                android:layout_width="wrap_content"
                android:layout_height="wrap_content"
                android:layout_marginEnd="10dp"
                android:src="@drawable/ic_arrow_drop_down_black_24dp"
                app:layout_constraintBottom_toBottomOf="@id/circleImageView"
                app:layout_constraintEnd_toEndOf="parent"
                app:layout_constraintTop_toTopOf="@id/circleImageView"
                tools:src="@drawable/ic_arrow_drop_down_black_24dp" />

            <androidx.constraintlayout.widget.ConstraintLayout
                android:id="@+id/constraintLayoutDescription"
                android:layout_width="match_parent"
                android:layout_height="wrap_content"
                android:background="#e8f5e9"
                android:visibility="gone"
                app:layout_constraintBottom_toBottomOf="parent"
                app:layout_constraintLeft_toLeftOf="parent"
                app:layout_constraintRight_toRightOf="parent"
                app:layout_constraintTop_toBottomOf="@id/circleImageView"
                tools:visibility="visible">

                <TextView
                    android:id="@+id/textViewDescription"
                    android:layout_width="match_parent"
                    android:layout_height="wrap_content"
                    android:layout_margin="10dp"
                    android:maxLines="8"
                    android:scrollbars="vertical"
                    android:text="@{person.description}"
                    android:textSize="16sp"
                    app:layout_constraintBottom_toBottomOf="parent"
                    app:layout_constraintLeft_toLeftOf="parent"
                    app:layout_constraintRight_toRightOf="parent"
                    app:layout_constraintTop_toTopOf="parent"
                    tools:text="Your details information of your at here. \nYour details information of your at here" />

            </androidx.constraintlayout.widget.ConstraintLayout>

        </androidx.constraintlayout.widget.ConstraintLayout>

    </androidx.cardview.widget.CardView>

</layout>
Bước 4: xây dựng class ExpendableRecyclerViewAdapter
Tiếp theo ta sẽ tạo một class ExpendableRecyclerViewAdapter kế thừa từ class RecyclerView.Adapter. Mục tiêu của class này nhận vào một danh sách các Person, xử lý việc hiển thị và các tương tác khi touch vào từng item Person trong đó.
class ExpendableRecyclerViewAdapter(private val items: List<Person>) :
    RecyclerView.Adapter<ExpendableRecyclerViewAdapter.ViewHolder>() {

    override fun onCreateViewHolder(parent: ViewGroup, viewType: Int): ViewHolder {
        val binding = DataBindingUtil.inflate<ItemPersonBinding>(
            LayoutInflater.from(parent.context),
            R.layout.item_person,
            parent,
            false
        )
        return ViewHolder(binding)
    }

    override fun onBindViewHolder(holder: ViewHolder, position: Int) {
        holder.bind(items.get(position))

    }

    override fun getItemCount(): Int {
        return items.size
    }

    inner class ViewHolder(val binding: ItemPersonBinding) : RecyclerView.ViewHolder(binding.root) {

        init {
            binding.constraintLayoutMain.safeClick(View.OnClickListener {
                binding.person?.reverseExpanded()
                notifyItemChanged(layoutPosition)
            })

            //disable scroll of recycler view when touch on expand layout
            binding.textViewDescription.setOnTouchListener { view: View, motionEvent: MotionEvent ->
                view.parent.requestDisallowInterceptTouchEvent(true)
                false
            }

            binding.textViewDescription.movementMethod = ScrollingMovementMethod()

        }

        fun bind(item: Person) {
            binding.person = item
            binding.executePendingBindings()
        }
    }
}
Ta quan sát thấy có hàm safeClick, mục tiêu của hàm này là hạn chế việc user click liên tiếp các item, sẽ dễ gây ra các vấn đề về hiệu ứng animation của danh sách và các lỗi tiềm ẩn khác. Hàm này được khai báo như sau
fun View.safeClick(listener: View.OnClickListener?, blockInMillis: Long = 500) {
    var lastClickTime: Long = 0
    this.setOnClickListener {
        if (SystemClock.elapsedRealtime() - lastClickTime < blockInMillis) {
            return@setOnClickListener
        }
        lastClickTime = SystemClock.elapsedRealtime()
        listener?.onClick(this)
    }
}
Bước 5: chuẩn bị dữ liệu cho việc hiển thị
Bước này ta sẽ chuẩn bị tập dữ liệu cho việc hiển thị. Ta khai báo 1 file array.xml trong thư mục "values" của dự án với nội dung
<?xml version="1.0" encoding="utf-8"?>
<resources>
    <string-array name="people">
        <item>Teri Files</item>
        <item>Thaksin Shinawatra</item>
        <item>Theresa May</item>
        <item>Tom Curley</item>
        <item>Tom Daschle</item>
        <item>Tves Brodeur</item>
        <item>Venus Williams</item>
        <item>Yu Shyi Kun</item>
        <item>Yuri Fedotov</item>
        <item>Zurab Tsereteli</item>
    </string-array>

    <integer-array name="images">
        <item>@drawable/teri_files_0001</item>
        <item>@drawable/thaksin_shinawatra_0004</item>
        <item>@drawable/theresa_may_0001</item>
        <item>@drawable/tom_curley_0001</item>
        <item>@drawable/tom_daschle_0001</item>B
        <item>@drawable/tves_brodeur_0001</item>
        <item>@drawable/venus_williams_0005</item>
        <item>@drawable/yu_shyi_kun_0001</item>
        <item>@drawable/yuri_fedotov_0001</item>
        <item>@drawable/zurab_tsereteli_0001</item>
    </integer-array>
</resources>
Đây là danh sách các tên người và hình ảnh tương ứng.
Để hiển thị thông tin chi tiết của người đó ta có thể tạo một string-array tương ứng nhưng tại đây để cho nhanh mình khai báo 1 string để hiển thị chung cho tất cả các người, mình add một biến description trong file strings.xml như sau
<string name="description">"1. Better safe than sorry – Cẩn tắc vô áy náy

2. Money is a good servant but a bad master – Khôn lấy của che thân, dại lấy thân che của

3. The grass are always green on the other side of the fence – Đứng núi này trông núi nọ

4. Once bitten, twice shy – Chim phải đạn sợ cành cong

5. When in Rome (do as the Romans do) – Nhập gia tùy tục

6. Honesty is the best policy – Thật thà là thượng sách

7. A woman gives and forgives, a man gets and forgets – Đàn bà cho và tha thứ, đàn ông nhận và quên

8. No rose without a thorn – Hồng nào mà chẳng có gai, việc nào mà chẳng có vài khó khăn!

9. Save for a rainy day – Làm khi lành để dành khi đau

10. It’s an ill bird that fouls its own nest – Vạch áo cho người xem lưng/ Tốt đẹp phô ra xấu xa đậy lại."
</string>
Bước 6: đọc và gán dữ liệu cho đối tượng Recyclerview
Kế đến trong file MainActivity.kt ta sẽ tạo một hàm để đọc thông tin các Person từ các file resoucre vừa tạo. Ta sẽ viết một hàm getListPersonFake() như sau
fun getListPersonFake(): List<Person> {
    val people = mutableListOf<Person>()

    val personNames = resources.getStringArray(R.array.people)
    val images = resources.obtainTypedArray(R.array.images)

    val generalDescription = resources.getString(R.string.description)
    personNames.forEachIndexed { index, personName ->
        val person = Person(
            personName,
            generalDescription,
            images.getResourceId(index, -1),
            false
        )
        people.add(person)
    }

    return people
}
Cũng trong file này ta bắt đầu tạo và gán dữ liệu cho đối RecyclerView ta đã khai báo trong actvity_main.xml. Ta thực hiện việc này trong hàm onCreate của class MainActivity
private lateinit var adapter: ExpendableRecyclerViewAdapter
private lateinit var binding: ActivityMainBinding

override fun onCreate(savedInstanceState: Bundle?) {
    super.onCreate(savedInstanceState)
    setContentView(R.layout.activity_main)

    binding = DataBindingUtil.setContentView(this, R.layout.activity_main)

    adapter = ExpendableRecyclerViewAdapter(getListPersonFake())
    binding.recyclerPerson.adapter = adapter
    binding.recyclerPerson.itemAnimator = null
}
Đến đây ta có thể chạy được ứng dụng nhưng sẽ không có các animation như hình minh họa ở trên. Để có các hiệu ứng ta tiếp tục đi đến bước kế tiếp.
Bước 7: tạo lớp animation
Bước này ta sẽ tạo các hiệu ứng, quan sát thấy ta có 3 hiệu ứng cần làm:
- Hiệu ứng cho mũi tên khi click vào mở rộng sẽ xoay lên, đóng lại sẽ xoay xuống
- Hiệu ứng sổ xuống để mở rộng item
- Hiệu ứng co lại để đóng item
Do đó ta sẽ tạo một class là Animations.kt để khai báo các hiệu ứng trên
object Animations {

    fun expandAction(view: View) {
        view.measure(View.MeasureSpec.UNSPECIFIED, View.MeasureSpec.UNSPECIFIED)
        val actualheight = view.measuredHeight

        view.layoutParams.height = 0
        view.visibility = View.VISIBLE

        val animation = object : Animation() {
            override fun applyTransformation(interpolatedTime: Float, t: Transformation) {
                view.layoutParams.height = if (interpolatedTime == 1f)
                    ViewGroup.LayoutParams.WRAP_CONTENT
                else
                    (actualheight * interpolatedTime).toInt()
                view.requestLayout()
            }
        }

        animation.duration = (actualheight / view.context.resources.displayMetrics.density).toLong()

        view.startAnimation(animation)
    }

    fun collapseAction(view: View) {

        val actualHeight = view.measuredHeight

        val animation = object : Animation() {
            override fun applyTransformation(interpolatedTime: Float, t: Transformation) {
                if (interpolatedTime == 1f) {
                    view.visibility = View.GONE
                } else {
                    view.layoutParams.height =
                        actualHeight - (actualHeight * interpolatedTime).toInt()
                    view.requestLayout()
                }
            }
        }

        animation.duration = (actualHeight / view.context.resources.displayMetrics.density).toLong()
        view.startAnimation(animation)
    }
}
Kế đến ta sẽ khai báo chúng để khi người dùng click vào các item thì sẽ chạy các hiệu này, ta thực hiện việc này trong file ExpendableRecylerViewAdapter.kt trong hàm init của ViewHolder
binding.constraintLayoutMain.safeClick(View.OnClickListener {
    binding.person?.reverseExpanded()
    binding.imageViewExpand.animate().setDuration(200).rotationBy(180.0f)
    if(binding.person!!.isExpanded) {
        Animations.expandAction(binding.constraintLayoutDescription)
    } else {
        Animations.collapseAction(binding.constraintLayoutDescription)
    }
    notifyItemChanged(layoutPosition)
})
Đến đây ta đã hoàn thành các bước để có được demo như hình minh họa.
Bạn có thể tải mã nguồn tham khảo tại đây https://github.com/hungan1409/ExpandRecyclerView
Tham khảo
https://medium.com/better-programming/recyclerview-expanded-1c1be424282c
All rights reserved
