Các thư viện giúp bạn làm việc hiệu quả hơn với Reactjs (P1)
Bài đăng này đã không được cập nhật trong 5 năm
1. Formik
Hiện nay có rất nhiều cách để cho bạn có thể quản lý form trong React một hiệu quả.Cúng có thể nói đến như redux-form, react-hook-form, react-material-ui-form-validator, formik ... .Theo ý kiến cá nhân của mình thì Formik là thự viện khá hay mà bạn nên thử sử dụng nó.Nó giúp chúng ta sử lý ba vấn đề chính sau đây
- Nhân giá trị trong và ngoài state form
- Validate giá trị và đưa ra lổi
- Xử lý việc submit form
Bằng cách sắp xếp tất cả những điều trên vào một nơi, Formik sẽ giữ mọi thứ có tổ chức - giúp việc kiểm tra, cấu trúc lại và trả kết quả cho form của bạn trở nên dễ dàng.
Cách sử dụng
1) Cài đặt :
npm install formik --save

//hoăc

yarn add formik
1) Demo :
import React from 'react';
 import { useFormik } from 'formik';
 import * as Yup from 'yup';

 const SignupForm = () => {
   const formik = useFormik({
     initialValues: {
       firstName: '',
       lastName: '',
       email: '',
     },
     validationSchema: Yup.object({
       firstName: Yup.string()
         .max(15, 'Must be 15 characters or less')
         .required('Required'),
       lastName: Yup.string()
         .max(20, 'Must be 20 characters or less')
         .required('Required'),
       email: Yup.string()
         .email('Invalid email address')
         .required('Required'),
     }),
     onSubmit: values => {
       alert(JSON.stringify(values, null, 2));
     },
   });
   return (
     <form onSubmit={formik.handleSubmit}>
       <label htmlFor="firstName">First Name</label>
       <input
         id="firstName"
         name="firstName"
         type="text"
         onChange={formik.handleChange}
         onBlur={formik.handleBlur}
         value={formik.values.firstName}
       />
       {formik.touched.firstName && formik.errors.firstName ? (
         <div>{formik.errors.firstName}</div>
       ) : null}
       <label htmlFor="lastName">Last Name</label>
       <input
         id="lastName"
         name="lastName"
         type="text"
         onChange={formik.handleChange}
         onBlur={formik.handleBlur}
         value={formik.values.lastName}
       />
       {formik.touched.lastName && formik.errors.lastName ? (
         <div>{formik.errors.lastName}</div>
       ) : null}
       <label htmlFor="email">Email Address</label>
       <input
         id="email"
         name="email"
         type="email"
         onChange={formik.handleChange}
         onBlur={formik.handleBlur}
         value={formik.values.email}
       />
       {formik.touched.email && formik.errors.email ? (
         <div>{formik.errors.email}</div>
       ) : null}
       <button type="submit">Submit</button>
     </form>
   );
 };
Formik cung cấp cho bạn các phươn thức để sứ lý form như
- initialValues
- validationSchema ( Kết hợp với Yup để có hiệu quả tốt hown)
- onSubmit
- errors
- touched
- ..........
Ngoài ra nó còn cung cấp các component như Formik, Form, Field, ErrorMessage ...
Các bạn có tiều hiểu thêm tại đây https://formik.org/docs/overview.
2. React-toastify
Nêu như bạn quá nhàm chán khi phải sử dụng hàm alert() trong javascript để thể hiện thông tin .Thi react-toastify có thể giúp bạn làm điều đó .
react-toastify là một thư viện nhỏ nhưng rất dễ tùy biến tạo ra các toasts thực tế và đẹp mắt trong trình duyệt
Cách sử dụng
npm install react-toastify --save

//hoăc

yarn add react-toastify
import { ToastContainer, toast } from 'react-toastify'
import 'react-toastify/dist/ReactToastify.css'
toast.configure({
  autoClose: 2000,
  draggable: false,
  position: toast.POSITION.TOP_LEFT
})
const notify = () => toast('Wow so easy !')

const App = () => (
  <div className="App">
    <button onClick={notify}>Notify !</button>
  </div>
)
Tùy vào các trường hợp mà các ban có thể tùy biến nó một cách hợp lý
toast.success('🦄 Wow so easy!', {
    position: "top-left",
    autoClose: 5000,
    hideProgressBar: false,
    closeOnClick: true,
    pauseOnHover: true,
    draggable: true,
    progress: undefined,
});
Các bạn có tiều hiểu thêm tại đây https://fkhadra.github.io/react-toastify/introduction.
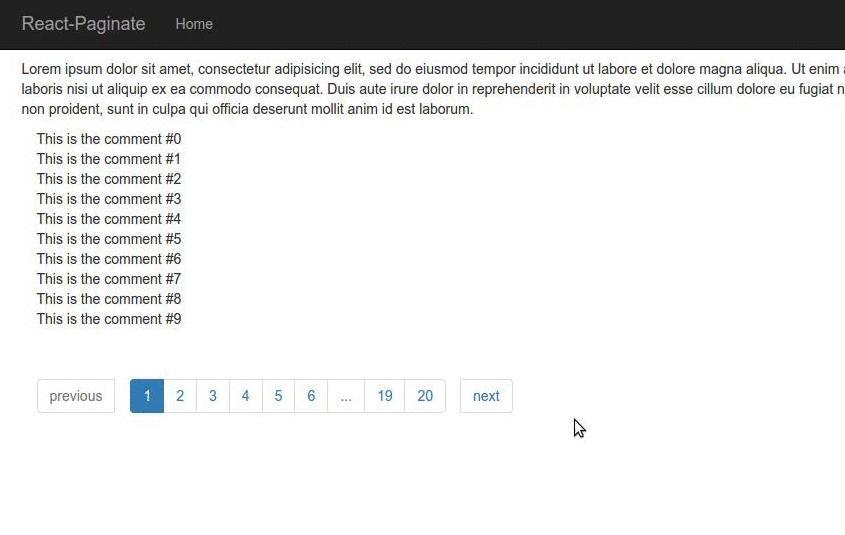
3. React-paginate
React-paginate là một thư viện bổ ích giúp chúng ta có thể làm chức năng phân trang một cách dể dàng hơn.Cung cấp các phương thức để có thể tùy chỉnh từ chức năng cho đến giao diện của nó
Cách sử dụng
1) Cài đặt :
npm install react-paginate --save

//hoăc

yarn add react-paginate
2) Demo :
import React, { Component } from 'react';
import ReactDOM from 'react-dom';
import PropTypes from 'prop-types';
import ReactPaginate from 'react-paginate';
import $ from 'jquery';

window.React = React;

export class CommentList extends Component {
  static propTypes = {
    data: PropTypes.array.isRequired,
  };

  render() {
    let commentNodes = this.props.data.map(function (comment, index) {
      return <div key={index}>{comment.comment}</div>;
    });

    return (
      <div id="project-comments" className="commentList">
        <ul>{commentNodes}</ul>
      </div>
    );
  }
}

export class App extends Component {
  static propTypes = {
    url: PropTypes.string.isRequired,
    author: PropTypes.string.isRequired,
    perPage: PropTypes.number.isRequired,
  };

  constructor(props) {
    super(props);

    this.state = {
      data: [],
      offset: 0,
    };
  }

  loadCommentsFromServer() {
    $.ajax({
      url: this.props.url,
      data: { limit: this.props.perPage, offset: this.state.offset },
      dataType: 'json',
      type: 'GET',

      success: (data) => {
        this.setState({
          data: data.comments,
          pageCount: Math.ceil(data.meta.total_count / data.meta.limit),
        });
      },

      error: (xhr, status, err) => {
        console.error(this.props.url, status, err.toString()); // eslint-disable-line
      },
    });
  }

  componentDidMount() {
    this.loadCommentsFromServer();
  }

  handlePageClick = (data) => {
    let selected = data.selected;
    let offset = Math.ceil(selected * this.props.perPage);

    this.setState({ offset: offset }, () => {
      this.loadCommentsFromServer();
    });
  };

  render() {
    return (
      <div className="commentBox">
        <CommentList data={this.state.data} />
        <ReactPaginate
          previousLabel={'previous'}
          nextLabel={'next'}
          breakLabel={'...'}
          breakClassName={'break-me'}
          pageCount={this.state.pageCount}
          marginPagesDisplayed={2}
          pageRangeDisplayed={5}
          onPageChange={this.handlePageClick}
          containerClassName={'pagination'}
          subContainerClassName={'pages pagination'}
          activeClassName={'active'}
        />
      </div>
    );
  }
}

ReactDOM.render(
  <App url={'http://localhost:3000/comments'} author={'adele'} perPage={10} />,
  document.getElementById('react-paginate')
);
Trên đây là một de mo nhỏ về react-paginate.Các tham số cần lưu ý đây
- pageCount ( Required) : Tổng số trang.
- pageRangeDisplayed ( Required) : Phạm vi các trang được hiển thị.
- marginPagesDisplayed ( Required) : Số lượng trang để hiển thị cho lề.
- onPageChange: Sử lý sựu kiện khi chuyển trang.
- ......
Các bạn có tiều hiểu thêm tại đây https://github.com/AdeleD/react-paginate.
All rights reserved
