Build API sử dụng Laravel và GrapQl - Mutation/JWT Authentication (Part 2)
Bài đăng này đã không được cập nhật trong 8 năm
Phần 1: Mutation GraphQL
Trong bài viết trước, chúng ta đã học cách xây dựng API xây dựng sử dụng Laravel và GraphQL cho danh sách product và user, nếu bạn chưa đọc thì bạn nên đọc nó trước. Còn bây giờ chúng ta sẽ tìm hiểu về Mutation và Authentication API với GraphQL.
GraphQL là công nghệ tuyệt vời để tạo ra API đơn giản và linh hoạt, nó mạnh mẽ cho client app phát triển bằng React Native / ReactJs. Có rất nhiều thư viện để hỗ trợ cho GraphQL và được giới thiệu tại đây.
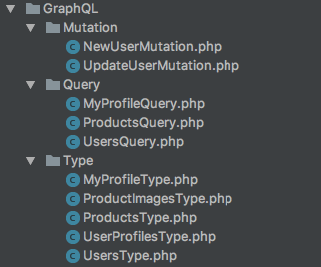
Tạo class Mutation
Mutation là kiểu để insert dữ liệu vào hoặc thay đổi dữ liệu đã có trong database. Bạn có thể xem chi tiết hơn tại đây. Trong bài trước chúng ta đã có User Model, trong bài này này thì chúng ta sẽ thêm mới user và update thông tin user bằng cách sử dụng mutation query. Đầu tiên chúng ta phải thêm class mới cho create user và update user.
Trong NewUserMutation.php chúng ta có function args() để declare các field và type của input. Type :: nonNull có nghĩa là field này bắt buộc. Trong GraphQL, query được đánh dấu bởi dấu chấm than (!) và sau khi save thành công thì chúng ta sẽ return về user data.
<?php
/**
 * Created by PhpStorm.
 * User: ardani
 * Date: 8/4/17
 * Time: 10:02 AM
 */
namespace App\GraphQL\Mutation;
use GraphQL\Type\Definition\Type;
use Rebing\GraphQL\Support\Facades\GraphQL;
use Rebing\GraphQL\Support\Mutation;
use App\User;

class NewUserMutation extends Mutation
{
    protected $attributes = [
        'name' => 'NewUser'
    ];

    public function type()
    {
        return GraphQL::type('users');
    }

    public function args()
    {
        return [
            'name' => [
                'name' => 'name',
                'type' => Type::nonNull(Type::string())
            ],
            'email' => [
                'name' => 'email',
                'type' => Type::nonNull(Type::string())
            ],
            'password' => [
                'name' => 'password',
                'type' => Type::nonNull(Type::string())
            ],
            'first_name' => [
                'name' => 'first_name',
                'type' => Type::nonNull(Type::string())
            ],
            'last_name' => [
                'name' => 'last_name',
                'type' => Type::string()
            ],
            'avatar' => [
                'name' => 'avatar',
                'type' => Type::string()
            ]
        ];
    }

    public function resolve($root, $args)
    {
        $args['password'] = bcrypt($args['password']);
        $user = User::create($args);
        if (!$user) {
            return null;
        }

        $user->user_profiles()->create($args);

        return $user;
    }
}
UpdateUserMutation.php là ví dụ về update user data, tất cả các hoạt động update và insert vẫn sử dụng Eloquent và bạn có thể sử dụng Query builder cho query phức tạp.
<?php
/**
 * Created by PhpStorm.
 * User: ardani
 * Date: 8/4/17
 * Time: 10:02 AM
 */
namespace App\GraphQL\Mutation;
use GraphQL\Type\Definition\Type;
use Rebing\GraphQL\Support\Facades\GraphQL;
use Rebing\GraphQL\Support\Mutation;
use App\User;

class UpdateUserMutation extends Mutation
{
    protected $attributes = [
        'name' => 'UpdateUser'
    ];

    public function type()
    {
        return GraphQL::type('users');
    }

    public function args()
    {
        return [
            'id' => [
                'name' => 'id',
                'type' => Type::nonNull(Type::int())
            ],
            'name' => [
                'name' => 'name',
                'type' => Type::nonNull(Type::string())
            ]
        ];
    }

    public function resolve($root, $args)
    {
        $user = User::find($args['id']);
        if (!$user) {
            return null;
        }

        $user->name = $args['name'];
        $user->save();

        return $user;
    }
}
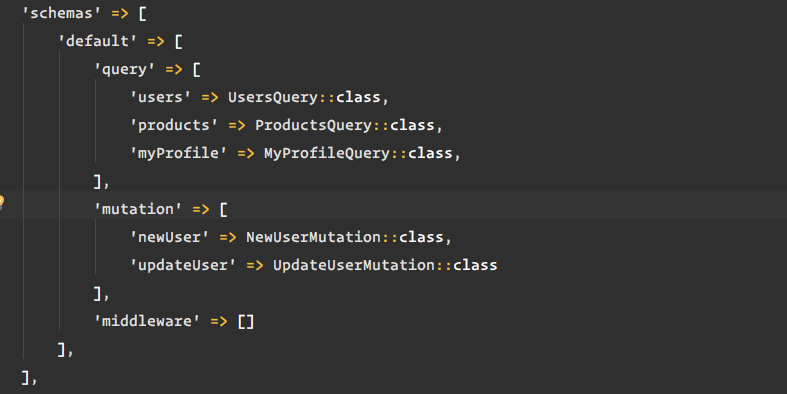
Append Mutation vào GraphQL
Bạn có thể tìm thấy graphql.php trong thư mục config và thêm class với namespace vào trong mutation schema.
Demo
Phần 2: JWT Authentication GraphQL
JSON Web Token (JWT) là một open standard (RFC 7519) định nghĩa cách thức truyền tin an toàn giữa các thành viên bằng 1 đối tượng JSON . Thông tin này có thể được xác thực và đánh dấu tin cậy bởi "chữ ký" của nó. Phần chữ ký của JWT sẽ được mã hóa lại bằng HMAC hoặc RSA.
Install JWT Package
JWT rất hữu ích cho việc xác thực API Stateless và dễ dàng tích hợp với Laravel khi sử dụng package này. Cài đặt JWT, bạn có thể làm theo hướng dẫn ở đây và để xử lý lỗi thì ở đây.
Create Controller For Authentication
Chúng ta sử dụng header param Authorization: Bearer {yourtokenhere} với mọi request đối với GraphQL. Đầu tiên ta tạo controller cho authentication như dưới đây:
<?php
/**
 * Created by PhpStorm.
 * User: ardani
 * Date: 8/4/17
 * Time: 11:18 AM
 */
namespace App\Http\Controllers;
use Illuminate\Http\Request;
use Tymon\JWTAuth\Exceptions\JWTException;
use Tymon\JWTAuth\JWTAuth;

class AuthenticateController extends Controller
{
    private $jwt;

    public function __construct(JWTAuth $jwt)
    {
        $this->jwt = $jwt;
    }

    public function authenticate(Request $request)
    {
        // grab credentials from the request
        $credentials = $request->only('email', 'password');

        try {
            // attempt to verify the credentials and create a token for the user
            if (! $token = $this->jwt->attempt($credentials)) {
                return response()->json(['error' => 'invalid_credentials'], 401);
            }
        } catch (JWTException $e) {
            // something went wrong whilst attempting to encode the token
            return response()->json(['error' => 'could_not_create_token'], 500);
        }

        // all good so return the token
        return response()->json(compact('token'));
    }
}
Thêm mới endpoint trong web.php cho login:
Route::post(‘graphql/login’, ‘AuthenticateController@authenticate’);
Create Query With Authentication
Ví dụ chúng ta sử dụng query myprofile và truy cập vào myprofile cần phải có authentication từ JWT. Đầu tiên chúng ta tạo MyProfileQuery.php:
<?php
namespace App\GraphQL\Query;

use App\User;
use Rebing\GraphQL\Support\Facades\GraphQL;
use Rebing\GraphQL\Support\Query;
use Rebing\GraphQL\Support\SelectFields;
use Tymon\JWTAuth\Facades\JWTAuth;

class MyProfileQuery extends Query
{
    private $auth;
    protected $attributes = [
        'name' => 'My Profile Query',
        'description' => 'My Profile Information'
    ];

    public function authorize(array $args)
    {
        try {
            $this->auth = JWTAuth::parseToken()->authenticate();
        } catch (\Exception $e) {
            $this->auth = null;
        }

        return (boolean) $this->auth;
    }

    public function type()
    {
        return GraphQL::type('myprofile');
    }

    public function resolve($root, $args, SelectFields $fields)
    {
        $user = User::with(array_keys($fields->getRelations()))
            ->where('id', $this->auth->id)
            ->select($fields->getSelect())->first();

        return $user;
    }
}
Quá trình xác thực xảy ra trong function authorize(), trong đó chúng ta phải kiểm tra JWT auth là hợp lệ để tiếp tục quá trình, nhưng nếu xác thực không hợp lệ sẽ hiển thị thông báo trái phép ở kết quả của GraphQ. Và đừng quên thêm vào truy vấn mới trong config graphql.php:
Demo
Hi vọng qua bài viết bạn có thể bắt đầu làm quen với GraphQL cũng như thấy những tính này mà nó mang lại.
References
https://medium.com/skyshidigital/easy-build-api-using-laravel-and-graphql-mutation-part-2-14dfc9ceb44c https://medium.com/skyshidigital/easy-build-api-using-laravel-and-graphql-jwt-authentication-part-3-ea15c2421408
All rights reserved
