Build a web application development environment with Nuxt.js + TypeScript + Vuetify
Bài đăng này đã không được cập nhật trong 7 năm
1. Introduction
I developed SPA with Nuxt.js + TypeScript + Vuetify configuration inside my company
At that time, I felt that the development efficiency was high, so I will introduce how to build and develop the environment.
What I thought was good is the following 3 points:
- Environment construction can be easily configured by using
Nuxt.js - Using
TypeScript, you can develop with the ease of using the benefits of type - Easy to handle material design UI by using
Vuetify
This time, the goal is to create a SPA as in the following image.
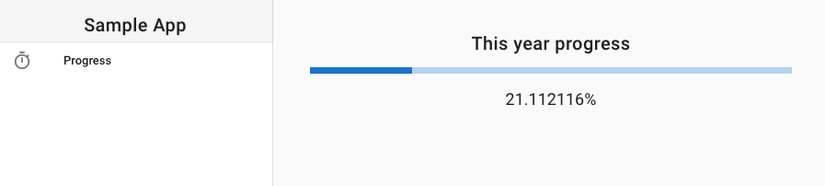
The progress bar shows how many percent this year has been progressing up until the current time.
※ Please note that this article will not mention how to handle SSR.
2. Technical Introduction
Here is an overview of the languages and frameworks covered in this article:
Nuxt.jsTypeScriptVuetify
2.1 Nuxt.js
Nuxt.js is a framework for building Vue.js applications.
It includes the following frameworks, which is mandatory when developing with Vue.js:
Vue-RouterVuexVue Server Renderer
Originally, it would be necessary to consider whether or not the framework above is necessary and set up combining the mandatory ones, but if you use Nuxt.js, you will be freed from these troubles.
2.2 TypeScript
TypeScript is a language developed by Microsoft that looks like JavaScript with features such as static typing and class-based object orientation.
2.3 Vuetify
The UI framework developed based on Vue.js and has the following features.
- Easy to handle material design
- Rich source code of documents and samples
In particular, I think that the term "rich in samples" describe a better place than other frameworks.
3. How to configure?
Here are the steps to create an environment where the technologies introduced above can be used.
I will walk you through the following four steps:
- Start with a template project
- Remove UI source code
- Import
Vuetify - Implement your own app
Prepare the project in steps 1 and 2 and proceed with the application implementation in steps 3 and 4.
3.1 Starting with template project
In Nuxt.js, several templates are prepared to simplify the environment construction.
I will use a template for TypeScript.
Firstly, I will install vue-cli globally.
If you execute the command and the version number is displayed, then there is no problem.
$ npm install -g @vue/cli

$ vue --version
> 3.5.1

$ npm install -g @vue/cli-init

$ vue init --version
> 3.5.1
Now that vue-cli is ready, next is to create a project from the template.
I will continue with reference to the following page.
https://github.com/nuxt-community/typescript-template
$ vue init nuxt-community/typescript-template my-project
You will be asked for the project name, etc.
Once the project is created, let's move it to local.
$ cd my-project

$ npm install

$ npm run dev
Connect to localhost: 3000 in a browser and the page is displayed successfully.
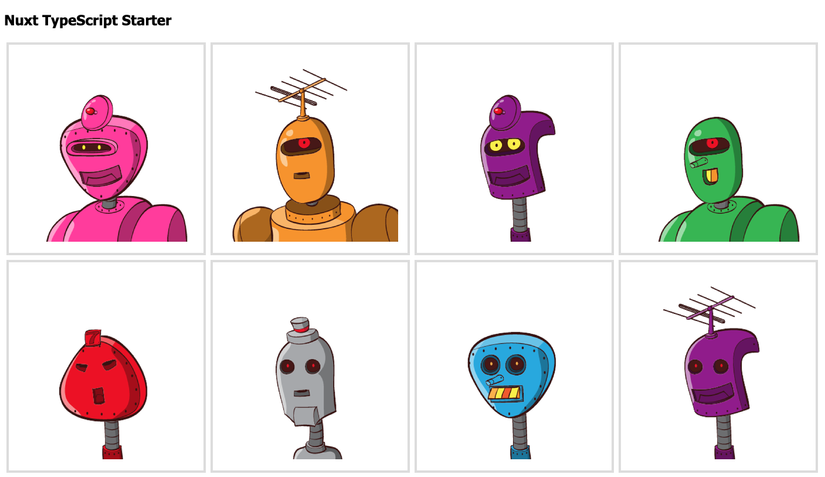
3.2 Remove the UI's source code
Next, remove the UI source code and prepare to create your own app.
Since the robot's face is currently displayed, I will erase them.
As the language is TypeScript, I will be using Visual Studio Code as the editor.
https://code.visualstudio.com/
Delete the SSR description part that is not covered by this article.
Delete nuxtServerInit() in my-project/store/index.ts.
And delete any import that you no longer need.
// ...

export const actions: ActionTree<RootState, RootState> = {

  // delete the following

  async nuxtServerInit({ commit }, context) {
    let people: Person[] = []

    people = context.isStatic ?
      localRandomData :
      await context.app.$axios.$get("./random-data.json")

    commit("setPeople", people.slice(0, 10))
  }

  // delete the above

}
If you delete the code and save it will automatically rebuild and you can immediately see the changes in your browser.
If you think changes are not reflected, please reload the page.
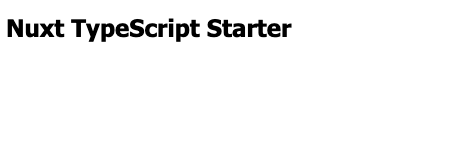
It is considered success if only the text of Nuxt TypeScript Template is displayed on the page.
3.3. Import Vuetify
Next we will import the Vuetify UI framework .
First, stop npm run dev with Ctrl + c and add Vuetify to the dependency with the following command.
export default {
  // omitted
  modules: [
    "@nuxtjs/axios",
    // add the line above
    "@nuxtjs/vuetify"
  ],
}
This is how you can use Vuetify.
I'm glad the framework is easy to import.
I will edit the page to try out Vuetify.
Edit my-project/pages/index.vue
Replace <template> as below.
There are a few lines, but you can assume that most of them are on the Vuetify documentation and sample pages.
https://vuetifyjs.com/en/components/navigation-drawers
<template>
<v-app>
<v-navigation-drawer app permanent>
<v-toolbar flat>
<v-list>
<v-list-tile>
<v-list-tile-title class="title">
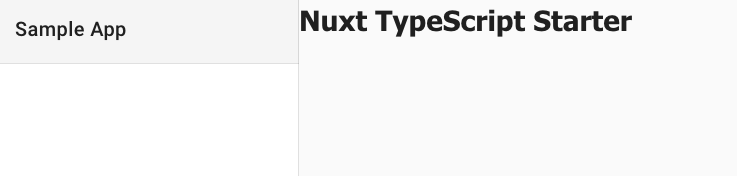
Sample App
</v-list-tile-title>
</v-list-tile>
</v-list>
</v-toolbar>
<v-divider></v-divider>
<v-list dense class="pt-0">
<v-list-tile
v-for="item in items"
:key="item.title"
>
<v-list-tile-action>
<v-icon>{{ item.icon }}</v-icon>
</v-list-tile-action>
<v-list-tile-content>
<v-list-tile-title>{{ item.title }}</v-list-tile-title>
</v-list-tile-content>
</v-list-tile>
</v-list>
</v-navigation-drawer>
<v-content>
<h1 class="header">Nuxt TypeScript Starter</h1>
</v-content>
</v-app>
</template>
Elements beginning with v, such as <v-xxx>, are elements prepared by Vuetify.
By combining these, you can easily build a UI for material design.
Once saved, the navigation drawer will be implemented.
Vuetify is good because you can easily build a UI as intended.
3.4 Implement your application
Finally, I will implement the main target, this year's progress bar.
First, create a navigation drawer menu.
This time, I would like to add data about the menu to the Vue component.
Edit my-project/pages/index.vue as follows.
// omitted

@Component({
  components: {}
})
export default class extends Vue {

  items: Object[] = []

  mounted() {
    this.items = [
      {
        title: 'Progress',
        icon: 'timer'
      }
    ]
  }
}
The view component has a field called items, which is initialized when mounted() is executed.
mounted() is a special method, which is the life cycle that is executed when a view component is loaded onto a page.
Actually, in <template> written in 3.3, there is a description that refers to this item.
v-for = "item in items" or {{item.title}} corresponds to this.
I think that the nice thing about Vue.js and Nuxt.js is that you can write "description about data and processing" and "description about design" separately in this way.
Next, prepare a progress bar and create a UI.
Rewrite <v-content> as below.
// omitted

    <v-content class="bar-container">
      <p class="title">
        This year progress
      </p>
      <v-progress-linear
        v-model="yearProgress"
      ></v-progress-linear>
      <p class="percentage">
        {{ `${this.yearProgress.toFixed(6)}%` }}
      </p>
    </v-content>
You can see that the progress bar simply by writing the element <v-progress-linear>.
Vuetify is very useful right?
This is not done yet, you will get an error that the yearProgress is not defined.
Let's add a field to the view component and initialize it.
@Component({
  components: {
  }
})
export default class extends Vue {
  items: Object[] = []
  yearProgress: number = 20

  mounted() {
    this.items = [
      {
        title: 'Progress',
        icon: 'timer'
      }
    ]
  }
}
At last, let's add some CSS
// omitted

<style scoped>

.title {
  font-family: 'Roboto', sans-serif;
  font-size: 20px;
  text-align: center;
}

.percentage {
  font-family: 'Roboto', sans-serif;
  font-size: 18px;
  text-align: center;
}

.bar-container {
  margin: 40px;
}

</style>
By adding this I made the progress bar rise up to 20%

All I have to do is calculate this yearProgress dynamically.
Rewrite the view component as below.
@Component({
  components: {}
})
export default class extends Vue {

  items: Object[] = []

  yearProgress: number = 0

  mounted() {
    this.items = [
      {
        title: 'Progress',
        icon: 'timer'
      }
    ]

    this.start()
  }

  start() {
    setInterval(() => {
      const date: Date = new Date()
      const numDaysOfMonth: number = this.calculateDaysOfMonth(date.getFullYear(), date.getMonth())

      const seconds: number = date.getSeconds() + date.getMilliseconds() / 1000.0
      const minutes: number = date.getMinutes() + seconds / 60.0
      const hours: number = date.getHours() + minutes / 60.0
      const days: number = date.getDate() + hours / 24.0
      const months: number = 1.0 * date.getMonth() + days / numDaysOfMonth

      this.yearProgress = 100.0 * months / 12
    }, 100)
  }

  calculateDaysOfMonth(year: number, month: number) {
    return new Date(year, month, 0).getDate()
  }
}
Once start() is executed, it is implemented to calculate the progress of this year every 100 ms.
The calculation result is stored in yearProgress.
If you make a mistake during this implementation, you will get an error at build phase.
By adopting TypeScript, you can know the typo missing in a blink of an eye.
Up to this point, an application has been completed that shows the progress of this year, as shown below.

4. Summary
In this article, I explained how to build the environment of Nuxt.js, TypeScript, and Vuetify, and implement a simple application.
By implementing a modern framework, I have enjoyed the following benefits.
- Simple environment construction by
Nuxt.jsand its template - Benefits of static typing with
TypeScript - Easy and Rich UI Assembly with
Vuetify
There are other web development frameworks at present, but it would be nice if you could read this article and try using Nuxt.js, TypeScript, and Vuetify.
All rights reserved
