BLADE TEMPLATING , MIGRATIONS AND SEEDING IN LARAVEL
Bài đăng này đã không được cập nhật trong 4 năm
I. Blade Templating in Laravel
Bài hôm nay chúng ta sẽ tìm hiểu về cách sử dụng layout trong Laravel Framework.
Blade Template là mẫu template php, cho phép bạn sử dụng cú pháp gọn gàng để nhúng mã php vào template , sử dụng linh hoạt, nhanh chóng.
Link tham khảo . http://laravel.com/docs/4.2/templates . Dưới đây là giao diện demo, mình sẽ thực hiện để ghép layout.
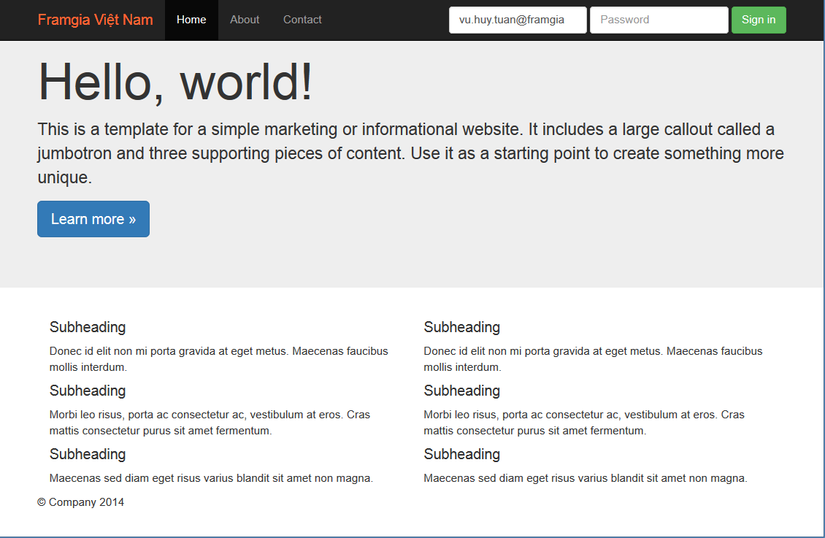 Mỗi trong website đều có những vùng, những phần tử ít khi thay đổi. Những phần tử đó như header, footer, side bar, navigation bar. Bởi vậy nên ta xây dựng một Blade layout.
Bây giờ chúng ta sẽ làm ví dụ để có thể hiểu được cách tạo layout trong Laravel.
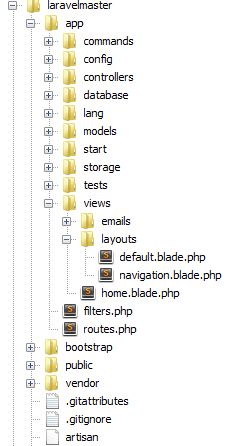
B1. Tạo app/views/layouts/default.blade.php Đầu tiên, chúng ta tạo một file là default.blade.php trong thư mục app\views\layouts, đây chính là file layout chính của chúng ta:
default.blade.php nó có nội dung như sau:
<!DOCTYPE html>
<html lang="en">
  <head>
    <meta charset="utf-8">
    <meta http-equiv="X-UA-Compatible" content="IE=edge">
    <meta name="viewport" content="width=device-width, initial-scale=1">
    <title>Framgia VietNam</title>
    <link href="{{asset('default/css/bootstrap.min.css')}}" rel="stylesheet">
  </head>
  <body>
     @include('layouts.navigation') // include file menu top
      <div class="row">
        @yield('content') // Nội dung thay đổi
      </div>
      <footer class="footer"><div class="container"><p>© Framgia 2014</p></div></footer>
      <script src="https://ajax.googleapis.com/ajax/libs/jquery/1.11.1/jquery.min.js"></script>
      {{ HTML::script('default/js/bootstrap.min.js')}} // link file js
  </body>
</html>
Giải thích:
- Để link đến file css, js. ta có thể sử dụng
{{ HTML::style('default/cs/bootstrap.css')}} //css
{{ HTML::script('default/js/bootstrap.min.js')}} //js
hoặc chúng ta có thể link trực tiếp đến file bằng hàm sau:
<link href="{{asset('default/css/bootstrap.min.css')}}" rel="stylesheet">
Bước 2: Để sử dụng, kế thừa được file default.blade.php, ta tạo Tạo file view app/view/home.blade.php được mổ rộng từ layout, có nội dung như sau:
@extends('layouts.default') // kế thừa từ layout default.blade.php
@section('content') // đây là nội dung sẽ được hiển thị
<div class="jumbotron">
      <div class="container">
        <h1>Hello, world!</h1>
        <p>This is page Home</p>
      </div>
 </div>
@stop
Bước 3. Để chạy thử, ta vào file app/route.php , chỉ định trong controller để action render đến view này như sau:
Route::get('/', function()
{
    return View::make('home');  // trỏ về file view home.bale.php
});
Bước 4: chạy demo
http://localhost/laravelmaster/public/ xem kết quả.
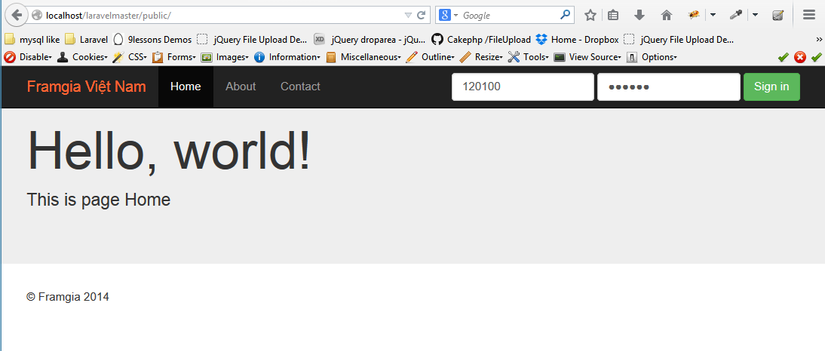
Như vậy chúng ta đã tạo được layout cho laravel.
Biến trong Blade template.
//app/route.php , truyền biến qua view, home.blade.php
Route::get('/', function()
{
 $data = array('name' => 'Vu Huy Tuan' ,
               'email' => 'vu.huy.tuan@framgia.com',
               'address' => 'Bac Ninh' );
 return View::make('home', array('company' => 'Framgia' ,'users' =>$data, 'name'=> 'Tuan'));
});
Cách viết ra một biến trong view.
Hello, {{ $name } // hello Tuan
Dùng toán tử if else
@if ($name == 'Tuan')
 My name is Tuan
@elseif ($name == 'Huy')
 My name is Huy
@else
 My name is...
@endif
Dùng các toán tử lặp
 @for ($i = 0; $i < 10; $i++)
  The current value is {{ $i }}
 @endfor

 @foreach($users as $key => $user)
 {{$key}} = {{$user}} ,
 @endforeach
 // result  name = Vu Huy Tuan ,email = vu.huy.tuan@framgia.com, address = Bac Ninh
 @while (true)
  <p>This is....</p>
 @endwhile
Như vậy là chúng ta đã hoàn thành xong việc tìm hiểu về layout, cách sử dụng các toán tử để in dữ liệu,…
II. Migrations và Seeding trong Laravel
Migration cơ sở dữ liệu trong Laravel cung cấp cho bạn một cách dễ dàng việc quản lý những schema CSDL trong ứng dụng. Khi bạn sử dụng migration, nhiều tác vụ liên quan tới CSDL schema dễ dàng hơn rất nhiều; bằng cách sử dụng migration bạn có thể thay đổi cấu trúc của bảng cơ sở dữ liệu, bạn có thể giữ lại những dữ liệu cũ bất cứ khi nào cho dù hiện tại bạn có thay đổi. Migration tạo ra các file lưu trữ những công việc đã thực hiện.
Creating Migrations
Để tạo 1 migration chúng ta sử dụng câu lệnh migrate:make trong command line
php artisan migrate:make create_users_table
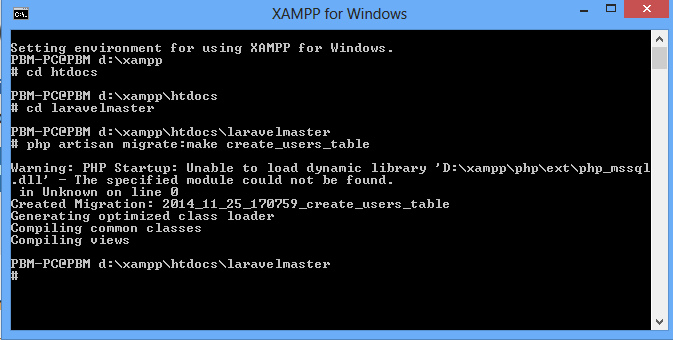
created Migration: 2014_11_25_170759_create_users_table là: của tên file là thời gian hiện tại tạo ra file. ta vào folder app/database/migrations/ sẽ thấy file 2014_11_25_170759_create_users_table.php được tạo ra.
file 2014_11_25_170759_create_users_table.php có nội dung như sau:
<?php

use Illuminate\Database\Schema\Blueprint;
use Illuminate\Database\Migrations\Migration;

class CreateUsersTable extends Migration {

 /**
 * Run the migrations.
 *
 * @return void
 */
 public function up()
 {
 //
 }

 /**
 * Reverse the migrations.
 *
 * @return void
 */
 public function down()
 {
 //
 }

}
Để xác định sự thay đổi trong CSDL, ta sử dụng câu lệnh ” php artisan migrate “, câu lệnh này sẽ gọi phương thức UP trong lớp Migration. Còn nếu bạn muốn rollback migration, bạn sử dụng câu lệnh “ php artisan migrate:rollback ” nó sẽ gọi phương thức DOWN.
VD: tạo table user, ta viết như sau:
<?php

use Illuminate\Database\Schema\Blueprint;
use Illuminate\Database\Migrations\Migration;

class CreateUsersTable extends Migration {

 /**
 * Run the migrations.
 *
 * @return void
 */
 public function up()
 {
       Schema::table('users', function(Blueprint $table)
       {
          $table->create(); // creates the table.
          $table->increments('id');
          $table->string('username',50);
          $table->string('email',100);
       });
 }

 /**
 * Reverse the migrations.
 *
 * @return void
 */
 public function down()
 {
 //
 }

}
Sau khi thay đổi file migration,ta cần chạy câu lệnh “php artisan migrate” để thực thi. Lưu ý: Trước khi run câu lệnh “php artisan migration” bạn phải chắc chắn đã cấu hình database chính xác, trong app/config/database.php . Nếu không sẽ báo lỗi.
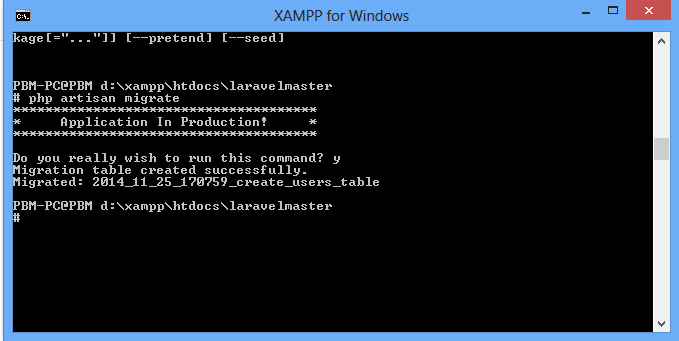
tiếp theo chúng ta sẽ vào phpmyadmin xem kết quả.

Nếu chúng ta muốn sửa , xóa các column trong bảng, chúng ta chỉnh sửa xong và thực thi câu lệnh “php artisan migrate” là xong.
Tham khảo tại : http://laravel.com/docs/4.2/migrations#database-seeding
Seeding CSDL
Link tham khảo http://laravel.com/docs/4.2/migrations
Laravel bao gồm cách đơn giản để seed cở sở dữ liệu của bạn với dữ liệu test sử dụng lớp seed. Tất cả những lớp seed được lưu trữ trong app/database/seeds. Cách đặt tên của lớp seed tùy vào chúng ta, nhưng laravel khuyến cáo nên đặt như UserTableSeeder. Mặc định thì lớp DatabaseSeeder được tạo ra bởi chương trình. Từ lớp này thì bạn có thể gọi và chạy những lớp seed khác, cho phép bạn điều khiển lớp seed theo thứ tự.
// class mặc định
class DatabaseSeeder extends Seeder {
public function run()
{
$this->call('UserTableSeeder');
$this->command->info('User table seeded!');
}
}

// tạo class khác
class UserTableSeeder extends Seeder {
public function run()
{
DB::table('users')->delete();
User::create(array('email' => 'foo@bar.com'));
}
}
Để seed cở sở dữ liệu, bạn có thể sử dụng câu lệnh db:seed
php artisan db:seed
Mặc định thì câu lệnh db:seed sẽ chạy lớp DatabaseSeeder, nhưng bạn muốn sử dụng lớp khác thì bạn có thể thêm lựa chọn –class trước
php artisan db:seed --class=UserTableSeeder
Bạn cũng có thể sử dụng câu lệnh migrate:refresh để seed cơ sở dữ liệu của bạn, câu lệnh này cũng được dùng cho việc rollback hay chạy lại migration của bạn
php artisan migrate:refresh --seed
Link Tham khảo : http://laravel.com/docs/4.2/migrations
http://laravel.com/docs/4.2/schema
Link source code https://github.com/vuhuytuan89/laravelmaster
All rights reserved
