Biến Google Sheet thành một REST API và kết hợp với React
Bài đăng này đã không được cập nhật trong 5 năm
Lady and gentlemen!
Chào mừng quý vị đến với bài viết tiếp theo của em sau chuỗi ngày nghỉ tết ấm no, hạnh phúc và chủ đề của lần gặp gỡ này sẽ là một bài viết giới thiệu hướng dẫn vui vui với tựa đề "Biến Google Sheet thành một REST API và kết hợp với React".
Như quý vị đã biết và đã thấy, posting data to API’s chưa bao giờ là dễ dàng. Cũng như quý vị đã bao giờ dùng React để post form data vào Google Sheets chưa ? . Nếu chưa, thì bài viết hướng dẫn nhỏ này là dành cho quý vị đấy ạ. ( Như văn mẫu  )
)
Chúng ta bắt đầu tìm hiểu cách mà mọi thứ hoạt động thôi nào!
Creating a React App
Để bắt đầu, chúng ta cùng tạo một project React bằng npx create-react-app react-googlesheets nào!
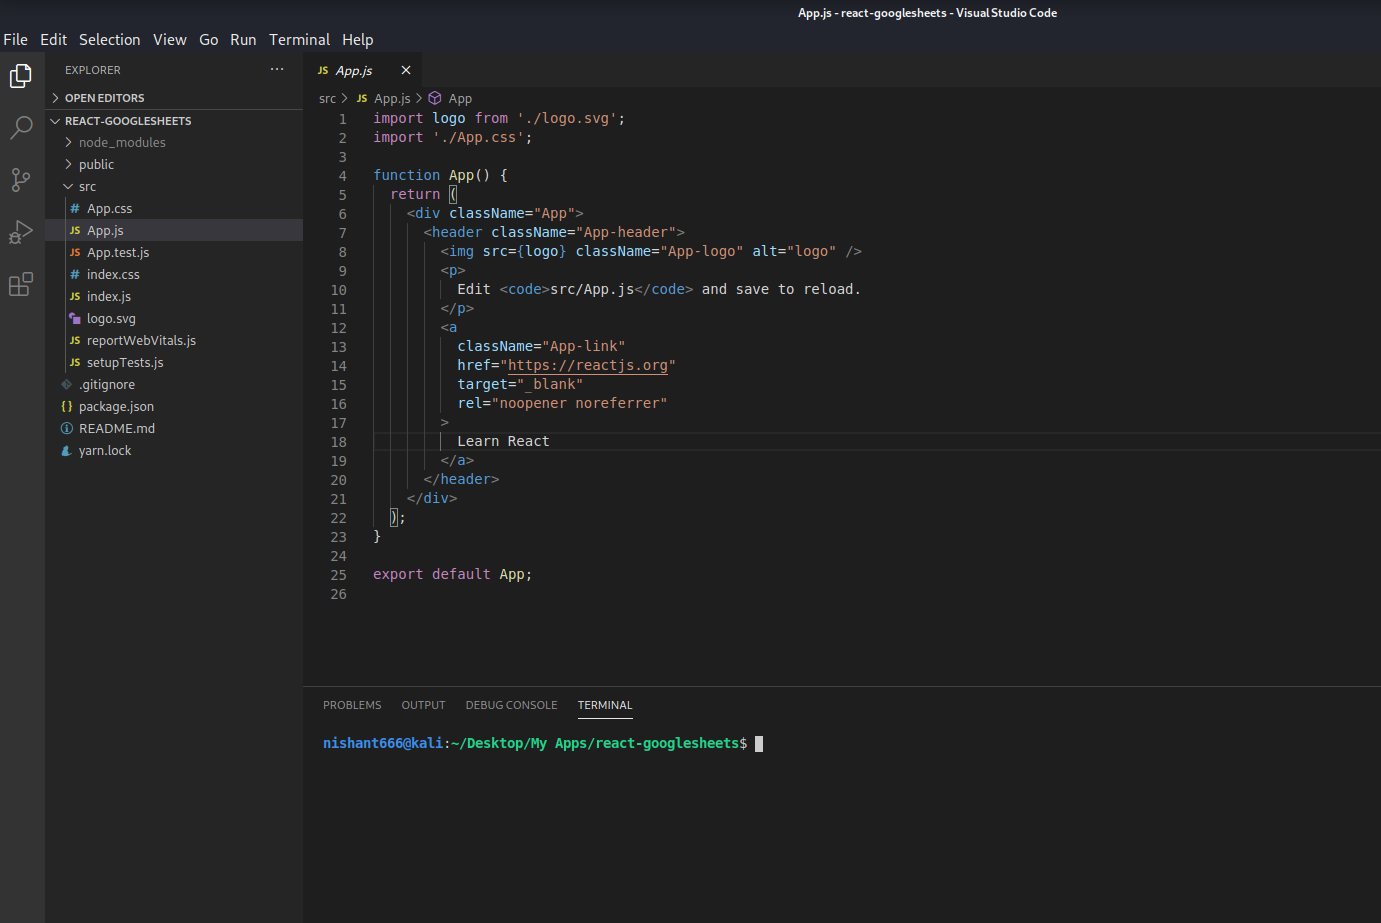
Xóa một số thứ không cần thiết trong App.js
import './App.css';
function App() {
  return (
    <div className="App">
      <header className="App-header">

      </header>
    </div>
  );
}
export default App;
Install Semantic UI
Chúng ta nên dùng Semantic UI để dựng giạo diện cho nó đẹp và nhanh nhé 
Để install chúng ta sẽ gõ npm install semantic-ui-react semantic-ui-css
Sau đó import css file vào file index.js
import 'semantic-ui-css/semantic.min.css'
Và cuối cùng sẽ là npm start to run app!
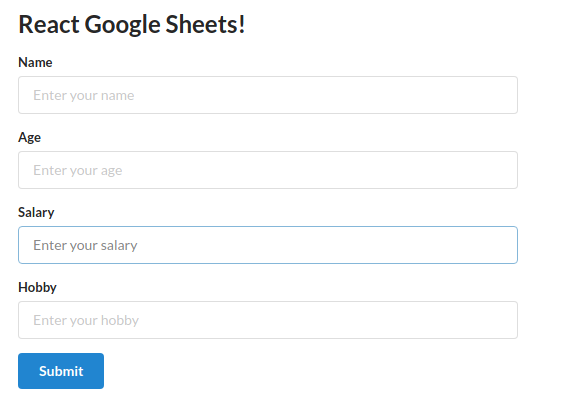
Create some input boxes
Nào chúng ta cùng tạo form với một số trường như name, age,salary,hobby.
Sử dụng một số components Buttons, Form, Container, và Header của semantic-ui-react ạ.
import React, { Component } from 'react'
import { Button, Form, Container, Header } from 'semantic-ui-react'
import './App.css';
export default class App extends Component {
  render() {
    return (
      <Container fluid className="container">
        <Header as='h2'>React Google Sheets!</Header>
        <Form className="form">
          <Form.Field>
            <label>Name</label>
            <input placeholder='Enter your name' />
          </Form.Field>
          <Form.Field>
            <label>Age</label>
            <input placeholder='Enter your age' />
          </Form.Field>
          <Form.Field>
            <label>Salary</label>
            <input placeholder='Enter your salary' />
          </Form.Field>
          <Form.Field>
            <label>Hobby</label>
            <input placeholder='Enter your hobby' />
          </Form.Field>

          <Button color="blue" type='submit'>Submit</Button>
        </Form>
      </Container>
    )
  }
}
Và đây là cái form của chúng ta!
Như vậy chúng ta đã xong UI, cùng làm một số function nào!
Đầu tiên chúng ta tạo state cho các form fields trong constructor.
import React, { Component } from 'react'
import { Button, Form, Container, Header } from 'semantic-ui-react'
import './App.css';
export default class App extends Component {
  constructor(props) {
    super(props)

    this.state = {
       name: '',
       age: '',
       salary: '',
       hobby: ''
    }
  }
changeHandler = (e) => {
    this.setState({[e.target.name] : e.target.value})
  }
submitHandler = e => {
    e.preventDefault();
    console.log(this.state);
  }

  render() {
    const { name, age, salary, hobby } = this.state;    (*)
    return (
      <Container fluid className="container">
        <Header as='h2'>React Google Sheets!</Header>
        <Form className="form" onSubmit={this.submitHandler}>
          <Form.Field>
            <label>Name</label>
            <input placeholder='Enter your name' type="text" name = "name" value = {name} onChange={this.changeHandler}/>
          </Form.Field>
          <Form.Field>
            <label>Age</label>
            <input placeholder='Enter your age' type="number" name = "age" value = {age} onChange={this.changeHandler}/>
          </Form.Field>
          <Form.Field>
            <label>Salary</label>
            <input placeholder='Enter your salary' type="number" name = "salary" value = {salary} onChange={this.changeHandler}/>
          </Form.Field>
          <Form.Field>
            <label>Hobby</label>
            <input placeholder='Enter your hobby' type="text" name = "hobby" value = {hobby} onChange={this.changeHandler}/>
          </Form.Field>

          <Button color="blue" type='submit'>Submit</Button>
        </Form>
      </Container>
    )
  }
}
Tiếp theo là changeHandler để set state mỗi khi on change.
Và cuối cùng là submitHandler để handle submit event mỗi khi nhấn submit.
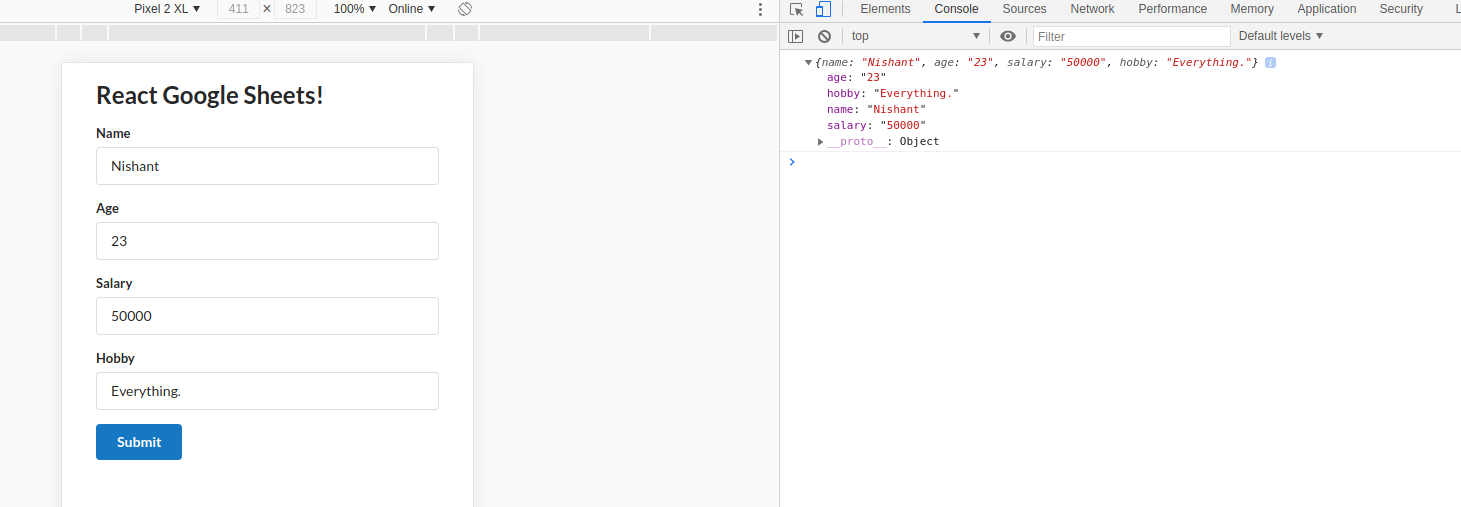
console.log để test thử thôi nào!
Posting data to Google Sheets
Đến giai đoạn biến Google Sheets thành một REST API rồi.
Trước tiên chúng ta cần tạo một Google Sheet và copy link với permission có thể edit. Đặt tên tùy ý quý vị ạ!
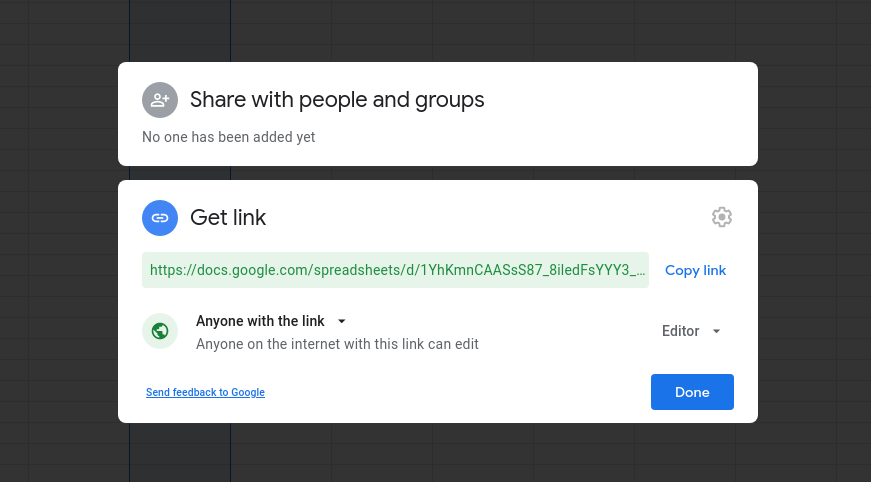
Sau đó chúng ta vào trang https://sheet.best/ vào tạo một tài khoản miễn phí.
Tạo mới một connection và paste link Google Sheet vào thôi.
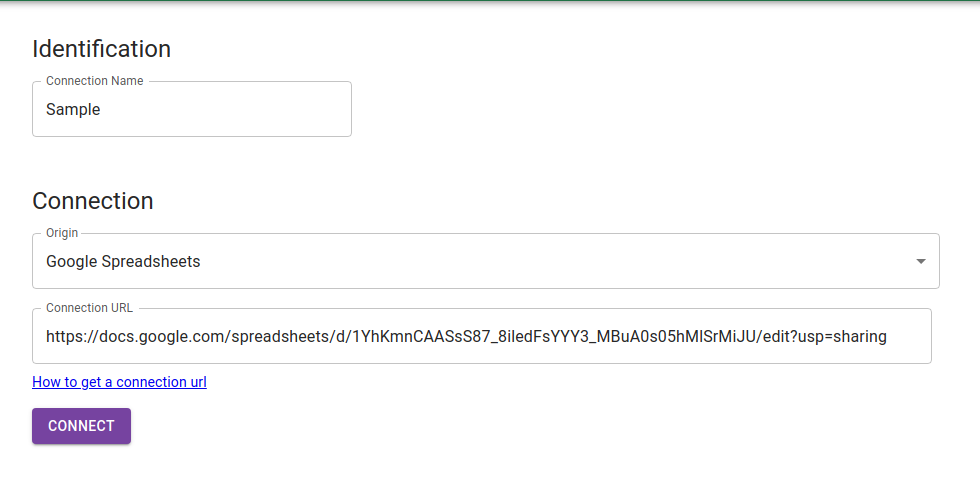
Nhấn connect sẽ được chuyển tới trang connection detail.
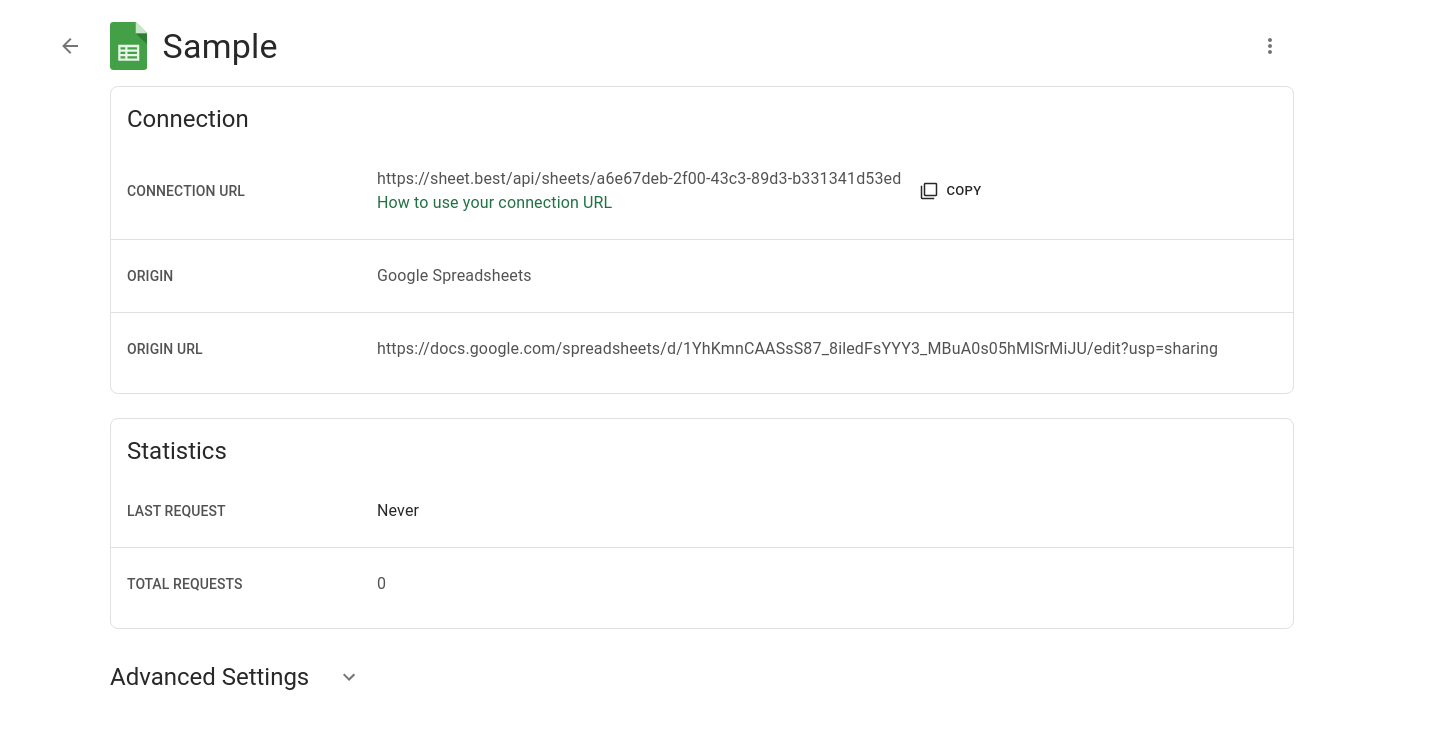
Bây giờ CONNECTION URL sẽ là một endpoint để bạn có thể sending POST Requests.
Thêm một chút nữa thôi, install Axios để call API với câu lệnh npm install axios
Result
Sửa lại submitHandler một tí.
submitHandler = e => {
    e.preventDefault();
    console.log(this.state);
axios.post('https://sheet.best/api/sheets/a6e67deb-2f00-43c3-89d3-b331341d53ed', this.state)
    .then(response => {
      console.log(response);
    })
  }
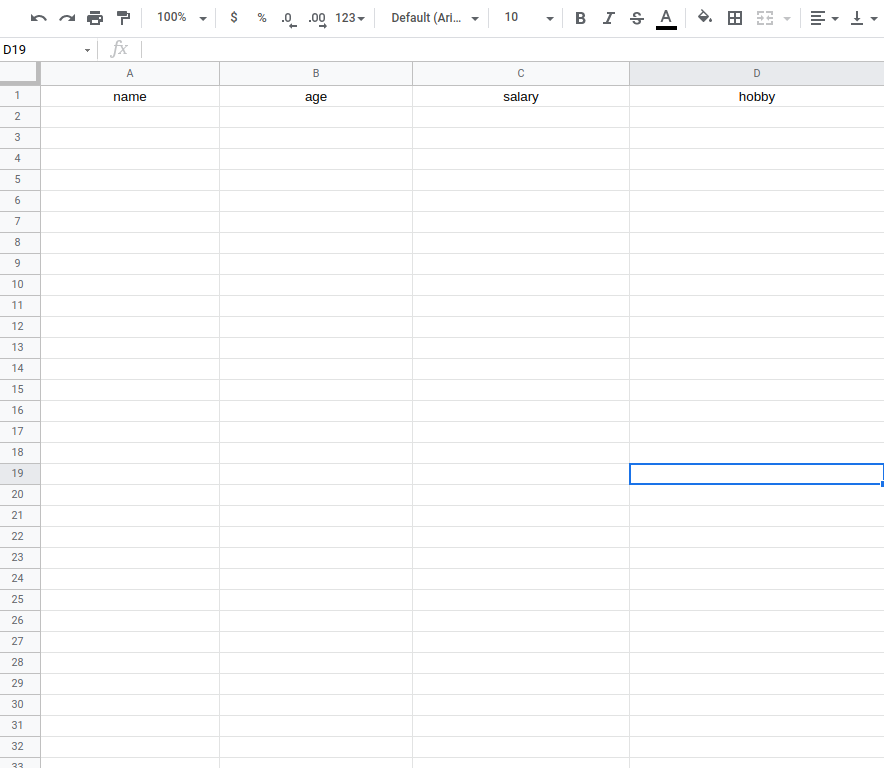
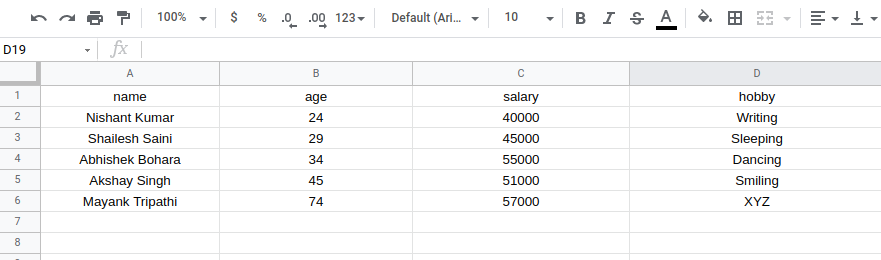
Thêm tên một số cột trong Google Sheet như tên các trường.
Điền form và submit thử thôi. Let's go!
Và đây là kết quả trên Google Sheets.
Conclusion
Như vậy là chúng ta đã có thể dùng React post form data vào Google Sheet rồi!
Xin cảm ơn quý vị đã cùng theo dõi đến cuối bài viết, xin hẹn quý vị vào lần hội ngộ tới!
Nhân đây em cũng xin chúc quý vị năm mới sức khỏe và thành công nào ạ!
Thanks for reading! Cat tax:
All rights reserved
