[Beginner]Kanban Board using Angular v5
Bài đăng này đã không được cập nhật trong 4 năm
Sau khi tìm hiểu về Angular thì hôm nay mình sẽ viết một ví dụ đơn giả về Angular là Kanban Board đơn giản dùng Angular 5.
Kanban Board là công cụ để trực quan hóa công việc bao gồm các cột tương ướng với trạng thái công việc. Mỗi công việc ở trạng thái nào thì được đặt ở cột tương ứng

Đầu tiên cài đặt môt trường
Đâu tiền bạn phải cài đặt ** Node.js® and npm ** Sau đóa cài đặt ** Angular CLI ** nó là một tool hỗ trợ việc build môi trường phát triển cho dự án angular nhánh chóng và dễ dàng.
npm install -g @angular/cli
Sau cài đặt xong, ta thử tạo một project Angular, bạn hãy mở terminal và chạy câu lệnh
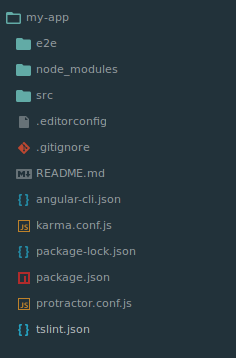
ng new my-app
 Cuối cùng chúng ta sẽ di chuyển đến thư mục của project và chạy nó
cd my-app
ng serve --open
Nó sẽ tự động mở trên trình duyện với địa chỉ http://localhost:4200/
Cấu trúc thư mục chính
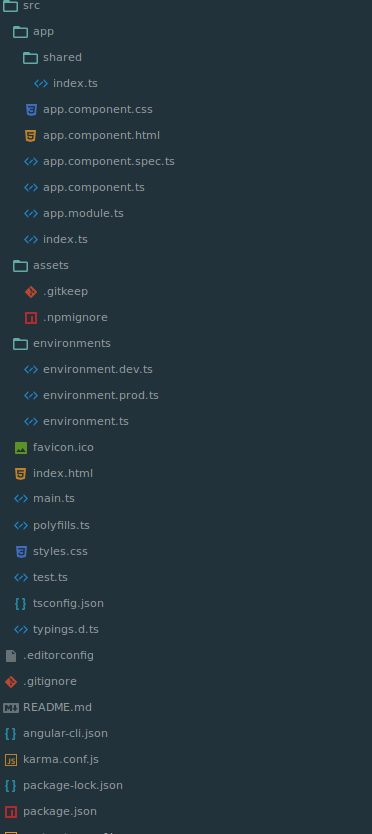
- app/app.component.{ts,html,css,spec.ts}: Định nghĩa AppComponent với html, css, spec, nó là root component.
- app/app.module.ts: Định nghĩa lớp AppModule nó được gọi là root module nó giúp nói cho Angular biết cách mà ứng dụng chạy như nào.
- assets/: Là thư mục chứa hình ảnh hay bất cứ thứ gì khi ứng dụng chạy.
- environments/: Đây là thư mục chứa file cho từng môi trường khác nhau như dev, production..
- favicon.ico: Đây là biểu tượng icon của ứng dụng bạn trên bookmark bar
- index.html: Đây là trang chính cho bất kì ai khi truy cập vào ứng dụng, và hâù như chúng ta không chỉnh sửa gì ở file này cả. CLI đã tự động thêm js, css vào khi ứng dụng được build
- styles.css: Khai báo css ở đây sẽ dùng ở tất cả ứng dụng, bình thường bạn sẽ khai báo css trong từng component để dễ quản lý và bảo trì
Kanban Board
Ý tưởng là:
- BoardComponent: là các cột trạng thái công việc như TODO, IN PROGRESS, RESOLVED, DONE
- ListConponent: Là danh sách để chứa danh sách các công vuệc như YOK-1000, YOK-2000..
- CardComponent: Là các đầu công việc như là YOK-1000
- CardSchema: là class mà mọi card sẽ được tạo ra
- CardStore: là class để lưu trữ các card được tạo ra và nó dùng để chúng ta có thể filter, hay cac thao tác khác
- ListSchema: là class chứa danh sách các card Tạo ứng dụng tên là kanban-board
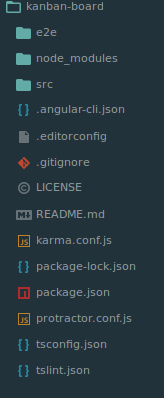
ng new kanban-board
Nó sẽ mất một thời gian để cài đặt, sau khi cài đặt xong
 Tạo CardSchema
Tạo cardschema.ts trong src/app gồm 2 thuộc tính là id và description
Tạo CardSchema
Tạo cardschema.ts trong src/app gồm 2 thuộc tính là id và description
export class CardSchema {
  id: string;
  description: string;
}
Tạo ListSchema Tạo listschema.ts trong src/app gồm 2 thuộc tings là name và cards
export class ListSchema {
  name: string;
  cards: string[];
}
Tạo CardStore Tạo cardstore.ts trong src/app
import { CardSchema } from './cardschema';

export class CardStore {
  cards: Object = {};
  lastid = -1;
  addCard(card: CardSchema) {
    card.id = String(++this.lastid);
    this.cards[card.id] = card;
    return card.id;
  }

  getCard(cardId: string) {
    return this.cards[cardId];
  }

  newCard(description: string): string {
    const card = new CardSchema();
    card.description = description;
    return (this.addCard(card));
  }
}
trong đây chúng ta sẽ viết các xử lý như là tạo mới card, lấy card theo id
Tiếp đến chúng ta sẽ tạo BoardComponent Ta mở terminal ra chạy câu lệnh để tự động tạo ra component
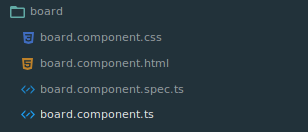
ng generate component board
sau khi chạy lệnh nó sẽ tự động tạo ra
 Xử ý trong file board.component.ts
import { Component, OnInit } from '@angular/core';
import { CardStore } from '../cardstore';
import { ListSchema } from '../listschema';

@Component({
  selector: 'app-board',
  templateUrl: './board.component.html',
  styleUrls: ['./board.component.css']
})
export class BoardComponent implements OnInit {
  cardStore: CardStore;
  lists: ListSchema[];
  constructor() { }

  setMockData(): void {
    this.cardStore =  new CardStore();
    const lists: ListSchema[] = [
      {
        name: 'To Do',
        cards: []
      },
      {
        name: 'IN PROGRESS',
        cards: []
      },
      {
        name: 'RESOLVED',
        cards: []
      },
      {
        name: 'DONE',
        cards: []
      }
    ]
    this.lists = lists;
  }

  ngOnInit() {
    this.setMockData();
  }

}
Trong đây chúng ta sẽ mockData cho từng trạng thái công việc, và nó được gọi khi component được khỏi tạo Xử lý trong board.component.html: đây là phần view của component để hiện thị data mà component sinh ra
<div>
  <app-list *ngFor="let list of lists" [list]="list" [cardStore]="cardStore"></app-list>
</div>
<app-list> </app-list> nó được gọi đến ListCompoent bạn có thể tìm hiểu thêm về *ngFor ở đây Xử lý trong board.compoent.css: style cho compoent
div {
  background: #ffffff;
  display: flex;
  padding: 0 5px;
  height: 100vh;
  overflow-x: scroll;
  margin-left: 15%;
}
Tạo ListCompoent Ta mở terminal ra chạy câu lệnh để tự động tạo ra component
ng generate component list
Sau khi chạy sau lệnh
 Xử lý trong list.compoent.ts
import { Component, HostListener, Input, OnInit } from '@angular/core';
import { CardSchema } from '../cardschema';
import { ListSchema } from '../listschema';
import { CardStore } from '../cardstore';

@Component({
  selector: 'app-list',
  templateUrl: './list.component.html',
  styleUrls: ['./list.component.css']
})
export class ListComponent implements OnInit {
  @Input() list: ListSchema;
  @Input() cardStore: CardStore;
  displayAddCard = false;

  constructor() { }

  ngOnInit() {
  }

  toggleDisplayAddCard() {
    this.displayAddCard = !this.displayAddCard;
  }

  onEnter(value: string) {
    const cardId = this.cardStore.newCard(value);
    this.list.cards.push(cardId);
  }

  allowDrop($event) {
    $event.preventDefault();
  }

  drop($event) {
    $event.preventDefault();
    const data = $event.dataTransfer.getData('text');

    let target = $event.target;
    const targetClassName = target.className;

    while( target.className !== 'list') {
      target = target.parentNode;
    }

    target = target.querySelector('.cards');

    if(targetClassName === 'card') {
      $event.target.parentNode.insertBefore(document.getElementById(data), $event.target);
    } else if(targetClassName === 'list__title') {
      if (target.children.length) {
        target.insertBefore(document.getElementById(data), target.children[0]);
      }else {
        target.appendChild(document.getElementById(data));
      }
    } else {
      target.appendChild(document.getElementById(data));
    }
  }

}
Ở đây chúng ta sẽ lấy được list và cardStore truyền từ thằng BoardComponent sang. OnEnter(): Sau khi nhấn nút enter trên giao diện người dùng thì sẽ tạo một card mới allowDrop(), drop(): Chúng ta có thể kéo thả card từ nơi này sang nơi khác được
Xử lý list.component.html
<div class="list" (dragover)="allowDrop($event)" (drop)="drop($event)">
    <p class="list__title"><strong>{{list.name}}</strong></p>
    <div class="cards">
        <app-card *ngFor="let cardId of list.cards" [card]="cardStore.getCard(cardId)"></app-card>
    </div>

    <input #addCardInput type="text" (keyup.enter)="onEnter(addCardInput.value); addCardInput.value=''; displayAddCard=false;" *ngIf="displayAddCard" autofocus>
    <a href="#" class="list__newcard" (click)="toggleDisplayAddCard()">Add a card...</a>
</div>
Trong đây nó lại gọi đến CardComponent <app-card></app-card> Xử lý list.component.css
.list {
  background: #F4F5F7;
  width: 258px;
  padding: 6px;
  margin: 5px;
  display: inline-block;
  webkit-border-radius: 0 0 4px 4px;
  border-radius: 0 0 4px 4px;
  border-radius: 4px;
}
.list__title {
  color: #5E6C84;
  font-size: 0.85714286em;
  font-weight: 600;
  line-height: 1.33333333;
  margin-top: 20px;
  text-transform: uppercase;
  display: inline-block;
  font-weight: normal;
  margin-top: 3px;
  flex: 0 100 auto;
  overflow: hidden;
  text-overflow: ellipsis;
  white-space: nowrap;
  text-align: center;
}
.list a {
  width: 100%;
  display: block;
  text-decoration: none;
}

input{
  width: 248px;
  padding: 5px;
  border: 2px solid orange;
  outline: 0;
  background: #fff;
  box-shadow:none;
}
Tạo CardComponent Ta mở terminal ra chạy câu lệnh để tự động tạo ra component
ng generate component card
Xủ lý trong card.component.ts
import { Component, Input, OnInit } from '@angular/core';
import { CardSchema } from '../cardschema';

@Component({
  selector: 'app-card',
  templateUrl: './card.component.html',
  styleUrls: ['./card.component.css']
})
export class CardComponent implements OnInit {
  @Input() card: CardSchema;
  selectCard: CardSchema;
  displayCard = true;

  constructor() { }

  ngOnInit() {
  }

  toggleDisplayCard() {
    this.displayCard = !this.displayCard;
  }

  dragStart(ev) {
    ev.dataTransfer.setData('text', ev.target.id);
  }

  onSelectCard(card: CardSchema): void {
    this.selectCard = card;
  }
}
card.component.html
<p class="card" draggable="true" (dragstart)="dragStart($event)" id="{{card.id}}"
  (click)="onSelectCard(card)"
  (click)="toggleDisplayCard()"
  *ngIf="displayCard"
  displayCard=true>
 {{card.description}}
</p>
<input #addCardInput type="text" (keyup.enter)="onEnter(addCardInput.value);
  addCardInput.value='';
  displayAddCard=false;"
  [(ngModel)]="selectCard.description"
  *ngIf="selectCard" autofocus>
card.component.css
p {
  border-radius: 2px;
  background: white;
  margin: 0 0 6px 0;
  padding: 6px 6px 2px 8px;
  box-shadow: 0px 1px 2px 0px rgba(9, 30, 66, 0.25);
  transition: background-color 140ms ease-in-out, border-color 75ms ease-in-out;
  color: #333;
  font-size: 14px;
}
Và đừng quyền app.component.html
<app-board></app-board>
Link source code: https://github.com/cntt11b1/Kanban-board-angular-5
All rights reserved
