Bài 13: Form input binding trong VueJS
Mình đã cập nhật lại tất cả các bài với các thay đổi ở hiện tại ở năm 2024: Vue 3, Vite, Laravel 11x,...
Cập nhật gần nhất: 08/06/2024
Chào mừng các bạn quay trở lại với series học VueJS của mình, ở bài trước chúng ta đã tìm hiểu về class và style binding, ở bài này chúng ta sẽ tiếp tục tìm hiểu về một kiểu binding nữa đó là binding cho các dữ liệu được nhập từ form: input, textarea, select,....
Để có thể bind dữ liệu cho các loại input form thì chúng ta sẽ sử dụng v-model nhé. Đây là kiểu "2 way binding" tức là dữ liệu các bạn khai báo từ data sẽ được bind với các input và dữ liệu nhập từ input sẽ được bind trực tiếp với những gì các bạn khai báo trong data
Text Input
Binding đơn giản
Binding đơn giản với input type text sử dụng v-model:
<template>
  <div>
    <label for="name">Name:</label>
    <input id="name" v-model="name" type="text">
    <p>Tên của bạn là: {{ name }}</p>
  </div>
</template>

<script setup>
import { ref } from 'vue';

const name = ref('');
</script>
Khi chạy lên và nhập vào input thì ta sẽ thấy rằng phần Tên của bạn là sẽ tự động được cập nhật (vì name là reactive state), check cửa sổ Vue devtool ta cũng thấy là giá trị ta vừa nhập cũng đã được lưu vào name:
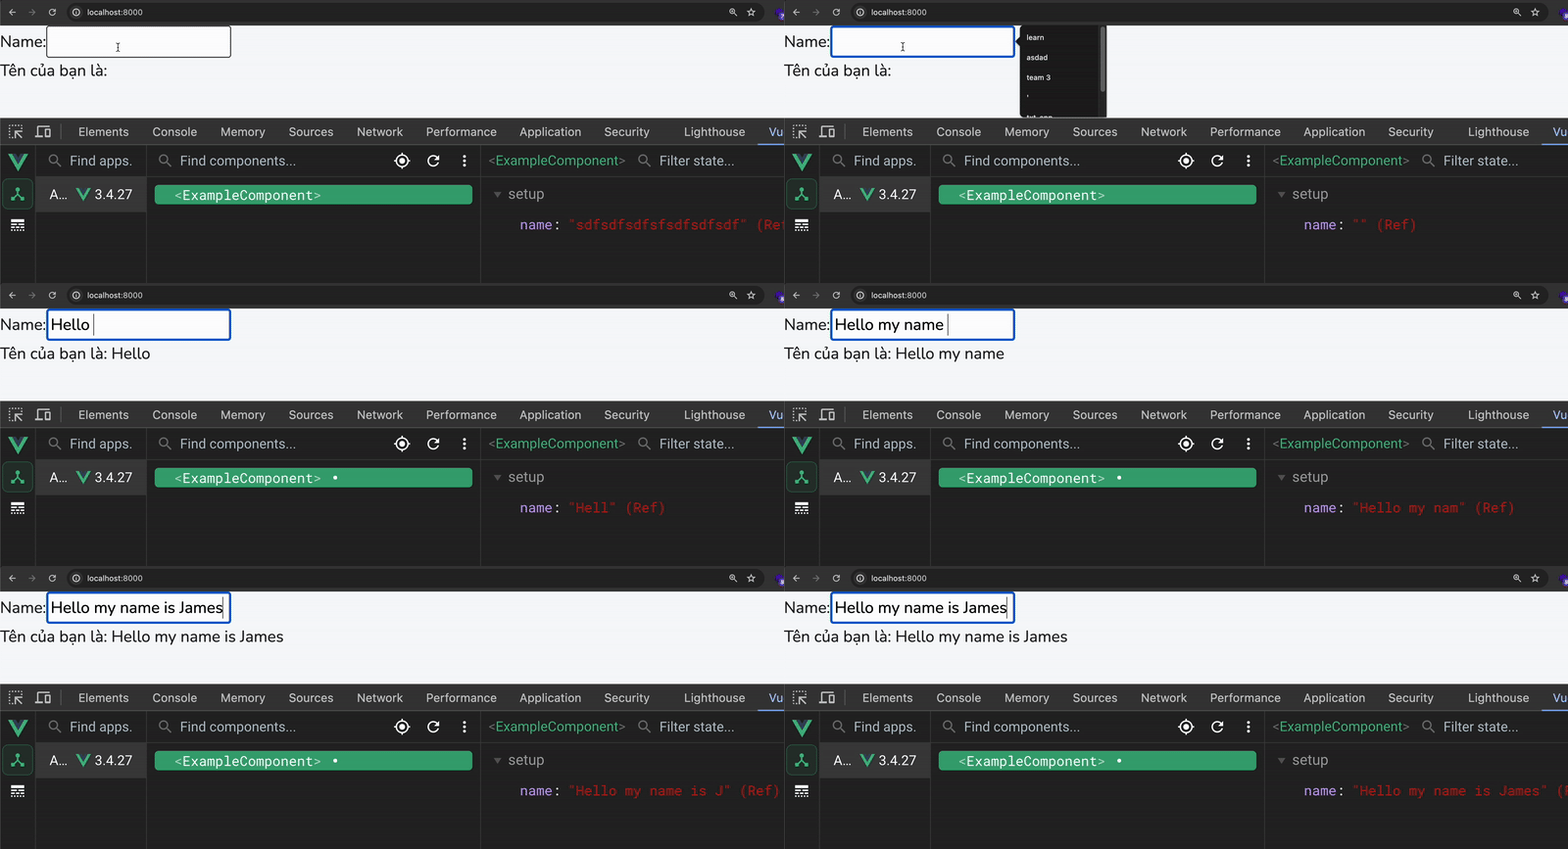
Và đây là lí do vì sao ta gọi v-model của VueJS là 2-way data binding: reactive state thay đổi thì UI cập nhật và ngược lại
Phân biệt với React là 1-way binding nhé các bạn, bên React thường ta sẽ phải có
[name, setName], name thay đổi thì phải gọi setName để cập nhật
Binding thuộc tính khác
Bạn cũng có thể binding các thuộc tính khác như placeholder hay type hoặc bất kì vị trí nào của <input>:
<template>
  <div>
    <label for="password">Password:</label>
    <input
      id="password"
      v-model="password"
      :placeholder="placeholder"
      :type="type">
    <p>Tên của bạn là: {{ password }}</p>
  </div>
</template>

<script setup>
import { ref } from 'vue';

const password = ref('');
const placeholder = ref('Password của bạn');
const type = ref('password')
</script>
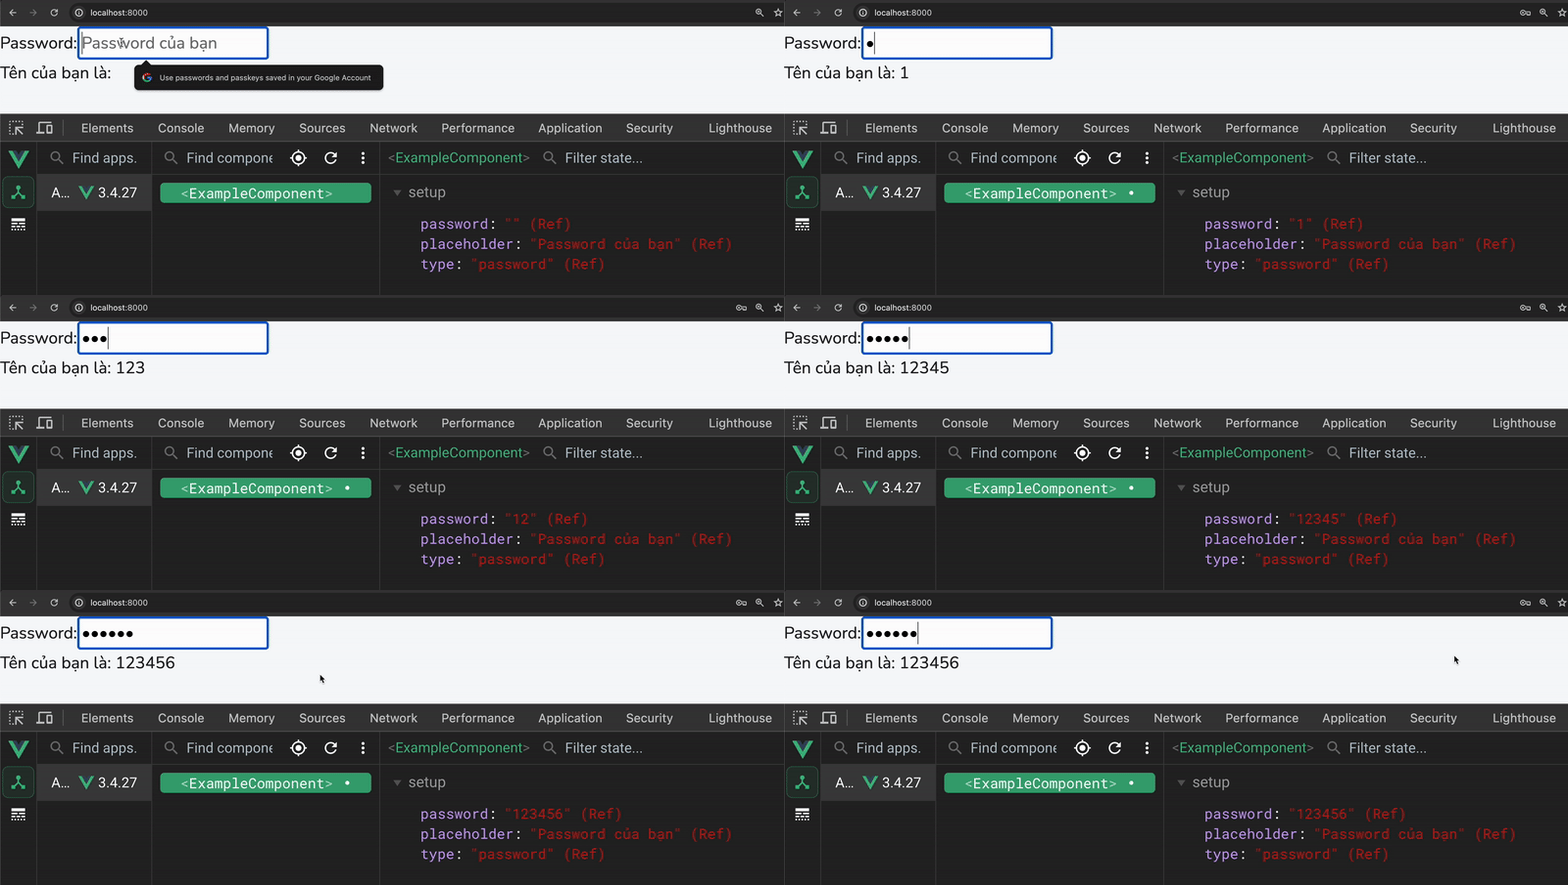
Binding với Computed Property
Đôi khi chúng ta muốn xử lý dữ liệu đầu vào trước khi in ra UI, hoặc trước khi gửi tới server, trong những trường hợp đó ta nghĩ ngay tới computed 😎:
<template>
  <div>
    <label for="upperName">Name:</label>
    <input id="upperName" v-model="name" type="text">
    <p>Tên của bạn in hoa là: {{ upperName }}</p>
  </div>
</template>

<script setup>
import { ref, computed } from 'vue';

const name = ref('');

const upperName = computed(() => {
  return name.value.toUpperCase();
});
</script>

Checkbox
Binding đơn giản
Binding với checkbox sử dụng v-model:
<template>
  <div>
    <label>
      <input type="checkbox" v-model="isChecked">
      Chấp nhận điều khoản
    </label>
    <p>Trạng thái: {{ isChecked ? 'Đã chấp nhận' : 'Chưa chấp nhận' }}</p>
  </div>
</template>

<script setup>
import { ref } from 'vue';

const isChecked = ref(false);
</script>
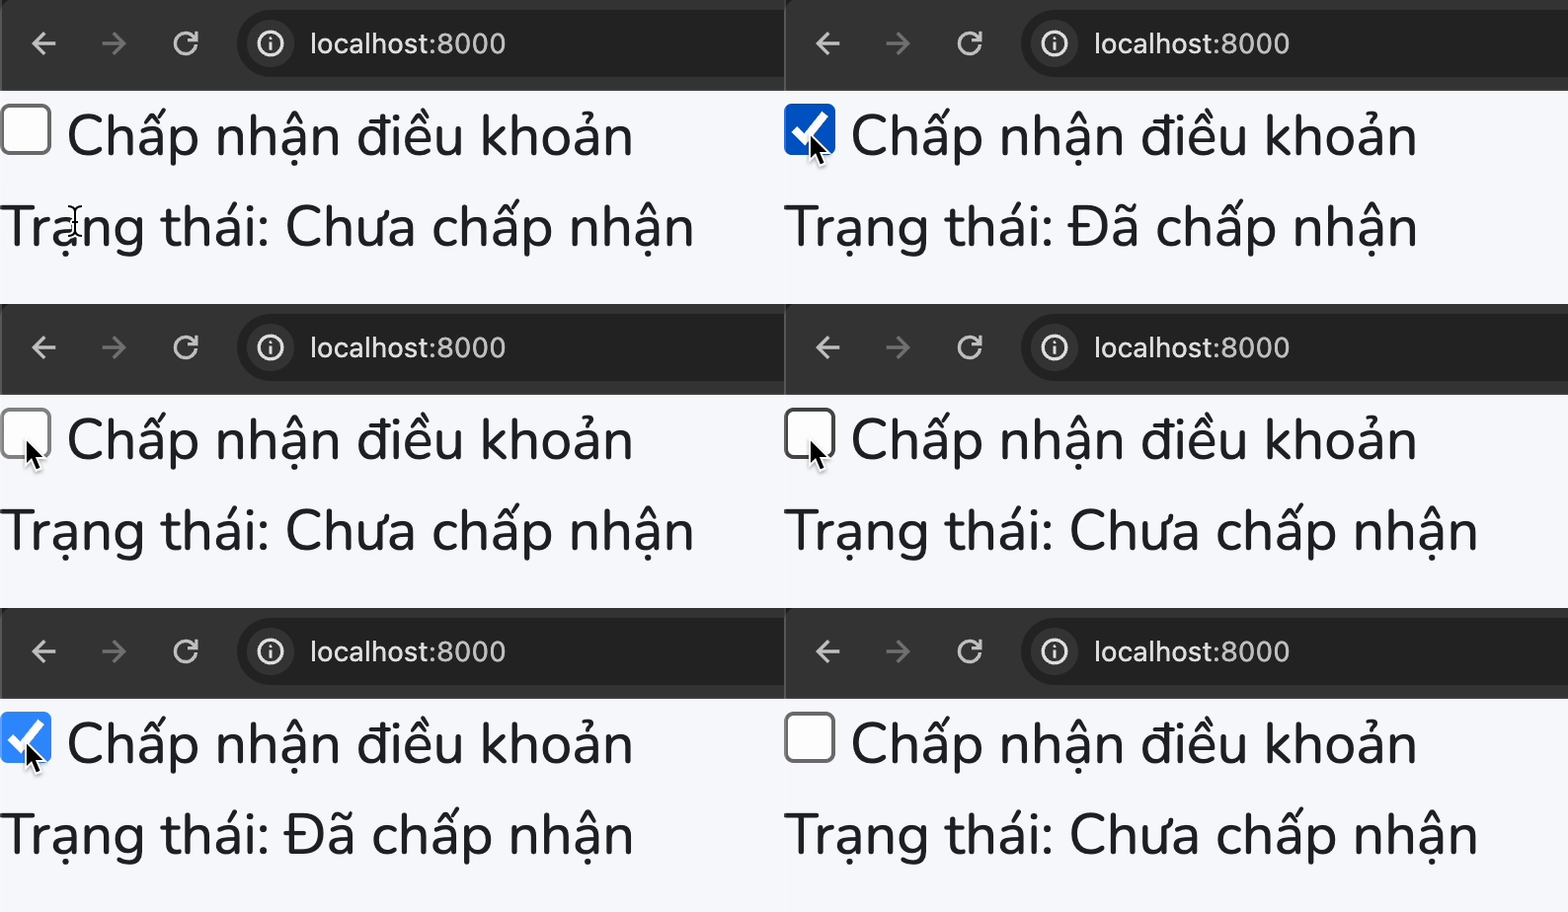
Multiple Checkboxes
Ta cũng có thể bind checkbox với một Array, sau đó lưu value của mỗi checkbox vào array đó:
<template>
  <div>
    <label>
      <input type="checkbox" value="HTML" v-model="checkedNames">
      HTML
    </label>
    <label>
      <input type="checkbox" value="CSS" v-model="checkedNames">
      CSS
    </label>
    <label>
      <input type="checkbox" value="JavaScript" v-model="checkedNames">
      JavaScript
    </label>
    <p>Ngôn ngữ bạn chọn: {{ checkedNames.join(', ') }}</p>
  </div>
</template>

<script setup>
import { ref } from 'vue';

const checkedNames = ref([]);
</script>

Radio Buttons
Binding với radio buttons sử dụng v-model:
<template>
  <div>
    <label>
      <input type="radio" value="Male" v-model="gender">
      Nam
    </label>
    <label>
      <input type="radio" value="Female" v-model="gender">
      Nữ
    </label>
    <p>Giới tính của bạn là: {{ gender }}</p>
  </div>
</template>

<script setup>
import { ref } from 'vue';

const gender = ref('');
</script>
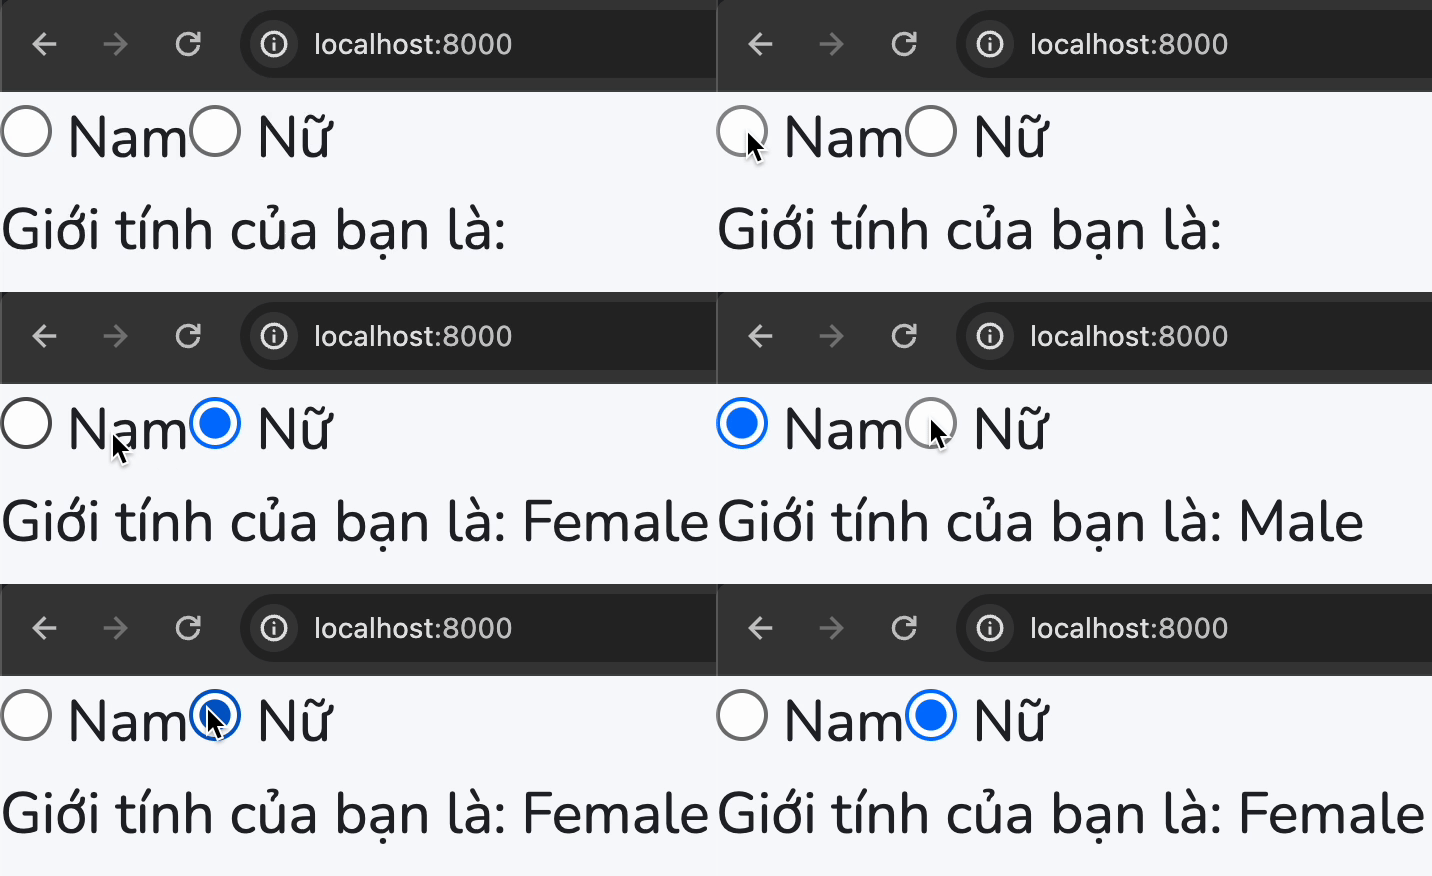
Select/Option
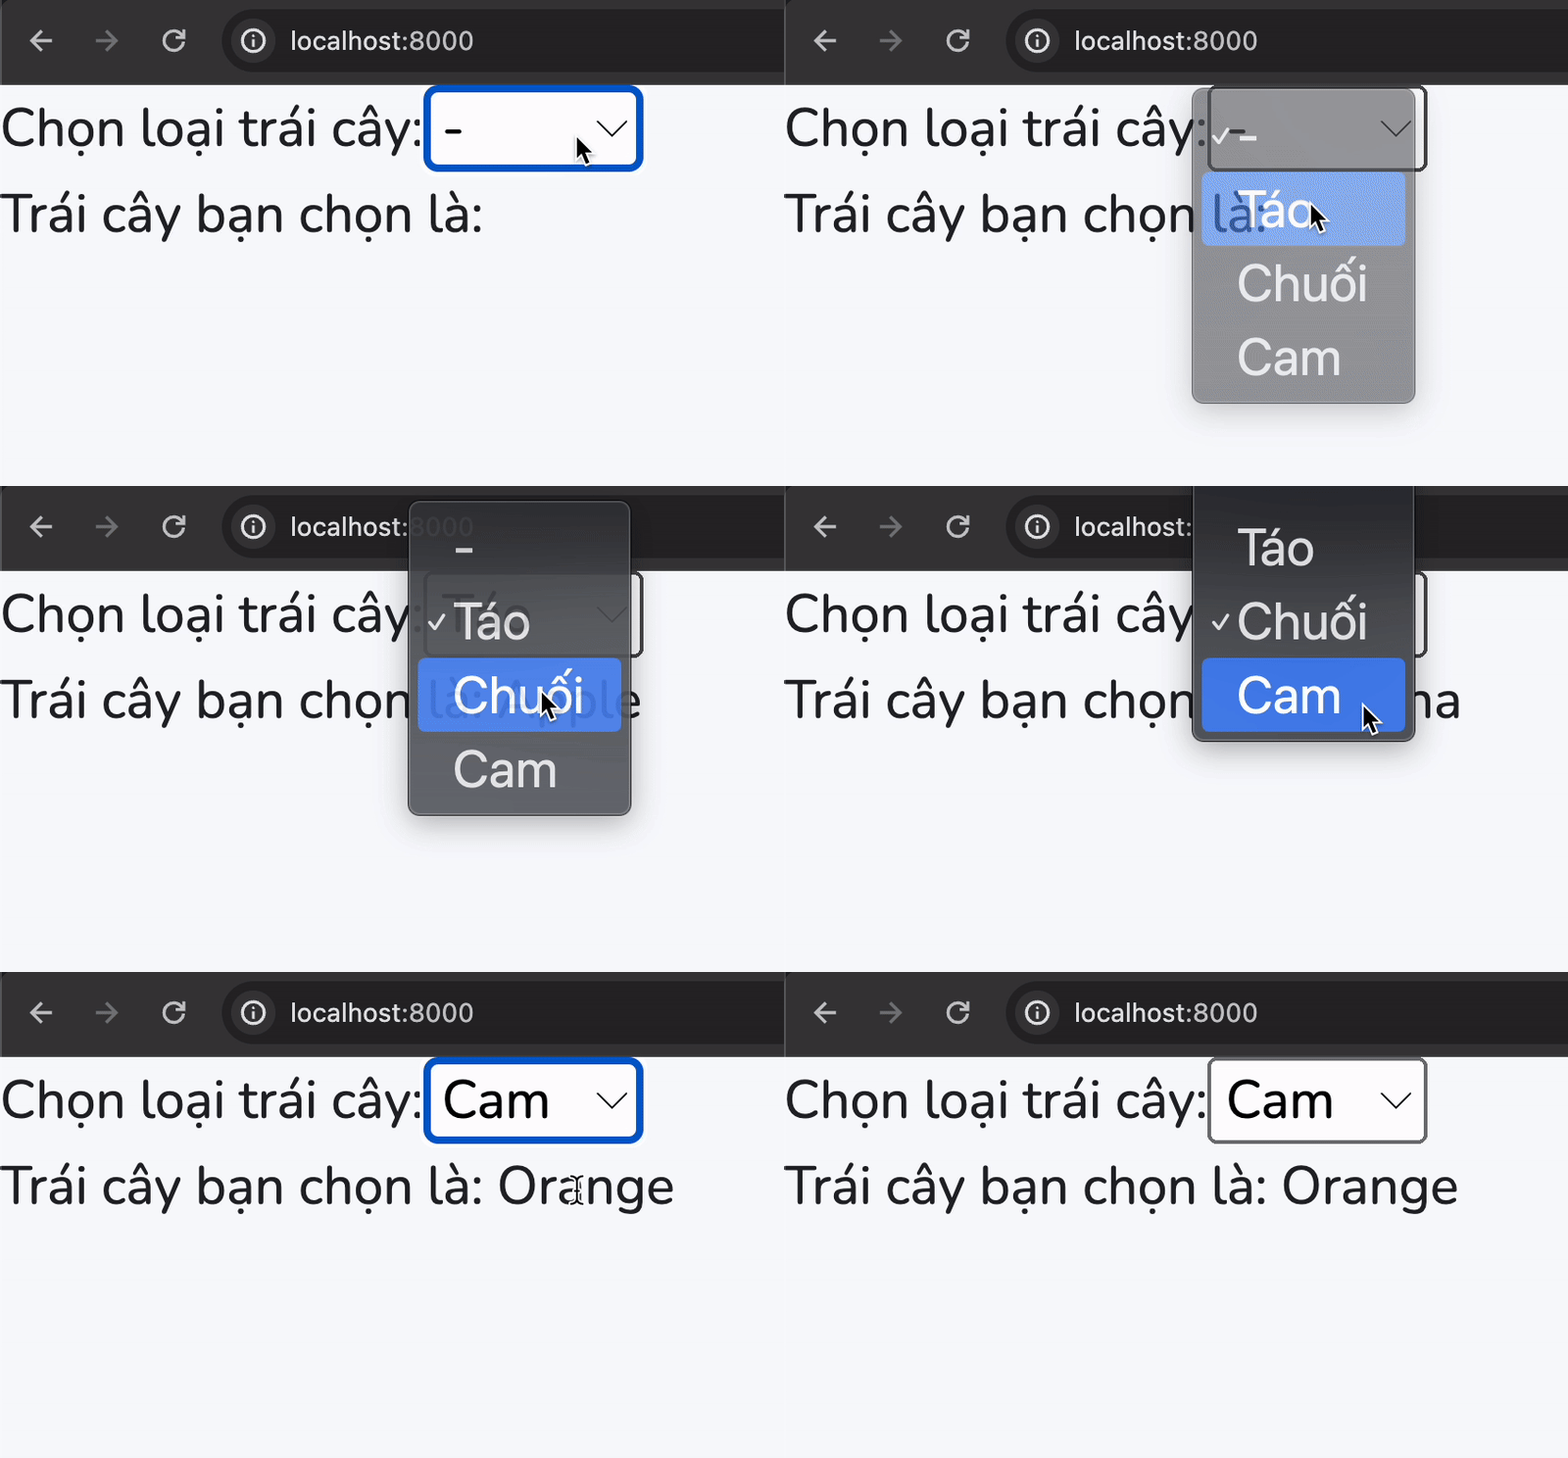
Binding với <select>/<option> sử dụng v-model:
<template>
  <div>
    <label for="fruit">Chọn loại trái cây:</label>
    <select id="fruit" v-model="selectedFruit">
      <option value="">-</option>
      <option value="Apple">Táo</option>
      <option value="Banana">Chuối</option>
      <option value="Orange">Cam</option>
    </select>
    <p>Trái cây bạn chọn là: {{ selectedFruit }}</p>
  </div>
</template>

<script setup>
import { ref } from 'vue';

const selectedFruit = ref('');
</script>
Textarea 📝
Binding đơn giản
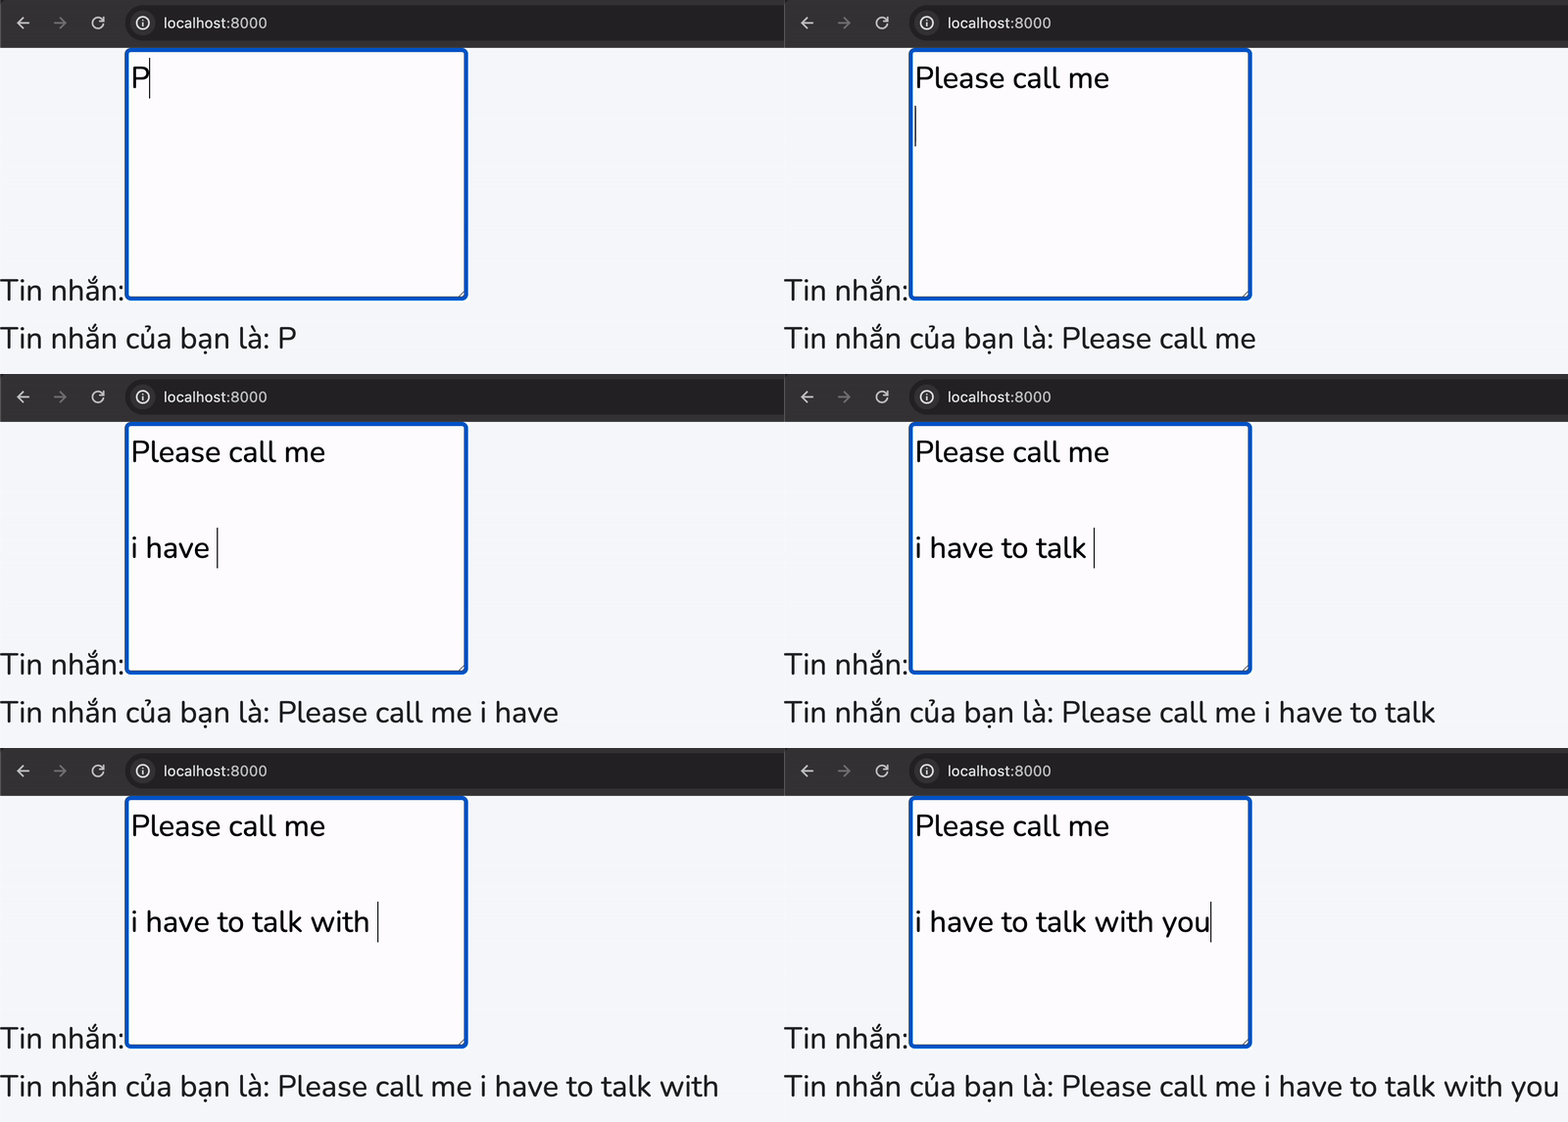
Binding với textarea sử dụng v-model:
<template>
  <div>
    <label for="message">Tin nhắn:</label>
    <textarea id="message" v-model="message"></textarea>
    <p>Tin nhắn của bạn là: {{ message }}</p>
  </div>
</template>

<script setup>
import { ref } from 'vue';

const message = ref('');
</script>

Binding thuộc tính khác
Tương tự các input khác, thì với <textarea ta cũng có thể bind bất kì thuộc tính nào mà ta muốn, ví dụ placeholder, rows:
<template>
  <div>
    <label for="messageWithPlaceholder">Tin nhắn:</label>
    <textarea
      id="messageWithPlaceholder"
      v-model="message"
      :placeholder="messagePlaceholder"
      :rows="rows">
    </textarea>
    <p>Tin nhắn của bạn là: {{ message }}</p>
  </div>
</template>

<script setup>
import { ref } from 'vue';

const message = ref('');
const messagePlaceholder = ref('Nhập tin nhắn của bạn');
const rows = ref(5);
</script>
Dưới đây là phần viết lại về Number Input cùng với các modifiers khác trong Vue 3:
Input Modifiers
Vue 3 cung cấp nhiều modifiers hữu ích khi làm việc với các input bindings. Ta cũng xem một số modifiers quan trọng và cách sử dụng chúng như thế nào nhé 🚀🚀
.number
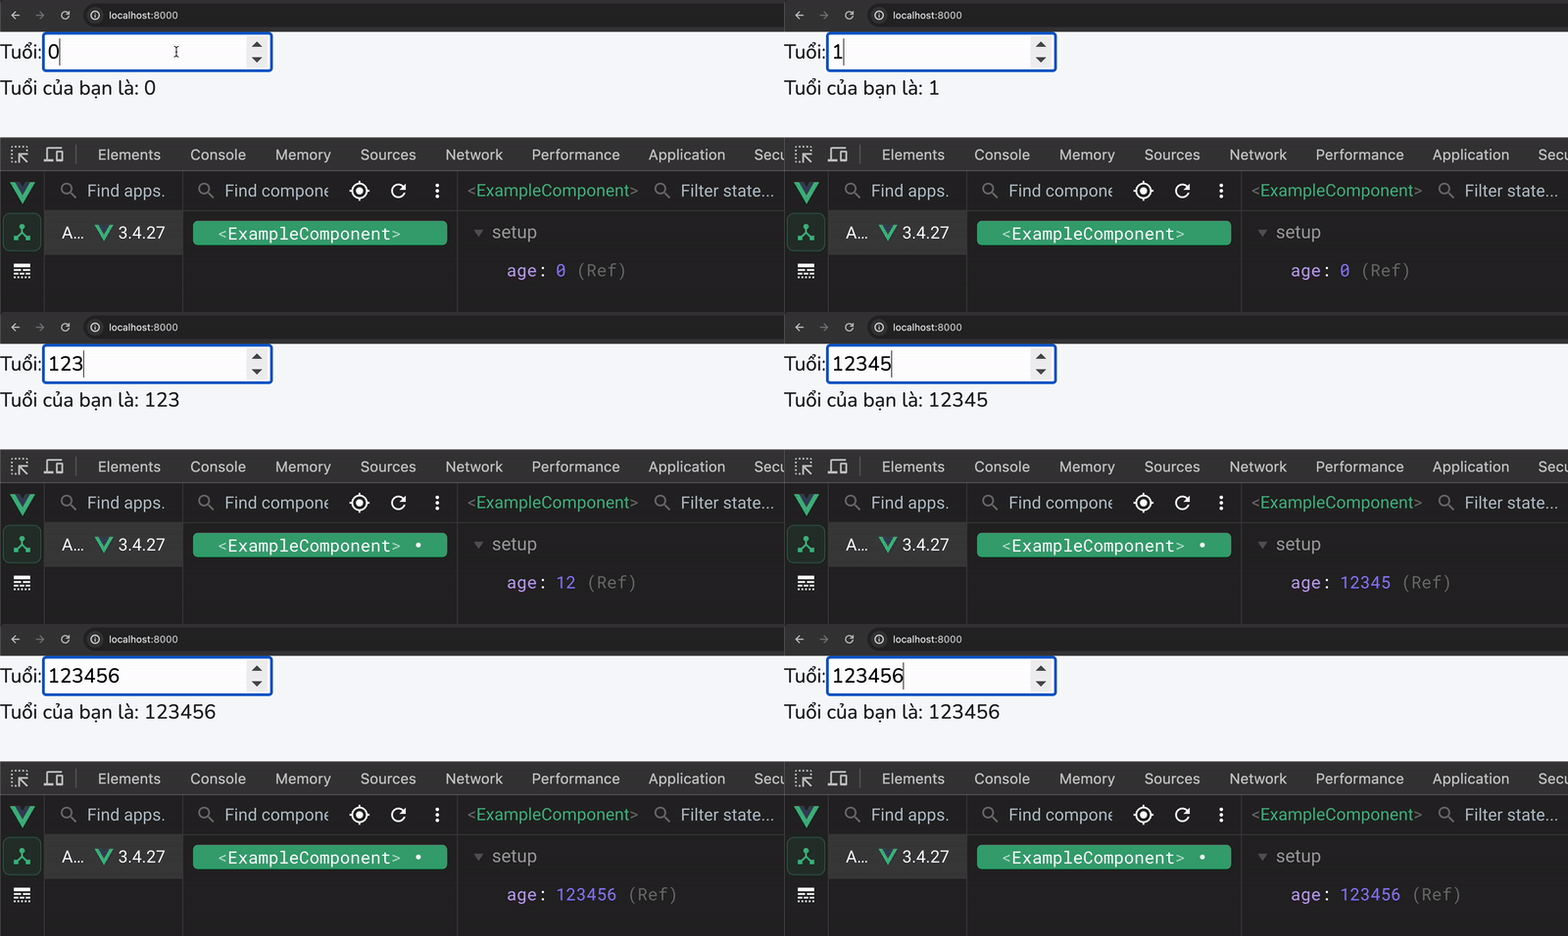
Modifier .number tự động chuyển đổi giá trị nhập vào thành số:
<template>
  <div>
    <label for="age">Tuổi:</label>
    <input id="age" v-model.number="age" type="number">
    <p>Tuổi của bạn là: {{ age }}</p>
  </div>
</template>

<script setup>
import { ref } from 'vue';

const age = ref(0);
</script>
Khi chạy lên và xem ở cửa sổ Vue Devtool ta sẽ thấy là Vue đã tự động convert giá trị ta nhập từ input thành number và lưu vào age:
.trim
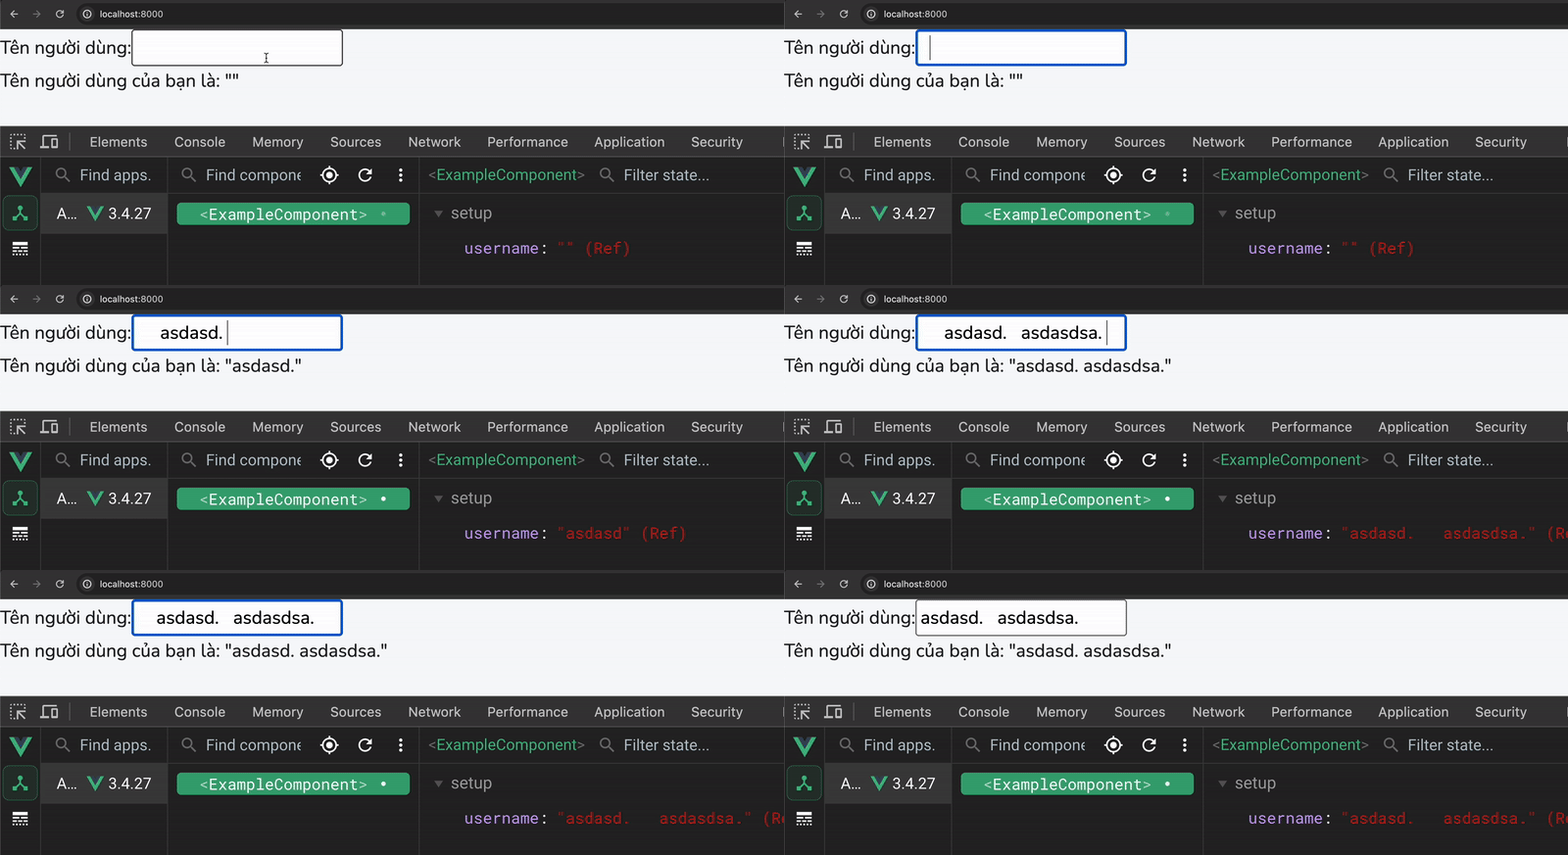
Modifier .trim loại bỏ khoảng trắng đầu và cuối của giá trị nhập vào:
<template>
  <div>
    <label for="username">Tên người dùng:</label>
    <input id="username" v-model.trim="username" type="text">
    <p>Tên người dùng của bạn là: "{{ username }}"</p>
  </div>
</template>

<script setup>
import { ref } from 'vue';

const username = ref('');
</script>
.lazy
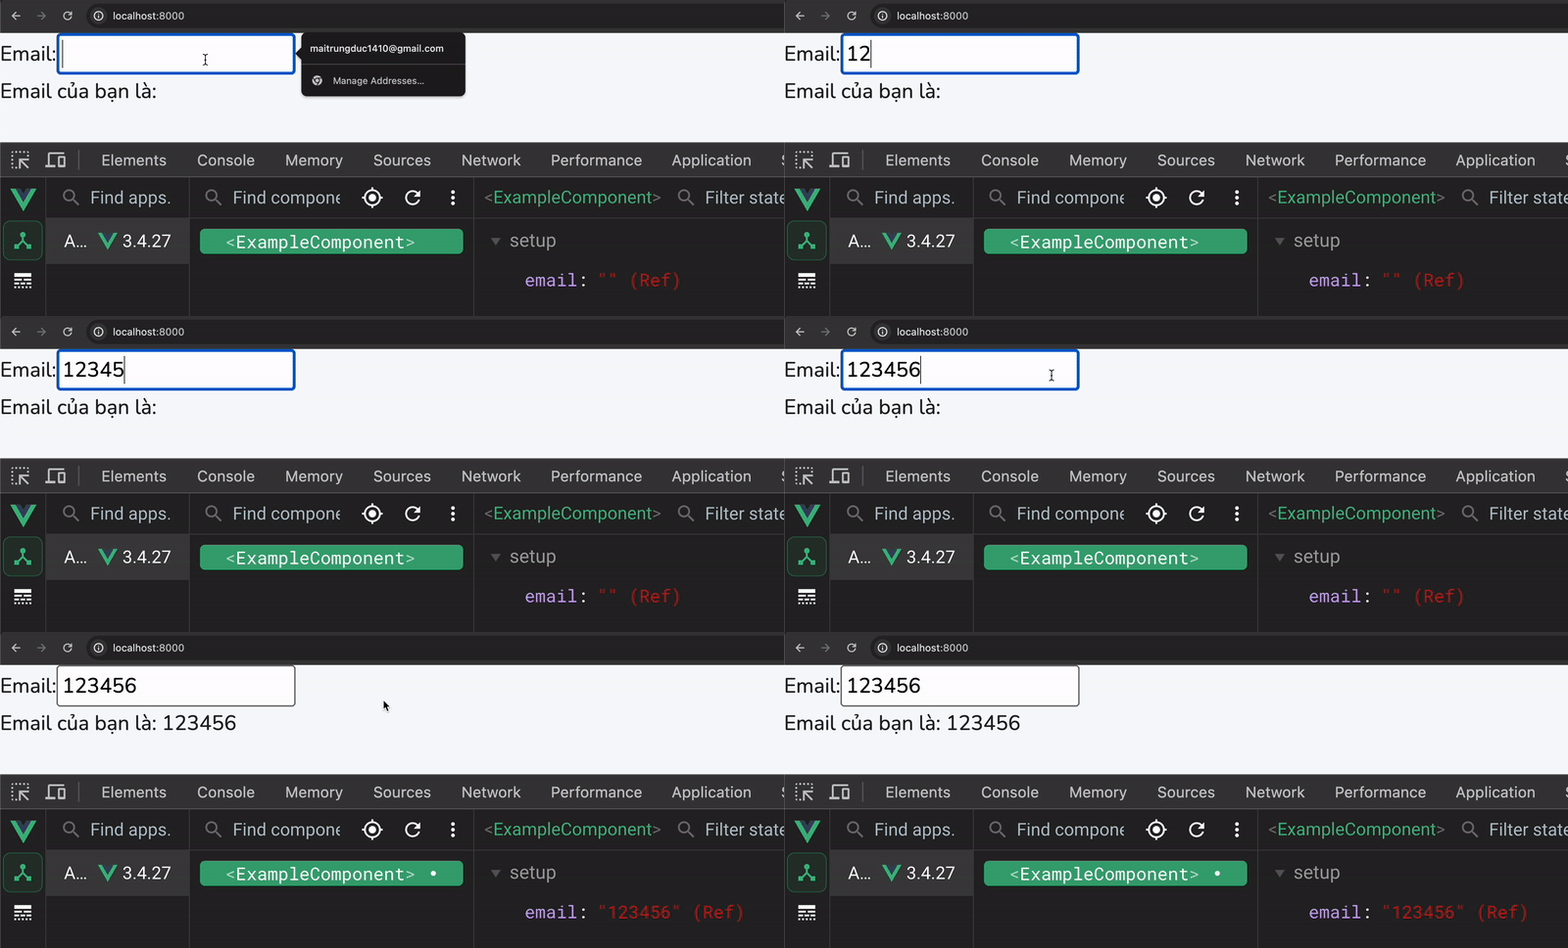
Modifier .lazy chỉ cập nhật giá trị khi sự kiện change được kích hoạt thay vì sự kiện input:
<template>
  <div>
    <label for="email">Email:</label>
    <input id="email" v-model.lazy="email" type="email">
    <p>Email của bạn là: {{ email }}</p>
  </div>
</template>

<script setup>
import { ref } from 'vue';

const email = ref('');
</script>
Khi chạy lên ta sẽ thấy rằng trong quá trình ta nhập vào input thì Vue sẽ chưa cập nhật lại giá trị của email (ref) ngay, mà khi ta click ra ngoài thì event change được kích hoạt vầ Vue mới thay đổi giá trị của ref:
Kết Hợp Nhiều Modifiers
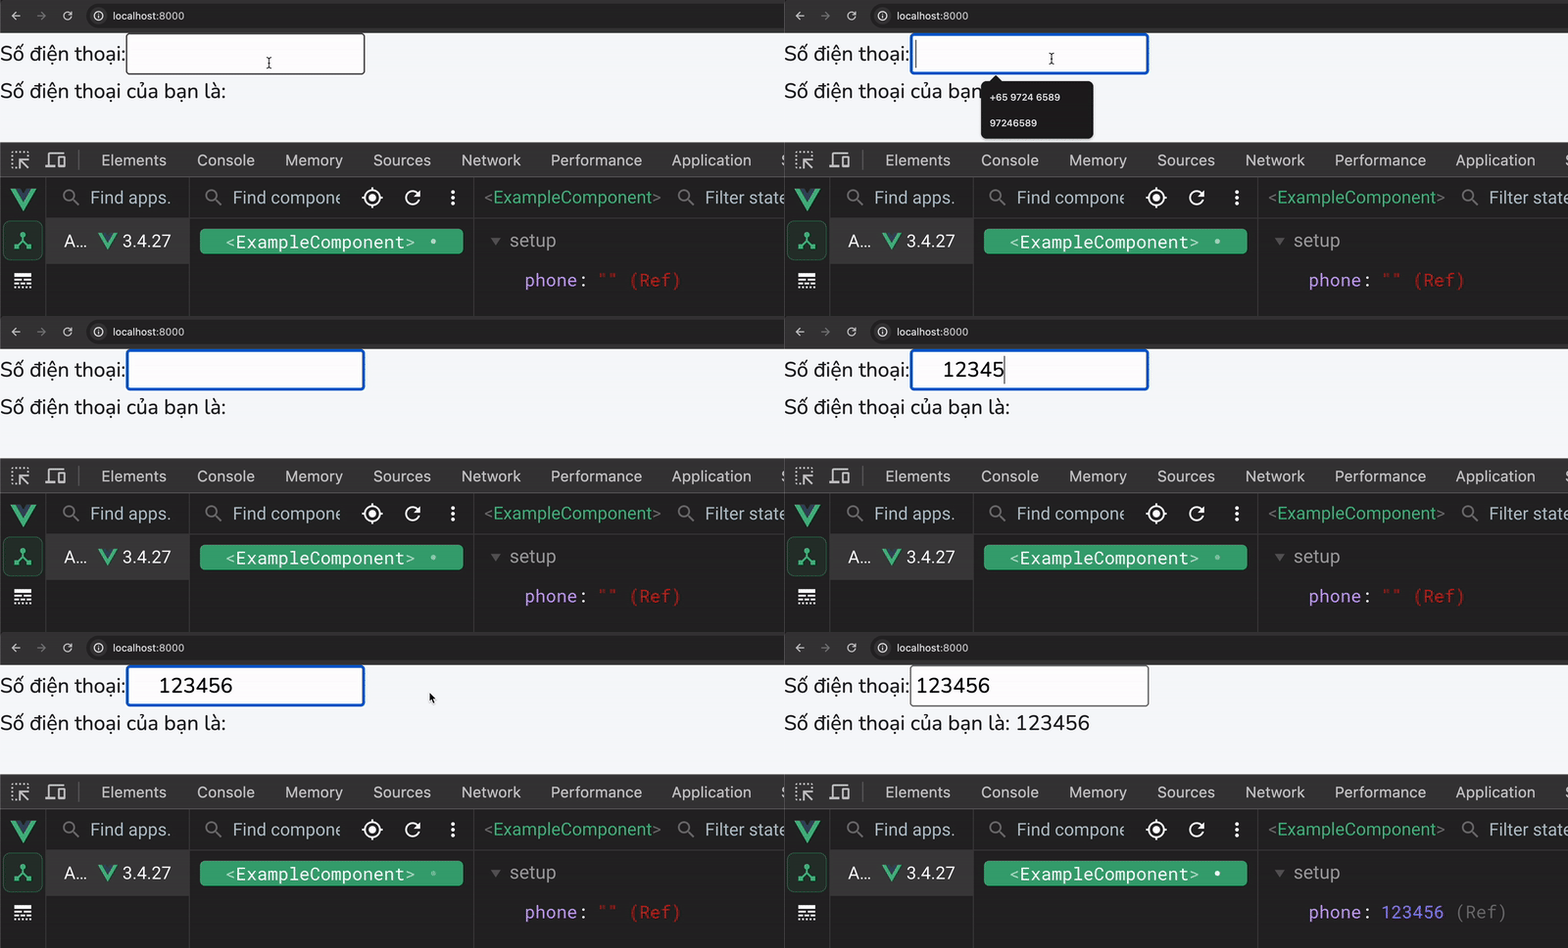
Bạn cũng có thể kết hợp nhiều modifiers với nhau:
<template>
  <div>
    <label for="phone">Số điện thoại:</label>
    <input id="phone" v-model.number.trim.lazy="phone" type="text">
    <p>Số điện thoại của bạn là: {{ phone }}</p>
  </div>
</template>

<script setup>
import { ref } from 'vue';

const phone = ref('');
</script>
Multiple v-model bindings
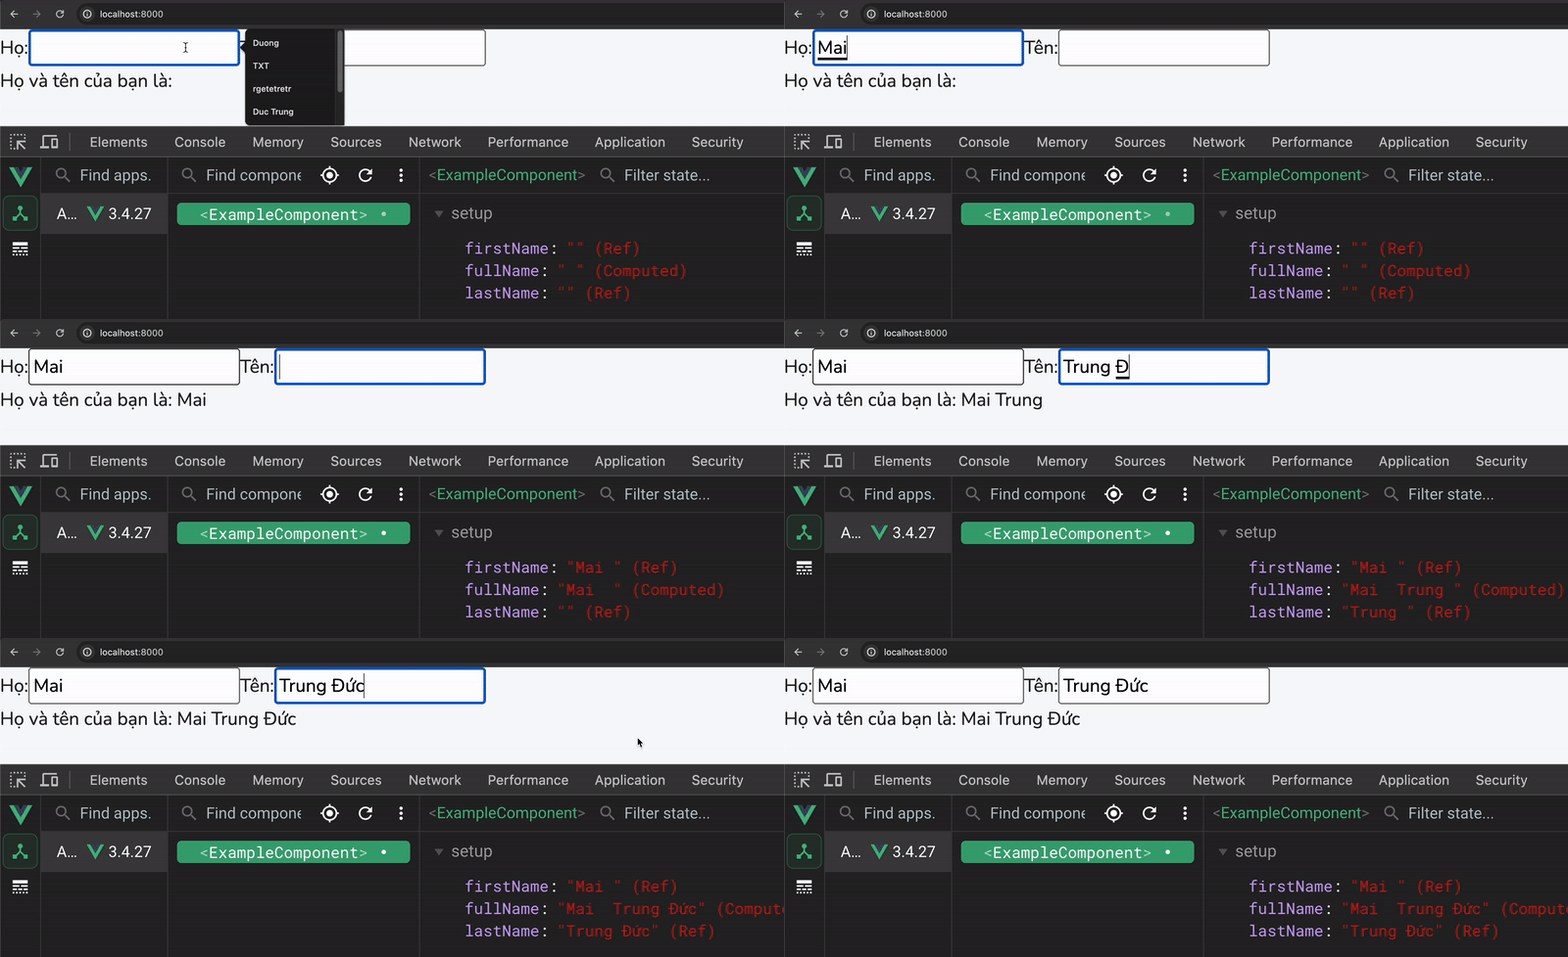
Ta có thể sử dụng nhiều v-model để bind nhiều giá trị và tổng hợp chúng lại (ví dụ dùng computed):
<template>
  <div>
    <label for="firstName">Họ:</label>
    <input id="firstName" v-model="firstName" type="text">
    <label for="lastName">Tên:</label>
    <input id="lastName" v-model="lastName" type="text">
    <p>Họ và tên của bạn là: {{ fullName }}</p>
  </div>
</template>

<script setup>
import { ref, computed } from 'vue';

const firstName = ref('');
const lastName = ref('');

const fullName = computed(() => {
  return `${firstName.value} ${lastName.value}`;
});
</script>
v-model với Component
Từ Vue 3, chúng ta có thể dùng v-model với Component luôn 😎😎
Xem ví dụ sau, ta có 2 component:
<template>
  <div>
    <test-component v-model="message"></test-component>
    <p>Giá trị message: {{ message }}</p>
  </div>
</template>

<script setup>
import { ref } from 'vue';
import TestComponent from './TestComponent.vue';

const message = ref('');
</script>
Và
<template>
  <input v-model="model" type="text">
</template>

<script setup>
const model = defineModel()
</script>
Khi chạy lên sẽ cho ta kết qủa như sau:

Nom không khác gì như kiểu ta đang dùng v-model trực tiếp với input thường ấy nhỉ, nhưng ở đây thì đang là 1 component 😎😎
Thực tế thì defineModel là 1 compiler macro của Vue, sau khi compile thì đây mới là code thực tế mà Vue tạo ra cho chúng ta:
<template>
  <div>
    <test-component
      :modelValue="message"
      @update:modelValue="$event => (message = $event)"
    ></test-component>
    <p>Giá trị message: {{ message }}</p>
  </div>
</template>

<script setup>
import { ref } from 'vue';
import TestComponent from './TestComponent.vue';

const message = ref('');
</script>
Và
<template>
  <input
    :value="modelValue"
    @input="$emit('update:modelValue', $event.target.value)"
    type="text"
  >
</template>

<script setup>
defineProps(['modelValue'])
defineEmits(['update:modelValue'])
</script>
Kết Luận
Form input bindings trong Vue 3 là một công cụ mạnh mẽ giúp bạn dễ dàng tạo và quản lý các input. Từ text input, checkbox, radio buttons, select box, textarea, number input, đến custom components, Vue 3 cung cấp đầy đủ các giải pháp để bạn thao tác với dữ liệu người dùng một cách rât là dễ dàng và hiệu quả.
Hy vọng qua bài viết này, bạn đã nắm vững cách sử dụng form input bindings trong Vue 3. Ở bài tiếp theo ta sẽ tìm hiểu về Event handling nhé
All rights reserved