Backup database và upload lên Google drive
Bài đăng này đã không được cập nhật trong 4 năm
Mở đầu
Xin chào các bạn, mình đã quay trở lại rồi đây. Hôm nay sẽ không phải là một bài chia sẻ về bể cá thông minh mà sẽ là một bài viết liên quan đến dữ liệu. Các bạn nếu quan tâm đến series bể cá thông minh của mình thì có thể theo dõi tại đây. Mình sẽ viết bài cuối của series này nhanh thôi.
Xin hỏi các bạn trong một trang web thì thứ gì quan trọng nhất? Chắc chắn 96.69% các bạn trả lời là dữ liệu phải không. Đúng vậy dữ liệu rất là quan trọng. Mình lập ra trang web là để thu thập và lưu dữ liệu mà  . Vì nó quan trọng như thế nên ta phải có biện pháp bảo vệ. Phải có một biện pháp để giữ cho nó không bị mất. Giả sử như một ngày đẹp trời một admin hoặc một hacker nào đó đó vô tình xóa một bản ghi quan trọng hoặc toàn bộ dữ liệu đi chẳng hạn. Điều đó thật kinh khủng khiếp nếu bạn không thiết lập một chức năng backup dữ liệu. Trang của bạn sẽ tự dưng trở thành một trang web trống rỗng như thời mới được tạo ra. Và hôm nay mình sẽ chia sẻ cách để backup cơ sở dữ liệu và upload file đã backup đó lên google driver.
Để thực hiện việc này chúng ta cần phải chuẩn bị 2 thứ:
- Một tài khoản google
- Một project laravel sử dụng mysql
Và chương trình sẽ phải thực hiện theo 2 bước:
- Bước 1: Tạo file backup cơ sở dữ liệu
- Bước 2: Upload file đã tạo lên google drive
Nội dung cần chuẩn bị
Lệnh backup cơ sở dữ liệu
Để tạo file backup cơ sở dữ liệu ta có một lệnh rất đơn giản dùng mysqldump như sau:
mysqldump database_name --password=your_pass --user=user_name --single-transaction | gzip >file_path_to_write_to.sql.gz
Và lệnh để khôi phục lại cơ sở dữ liệu đã backup là:
gunzip < file_path_to_write_to.sql.gz | mysql --user=user_name --password=your_pass database_name
Bật Google Drive API
Muốn sử dụng được API Drive thì ta cần phải bật nó lên. Các bước thực hiện như sau:
- B1: Tạo project Truy cập vào link này. Sau đó đăng nhập bằng tài khoản gmail.
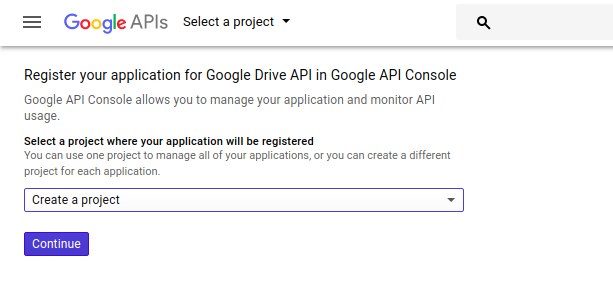
Các bạn ấn nút Continue để tạo một project. Nếu bạn đã có project rồi thì chọn project đó rồi ấn Continue. Chờ một chút nó sẽ hiện ra trang như sau.
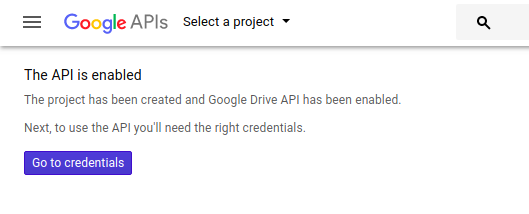
- B2: Tạo giấy chứng nhận Ấn nút Go to credentials để truy nhập vào trang tạo giấy chứng nhận. Màn hình Add credentials to your project xuất hiện. Mình chưa tạo credential vội. Cài đặt một số thông tin trước đã. Ấn Cancel để hủy bỏ.
Tiếp theo chọn tab OAuth consent screen và điền các thông tin cần thiết vào đây.
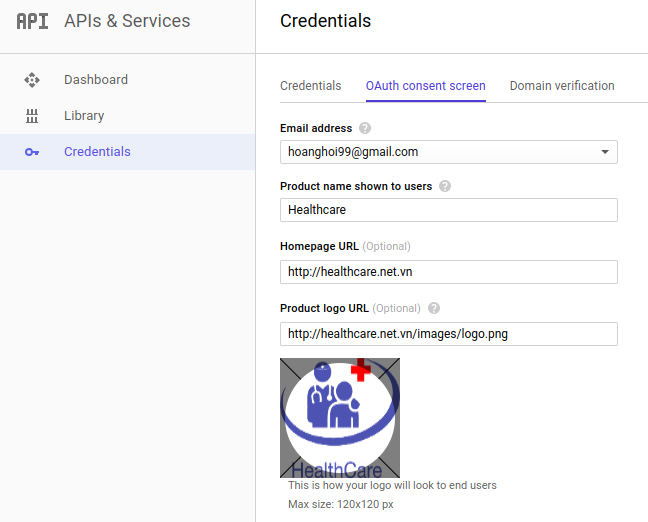
Chỉ cần chọn email và điền Product name shown to users là được. Sau đó ấn Save để lưu lại.
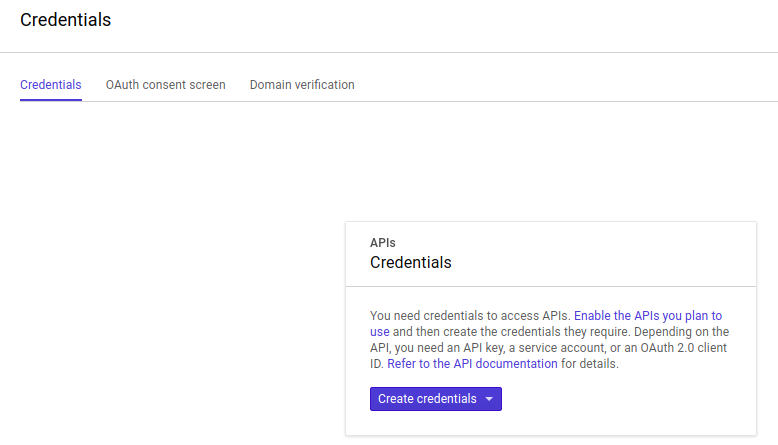
Chuyển sang tab Credentials ấn nút Create credentials. Nó sẽ sổ ra một danh sách chọn. Chọn OAuth client ID.
Tiếp đến chọn Other và nhập tên OAuth client cần tạo.
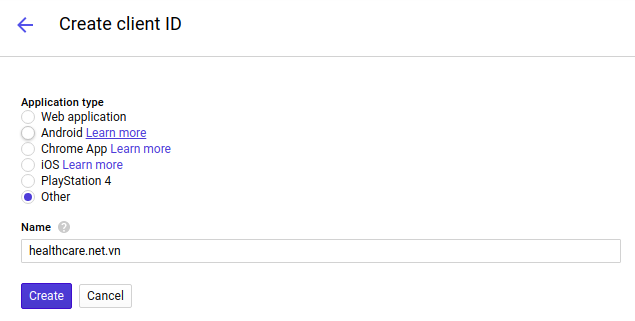
Rồi ấn Create. Màn hình sẽ hiện client ID và client secret. Ấn OK để tắt nó đi.
- B3: Tải file json của giấy chứng nhận Trên màn hình Credentials, ta sẽ tải file json của credential vừa tạo về bằng cách ấn nút có hình mũi tên tải xuống bên phải của credential đó.

Đổi tên file json đó thành drive-secret.json cho dễ nhớ. Rồi chép file đó vào thư mục /storage/drive của project.
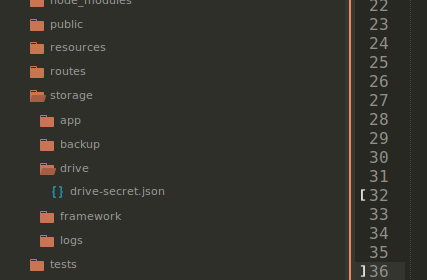
Cài đặt thư viện cần thiết
Để có thể thao tác với Google Api dễ dàng. Ta cài thư viện google/apiclient vào project laravel.
composer require google/apiclient
Lập trình
Với mục tiêu đề ra là tạo file database backup sau đó upload lên google driver chúng ta sẽ cần phải tạo 2 command:
- Một command dùng để tạo file database backup
- Một command upload file database backup lên Google Drive. Command này sẽ gọi command đầu kia để tạo file database backup trước.
Như vậy mục tiêu đã rõ ràng, công việc đã minh bạch cùng code thôi.
Tạo command export database file
Tạo command bằng lệnh artisan:
php artisan make:command ExportDatabase
Thêm config path lưu file export ra ở file config/filesystems.php:
// config/filesystems.php

    'path' => [
        'backup_database' => 'backup/database',
    ],
Nhập tên command:
protected $signature = 'db:export';
Ta sẽ sử dụng Process của Symfony để gọi shell command tạo file export database.
Nói qua về Process một chút. Process là một thư viện hỗ trợ việc thao tác với shell command. Nó sẽ giống với hàm exec, passthru, shell_exec, system trong PHP vậy. Khi sử dụng Process thì ta sẽ dễ dàng viết test cho command của bạn. Và chính Laravel cũng đang sử dụng Process nên ta hoàn toàn tin tưởng và tất nhiên sẽ không phải cài thêm thư viện rồi vì nó đã có sẵn trong project laravel.
Bây giờ ta use thư viện và triển thôi
// app/Console/Commands/ExportDatabase.php

use Symfony\Component\Process\Process;
use Symfony\Component\Process\Exception\ProcessFailedException;
Hàm handle:
// app/Console/Commands/ExportDatabase.php

public function handle()
{
    $dateTime = Carbon::now(); // Lấy thời gian hiện tại
    $dateTimeString = $dateTime->format('Y_m_d_H_i_s'); // Tạo chuỗi thời gian

    /* Tạo đường dẫn đến file database export. Lưu ý đường dẫn này phải là đường dẫn tuyệt đối cho nó chắc cú. */
    $fileName = 'database_' . $dateTimeString . '.sql.gz';
    $filePath = storage_path(config('filesystems.path.backup_database'));

    /* Lấy các thông tin cấu hình database từ file env */
    $database = env('DB_DATABASE');
    $userName = env('DB_USERNAME');
    $password = env('DB_PASSWORD');

    /*---------------------------------------------------Tạo shell command---------------------------------------------------*\
    |                                                                                                                         |
    | mysqldump database_name --password=your_pass --user=user_name --single-transaction | gzip >file_path_to_write_to.sql.gz |
    |                                                                                                                         |
    \*-----------------------------------------------------------------------------------------------------------------------*/
    $shellCommand = 'mysqldump '
        . $database
        . ' --password=' . $password
        . ' --user=' . $userName
        . ' --single-transaction | gzip'
        . ' >' . $filePath . '/' . $fileName;

    /* Tạo đối tượng Process, chạy shell command và thông báo lên màn hình */
    $process = new Process($shellCommand);
    $process->run();
    $this->info('Export database ' . $database . ' to file ' . $fileName . ' success!');
}
Mình đã chú thích các đoạn code rồi nên sẽ không giải thích gì thêm nữa nhé.
Bạn đừng quên đăng kí command class vào file app/Console/Kernel.php nhé.
// app/Console/Kernel.php
    protected $commands = [
        Commands\ExportDatabase::class,
    ];
Chú ý: Đối với phiên bản laravel 5.5 trở lên thì trong hàm commands() của file app/Console/Kernel.php đã được tự động load các class trong thư mục Commands rồi nên các bạn không cần thực hiện đăng kí command bằng tay nữa.
Chạy thử lệnh:
php artisan db:export
Kết quả tạo được file database trong thư mục storage
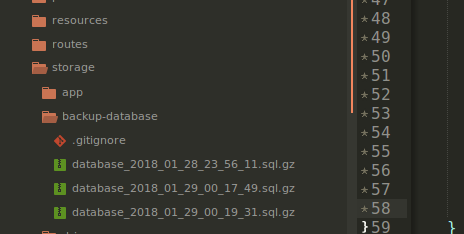
Tạo chức năng upload lên drive
Config
Thêm các biến config tại file config/services.php
// config/services.php

/*..............*/
    'google_drive' => [
        'secret' => storage_path('drive/drive-secret.json'),
        'access_token' => storage_path('drive/access-token.json'),
    ],
/*..............*/
Thêm một disk database vào mảng disks trong file config/filesystems.php để có thể truy cập được thư mục 'backup-database'dễ dàng hơn.
// config/filesystems.php`

'disks' => [
    'database' => [
        'driver' => 'local',
        'root' => storage_path('backup/database'),
    ],
    /*..................*/
],
Tạo Google Drive service
Luồng hoạt động của google driver service như sau:
- Tạo 1 client với file drive-secret.json vừa tải về
- Lấy AccessToken để xác nhận app có thể truy cập vào Drive. Giai đoạn này chúng ta phải cấp quyền truy cập bằng tay lần đầu tiên. AccessToken sẽ được lưu vào file
access-token.json. Sau đó thì khi AccessToken hết hạn nó sẽ được tự động gia hạn bằng key gia hạn AccessToken cũng được lưu trong fileaccess-token.json. - Sau khi xác nhận quyền truy cập API thành công thì bạn có thể upload, download, quản lý file trên drive tùy ý.
Bây giờ chúng ta sẽ tạo file app/Services/GoogleDriveService.php thực hiện các công việc trên:
<?php

namespace App\Services;

use Google_Service_Drive;
use Google_Service_Drive_DriveFile;
use Google_Client;
use Storage;
use Exception;

class GoogleDriveService
{
    protected $driveService;
    protected $scopes = [
        Google_Service_Drive::DRIVE_FILE,
    ];
    protected $accessType = 'offline';

    public function __construct()
    {
        // Get the API client and construct the service object.
        $client = $this->getClient();
        $this->driveService = new Google_Service_Drive($client);
    }

    public function listFiles()
    {
        // Print the names and IDs for up to 10 files.
        $optParams = [
            'pageSize' => 10,
            'fields' => 'nextPageToken, files(id, name)'
        ];
        $results = $this->driveService->files->listFiles($optParams);

        if (count($results->getFiles()) == 0) {
            print "No files found.\n";
        } else {
            print "Files:\n";
            foreach ($results->getFiles() as $file) {
                printf("%s (%s)\n", $file->getName(), $file->getId());
            }
        }
    }

    protected function getClient()
    {
        $client = new Google_Client();
        $client->setApplicationName(config('app.name'));
        $client->setScopes(implode(' ', $this->scopes));
        $client->setAuthConfig(config('services.google_drive.secret'));
        $client->setAccessType($this->accessType);
        $client->setAccessToken($this->getAccessToken($client));

        // Refresh the token if it's expired.
        if ($client->isAccessTokenExpired()) {
            $this->refreshToken($client);
        }
        return $client;
    }

    protected function getAccessToken($client)
    {
        // Load previously authorized credentials from a file.
        $credentialsPath = config('services.google_drive.access_token');
        if (file_exists($credentialsPath)) {
            $accessToken = json_decode(file_get_contents($credentialsPath), true);
        } else {
            $accessToken = $this->requestAccessToken($client, $credentialsPath);
        }

        return $accessToken;
    }

    protected function refreshToken($client)
    {
        $credentialsPath = config('services.google_drive.access_token');
        $client->fetchAccessTokenWithRefreshToken($client->getRefreshToken());
        file_put_contents($credentialsPath, json_encode($client->getAccessToken()));
    }

    protected function requestAccessToken($client, $credentialsPath)
    {
        if (php_sapi_name() != 'cli') {
            throw new Exception('Please run this application on the command line.');
        }
        // Request authorization from the user.
        $authUrl = $client->createAuthUrl();
        printf("Open the following link in your browser:\n%s\n", $authUrl);
        print 'Enter verification code: ';
        $authCode = trim(fgets(STDIN));

        // Exchange authorization code for an access token.
        $accessToken = $client->fetchAccessTokenWithAuthCode($authCode);

        // Store the credentials to disk.
        if(!file_exists(dirname($credentialsPath))) {
            mkdir(dirname($credentialsPath), 0700, true);
        }
        file_put_contents($credentialsPath, json_encode($accessToken));
        printf("Credentials saved to %s\n", $credentialsPath);
        return $accessToken;
    }

    public function uploadLatest()
    {
        $files = Storage::disk('database')->files();
        $file = array_pop($files);
        if ($file == '.gitignore') {
            throw new Exception('Database file not exist', 1);
        }

        $fileMetadata = new Google_Service_Drive_DriveFile([
            'name' => $file,
        ]);
        $content = Storage::disk('database')->get($file);
        $this->driveService->files->create($fileMetadata, [
            'data' => $content,
            'mimeType' => 'application/gzip',
            'uploadType' => 'multipart',
            'fields' => 'id',
        ]);
        return $file;
    }
}
Tạo command
Tạo command bằng lệnh artisan:
php artisan make:command BackupDatabase
Hàm handle tạo backup và upload lên Drive
public function handle()
{
    $this->call('db:export');
    $this->driveService = new GoogleDriveService;
    $file = $this->driveService->uploadLatest();
    if ($file) {
        $this->info('Upload file ' . $file . ' successful!');
    }
}
Kết luận
Như vậy mình đã giới thiệu xong cách backup dữ liệu lên Drive rồi. Bây giờ chúng ta có thể yên tâm là dữ liệu của mình sẽ không bao giờ bị mất một cách oan ức nữa.
Tài liệu tham khảo:
All rights reserved