Autolayout Visual Format Language
Bài đăng này đã không được cập nhật trong 4 năm
1. Introduction
Bài hướng dẫn này dành cho những bạn đã có kiến thức cơ bản về Autolayout, nếu bạn chưa có kiến thức về Autolayout nên tìm hểu về Autolayout trước khi đọc bài này. Visual Format Language là ngôn ngữ declarative sử dụng để định nghĩa các Auto Layout constraints cho các view. Giống như cái tên của nó, cú pháp của ngôn ngữ này dễ hiểu ta có thể dễ dàng hình dung được mối quan hệ các view một cách dễ dàng và trực quan. Auto Layout constraints với các độ ưu tiên khác nhau, layout chiều dọc, chiều ngang, spacing, kích thước có thể dễ dàng tạo ra được thông qua việc sử dụng Visual Format language. Layout này được định nghĩa trong một biến string sau đó được truyền tới phương thức constraintsWithVisualFormat:options:metrics:views: và constraintWithItem:attribute:relatedBy:toItem:attribute:multiplieconstant: của class NSLayoutConstraint Visual Format Language sẽ rất tiện lợi khi mà trong project có những phần chúng ta ko thể tạo được layout trên storyboard mà phải thực hiện chúng trong code.
2. Creating a New Project
Chúng ta sẽ tạo 1 project mới để xem cách sử dụng Visual Format Language và những lợi ích từ việc sử dụng ngôn ngữ này.
Step 1: Project Template
Mở Xcode chọn New -> Project ... sau đó chọn Single View Application -> Next

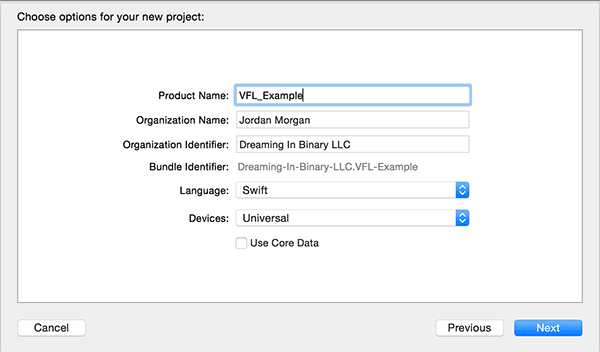
Step 2: Project Configuration
Điền các thông tin Project Name, identifier,... chọn ngôn ngữ là Swift
3. Creating a Constraint for a Single View
Step 1: Define Variables
Chúng ta sẽ tạo 3 biến kiểu UIView, mở ViewController.swift và add dòng code dưới đây vào method ViewDidLoad:
var vwBlue:UIView!
var vwRed:UIView!
var vwGreen:UIView!
Step 2: Initialize Views
Tạo function tên initViews, hàm này có chức năng khởi tạo views và add chúng vào view. Chắc chắn rằng gọi hàm này trong viewDidLoad sau khi gọi superclass của viewDidLoad
func initViews() -> Void
{
    //Initialize
    vwRed = UIView()
    vwBlue = UIView()
    vwGreen = UIView()

    //Prep auto layout
    vwRed.setTranslatesAutoresizingMaskIntoConstraints(false)
    vwBlue.setTranslatesAutoresizingMaskIntoConstraints(false)
    vwGreen.setTranslatesAutoresizingMaskIntoConstraints(false)

    //Coloring
    vwRed.backgroundColor = UIColor.redColor()
    vwBlue.backgroundColor = UIColor.blueColor()
    vwGreen.backgroundColor = UIColor.greenColor()

    //Add them to the view
    self.view.addSubview(vwRed)
    self.view.addSubview(vwBlue)
    self.view.addSubview(vwGreen)
}
Khi sử dụng Auto Layout bằng code, có vài điều chúng ta cần chú ý, đầu tiên là liên quan tới thuộc tính translatesAutoresizingMaskIntoConstraints, thuộc tính này có giá trị mặc định là true, điều này có nghĩa là Auto Layout constraints sẽ được tạo ra dựa theo autoresizing mask của các view. Do đó để ko bị conflict chúng ta sẽ set giá trị này thành false Điều thứ 2 chúng ta cần chú ý là view life cycle, trước khi Auto Layout constraints được add vào các view nó cần được add vào superview nếu ko sẽ bị runtime exception.
Step 3: Create the Constraints for a Single View
Chúng ta sẽ bắt đầu với 1 ví dụ đơn giản về Visual Format Language. Sử dụng view màu đỏ vwRed, chúng ta sẽ tạo constraint cho nó có size bằng với superview. Trường hợp này hữu ích trong trường hợp add background image cho màn hình. Trước khi có thể sử dụng được Visual Format Language ta cần tạo các reference tới các view này qua dictionary, qua đó VFL có thể định danh được các view này. Tạo function tên createConsstraints trong ViewController.swift
func createConstraints() -> Void
{
    //Views to add constraints to
    let views = Dictionary(dictionaryLiteral: ("red",vwRed),("blue",vwBlue),("green",vwGreen))

    //Horizontal constraints
    let horizontalConstraints = NSLayoutConstraint.constraintsWithVisualFormat("H:|[red]|", options: nil, metrics: nil, views: views)
    self.view.addConstraints(horizontalConstraints)

    //Vertical constraints
    let verticalConstraints = NSLayoutConstraint.constraintsWithVisualFormat("V:|[red]|", options: nil, metrics: nil, views: views)
    self.view.addConstraints(verticalConstraints)
}
Step 4: Build and Run
Gọi hàm createConstraints trong hàm initViews mà ta đã tạo ở trên. Build and run project
4. Analyzing the Visual Format Language Syntax
Khi sử dụng VFL, các constraints sẽ được định nghĩa theo chiều dọc hoặc chiều ngang, chiều cao chiều rộng của view. Chúng ta hãy xem xét dòng code sau:
"H:|[red]|"
Đầu tiên chúng ta xác định rằng constraint này sẽ được định nghĩa cho chiều ngang (horizontal) bằng cách bắt đầu string bằng chữ H, các constraints sẽ được định nghĩa sau dấu : này. Ký hiệu | tượng trưng cho superview, để add space giữa các thành phần ký tự - được sử dụng, chúng ta có thể đặt các giá trị số cố định để định nghĩa ra giá trị spacing này. Các views được truy cập thông qua key định nghĩa ở dictionary truyền vào constraintsWithVisualFormat, mỗi view sẽ được bọc bởi [] Nhìn vào sting này ta có thể hiểu như sau: Theo chiều ngang Horizontally, view màu đỏ này sẽ dãn toàn bộ chiều rộng của nó so với superview ko có padding.
5. Creating Constraints for Multiple Views
Chúng ta đã có kiến thức cơ bản về cú pháp của VFL, chúng ta sẽ sửa hàm createConstraints để add layout tới 2 views.
Step 1: Edit the Horizontal Constraint
Tại hàm createConstraints sửa như sau:
//Horizontal constraints
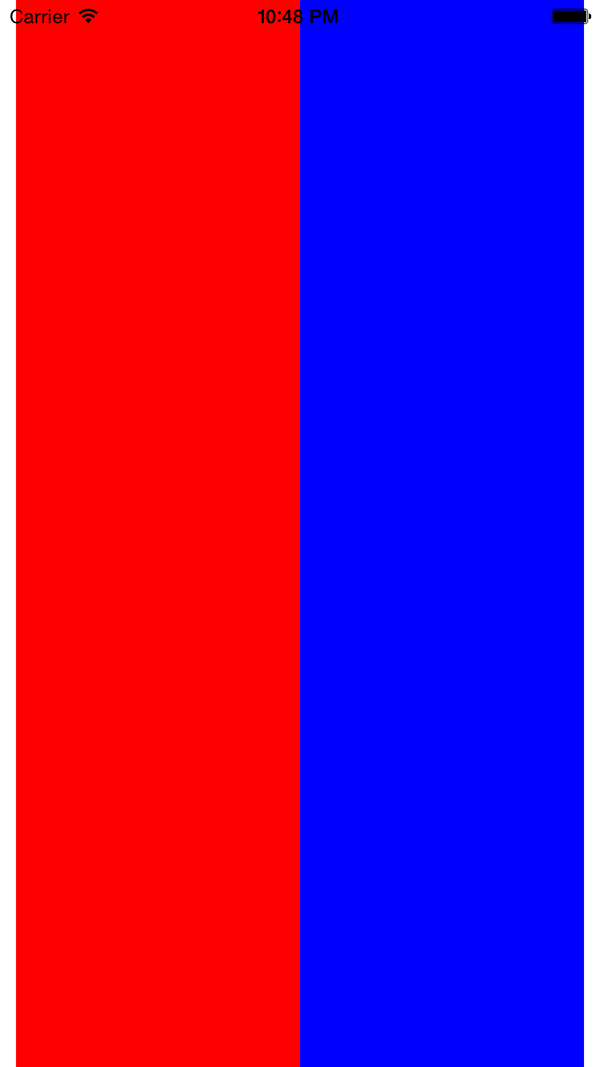
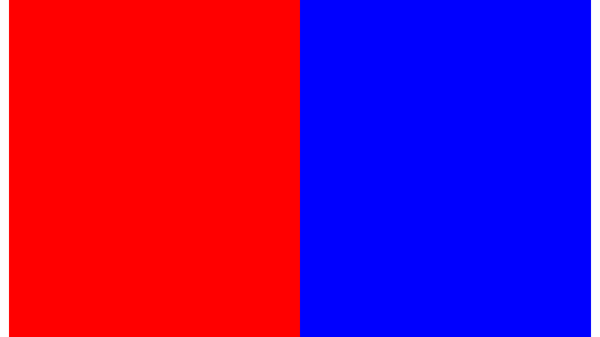
let horizontalConstraints = NSLayoutConstraint.constraintsWithVisualFormat("H:|-10-[red(>=100,<=200)]-0-[blue(==red)]-10-|", options: nil, metrics: nil, views: views)
self.view.addConstraints(horizontalConstraints)
Đoạn code này thực sự cho ta thấy được sự linh hoạt của VFL. Đoạn code trên tạo ra rất nhiều layout constraint cho chúng ta. Sau tên của view, horizontal size được định nghĩa trong dấu (), trong hàm trên red view có kích thước >=100 và <=200.
View blue định nghĩa rằng sẽ có cùng horizontal size so với red view.
Build and run:
Step 2: Adding Priorities
Thay đổi app xoay theo chiều ngang dọc, trong khi app vẫn chạy tốt quan sát xcode console ta sẽ thấy có dòng cảnh báo 1 vài constraints có thể ko đuọc thoả mãn, điều này không làm crash app nhưng có thể dẫn tới sai lệch trong giao diện. Điều này xảy ra do 2 views được tạo ra ko thể có chiều rộng là 200 point và không có spacing khi ở chiều ngang. Autolayout giải quyết vấn đề này bằng cách sử dụng priorities. VFL định nghĩa priorities bằng cách dùng ký hiệu @. Chúng ta sẽ sửa code như sau:
//Horizontal constraints
let horizontalConstraints = NSLayoutConstraint.constraintsWithVisualFormat("H:|-10-[red(>=100,<=200@20)]-0-[blue(==red)]-10-|", options: nil, metrics: nil, views: views)
Do red và blue views bây giờ sẽ có độ ưu tiên thấp theo chiều rộng xác định bởi @20, Autolayout system sẽ bỏ constraints này và cung cấp cho chúng constraint đúng khi runtime. Chạy lại app và xem kết quả.
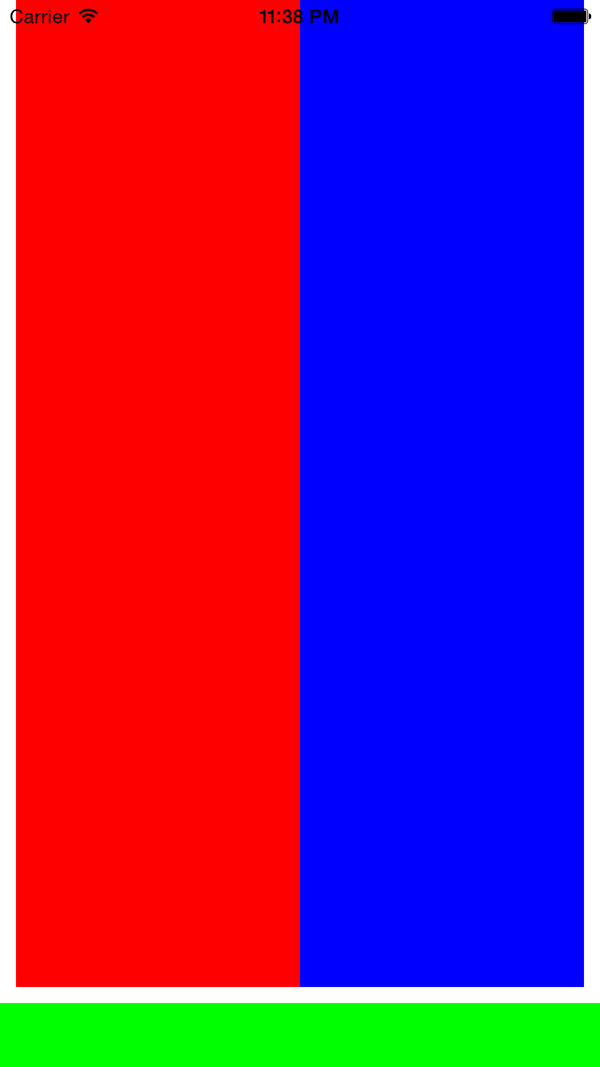
Step 3: Adding Constraints to the Bottom View
Tiếp theo, chúng ta sẽ tạo constraints cho green view. Cập nhật hàm createConstraints như sau:
func createConstraints() -> Void
{
    //Views to add constraints to
    let views = Dictionary(dictionaryLiteral: ("red",vwRed),("blue",vwBlue),("green",vwGreen))

    //Horizontal constraints
    let horizontalConstraintsRedBlue = NSLayoutConstraint.constraintsWithVisualFormat("H:|-10-[red(>=100,<=200@20)]-0-[blue(==red)]-10-|", options: nil, metrics: nil, views: views)
    self.view.addConstraints(horizontalConstraintsRedBlue)
    let horizontalConstraintsGreen = NSLayoutConstraint.constraintsWithVisualFormat("H:|[green]|", options: nil, metrics: nil, views: views)
    self.view.addConstraints(horizontalConstraintsGreen)

    //Vertical constraints
    let verticalConstraintsRed = NSLayoutConstraint.constraintsWithVisualFormat("V:|[red]-10-[green(40)]|", options: nil, metrics: nil, views: views)
    self.view.addConstraints(verticalConstraintsRed)
    let verticalConstraintsBlue = NSLayoutConstraint.constraintsWithVisualFormat("V:|[blue]-10-[green(40)]|", options: nil, metrics: nil, views: views)
    self.view.addConstraints(verticalConstraintsBlue)
}
Bởi vì horizontalConstraintsGreen constraint không định nghĩa chiều rộng hay spacing so với view chả của nó, nên nó sẽ được dãn toàn bộ chiều dài, vertical constraint chỉ định rằng nó sẽ có chiều cao 40p và spacing so với red blue view là 10p.
Build and run xoay app theo chiều ngang dọc
Step 4: Adding Metrics
Để dễ đọc chugns ta sử dụng dictionary của metrics trong việc khai báo các constraints như sau:
let metrics = Dictionary(dictionaryLiteral: ("spacing", 10),("lowWidth",100),("highWidth",200),("priority",20),("redBlueSpacing",0),("greenHeight",40))
Bây giờ thay vì sử dụng hardcode chúng ta sử dụng các giá trị metrics dictionary, sửa hàm createConstraints sử dụng metrics dictionary như sau:
func createConstraints() -> Void
{
    //Views to add constraints to
    let views = Dictionary(dictionaryLiteral: ("red",vwRed),("blue",vwBlue),("green",vwGreen))
    //Metrics for Visual Format string
    let metrics = Dictionary(dictionaryLiteral: ("spacing", 10),("lowWidth",100),("highWidth",200),("priority",20),("redBlueSpacing",0),("greenHeight",40))

    //Horizontal constraints
    let horizontalConstraintsRedBlue = NSLayoutConstraint.constraintsWithVisualFormat("H:|-spacing-[red(>=lowWidth,<=highWidth@priority)]-redBlueSpacing-[blue(==red)]-spacing-|", options: nil, metrics: metrics, views: views)
    self.view.addConstraints(horizontalConstraintsRedBlue)
    let horizontalConstraintsGreen = NSLayoutConstraint.constraintsWithVisualFormat("H:|[green]|", options: nil, metrics: nil, views: views)
    self.view.addConstraints(horizontalConstraintsGreen)

    //Vertical constraints
    let verticalConstraintsRed = NSLayoutConstraint.constraintsWithVisualFormat("V:|[red]-spacing-[green(greenHeight)]|", options: nil, metrics: metrics, views: views)
    self.view.addConstraints(verticalConstraintsRed)
    let verticalConstraintsBlue = NSLayoutConstraint.constraintsWithVisualFormat("V:|[blue]-spacing-[green(greenHeight)]|", options: nil, metrics: metrics, views: views)
    self.view.addConstraints(verticalConstraintsBlue)
}
Conclusion
VFL rất hữ ích khi ta tạo Auto Layout constraints trong code. Thay vì chúng ta tạo từng constraint một VFL cho phép chúng ta tạo rất nhiều constraints trong 1 dòng code. Trước khi Autolayout được tạo ra việc resize views hết sức phức tạp, từ khi có Auto Layout và VFL việc tạo giao diện với các device có kích thước khác nhau đã trở nên dễ hơn bao giờ hết. Nguồn: https://code.tutsplus.com/tutorials/introduction-to-the-visual-format-language--cms-22715
All rights reserved
