Animating Gradients với iOS ( CPU = 0 )
Bài đăng này đã không được cập nhật trong 6 năm
Một bài toán khó là tổ hợp của nhiều bài toán dễ - Một ứng dụng phức tạp cũng là tổ hợp của nhiều kiến thức cơ bản. Chính vì thế mình xin phép trình bày về một tutorial hướng dẫn custom 1 animating gradient. Điều đặc biệt ở đây là khi chạy thì mình check CPU = 0 quả là rất ngon đúng không ạ!
Tutorial này được xây dựng trên bài chia sẻ của tác giả Mark Moeykens
Mục tiêu của tutorial ta sẽ làm 1 demo tại đây
1. Custom UIView
Để dễ dàng sử dụng và tái sử dụng thì ta sẽ tạo 1 subclass của UIView và sử dụng IBIspectable và IBDesignable để xây dựng một giao diện tùy chỉnh cấu hình các điều khiển của mình và biễu diễn trong thời gian thực trong khi sử dụng Storyboard.
@IBDesignable
class UIViewF: UIView {

}
Ở trên mình có đưa ra vấn đề là CPU = 0 thì để làm được điều đó thì ta sẽ không animation cho chính UIView mà ta sẽ thực hiện việc đó giao cho CALayer đảm nhiệm để gradient color. Không lan man tốn time nữa ta sẽ đi vào vấn đề chính.
Trước tiên trong class UIViewF ta sẽ tạo 1 method updateView()
func updateView() {
        let layer = self.layer as! CAGradientLayer
        layer.colors = [ firstColor.cgColor, secondColor.cgColor ]

        if (horizontalGradient) {
            layer.startPoint = CGPoint(x: 0.0, y: 0.5)
            layer.endPoint = CGPoint(x: 1.0, y: 0.5)
        } else {
            layer.startPoint = CGPoint(x: 0, y: 0)
            layer.endPoint = CGPoint(x: 0, y: 1)
        }
    }
Tiếp theo sẽ implement firstColor secondColor và horizontalGradient
@IBInspectable var firstColor: UIColor = UIColor.white {
        didSet {
            updateView()
        }
    }

@IBInspectable var secondColor: UIColor = UIColor.white {
        didSet {
            updateView()
        }
    }

 @IBInspectable var horizontalGradient: Bool = false {
        didSet {
            updateView()
        }
    }

override class var layerClass: AnyClass {
        get {
            return CAGradientLayer.self
        }
    }
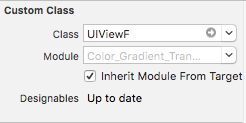
Ok vậy là việc tạo custom 1 class đã xong. Bây giờ ta sẽ vào set lại class cho view

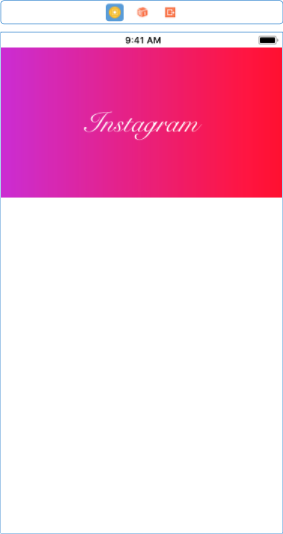
Và đây là kêt quả sau khi set class cho view

2. Implement animating gradient
Để thực hiện được việc cho gradient color như trong video ở trên thì có nhiều cách để triển khai. Nhưng ở đây mình xin phép chia sẻ 1 hướng là bằng cách ta sẽ tạo 1 mảng Tuple để lưu trữ 1 đối tượng với 2 trạng thái màu sắc
var colorArray: [(color1: UIColor, color2: UIColor)] = []
Tiếp theo sẽ add dữ liệu vào mảng đó

Tạo một biến currentColorArrayIndex để get ra index
var currentColorArrayIndex = -1
Và cuối cùng là method để implement animation
    func animateBackgroundColor() {
        currentColorArrayIndex = currentColorArrayIndex == (colorArray.count - 1) ? 0 : currentColorArrayIndex + 1
        UIView.transition(with: gradientView, duration: 2, options: [.transitionCrossDissolve], animations: {
            self.gradientView.firstColor = self.colorArray[self.currentColorArrayIndex].color1
            self.gradientView.secondColor = self.colorArray[self.currentColorArrayIndex].color2
        }) { (success) in
            self.animateBackgroundColor()
        }
    }
Build và tận hưởng kết quả thôi ^^
Một bài viết về animation dùng CALayer. Trong bài viết có chỗ nào thiếu xót thì mọi người cmt bên dưới nhá. Cám ơn mọi người đã đọc bài viết !
All rights reserved