AJAX SORTABLE LISTS RAILS 4
Bài đăng này đã không được cập nhật trong 4 năm
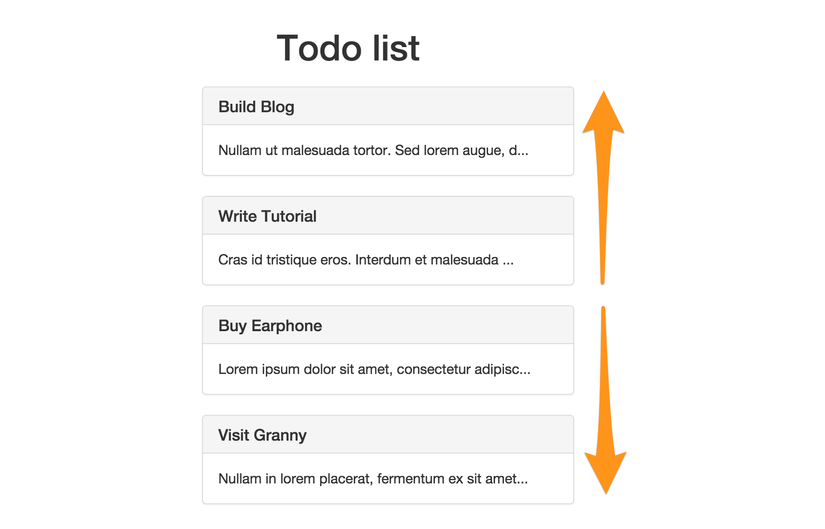
Để tạo ra một danh sách và cho chúng hiển thị trong ứng dụng của bạn là một việc rất đơn giản. Nhưng nếu danh sách hiển thị đó lại không hiển thị đúng theo thứ tự như người dùng muốn, vậy phải làm thế nào?? Một giải pháp cho việc này đó là bạn có thể cho phép người dùng thực hiện thao tác kéo và thả các item về vị trí sắp xếp theo ý muốn của người dùng. Để hỗ trợ thực hiện chức năng này bạn có thể sử dụng Ajax.
1. Getting Started
Để có thể thực hiện chức năng kéo và thả, chúng ta sẽ sử dụng html5sortable jquery plugin.
Bạn có thể lấy plugin sắp xếp html5 từ github. Bạn có thể tìm file js trong thư mục src. Sau đó bạn thêm file html.sortable.js vào thư mục vendor/javascripts của bạn.
Tiếp theo hãy thêm require file vừa thêm trong file application.js của bạn.
    // This is a manifest file that'll be compiled into application.js, which will include all the files
    // listed below.
    //
    // Any JavaScript/Coffee file within this directory, lib/assets/javascripts, vendor/assets/javascripts,
    // or vendor/assets/javascripts of plugins, if any, can be referenced here using a relative path.
    //
    // It's not advisable to add code directly here, but if you do, it'll appear at the bottom of the
    // compiled file.
    //
    // Read Sprockets README (https://github.com/sstephenson/sprockets#sprockets-directives) for details
    // about supported directives.
    //
    //= require jquery
    //= require jquery_ujs
    //= require html.sortable
    //= require turbolinks
    //= require_tree .
2. Updating our Task Model
Tiếp theo chúng ta sẽ cần tạo model Task với 2 thuộc tính là title và description. Chúng ta cần lưu trữ vị trí cho các task và để làm việc này thì ta nên thêm cả thuộc tính priority dùng để lưu vị trí của task trong database. Chúng ta có thể sắp xếp các task nhờ vào thuộc tính này
rails g migration createTasks title:string description:string priority:integer
Sau đó bạn cần chạy lệnh rake db:migrate để create table trên.
3. Integrating html5sortable
Ta sẽ tạo file view/index như sau:
index.html.erb
    <div class="row">
      <div class="col-md-5 col-md-offset-4 sortable">
        <% if @tasks.any? %>
            <%= render @tasks %>
        <% else %>
        <p>No tasks found <%= link_to "Create Task", new_task_path %></p>
        <% end %>
      </div>
    </div>
Ở trên có sử dụng <%= render @tasks %> tức là nó sẽ chuyển đến partial _task.html.erb. Và có thêm class .sortable vào thẻ div bao ngoài partial, nó là class chúng ta sẽ gọi để có thê sắp xếp các task của mình.
_task.html.erb
    <div class="panel panel-default">
      <div class="panel-heading">
        <h3 class="panel-title"><%= task.title %></h3>
      </div>
      <div class="panel-body">
        <%= truncate task.description, length: 50 %>
      </div>
    </div>
Tiếp theo chúng ta sẽ phải thực hiện sắp xếp partial các task, trong file tasks.js sẽ gọi sắp xếp thông qua class sortable mà đc thêm ở trên
task.js
    var ready;
    ready = function(){
        // call sortable on our div with the sortable class
        $('.sortable').sortable();
    }

    $(document).ready(ready);
    /**
     * if using turbolinks
     */
    $(document).on('page:load', ready);
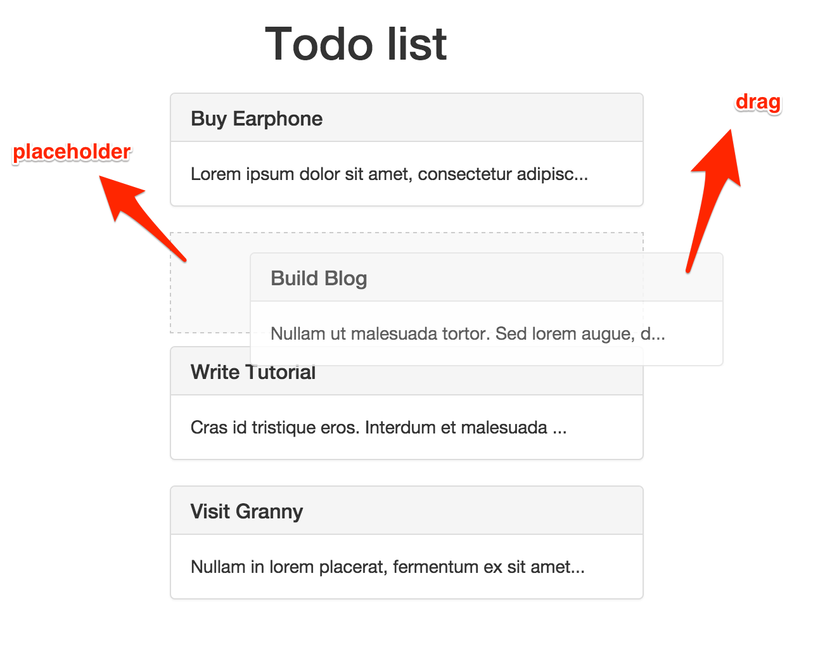
plugin sắp xếp sẽ tìm kiếm class .sortable-placeholder để sử dụng hiển thị một placeholder kéo thả các task. Bạn có thể tạo kiểu cho nó tuỳ theo ý muốn, có thể tham khảo như sau:
task.css.scss
    .sortable-placeholder {
      border: 1px dashed #CCC;
      background-color: #f9f9f9;
      height: 80px;
      margin-bottom: 10px;
    }

    .sortable {
      display: list-item;
    }
Bây giờ chúng ta cần phải có chức năng kéo và thả.
Các task của bạn bây giờ có thể đã được kéo và thả vào vị trí bất kỳ, nhưng thứ tự mới không tồn tại trong database. Khi mà bạn reload lại trang thì các task sẽ trở lại vị trí mặc định ban đầu khi bạn chưa thực hiện kéo thả.
4. Persisting Changes
Chúng ta sẽ thêm một thuộc tính data-id, nó sẽ giữ id của task và một thuộc tính khác data-pos để lưu vị trí của task trong DOM. Chúng ta sẽ gửi các thuộc tính này đến ứng dụng rails mỗi lần người dùng sắp xếp danh sách và cập nhật cấp độ ưu tiên các task tương ứng.
_task.html.erb
    <!-- adding data-id attribute -->
    <div class="panel panel-default" data-id="<%= task.id %>">
      <div class="panel-heading">
        <h3 class="panel-title"><%= task.title %></h3>
      </div>
      <div class="panel-body">
        <%= truncate task.description, length: 50 %>
      </div>
    </div>
Sau đó chúng ta sẽ sử dụng jquery để thiết lập data-pos cho mỗi task
task.js
    var ready, set_positions;

    set_positions = function(){
        // loop through and give each task a data-pos
        // attribute that holds its position in the DOM
        $('.panel.panel-default').each(function(i){
            $(this).attr("data-pos",i+1);
        });
    }

    ready = function(){

        // call set_positions function
        set_positions();

        $('.sortable').sortable();
    }

    $(document).ready(ready);
    /**
     * if using turbolinks
     */
    $(document).on('page:load', ready);
Bạn có thể kiểm tra DOM của mình, bây giờ bạn có thể thấy rằng jquery đã thiết lập các data-pos cho mỗi task của bạn.

bây giờ sau khi người dùng đã hoàn thành sắp xếp, chúng ta cần phải gửi lại thứ tự được cập nhật trở lại rails. Để thực hiện việc này, chúng ta sẽ lắng nghie để gọi lại hàm sắp xếp nhờ html5sortable plugin. Hàm này được kích hoạt mỗi khi người dùng dừng sắp xếp và vị trí DOM đã được thay đổi. Chúng ta sẽ bổ sung thêm logic để có được thứ tự cập nhật trong hàm này.
tasks.js
    var ready, set_positions;

    set_positions = function(){
        // loop through and give each task a data-pos
        // attribute that holds its position in the DOM
        $('.panel.panel-default').each(function(i){
            $(this).attr("data-pos",i+1);
        });
    }

    ready = function(){

        // call set_positions function
        set_positions();

        $('.sortable').sortable();

        // after the order changes
        $('.sortable').sortable().bind('sortupdate', function(e, ui) {
            // array to store new order
            updated_order = []
            // set the updated positions
            set_positions();

            // populate the updated_order array with the new task positions
            $('.panel.panel-default').each(function(i){
                updated_order.push({ id: $(this).data("id"), position: i+1 });
            });

            // send the updated order via ajax
            $.ajax({
                type: "PUT",
                url: '/tasks/sort',
                data: { order: updated_order }
            });
        });
    }

    $(document).ready(ready);
    /**
     * if using turbolinks
     */
    $(document).on('page:load', ready);
Bạn sẽ cần chú ý đến lời gọi ajax, gửi một yêu cầu PUT đến sort_tasks_path (tasks/sort). Vì vậy, ta cần thiết lập url này. Định nghĩa nó trong file routes.rb
    Rails.application.routes.draw do
      root 'tasks#index'
      resources :tasks do
        put :sort, on: :collection
      end
    end
Tiếp theo ta sẽ cần tạo action tương ứng với url vừa tạo ở trên. Viết method sort trong controler TasksController. Method này sẽ thực hiện sắp xếp, cập nhật thứ tự các task.
tasks_controller.rb
    class TasksController < ApplicationController
      # index, new, create, show actions

      def sort
        params[:order].each do |key,value|
          Task.find(value[:id]).update_attribute(:priority, value[:position])
        end
        render nothing: true
      end

      # more code
    end
Method sort sẽ lặp thông qua các tham số thứ tự và cập nhật mức độ ưu tiên cho các task. Mỗi tham số gồm id của task và vị trí mới. Chúng ta sẽ tìm task nhờ id của nó và sau đó cập nhật thuộc tính priority của nó.
Chúng ta sẽ sắp xếp các task dựa vào cột priority. Trong model Task, ta thêm vào một scope để sắp xếp các task của bạn dựa vào cột tính priority tăng dần.
task.rb
    class Task < ActiveRecord::Base
      validates_presence_of :title, :description

      default_scope { order("priority ASC") }
    end
Bây giờ bạn có thể kéo và thả các task và sau đó load lại trang, vị trí mới của các task được lưu vào database.
Trên đây là cách để tạo chức năng kéo thả cho các item tuỳ theo ý muốn của người dùng. Cảm ơn bạn đã theo dõi bài viết. Mong rằng nó sẽ giúp ích cho bạn. Bài viết còn nhiều thiếu sót mong nhận được sự góp ý từ bạn đọc.
Tham khảo: http://josephndungu.com/tutorials/ajax-sortable-lists-rails-4
All rights reserved
